Extreme Makeover: Body Horror Edition. Let's Play Look Outside!

Put your Let's Plays in here.
Post Reply
User avatar
Image

Moon Sammy washes, in the Sink.

Below the Sink, there is a Drain.

The Drain goes straight, into the Sea.

The Sink itself, is Porcelain.

The Game

Look Outside is (stop me if you heard this one before) an indie RPG Maker horror game, developed by FrankieSmileShow AKA Francis Coulombe and published by DevolverDigital, and released on March 21st of 2025 (super recent for when this thread is being written!). Like a lot of RPG Maker horror games that aren't straight up adventure games, it melds traditional RPG systems with a more survival horror-esque resource driven progression. The game is notable for its detailed and disturbing body horror artwork, in addition to the impressive number of variable and random events that can occur within the game. Doubly impressive since it was largely developed by a single person and began life as a throwaway Game Jam entry. And I'll be doing my best to show off as much of it for you, prospective viewer!

The Let's Play

This LP will be done on the game's Normal Difficulty, which is the at-present highest difficulty setting. I'll be doing my best to leave no stone unturned, completing all side quests, getting all endings, and showing off as many random events that can occur as I can. Thankfully, the game has also picked up a number of fans who've set about compiling some of the more niche or time consuming events to demonstrate, so I'll be sure to plug those for certain particularly involved events that are difficult to demo in an LP setting. One thing I must note that made me a little reluctant to start this LP is that the game is currently in a somewhat unfinished state, with several patches having been released since launch that have rebalanced certain things, added new content and have restored unimplemented content. Certain things I do or show off may be subject to change as the LP goes on, but I'll be sure to cover those things when/if a patch rolls out while I'm doing this LP. And naturally, even after a formal conclusion, I can always come back to do more videos in the event of any major updates! With all that said,

The Videos

Part 1, Is Chicago, Is Not Chicago
Part 2, Sugar Free Jazz
Part 3, Casiotone Nation - Live
Part 4, Blueeyed Devil
Part 5, Bus to Beelzebub
Part 6, True Dreams of Wichita
Part 7, Screenwriters Blues
Part 8, Moon Sammy
Part 9, Supra Genius
Part 10, City of Motors
Part 11, Uh, Zoom Zip
Part 12, Down to This
Part 13, Mr Bitterness
Part 14, Janine
Part 15, Super Bon Bon
Part 16, Soft Serve
Part 17, White Girl
Part 18, Soundtrack to Mary
Part 19, Lazybones
Part 20, 4 out of 5
Part 21, Paint
Part 22, Disseminated
Part 23, Collapse
Part 24, Sleepless
Part 25, The Idiot Kings
Part 26, How Many Cans
Part 27, Rolling
Part 28, Misinformed
Part 29, Circles

Full LP Playlist

If you're a fan of RPG Maker horror with disturbing visuals, my LPs of Fear & Hunger and its sequel Termina will surely be right up your alley. If you're a die hard enjoyer of Apartment based horror, then you will of course be all about my LP of Silent Hill 4. And in the largely unrelated chance that you are interested in Persona 3, have I got an LP for you!

Last edited by Cullen on Thu Mar 05, 2026 11:47 am, edited 30 times in total.

User avatar


Part 1! We quickly find out that there is much more to do in this game than just Looking Outside, which is a twist I could have never predicted when first buying this game.

Extra Notes

-Our Neighbor, Sybil, is our primary means for saving our progress. On Easy mode, the game regularly auto-saves as you go from room to room in the Apartment building, but on Normal mode we can only save via Sybil. Sybil will save our progress whenever we either A.) Advance time by at least one hour while exploring or B.) go to bed to advance to the next day.

-Look Outside features a limited amount of time to complete the game in. Each new room we explore, fight we get into, and activity we engage in while at home advances the in-game clock. We have 15 days to complete the game and get an ending in, otherwise we get the standard ending for waiting out... whatever's happening outside.

-Among the activities available in Sam's apartment, we can play video games (he just like me fr fr), screw around on our computer, cook, brush our teeth and shower. We'll gain a handful of new activities as we progress in the game. Some of these activities have more practical applications such as healing ourselves or creating battle items to use, while others serve to balance out our hidden "Sanity" stats. Displayed nowhere in the games main menus are the stats Morale, Calm, Social, Hygiene, Energy and Hunger. Of these stats, Morale and Social don't seem to do anything. Calm determines if Sam is anxious or not. Should Sam become Anxious, he gets a penalty to all experience he earns. Most things you do in the apartment improve Calm, so you should rarely have to worry about this. Hygiene prevents Sam from becoming Stinky if its high. Being Stinky has some drawbacks, but I'll wait until I can demo it before going over them. Energy is the first of these that has no number. Should you neglect to sleep at day's end, Sam can become tired which will penalize all his core battle statistics. Energy can be restored simply by going to bed, though you are never forced to actually sleep in this game. Hunger also has no number representing it. Should you go one day without eating anything, Sam will become Hungry which will reduce his max HP. Should you go another day without eating, Sam will become Starving, reducing his HP further. Like Energy, you're never forced to top this off but the penalties can be quite harsh. For the most part, playing the game normally will result in these stats never being a problem, and by Day 3 I never see Sam feeling anything other than Great.

-Bringing it back to point 2, entering areas previously unexplored causes time to advance on the clock. This means that early on time will be advancing quite rapidly, but we don't lose any time when backtracking through areas we've already been to. This includes areas that maybe we just walked into but immediately left. Another smaller thing that advances time is getting into fights. When engaging in combat with an enemy, time will advance on the clock. I'm not sure if this is a one time thing for if you get into an encounter but run away, or if the time advances only when you successfully kill an enemy, but it's a fairly minor usage of your limited time either way.

-We get our first weapon upon entering the opened apartment the blood trail leads to, a Baseball Bat! This is a Crush type weapon that affords us the skills Power Smash and Homerun. Every weapon in the game has a distinct damage type and offers us different skills to use (so not all Crush weapons have Homerun for instance, though the majority do have Power Smash). The main weapon damage types areSlash, Crush and Pierce, with guns having the Missile damage type. Every enemy has distinct resistances and weaknesses, with resistances greatly extending the length of battles, so it's good to have a variety of weapon types at your disposal. Pick up every weapon you come across!

-Other damage types include Fire, Cold, Acid, Explosive and Corruption. The first 4 are mostly found via single use combat items, while the last one is a special type exclusive to one weapon in the game.

-As far as your battle stats go, these are largely influenced by your equipment. Level ups do give incremental increases to your core stats, but only a point at most and sometimes nothing at all. Besides the standard HP and Stamina (which functions as MP in this game), you have Attack, Defense, Ballistics, Bullet Defense, Agility and Luck. Attack is the main statistic for Melee weapon and Ballistics is for Guns. Defense is the primary stat of your armors, while Bullet Defense is occasionally increased along side it. Not many things in the game use Gun based attacks, so Bullet Defense is a largely ignorable stat. Agility determines turn order, with higher Agility making it much more likely you'll go first, though there is some randomness to turn order in this game. Luck directly correlates to your crit rate, so at the game's offset you'll essentially never crit but it becomes a pretty regular thing by the late game. Critical hits deal 1.8X damage. It was originally 3X when the game first launched but that was way too powerful and it got nerfed within the game's first patch.

-Our first encounter is largely scripted and it's not worth using your skills on. Just swing away and the Wounded Neighbor is toast.

-Be sure to get that Knife, it's quite good for this stage of the game!

-Weapons can break, with each weapon having a percent chance to become Damaged when being used. Skills have a much higher chance of causing Weapon Damage. If a Weapon is Damaged twice, it breaks altogether and is gone permanently. Weapons breaking is rather annoyingly a strictly RNG based mechanic, though a recent patch has mitigated the effects of this system to make it less of a pain in the ass. Weapons that being used for the first time have a number of "Safe Hits" that divide the break chance by 10, with sufficiently low chances skipping the calculations for weapons breaking entirely. Unique weapons that we'll find later have a greater number of these "safe hits" to work with and should seldom break on use. Prior to the 1.03 update, it was not uncommon for people to have weapons start breaking on them right away, including rare and limited weapons that take quite a bit of effort to get!

-Coins can be used at the vending machine, though this mechanic is very undercooked and not super helpful. I just did it for demonstrative purposes.

-Vincent's apartment has several important items, the most immediately critical one being the Crafting Kit. The Guinea Pig Cinnamon will also be very important, but it won't be until the end of the game that we know why!

-You don't have to kill Vincent right now, but the Polo Shirt and Chicken Sandwich he drops are quite helpful.

-When returning to the apartment, you will get EXP awarded based on how long you were out. The reward maxes out at 8 hours outside of the apartment, so it's a good idea to return whenever the danger track reaches its end. As mentioned previously, you need to have spent at least one hour outside your apartment to get a save opportunity from Sybil.

-There is a very finite amount of EXP in Look Outside, so you should take every little bit of it you can get! The highest level I've ever managed to reach is 18, and the final level up was obtained off the final boss of the game.

-With the Crafting Kit from Vincent, we can combine a variety of items together to make battle items. I use the cloths we picked up to make some Molotovs, which are very handy for the Grinning Beast fight. There are other important items to create, but we lack the materials for them currently. You can also make Healing items with the crafting kit.

-Certain food items we collect need to be prepared at home. Meals restore a decent amount of HP and STM, and restore our invisible hunger stat. Normally if Sam is solo or only has one roommate, you'll also get some Leftovers from your meals, which restore a small amount of HP and STM themselves when used from your items. The game was being a little buggy here and didn't produce them for me initially.

-When spending time at the apartment, you'll occasionally get knocks on your door. Answering the door can result in a variety of encounters, most positive but some are dangerous. In this instance, we got the injured man William, who will ask for a medical supply and give us rewards in turn if we can provide them. Look closely at him through the peephole whenever he shows up though...

-Door encounters seem to be seeded, although the exact way the game determines this I'm not sure. What I can tell for certain is that if you save your game, advance time until a door encounter happens and then reload your save after, you'll get the same door encounter every single time if you take the same actions.

-Floor 2 is the only accessible area to us once we unlock the stairwell. Take note of the Astronomer, he's very important for most of the game's endings. Killing him would lock you out of those, so uh don't do that.

-Most NPCs can be attacked, and largely you just do this if you want to be an asshole. There is one NPC who can be killed for a pragmatic reason, but the game unintentionally punishes it harshly due to a bug I'll go over later.

-You don't need to talk to Jeanne, but raiding her stuff is pretty helpful. Keep that request for her Laundry in mind though!

-You can run from the Grinning Beast, but you'll get a similar result to what happened when I went for the gun first. It's better to fight it out.

-The Grinning Beast is quite tough, but if you do it the way I did you'll win 100% of the time. Stun her on the first turn, and even if she recovers right away she does nothing on her second turn so that's no issue. After stunning her, throw both your Molotovs. If you're at full health, you'll survive her multi-bite attack. Toss a throwing knife after it, and you'll win.

-Leigh serves as our first trader of the game, and she can be a nice way to unload your junk and pick up some spare supplies. The pistol bullets in particular are quite nice. She never restocks though, so it's best to just get the useful stuff purchased, and then recruit her after! You'll never be able to trade with her again if you recruit her, but she's far more helpful as an ally.

-Leigh has slightly better stats across the board than Sam, especially in terms of HP. She also can transform back into the Grinning Beast when in battle. This will berserk her for one turn and make her attack her own team, but she'll be fully controllable after that berserk turn passes. The Grinning Beast has a power double attack as its standard attack strike and Leigh learns a variety of Skills she can only use in Grinning Beast mode as she levels. I'm not a huge fan of using the Grinning Beast, but it can be helpful for the handful of longer battles in the game. The Grinning Beast used to completely suck, as it set Leigh against you for an insane three turns. Most battles in Look Outside don't make it past the second turn, so using the Grinning Beast was often just actively handicapping yourself.

-We get our first Gun after the Grinning Beast event, whether we run or fight it out. Guns have fantastic base power, but your Ballistics stat basically never increases from Leveling so guns have very static power. They also require ammo to use, obviously, though the game is decently generous with bullets. This pistol has a multi-shot technique, firing 3 bullets for a measly 2 STM. It's far and away our best damage dealing option right now, but should be used with caution as any shots in excess of what it takes to kill an enemy are still consumed. Guns can be reloaded within battle or out of battle from the Skills menu. It took me until my third playthrough to realize the latter because I am a rube.

-You could go for an alternative trade with Lyle for the photo paper, but why deny him happiness?

-The Crosswords we get from Lyle are one of the premier ways of wasting the clock in the apartment. You can do one hour crossword sessions to try and fish for door encounters, though the book does eventually run out of puzzles to solve. Rather amusingly, crosswords seem to wildly accelerate the decay of your Hygiene stat.

-You can kill Lyle to access his Dark Room, though this is not at all necessary. Just be sure to keep that photo from developing...

-We can play video games at the apartment to gain EXP, restore Calm and potentially learn new skills! The party members we get throughout the game all have different video games they are interested in and can play along with Sam to also get EXP. Leigh likes Wizard's Hell so that's the one I went with for demonstrating the mechanic. Each play session takes some time on the clock, usually 2 hours. Every video game has a specific number of sessions needed to finish it for the skill.

-Besides Wizard's Hell that we got from Vincent, we start with Super Jumplad, Mad Wheels 97, Myrmidon and Screamatorium if we check the shelves off to the left 4 times in a row. Of the 20 games available to collect in Look Outside, Super Jumplad and Madwheels 97 teach the best skills by a mile, so you don't have to engage with this collection quest too much if you won't want to. If you're curious, Super Jumplad takes 2 sessions and 4 in-game hours to finish, while Madwheels takes 5 sessions and 10 in-game hours to finish.

User avatar


Part 2 is out! As soon as midnight rolls around for the first day, Clint will burst down the door to his apartment allowing you to do the Baby Teeth sidequest. Even disregarding the ending where you just wait out 15 days, there's actually pretty short list of things you NEED to do in order to get an ending in Look Outside. The bulk of things we'll be doing throughout the game are purely optional, but it'd make a pretty boring LP if I just rushed to the end!

Extra Notes

-I have no idea what the Trade function with your allies in the apartment is supposed to do, but it is universally non-functional across everyone who joins you in as far as I can tell.

-Sadly, your team never gets any new dialogue over the course of the game in as far as directly talking to them goes. Thankfully, most of them have a pretty wide array of interactions with meals and video games.

-As mentioned previously, the specific trigger for Clint to bust down the door to apartment 34 is just for midnight to roll around. You don't have to sleep in order for this event to occur.

-If you don't pick up the Teddy Bear before talking to Joel, you can run from him to go grab it and then turn it over by engaging him in combat again. The only other way to get the door knob to Madison's room is to kill him (how could you?).

-It's possible to kill Madison before she fully reveals herself if you just unload the pistol into her, but that would be a way less interesting way to handle the fight.

-Baby Teeth is completely optional unless you want the achievement for beating her. The specific trigger to recruit Joel is killing Madison, so once that's done you can just run on through the room as Baby Teeth appears.

-I execute the Baby Teeth fight pretty poorly but it's not too big a deal. I really wanted to show off Leigh's Grinning Beast form for this fight, which was a mistake since she defaults to Slash damage in that form which Baby Teeth resists. It'll be awhile before we get access to any interesting skills for the Grinning Beast as well. This fight is pretty easily won just by repeatedly multi-firing the pistol, as Baby Teeth often renders herself blind and not terribly threatening.

-The Jawbone Club was actually added in an update, 1.02 I believe. Originally Baby Teeth dropped nothing, meaning there was little reason to fight her on replay if you had already beaten her once for the achievement. It's a pretty solid weapon, though I wouldn't bank on that stun proccing.

-Joel can refuse to join you if you acted sufficiently uncaring in your initial conversation with him. In particular, he dislikes doctors so claiming to be one doesn't endear you to him all that much.

-Joel was a pretty solid party member in earlier patches, but he's really awesome now. All his moves have had their damage cranked up, and he had some new very useful skills added which I'll go over as we get them. Joel has pretty low HP, which can be especially problematic considering most of his skills use HP to cast instead of STM but his natural defense is quite high so he becomes remarkably sturdy with enough levels. The HP issue can also be corrected with numerous equipment pieces found throughout the game. Joel can never use any normal melee weapons, and there's only one ranged weapon type he can equip, but he doesn't really need those things.

-Joel also has a unique trait that isn't super helpful right now but is extremely good once he gets a certain skill later: Joel passively recovers STM as you walk around. To my knowledge, he's the only character that does this and it is super helpful for the one skill he learns that does use STM instead of HP. *EDIT* Sadly as of the current version of the game, Joel has lost this ability. My previous playthrough started on 1.02 and updated to 1.03 midway through, so some of Joel's abilities did not update properly. He also has a skills I didn't see since I had leveled past the point where he would learn them and his Skills now cost STM AND HP.
*DOUBLE EDIT* Joel got his recharging STM back upon learning his Roundsaw Jaw skill. This kid is throwing me for a loop!

-How much Benjamin gives you is dependent on how many correct choices you made in the play session. You must pick all the right options to get Kill To Shoot.

-Completing Super Jumplad netted us the Jump Attack skill, one of Sam's best gaming related skills. The power of this skill keys off both your weapon attack and your agility, allowing it to hit some pretty high numbers for a very paltry 2 STM per cast. It does have the drawback of spotty accuracy though, so be wary of that.

-As mentioned in the video, we can actually complete Rafta's request fairly quickly. I won't be finishing it until long after we are able to though, as it causes a really obnoxious bug to happen with a certain vendor in the game. Also the quest chain itself is just unfinished as of the current patch.

-The Rat King prowls the first floor, spawning in at a random section of it every time you enter the hallways. He's not the toughest boss in the game, but taking him on now is far too risky. Save him for when you have a full team and preferably multiple guns.

-There is an achievement for getting killed by the Giant Eyeball if you're so inclined. Definitely head into his room for the small key regardless.

-Eugene opens up his shop early on into Day 2, and will probably be your most frequently visited vendor throughout the game. He'll update his stock every day up to a point, but to get him to lay out everything he can sell you, you will need to regularly buy stuff from him. Try to spend about 100-200 dollars on him daily to get him to stock the video game he sells if you are trying to collect all of those. Note that we cannot sell anything to Eugene, and he never actually restocks any items: just lays out new ones. Those 24 pistol bullets are the ONLY pistol bullets he ever sells.

-You can haggle with Eugene to lower the price on an item, but you get a limited number of haggles per playthrough. Haggle enough, and Eugene refuses to do anymore price drops for you for the rest of the game. Save haggling for the really pricey stuff, as more expensive items get bigger discounts off a haggle.

-For another somewhat unfinished mechanic, exploring with a high danger value results in shadowy figures chasing after you... in very specific areas of the game. Once you get to the Ground Floor, this mechanic basically never comes up except when you're returning to the Third Floor hallway. Do be careful though, some pretty nasty figures can appear at a max danger value that are comparable to bosses.

-Sam will periodically reflect on things in the Shower such as games you haven't finished and quest events that have multiple resolutions. He can also have similar thought if he is having meals by himself. Very rarely when checking the mirror, he can ruminate on certain events, but the chances for this to happen are very low and I've only seen Sam reflect (no pun intended) on two specific things.

-The Astronomers give you pretty oblique hints on what they are looking for, and Sybil is able to parse them and give you a better idea on what you should looking for. Be sure to pay attention to what she says!

-Like Clint breaking down the door, the "invisible man" questline will become available once Midnight rolls around and brings you into Day 3. Unlike Joel's sidequest, this one needs to be taken care of in order to complete the game with the best ending. There's one more change to the Third Floor that will happen come Day 4, and then no more afterwards as of this current patch.
Last edited by Cullen on Tue May 06, 2025 11:02 am, edited 1 time in total.

User avatar


Part 3 is out! We follow up on a tip from Sybil and run into problems, as expected. Afterwards, we conduct a more thorough exploration of the first floor and familiarize ourselves with most (but not all) available locations. And then we commit an atrocity.

Extra Notes

-Acid Flasks are amazing, and you should always keep at least a couple on hand for any fights that are going sideways. Hurling them at dangerous foes is always a great way to expedite fights.

-Unlike Joel's apartment, you will need to enter Apartment 31 and at least secure the Negative Disc from it if you want the game's best ending. The Star Gazer can be avoided by simply juking around him when you switch the lights off, and you don't actually have to wait for him to mark the light switch in order to turn it off.

-Though Apartment 31 is unnecessary to explore if you're not going for the best ending, it's still worth ducking into for the items it holds since it only becomes dangerous when the lights are off, and the Gazer can't FORCE you to turn them off. The safe in the bedroom in particular has a pretty large cash payout within if you have a spare key for it.

-Take note of the numbers from the planet chart and what they correlate to, as it ties into the biggest game long puzzle.

-The enemies in the meat dimension are quite a bit above you in raw stats at this point. I fought most of them for glory, but trying to avoid them is the wise decision.

-There's an alternative way to get into Apartment 31, but it only matters if you're trying to clear the game as fast as possible. Amusingly you still get the alternate access method even if you've already cleared out the apartment, and most people are going to get this method on their first playthrough. I suspect in an earlier build that Apartment 31 opened up naturally on a much later date.

-Eugene's inventory expands dramatically Day 2, with him selling a lot of ammo in particular. I forget to re-iterate it in the video, but remember that Eugene doesn't restock any of his inventory! He just adds new things as you buy from him, so any ammo or supply purchases are a one time deal. Still, if we could get 6 Acid Flasks for about 200 bucks, that's a decent one time deal.

-The Rat Tail trader has some pretty good accessories, though most can be obtained from rat enemies found around Floor 1 if you're lucky (The Filth Ring is exclusive to him though). That said, I'd advise against killing most rats right now until you defeat a certain boss later, as to not deny yourself some rewards.

-You don't need to talk to the Astronomer on the First Floor, or any of them but Jasper really, but hey. Background fluff.

-The Overgrown Apartment has many good rewards within it, but most of the enemies inside are extremely dangerous. Definitely save it for when you have better armor and can foot the STM cost for Cleave in almost every encounter you get into.

-Frederic's quest is yet another one that is mandatory if you want to get the game's best ending, although only a portion of it is. Frederic will provide you with items as you subjugate his paintings, with a plot critical one being awards after you fell your third painting.

-You don't have to kill the rats in the Rat Baby's apartment, but there's not much value in sparing these particular rats.

-Must we truly be the real monster?

User avatar


Part 4 is out! Rest assured, Rat Baby fans in the audience, they are thoroughly unmunched in this video. We instead opt to deal with the Frederic situations while I try to come up with an alternative to the sadistic sacrificial situation. The going in Frederic's apartment is quite rough, but we manage to pull through with plenty of levels gained and some good equipment secured!

Extra Notes

-Crosswords are the premier time waster of the game if you want to fish for door events. You can play in increments of an hour, up to a maximum of 4, with any door knock opportunities interrupting ongoing sessions. There is actually a finite number of crossword puzzles to complete, and upon clearing them all you get a special code that is different every playthrough... and is currently useless because whatever it's supposed to go to hasn't been implemented. Regardless, there is an achievement for clearing all the crosswords if you're so inclined. It takes roughly 70 in game hours to clear every crossword puzzle, although it can take closer to 80 since the amount Sam finishes in an allotted time slot can vary. The party member Morton can aid in solving puzzles, cutting the required time to fully clear the book in half, though actually getting said party member is purely RNG.

-We pick up the second child character off of a random door event: Sophie! Sophie is actually a part of a door event quest regarding her mother Harriet, and either one of them can randomly show up in either order. You do not need to meet Harriet in order to meet Sophie, contrary to popular belief, and contrary to what I believed prior to starting this LP you do not need to advance the story a certain amount for Sophie to show up either. As for Sophie herself, she's a character I like in theory but she's pretty undertuned in the current build of the game. Sophie has a unique command in Hide! that dramatically increases her evasion when she uses it. Hide! also allows her to user her Trick skills, which are a variety of ailment inflicting skills, making Sophie one of the premier ailment inflicters in the game and one of the only ones that can inflict poison. As a drawback, using Tricks puts Sophie in the Exposed status, which removes the evasion buff but lets her continue to use Tricks. Sadly, she has absolutely terrible stats with gutter tier Attack, HP and STM. As a small girl, she also has a very limited equipment pool, although she was indirectly buffed in this regard as her slingshot used to be considered a two handed weapon which prevented her from using knives. The fact that she needs to set up Hide! every battle also hinders her a bit, as she takes a turn of set up before she can flex her gimmicks. In the off chance she does get hit, Hide! also has a random chance of dispelling upon damage. Fully completing her quest with her mother does permanently remove Sophie from your party, so it's likely she's a little bad on purpose to lessen the sting if you lose her, but it's a shame because she's just on the cusp of being really good.

-Pay attention when Harriet shows up. If there's anything odd about her and you fail to notice it, the consequences can be disastrous for poor Sophie. If you're curious, reuniting Sophie with her mother awards a bunch of healing items. You're also supposed to be able to visit Sophie and Harriet in their apartment, but this isn't implemented in the current patch.

-You're given the freedom to help out whichever Frederic you like for a variety of rewards.

Wiggly Fred: Nothing! Though he does make you the official owner of his fridge.
Bright Fred: His once per day heal is upgraded to over 100 HP to the entire party. He also gives you a Medic-in-a-jar, an item that can similarly give you a potent once-per-day heal.
Tumor Fred: Will award you a Tumor Lump, a throwable item in combat, provided you have none in your inventory. The Tumor Lump itself can split and duplicate in your inventory when a new day comes around.
Shadow Fred: Nothing! Is always hostile as well.
Fred Who Bites: Nothing! Though he does have an achievement tied to him.
Godlike Fred: Depends on if you get him to drop his ruse or not. If you don't, he awards you a Strange Feather which is a luck boosting accessory. If you do, he gives you 400 dollars instead.
Scared Fred: Nothing! Has a surprisingly involved quest to get him out of the cabinet.
Toxic Fred: Upgrades the cowboy hat if you were foolish enough to put it on, giving you immunity to poison. Not many things in the game can poison you, and the hat itself is pretty bad, so not a great reward.
-Face Taker: A lot of rewards actually, awarded at different kill thresholds. He gives you 4 Turpentines at 1 Fred Dead, a canvas bag to take the ethereal painting with at 3, 6 bandages, 2 tonics and a first aid kit at 6 Freds Dead, and finally the Painter's Palette if he's the last one standing. This is a unique sub weapon that goes into your Ranged slot. Though it can't be used to attack, it gives your melee attacks the ability to inflict random ailments. This can only be obtained if you help him out.
Real Frederic: Duplicates a piece armor for you once. Best saved for when you have something actually worth duping.


-There are a number of complexities to the Frederic quest that I didn't want to oversaturate the video with. We'll go over some of the more notable alternative things you can do in the next video.

-It's advisable to save the Frederic quest for later as the enemies are quite dangerous and we're light on healing items. No guts, no glory though!

-The Cleansing Swipe move on the Mop is designed for this area, heavily damaging or one shotting nearly everything within the apartment. Thankfully, the reworked durability system makes this much more reliable, Mops were incredibly prone to breaking within one or two swings prior to version 1.03.

-All of the Green blob monsters must be killed to fully subjugate Toxic Fred.

-We meet the Shadow! We're actually running into him relatively late, he can show up as soon as Day 2 begins in random rooms. There's a bit of a lengthy sidequest involving him, at least as far as in game time goes. To fully complete it and get all relevant achievements, you'll need to be kind to him and give him good items. That said, he can give you a more practical reward if you do things less than perfect. You can get 350 dollars from him later if you give him a Chocky Bar in the first encounter and then only do his dialogue choices in all succeeding encounters while not giving him anymore items. For the sake of demonstration though, we'll be completing his quest "properly".

-Frederic's apartment can be worth going into just for the vendor trash and Hunting Shotgun. It's a good source of money at this point, and the shotgun is a handy weapon to have.

-Shotguns are the only true AOE guns of the game. While their Wide Blasts are fairly weak in comparison to Point Blank Shots, it's still a decently helpful attribute in comparison to other guns that only have randomly distributed multi-hit skills as a means of AOE damage.

-If you want to get the best ending, you MUST collect the sky painting at some point. It's fairly easy to grab later if you're apprehensive about fighting through Frederic's apartment now.

-The quest reward for The Real Frederic used to have an obnoxious bug where if you talked to him before killing all other Freds, he'd never realize when you actually finished and thus would never give his reward. You'd need to talk to him last to get the option for his quest reward. Thankfully, the current patch has fixed this bug and that is no longer necessary.

-Apartment 30 opening is the last change that will happen to Floor 3 purely through advancing time. This apartment was made much more dangerous as of the current patch, so it'll be interesting to see how it goes for me as I had already passed it on my previous playthrough when the new update rolled out.

-With about 4 Acid Flasks and some guns, the Rat King can be defeated well before he becomes an issue. Should he get in Melee range, he will Mark a character and go all out on them. Luckily, we killed him before he could do much of anything and got the Rat Crown. This allows us to converse with rats, which will let us get some extra items and an achievement. In this video, we use it to bypass the Rat Freak fight while also getting a unique weapon from him in the process. We'll kill him later.

-The Odd Necklace is too risky to use, but it sells for a good bit of money so I'd recommend grabbing it anyway.

-By sacrificing an arm to the Wallmouth, we can save the Rat Baby! In all patches so far, this has been rather buggy and it's not impossible this penalty will break before the LP is over. I'll stick to the spirit of it though and live with the restrictions even if I hit a point where I don't have to.

-I was rushing a bit to wrap up the video, but Jeanne gets some new dialogue for a very brief period. To see it, you must talk to her after getting the Earth and Mars discs but BEFORE actually entering the Ground Floor. I will show it next time.

-There's a special thing that can happen if you make it to the Ground Floor with 1 or less people recruited. I'll show it in a future video.
Last edited by Cullen on Sun May 04, 2025 5:20 pm, edited 2 times in total.

User avatar
Just counted up the Frederic's one by one and there are in fact ten of them.

User avatar
That it is an impressive failure on my part, I even double checked them before finishing up my notes and somehow still came up with nine. Clearly I need to read my lists back more carefully.

User avatar


Part 5 is out! We are just flush with things to do at this point, so I take the opportunity to clear up a bunch of loose ends before even more junk begins to pile up before returning the Ground Floor and avoiding our original road pizza fate. Reaching the Ground Floor is the first real step in gaining access to endings besides just letting time on the calendar run out, making it a pretty major milestone. Perhaps not coincidentally, we also start getting access to some very powerful items that make the going much smoother.

Extra Notes

-I check out some of the alternative Frederic fates. Dying in dialogue to Fred Who Bites and getting conscripted by Toxic Fred both provide achievements if you're looking to secure 100% completion. Thankfully in the latter's case, it's awarded as soon as you talk to him with the possessed hat on, meaning you can just reload afterwards since his reward for becoming the real Fred sucks ass.

-Despite the incredibly involved nature of getting him to come out of the cabinet without resorting to force, Scared Fred awards no special achievement for doing so nor does he even have a reward if he becomes the real Fred. Curious little diversion, I must say.

-I haven't tested this personally, but I've heard Toxic Fred can be very buggy if you choose to fight him after being duped into putting the hat on. Frequently, the fight script breaks and he ends up just being invincible. Not a situation you're super likely to find yourself in, but be wary.

-Returning to home, we grind out Madwheels 97. Nitro Boost is the other worthwhile gaming skill to pick up, being a cheap partywide buff that gives an appreciable boost to Agility and Evasion. It can go a long way in reducing damage to the party in boss fights, allowing us to slug the boss before they can act and occasionally nullifying any potential damage. The Nitro buff lasts 5 turns, which is more than enough for most any fight in the game since fights rarely last longer than that.

-We get our next door visitor party member, Dan! Dan's a really gimmicky character whose unique skills revolve around maintaining a live stream. In battle, Dan can use a Calm Intro or an Irate Intro to begin his stream, giving him support and offense skills respectively. Support skills by and large cost viewers to use, while offense skills can build up Dan's viewer count (though the strongest skills also cost viewers). In earlier patches, Dan's offensive skills focused on damage for less represent damage types such as Fire and Cold, but he's been retooled to have more ailment based attack skills instead, like Sophie. He also got a buff that causes his view count to stay consistent between battles, with him losing a viewer per in-game hour that passes without a fight. Originally his view count would plummet back to 0 as soon as fights ended, sometimes amusingly going into the negatives somehow. Despite all that, I consider Dan to be one of the worst party members in the game, alongside Sophie. For similar reasons to Sophie, his gimmick is just too convoluted and takes too long to get going. Dan has this worse than Sophie even, since Sophie just needs to use one command to fully access her skill list. Dan needs to use a command that costs STM to use his full skill list, and he has a secondary resource he must build up in order to use his best stuff. In the case of his Calm skill tree, he gets so few viewers from a Calm Intro that he'll quickly find himself unable to use any of his support skills at all. Battles just simply don't last long enough for Dan to really get going, resulting in most of his skill list being unused. While it's nice that he now retains viewership between battles, the places where this can be put to use usually have loads of weak enemies that die in a single turn if you go all out from the jump anyway. If Dan could be set to use a specific Intro as a battle opener before anyone gets a chance to act, his streamer skills would be a lot more usable. As it is, he just takes too much set up for not much payoff. On the brighter side of things, he has way better stats that Sophie and can use most every piece of equipment in the game like Leigh. I'll probably eventually just have him carry a rifle around to take Aimed Shots with unless someone more interesting than him happens to show up at the door later.
*EDIT*: Getting to play around with him now, Dan's stream intro DOES now carry over into successive fights along with his viewers, which goes a long way towards making his skills more usable. Sadly the skills themselves are of dubious use compared to weapon skills.

-Dan can potentially be hostile. If he's asking for food instead of friendship, steer clear of him.

-We're forming a pretty noticeable Roach colony in our home. This is for a sidequest with two possible resolutions. We'll be going for the positive resolution for this LP since it leads to an extra party member. To accomplish this, just leave out a cooked meal every night before going to sleep, and you'll continually get notes from the Roaches expressing their gratitude until an achievement pops. If you want the negative resolution for the achievement that brings, wait until you have a huge number of Roaches in your apartment and then start interacting with them and killing them. It'll take awhile, but eventually a more... abrasive note will be delivered to you signifying you are an enemy to Roaches.

-If you continue to leave your plant in the light, it will die. You must return it to the corner to continue the plant talk sidequest.

-We grab the Super Slingshot for Joel to use. This is a decent little bit of ranged damage for him if you'd rather not burn HP on Teeth Cannon, but unfortunately the only marbles in the game to my knowledge are the 32 Eugene sells and the 10 that Sophie comes with. After 42 uses, the thing is little more than a dead Ranged slot for Joel and Sophie. On the brighter side, the way the game keeps track of its ammo is rather buggy and a lot of times the Slingshot can be fired without a marble actually being consumed.

-The new dialogue with Jeanne can only be obtained after getting the Mars Disc but before entering the Ground Floor, so make sure to talk to her before opening up that area if you want to see it!

-You can choose to spare the rats and buy cheese from them once per day, though it would take several days to get the same amount of cheese from them as you get from just killing and robbing them. The fact they frequently drop Rat Tail Belts also makes it pretty desirable to just wipe them out.

-Joel has learned his Roundsaw Jaw move, a very potent STM consuming ability that hits for 4 instances of Slash damage. With Teething in effect, its damage is doubled! It's a bit pricey to use, but it gives Joel an excellent source of non-piercing damage to use. Sadly, we haven't quite yet encountered anything sturdy enough for it to be to put to good use against.

-Sometimes you can get some seriously good item drops! Killing the Rat Freak got us both a second set of Rat Claws and more importantly the Sewage Blade. This weapon essentially turns Sam's Jump Attack into a slightly weaker Acid Flask, which is extremely good. We'll likely make heavy use of this going forward.

-Funnily enough, you actually don't have to kill the Laundry Worm to advance Jeanne's sidequest. You don't have to enter the Laundry Room period in fact, her sidequest moves to its next phase as soon as you enter the Ground Floor.

-Nestor will be come important later, but for now he just spends the rest of the game staring into a urinal.

-The Bus Crash is a major sequence trigger for beginning a extended sequence for getting the basement key. We don't need to fight any of the bus passengers to proceed, but we do need to see the crash happen for the game to continue. Once it does happen, the game starts a timer counting down in-game hours, and after about 4.5 hours a new area will open to us.

-Crawling Hand can be ignored, but he's a good amount of EXP and relatively easy to kill so I figure why not? All of the Hand enemies are weak to slash attacks, so keep your cleavers and axes at the ready.

-Jasper is the acting leader of the Astronomers, though funnily enough he is not the last one we meet. Nor is he the founder for that matter. Jasper will accept offerings of depictions of the Entity that is causing the game's events (with one special exception of another he will take). To get the game's best ending, you must provide him 4 correct offerings... or you can give him a bunch of crap that you say is a correct offering for a variety of bad endings. Of our current inventory, the only valid item we have for him is Frederic's painting. As for items in total we can give him, we only have 3 things that are valid so we can't quite finish the game yet. It'll be a bit before we get a 4th acceptable item.

-With the Pen and Stationary, we can turn them over to Rafta to continue her quest. We want to hold off on this for awhile, as there's a rather annoying bug regarding the resolution of that quest that can prevent us from collecting all of the video games required for the achievement you get for obtaining them all.

-Mutt's Fish 'n Chips is an incredibly valuable vendor. By talking to Mutt directly, he serves as a consistent place to sell our vendor trash to. His main inventory never updates though, so anything bought from there is gone for good like Eugene's shop. The real draw of Mutt's store is his counter of Special Items. Every day, Mutt will place a new item on the counter drawn randomly from a set pool. For every single one of these items purchased, the next item will cost 25% more. Each item has a distinct base price, some much higher than the lockpicks that I purchased, so these items can become seriously pricey after you buy enough of them. Among the more notable things he can sell, there's a video game available to buy, a Coffee Machine that allows you to make 4 cups of coffee every morning (a very potent STM restoring item), he can sell a Crossbow that fires a variety of bolts that Mutt sells in his main inventory, as well as powerful weapons and armors. There's also a special item Mutt will put out on the last day of the game that unlocks an achievement. I got quite lucky this playthrough as Mutt had laid out the extremely valuable lockpicks. He won't always be selling these early on, but getting them now means we never have to worry about needing Simple Keys ever again.

-Ghislaine and Norm finally explain to you what ailments are in the game and what each one does. Not super helpful to me, but obviously handy to a new player who is confused what anything you're hit with even does.

-Emmanuel can be given Cassette Tapes obtained from slain bus passengers in trade for some unique pieces of equipment. Like the Rat Tail Vendor, you can also obtain these items if you have good luck on item drops from the bus passenger's. In fact, Emmanuel's entire stock can be obtained off of good luck, though I'm not holding my breath for that. Emmanuel's gear focuses on multi-hit strikes and things that give you a chance of acting twice. They have horrible stats though, so it's debatable how worthwhile they are.

-With Lockpicks in tow, I open up every Safe we've passed thus far, getting a cool amount of cash!

-I trade off the Rat Tails we got, though through good luck we had already gotten pieces of the best stuff the Rat Tail Vendor can provide us. The Filth Ring is an interesting accessory, but since it lowers all your stats if you're not inflicted with an ailment, I probably won't make much use of it.

-For one final note, I'm just going to list all the video game skills you can learn in the game here. Jump Attack and Nitro Boost are the only ones really worth the time to learn, most of the remaining ones are either too weak or too gimmicky to really do much for you so it's unlikely I'll bother with them. I won't go over where you can find these games at this point since most of them are found in future areas or off of events we haven't seen yet.

Wake The Blood Knight: Blood Madness. Costs 5 STM. Puts Sam in a berserk state that increases his damage and defense but prevents you from controlling him. Bad for obvious reasons.

Wizards Hell: Arcane Tears: Painful Stab. Costs 2 STM. Inflicts a DOT effect on the enemy that reduces their accuracy and hits them for 1/10th their HP in damage per turn. Not terrible, but most fights don't last long enough for this to make a meaningful difference. In a different game this would probably be broken as hell.

Super Jumplad: Jump Attack. Costs 2 STM. An attack that uses your Agility in addition to your Attack stat to determine damage. Flatly better than attacking normally, and since you start with this game and it takes 4 hours to beat, this one can be picked up very quickly. The only drawback is that it seems to have less than perfect accuracy, it misses frustratingly often.

Super Jumplad 3: Numbness. Costs 10% of your HP and 5 STM. Makes Sam immune to status ailments for 10 turns. It's a little too niche, though there are some annoying status effects in the game it could potentially be good for. Granted you can use it before the enemy gets to act, that is.

Catafalque: Risk Taker. Costs 4 STM. Increases Sam's attack power but also increases the damage he takes. Defense is pretty important in this game, so I wouldn't recommend it.

Honko's Grand Journey: Cash Sock. Costs 2 STM and 5% of your money. Deals damage based on how much money you have. Ewww, no. Money is much better used for its intended purpose, and there's a finite amount of it in the game.

Madwheels 97: Nitro Boost. Costs 3 STM. Gives your party the Nitro status, boosting accuracy and Evasion by 30% for 5 turns. Extremely good and from a game we start with. Always use this as Sam's opener in boss fights.

Wraithscourge: Dungeon Dance. Costs 2 STM. Counters received attacks for 4 turns. I'm not a big fan of counter based skills, and like so many other set up skills it falters due to battles being very short in Look Outside. It's entirely possible for it to do nothing in a fight if Sam isn't attacked.

Massacre Princess: Meteor Strike. Costs 999 STM. Very much a joke skill, you will never reach that much STM in normal play. If you hack the game to cap your STM, you'll find this skill just replicates a normal attack. Nice troll!

Kill to Shoot: Aim The Killshot. Costs 2 STM. Makes your next attack guaranteed to hit...? I actually have no idea what this does.

Myrmidon: Combat Medic. Costs 4 STM. Heals a target for 25% of their HP, with a 25% chance to also inflict bleed. Not terrible, I think that's a pretty worthwhile risk considering other HP restoratives in very finite supply. It takes 14 hours to learn this though, so you're practically sacrificing an entire in-game day to get it.

Myrmidon XII: Garrison. Costs 3 STM. Prevents you from evading, but increases Ballistics, Bullet Defense and gun crit rate for 6 turns. Actually a pretty solid buff, though obviously useless in this LP since Sam sacrificed his shooting arm. It's also learned super late, with the game being found in one of the last areas of the game, so it has very limited floor time once you do get it.

Screamatorium: Screamer. Costs 4 STM. Attempt to inflict Panic on all enemies. There are some enemies with nasty skills in this game, so this could potentially be useful depending on how reliable it is.

Frogit About It: Croak Orders. Costs 4 STM. Attempt to inflict Charm on an enemy, making them fight for you. Essentially functions as another means to Stun an enemy, so it's usefulness hinges on how reliable it is, like Screamer.

Blood Ghoul Orgy 3: Hurt Me Plenty. Costs 3 STM. Taunts enemies into attacking Sam, reducing incoming damage by 25% as well. Lasts 5 turns. If Sam is loaded up with good defensive gear and turtles up after using it, it can be a decent way to shut down single targeting enemies. I'm more of an aggressive player though, so I don't really care for this.

Octocook: Octostrike. Costs 8 STM. Launces 8 randomly targeted attacks. Expensive, but certainly powerful if you have a good weapon! Getting this game is dependent on RNG though, so it's not impossible to never have it come up as an option in your playthrough. Definitely pick it up if you do get it.

Reptile Football: Running Tackle. Costs 1 STM. Deals additional damage based on your Defense. Terrible. Unlike Jump Attack, this is purely influenced by one stat and that is Defense. It's quite weak, so I wouldn't recommend getting it.

Crossword Challenge: Confusing Word. Costs 5 STM. Attempts to inflict Confuse on all enemies. Essentially a juiced up version of Screamer, since Confused enemies cannot use skills in addition to randomly targeting between friend and foe.

User avatar


Part 6 is out! Once the bus crash happens, a timer begins that will cause the Ground Floor to change and allow you to continue the game. It takes about 4.5 hours for the next story event to happen, which gives us a good window of time to burn for that newly opened apartment on Floor 3! Once that's done, we pay a visit to our slumlandlord.

Extra Notes

-If you make it to the Ground Floor with one or NO people recruited (and that's recruited, not just in your active party), the building's lead custodian Papineau will be available to recruit in the men's room! Papineau is pretty awesome if you get him right now. Like Leigh, his core stats and especially his HP and STM are quite a bit better than Sam's. Unlike Leigh, he has some skills that don't required Berserking him for a turn to use. His Bear Hug skill is a non-weapon based Crush skill that scales with how much HP he currently has. Stacking him with HP boosting equipment and keeping him healthy makes it quite impressive in the field of pain! Papineau also prepares a lunch every day. Initially, he can only do a Lunch Break with it in battle, which fully heals him but causes him to become inactive for several turns. The more interesting thing he can do with it later is Share his lunch, which heals the entire party for 30% HP and STM. This can only be done in battle, and only once per day, but it's a nice little bit of extra healing in a game with limited supplies! Papineau also comes with a unique weapon in Joyeuse, a fairly powerful mop that actually can be put to good use since it doesn't break in 5 seconds anymore.

-If you don't recruit Papineau in the bathroom, he moves to a much later room in the game, but unfortunately at the same level he joins when you could first encounter him (Level 4, though I don't know currently if the new patch has changed this). It's not really worth subbing him in at that stage of the game since you'll likely have a team of people triple his level at that point. Also if you fail to recruit him when he's in the bathroom, he'll be killed by bus passengers when Mr. Henderson's room finally opens.

-The Taxidermy dungeon used to be much easier, with very weak enemies and powerful armor to grab to make the going forward much smoother. All of the enemies within it have had their HP roughly doubled and they now hit like runaway freight trains, especially if you have weak armor and are low leveled. I definitely made the right choice to hold off on this place until I was well equipped with slash weapons and had Dan around to help.

-Joel seems to have gained his STM regen effect upon learning Roundsaw Jaw. I certainly won't complain, that goes a long way to aiding Joel in his continuous evolution into a murder machine!

-Originally the Taxidermy monster fight didn't properly transition into the Suture Wire phase, he would just die. Now that he does become Suture Wire like intended, yeesh that is some serious damage! I definitely could have stood to craft more Acid Flasks before heading in here.

-The locked door originally didn't open properly in the real apartment when you unlocked it in the leather zone, but now it does! In addition to more taxidermized baubles to sell, you get the unique Suture Kit healing item. It heals 20% hp like a bandage, but it can also revive people! It has 8 uses, so use them wisely!

-Once the requisite time has passed, bus passengers will funnel out into the rest of the apartment, sometimes even appearing in the stairwell and on the various other floors. This is the trigger for Mr. Henderson's apartment finally opening up, which by extension allows us to continue the game.

-The Landlord dungeon is probably the least liked portion of the game by most who have played it. It's an overlong area packed to the gills with incredibly wimpy enemies who do little damage and die in 1-2 hits. It's also one of the most blatantly unfinished portions of the game, as several of the sidequests within it seem to have large chunks of content missing from them.

-You'll need to pay Mr. Henderson quite a bit to fully unlock the Landlord Dungeon, but thankfully most of the money for it is obtained within the dungeon itself. I think it's about 1,400 dollars altogether you need to pay him.

-The Supply Cache sidequest is our first instance of a barely implemented quest for this dungeon. There are a couple cracks in the wall/floor you can check for money items. And I mean couple very literally, there are exactly two. I've never had to actually use the radio.

-The exterior battlefield is massive and with low visibility, so it is very easy to get lost in it, as I did in the video!

-It is worth your time to kill most of the enemies in the dungeon, tedious as it is. They are very generous with the cash, and occasionally drop Grenades and Ammo Crates. The latter can push your ammo reserves well beyond what you'll normally have if you're lucky!

-The Explosives sidequest is also unfinished. There is exactly one thing to detonate with a sapper charge, and the guy doesn't actually pay you for it when you do it. That said, it is well worth taking the sapper since the wall you blow leads to one of the best weapons in the game and enough ammo to last it for the remainder of it.

-The minesweeping sidequest is probably the most finished quest within the dungeon, but it's pretty scuffed. If you have someone equip the Mine Detector, it'll occasionally ping where a mine is hidden and make it slightly easier to ready yourself to pluck them. Not worth it in my opinion, the Detector is a completely useless two handed weapon, and there are some narrow hallways later with mines that we can inch through in order to finish the quest easily. The practice field flat out doesn't work, and there isn't actually any buried treasure to find. I've also heard the Mine Officer doesn't actually sell you a new detector if you happen to break yours, but I haven't tested that personally.

-Plucking mines is relatively easy, just walk up to them and mash the interact key. If they pop up out of the ground before you get in close, you can run away and they'll rebury themselves.

-We get another new party member! Hellen is pretty unique and pretty awesome. She has among the best HP and STM in the game with a high Attack stat, though low Agility and an inability to use guns. She's able to inflict the unique Stalk status, which improves her damage and crit rate against stalked targets. She has a number of unique skills performable with Slashing or Piercing weapons, though her best one has recently been nerfed. She's probably one of the best party members in the game, and I'll do my best to show her off next time around.

User avatar
A new patch has dropped today! This one hasn't really changed much to the game in as far as I can tell, but it does have some very amusing coincidental balance changes. Namely, Joel has had Teeth Cannon and Roundsaw Jaw slightly nerfed, Dan has had his offensive skills buffed, and Hellen has had some of her more extreme nerfs walked back. The last video could not have ended in a more perfect combination of characters, I have to say. Otherwise it was mostly bug fixes with the exception of a boss I was planning to fight in the next video having his most dangerous aspect nerfed, which is honestly kind of disappointing from a demonstration perspective. It's a good change otherwise because that boss has been a serious pain in the ass for the wrong reasons up to this point.

User avatar


Part 7 is out! This outing is mix of addressing loose ends and finally completing the Landlord dungeon before we move onto the basement. The Basement is absolutely massive and has several major areas unto itself, so it's a good idea to clear out some of the miscellaneous areas I've passed up before they get lost in the lurch. We also finally secure some genuinely fantastic equipment, which goes a long way in making enemies we fight going forward much less of a danger.

Extra Notes

-Before getting into the nitty gritty, we did have a patch between the last video and this one. There were no major content overhauls, though there can be some sneaky changes that FrankieSmileShow omits from/forgets to include in the patch notes. In a moment of serendipity though, all the major changes of the new patch happen to be relevant to our current situation! Namely there have been some balance changes to characters we are using plus a change to a boss we fight within the video that I'll go over later. For the party members,
Joel: Roundsaw Jaw and Teeth Cannon have been made more expensive to use, and both have been hit with damage nerfs. Roundsaw's isn't too noticeable, but Teeth Cannon had its damage roughly halved from the previous patch. Probably a good idea considering how much that was slamming the enemies for in the prior videos, but sad to see it go!
Dan: His Scan ability has been improved which is of little importance to me since I know what most enemies do anyway. His Irate skills have gotten damage buffs, although they're still not on par with Joel's abilities. I have managed to figure out some uses for Dan over the course of this video though, so he's steadily improving in my eyes!
Hellen: Some of her most overt nerfs got walked back or toned down before I even got a chance to demonstrate them! Her Massacre skill now costs 15 STM instead of 8, and the Fallow Will status it induces has been heavily toned down. Originally this status lowered Hellen's Crit Rate, Attack Power, AND prevented you from healing her, though she gained a defense buff in compensation. The skill to purge it flatly reduced Hellen to 10% of her HP. Now it only reduces attack power and crit rate, and the skill that purges it costs 50% of Hellen's HP. One change mentioned in the 1.03 notes that doesn't seem to be true is that Hellen's base level when joining was raised: I distinctly recall her joining at level 4 even prior to version 1.03.

-Speaking of Hellen! She's a fairly sturdy and powerful melee attacker, though she has a couple distinct drawbacks. Hellen cannot use firearms, and her Head slot is locked into the Hockey Mask, a decently strong helmet that unfortunately also reduces accuracy. Past that, Hellen revolves around a unique status called Stalk, that she can inflict on the enemy either one at a time with the Stalk skill or an entire enemy party by removing her mask, at the cost of confusing everyone including your own party. A stalked target takes more damage from Hellen, and they become more susceptible to being critted by her. Hellen also picks up several unique attack skills that can be used with slashing or piercing weapons (previously only one handed varieties, corrected in 1.03 to be all Slash and Pierce weapons) that gain even more damage and crit rate from the Stalk status. Chief among them is Massacre, a 4-hit randomly targeted attack. This ability used to be broken as it was an 8 STM move that could be spammed relentlessly due to Hellen's high STM and did great damage even without Stalk. It has since been nerfed to induce the Fallow Will status, which prevents Hellen from using the skill repeatedly as mentioned previously. Fallow Will has its own selection of skills that can be used when its in effect, even past Salt The Earth, but I haven't had a chance to play around with it personally.

-We tackle the Overgrown Apartment, which is always a weird place to work into a playthrough. It is far too dangerous to enter this place when you first reach the First Floor, but is very easy once you have a full team with Cleavers and Axes. We do definitely want to clear the place out before entering the basement though, as the car key we get from it can be used in the parking garage that the basement connects to. Most of the enemies in this place are quite durable, and the mini-bosses located in the bathroom and bedroom can be extremely hazardous to face, so don't rest on your laurels at any moment when exploring it!

-Once you've reached the Ground Floor, Jeanne's mutation will have triggered. Her laundry is actually a complete red herring, you don't need to get it from the Laundry Worm for this event to happen and she actually never does make good on that 50 dollar promise. Regardless, it is well worth your effort to kill the Hydra buds to save her. Completing this sidequest nets us the extremely powerful Studded Jacket armor, which gives a huge boost to Defense and a generous boost to several other stats. We also get the Motorcycle Helmet, which gives similar boosts to the Jacket as well as Stun immunity, but also incurs a nasty accuracy penalty that makes you miss constantly. You can combine it with the Eyeglasses to eliminate that drawback, but I kind of prefer having flexibility with my accessory slot. It's still not a bad option in lieu of other gear choices though.

-I decide to have Frederic dupe the Studded Jacket for me. There are defensively stronger pieces of armor in the game, but the Studded Jacket gives probably the best overall boosts of any armor in the game. It's definitely worth it to have two of them! Frederic takes until the next day rolls over to finish making his dupe, which can happen pretty quickly depending on when you hand the armor off to him.

-There are many doors we can open with Herbicide, but the Frozen Apartment is definitely the largest and most involved area we can get into with it. There's not enough Salt within the apartment itself to fully explore it, but thankfully there is enough in the game to melt every single ice block that will ever potentially bar your path. I opt to take the route that gets me the most monetary rewards on top of also allowing me to face the boss within the apartment. Unlike the Overgrown Apartment, nothing besides the boss is too threatening here.

-Joel has picked up what is by far his best move, Teethstorm! This was sneakily slid into his skill list last patch and it is a phenomenal payoff for building up Joel. Its base damage is half his current HP, before the amount of HP it costs to use it is considered, and it also seems to do additional damage based on Joel's attack stat. It hits all enemies in a battle, and it seems like it never misses. Once Joel has this ability, he becomes amazing at clearing out trash mobs. It takes awhile for him to get here, but it was well worth the time!

-Since Dan's Status carries between battles now and he can amass viewers quickly in Irate mode, he's now picked up a decent niche as a pocket healer. His healing is weak, but he can do a lot of it once he hits 20 viewers. Have him keep Joel topped off for Teethstorm spam, and you got a nice little dynamic duo here!

-I can probably get more mileage out of Dan's Irate skills if I give him accessories that make him immune to the ailments they inflict. Something to keep in mind next time we see the curio trader!

-Pompom used to be the most annoying boss in the game. Nearly every single turn, he would use Cold Wave, a skill that hit the entire party for about 30 damage and had an extremely high chance to Freeze whoever it hit. Freeze is an alternative stun ailment that prevents you from acting when inflicted, but unlike the actual Stun status ailment, characters/enemies don't build up cumulative resistance to it for remaining battle when its inflicted. It was entirely possible for Pompom to freeze your entire team turn after turn and not let you do anything, especially because he used to be lightning fast. His speed has been nerfed and he can no longer use Cold Wave multiple turns in a row, bringing from an obnoxious luck based battle to about as vanilla as everything else in the apartment. Kind of a shame actually. Random related trivia, there are accessories that give you resistance to Cold damage, but nothing that gives you immunity to Freeze. It was frustrating when I invested in a Ring to protect against the Cold specifically for this guy and then I found that out.

-We reach the one place we can actually use a sapper charge, and the reward is well worth grabbing those charges for! The War Rifle is one of the strongest guns in the game, and we get enough rifle ammo alongside it to basically last us for the remainder of the game. Whoever has this rifle should just be making Aimed Shots constantly. Get to it, Dan!

-The Dog Tag Trader is probably the single most unfinished sidequest in this game, unless it's some kind of elaborate prank on the player. There's only one set of Dog Tags to give him the one you find in Mr. Henderson's room. Presumably every enemy in the dungeon is supposed to have a chance to drop Dog Tags, but as of the most current patch this still hasn't become a factor.

-You can use the Tame Landmine in battle, but why would you kill Betty like that!?!

-The Trench Digger is extremely dangerous if you let him live to his second turn. He'll fire off an explosive round that deals huge damage to everyone. I'm shocked I was able to smash him down before that happened!

-The Jupiter disc is used for only one lock, but it leads to a very good weapon.

-I get a harsh reminder of the Danger mechanic on my way back to Frederic. I kind of wish the Shades were a threat past the First Floor, I often forget they're even in the game!

-The Rat Baby is now big enough to join us on adventures! He's pretty much a joke character with stats as bad as Sophie and the ability to bite enemies to inflict Disease. He can use better weapons than Sophie can though, including one handed Firearms! We'll have our little hellspawn blast on some fools in the next video, don't you worry.

User avatar


Part 8 is out! With Mr. Henderson and his warzone in our rearview, we can now enter the basement and see what awaits us there. There's quite a bit left to do in the game but the end is also rapidly approaching. Once you're through the Boiler Room and reactivate the elevator, it's now possible to get one of the non-time out endings at any time. Naturally though, we'll be taking care of absolutely everything we can do before committing to any ending.

Extra Notes

-We start by getting a new party member... NOT! Morton is one of several encounters that can potentially be Corrupted, and will attack you if you open the door for him in the Corrupted state. Corrupted characters have distinct sprites from their normal peephole images, and will often make suspicious comments indicating they're not quite right. If Morton were to be his usual self, we could trade the Junk items we've been collecting to him. He gives you various rewards for different milestones, joining you at 15 junks given altogether. He keeps active track of the total Junk you've given him, so it's possible to get him early without enough and simply recruit him on a revisit when you have more... if you're lucky enough to see him again. Now I've heard reports of people getting the Corrupted encounters, and then later encountering the uncorrupted versions of the characters at a later date. Not sure if it still works like that, though I do know that the reverse (Meeting the Uncorrupted character and then being visited by the Corrupted version) cannot happen.

-If you're curious, the characters that can potentially be Corrupted besides Morton are Dan, Sophie's mother Harriet, and the injured man William.

-After Hellen's third interaction with the Rat Baby, her normal hockey mask will permanently be swapped out with the baby's paper mask. How cute!

-We get the introduction to two "Extra Durable" weapons in this part, the Mace and the Claymore! These weapons can suffer two instances of breaking without being completely destroyed, though they do get weaker with each break.

-Eugene is also now selling the all powerful Combat Knife. This is the best non-special one handed weapon in the game, with a tremendous attack power and the potent Carve skill. It's fantastic in the hands of Hellen. If you're really lucky, there's a weapon's trader that can visit your apartment with it as early as the first day of the game! Makes things quite a bit easier if you secure this knife that early. Beyond that and the one Eugene sells, there's another guaranteed pick up for the Combat Knife towards the end of the game.

-Antoine used to be a pretty unremarkable encounter, but his Yanma kick is absolutely devastating now. I distinctly recall last time I fought him, he also had a permanent counter status that procced off of any melee strikes he was hit with, but it didn't seem to happen this time. He still almost turned Fievel into pavement pizza regardless. Another interesting note is that he originally only had one sprite, being in his second phase form from the beginning of the fight.

-Fievel picked up the Copy Dad skill! This allows him to copy any action Sam takes, letting him use any of the video game skills Sam has learned. That said, there's only a handful of skills this might be potentially good for, owing to Fievel's fairly low Attack stat.

-The Roach family looks intimidating, but they're much less of a threat compared to Antoine. We must leave no stone unturned though!

-We can enter the security room now and set it up for the offering we get from it later, but I'd rather just take care of that all at once. If you did want to get into it now, you can do so by placing the Pluto and Sun disc on one side of the door, and the Negative and Uranus discs on the other side.

-Steve is an NPC that was added to the game as of this new update! You can trade bandages to him for vendor trash, if you are so inclined.

-The Boiler Room is massive and very easy to get lost in. Thankfully, I've played the game enough to know which ways we want to go for the purpose of getting through it quickly. There is a fairly lengthy sidequest contained within the Boiler Room that we will be coming back for later.

-The Boiler Beast used to be pretty underwhelming, but he is genuinely dangerous now. Every time he catches you, he launches a Gore Vortex before you can do anything, which hits your entire team for 60 damage. In standard combat, he gets 3 actions and can potentially use Gore Vortex AGAIN. Be prepared for a knock-down drag-out slugfest if you decide to fight with him!

-The Enforcer was another fairly vanilla enemy that got super buffed. His goal shots can decimate low HP/Low Defense characters. Good thing we shored up our armor before coming here!

-The Hockey Stick used to be indestructible due to a bug, which was kind of nice due to the weapon durability system being much more of a pain in the ass originally. Now it breaks as intended and weapon durability is less of a hassle, so it's nothing too special anymore.

-You can visit Musette periodically to get soup, which is a 40 HP restore to your whole party! I'm not sure what the limit is on how many times you can ask for soup, I've only ever taken a few helping from her.

-Beryl reveals some potentially interesting information about Sybil... that as of the current version of the game goes absolutely nowhere. Not sure if this is supposed to be a red herring or not.

-Inside the parking garage, we find the Double Barreled Shotgun! It's a potent weapon, but the fact it only holds two shells at a time makes it pretty undesirable to use in my opinion. The Double Point Blank shots are powerful, sure, but powerful enough to justify reloading every other turn?

-I stammer a bit explaining this in the video, but prior to version 1.02 there were two Double Barreled Shotguns in the game, the only instance of there being two of the same kind of gun (The Hunting Shotgun is a distinct weapon with unique traits and skills). This lead to an amusing programming error if you had two characters wield these shotguns at the same time: One gun firing caused ammo to deplete for both characters using the gun, and if they used enough bullets to go into negative ammunition (the game has no coding to handle for if a character manages to use a gun attack without having any ammo, so they can still fire even if the shouldn't be able to), your ammo would underflow and give you infinite ammo for both shotguns. Since this was an outlier situation for guns anyway, the second Shotgun was just removed from the game to fix this issue.

-That guy will dangle over the Garbage Worm for as long as you leave him to it.

-With the Elevator restored, we have a quicker way to travel between our home and the ground floor, and can access the ground floor without sacrificing the Earth and Mars discs. Several doors require those discs to open, so this is quite handy!

-We've completed The Shadow sidequest, and got both achievements for the differing results! As a roommate, the Shadow never really gives you anything too helpful since he just pulls randomly from a table of nearly every item in the game. He's just as likely to give you a Chocky Bar as he is an Explosive. At least he seems happy to be with us. I'd recommend going for the money conclusion of the quest, personally.

-After fostering the Roaches in our home, they have become... Roaches! Roaches is a pretty interesting party member. He's unable to use armors besides the Trench Coat and Hat he starts with, and he can't use footwear either. He's capable with any other weapon type though, and revolves around a unique DoT effect called... Roaches. Roaches is a 3-stage DoT like Bleed that can be inflicted by Roaches' skills and his normal attacks. As he levels, he will gain new attacks and support skills that become stronger with more Roach stacks in play. He was quite weak in the earlier versions of the game where the Roaches effect was an astonishingly weak 1-stage DoT effect, but he was one of the other characters who got buffed up to be more useful. He also starts at Level 8 as of the current patch, as opposed to Level 4 as it was in older versions. I'm excited to see if he's a lot better than the last time I used him!

User avatar


Part 9 is out! After the cliffhanger we were left on last time, I made sure to address a good chunk of the things we had to pass up to get to the elevator quickly. I'm pretty sure I got the most pressing and important things.

Extra Notes

-The writer's room is probably the easiest way to open up the bulk of the game's bad endings, as the two manuscripts you can grab from it without a fight are both perfectly acceptable offerings to Jasper. He doesn't care if you give him a redundant submission. That said, you can get an ending without visiting his room, as the convenience store key we grab later also allows us to pick up an offering. You'll need a painting from Frederic's apartment if you plan to go that route.

-The Typewrither is another boss that has been tuned up considerably in the game's patches. This recording is the first time I've ever seen him live long enough to go berserk, and it was quite a nasty shock!

-You used to be able to grab infinite sheets to add to the loose manuscript, but that has sadly been fixed in a recent patch.

-We're getting light on healing supplies, so it's a good idea to know how to make more with your crafting tools. Disinfectants are the main component of most healing items you can make, combining with Cloths to make 5 bandages and with Tonics to create a first aid kit. You can create more Disinfectants by combining Medicell with Vinegar.

-Gas Bombs deal light damage to all enemies, and more intended for blinding and stunning over raw damage. They aren't super consistent, so they're one of my less preferred items to make with crafting.

-The fungal spores used to have all sorts of buggy interactions with Sam. Sometimes they could permanently alter your vision and add a blur effect to the remainder of your playthrough, and they could also visually restore Sam's arm since the game didn't originally have sprites for one armed Sam with a mushroom on his head. Combined with the fact Sam would frequently regain access to his lost arm, it was entirely possible to undo your sacrifice for the Rat Baby. Patches have since corrected these errors.

-We quickly get the Convenience Store key upon entering the Fungus Dungeon, which allows us to secure a video tape to use as an offering, regardless of whether or not we even record anything to it.

-Phillipe is the one time that you must boot a party member out of your current line up in order to add a new one to it. He's worth it though, just look at him :unsmith:

-It's a bit late in the game, but the people we rescue from the Fungus Dungeon give us all sorts of useful bonuses! From upgrading our apartment, crafting new weapons and even giving us a card mini-game, it's well worth our time to come here and save these people! If it wasn't a trap and all their offered services are red herrings. The items they give us are also booby traps that have much worse effects than advertised should you deign to use them.

-The Laughing Mold is the one time in the game where a boss achievement can be obtained without actually killing the associated boss. If you help him practice his comedy routine, he's more than willing to let you go and you still get the achievement for handling it that way! Or you can piss him off and kill him, your choice.

-With the Neptune disc acquired, there's no door left in the game that we cannot open. We'll be rounding up all the disc doors in due time.

-Phillipe :negative:

-There's a variety of ways that Phillipe's betrayal can go, but I went with the one that showed off the fake utility staff as well. Were you to just kill the Spore Mother without doubling back to the entrance, they would just be gone before the ruse even had a chance to be exposed to you. There's a variety of things that can happen alternatively if you take Phillipe to the Spore Mother, influence by whether or not you bump into any of the spores on the path to her. It's tricky, but not impossible to engage the Spore Mother without tripping balls. Note that Phillipe's corpse is in our inventory now due to us choosing to believe him despite everything. There's nothing you can actually do with it sadly.

-In older patches of the game, party members that left you permanently took the gear you gave them with them. Thankfully, that is no longer the case and the game automatically strips them if you kick them out of your apartment or if they are lost to you in some other fashion.

-The Spore Mother is a fairly easy and uninteresting boss all things considered. She's only really interesting if you make it to her with Phillipe in tow.

-The Laughing Mold use to collapse along with the rest of the spores, but helping him with his comedy routine gives him the drive to continue on. He now pals around with the Basement Dwellers. How heartwarming!

-You can kill Eugene at any time, though obviously you miss out on anything he would stock on succeeding days if you kill him early one. Whether due to glitches or a deliberate attempt to punish the player, bulk purchases at Eugene such as ammo and healing items only give you one of each item if you steal them instead of the advertised amount. This is less of an issue for the armor and melee weapons Eugene sells, but those are honestly among the least helpful things in his product line.

-We finally conclude the Rafta and Nestor sidequest that we've had since the start of the game. The reason I've put this off for so long is that Nestor taking over Eugene has a similar consequence to killing Eugene where the shops products cease to update anymore. Granted, I just took the game over and wound back to before I completed the quest, so it wasn't a super necessary reason to put this off for, but you never know what might get changed in update. The reason I cared about that is because,

-The Nestor and Rafta sidequest is currently unfinished. Nestor tells you what his various pieces are up, but there is no way to follow up on this information as the encounters hinted at are simply not anywhere to be found. Getting Eugene's pistol is not worth losing out on any potential new stock he gets, which is why I got the special achievement unlocking game over in the last conversation.

User avatar


Part 10 is out! Another round of loose ends addressed this time, focusing on clearing out the Parking Garage as well as setting up for a future offering. We've also been able to end the game since picking up the convenience store key in the Fungeon, so I take the opportunity to demo our very first ending!

Extra Notes

-While the Underbody and Hellride are more or less the same as they have been since the game launched, the Cop Car and SWAT Truck have been tuned up a bit in updates. The Cop Car just hits damned hard now with its Burning Rubber skill and picks up multiple actions per round when originally it only acted once, and it also picked up the obligatory health buff to make the fight last longer. The tongue prisoners of the SWAT Truck was not something I saw until 1.03, so if it ever happened before that it was no problem killing the truck before it managed it. It makes the fight a little more dynamic, though not as dangerous as the Cop Car.

-The Hellride is not super threatening directly, but the time limit to defeat it can be pretty tight if you don't have a full party with AOE attacks. Solo Sam in particular would need to really on the damage to win this fight before he's literally dragged to Hell. Fortunately, with my set up it wasn't anything close to a big deal.

-The Hellsword is a fantastic weapon in terms of raw attack power marred by a few issues. The HP and STM debuff can be quite severe. While the relative effect is greater on someone like Hellen, she's probably still a better user for it since she won't be dropped into absurdly low stats someone like Dan would be. It also has no skills of its own (a common problem for the most powerful unique weapons in the game sadly), so it needs someone who has skills that scale off of weapon attack like Sam and Hellen to get the most out of it. Finally, it seems to have missed the bus for getting a fix to the game's wonky durability system. This thing was breaking on my constantly in the video, even though Hellen's unique skills do not have increased weapon break chances.

-The weapon storage room is likely the first place you'll encounter a SMG, though it's not the only way to get one. A weapons trader who visits your home can sell a much weaker standard variant, though even within this video where I do nothing but burn time in the apartment he has still yet to show his face for the LP.

-The Flak vest is one of the best armors in the game for raw defense. I like the general stat increases of the Studded Jacket more, but it's a great option for your squishier characters who have better natural offenses.

-I set about killing Panopticon pretty quickly as his Record skill is, ironically, very unpredictable. When he's recording a character, he'll repeat whatever action they take at the end of his turn, but this hasn't really been programmed very well. Even after some patches, he still has a tendency to crash the game if he tries to replicate something that Frankie didn't account for him trying to do.

-Argot technically counts as a boss, and you even get an achievement for killing him the first time! He's not super special though, even after getting slightly bulked up with patches.

-Although the game gives you free reign to kill most NPCs in the game, as demonstrated this option is a bit undercooked at the moment. A large number of them have absolutely no reaction to you attempting to murder them, and Placide didn't even have encounter data at all! I even still got to have hot showers after killing him even though he was the one serving as the building's boiler. Aside from Eugene and Emmanuel, killing NPCs yields no reward. In the case of the Astronomers, and more specifically Jasper, it blocks you from completing the game with any ending besides No Going Back!

-We learn that Steve is actually very dangerous, so be sure to bribe him with those bandages if you aren't equipped for a war!

-We burn time until the ending with Crosswords and get door encounters until the end of the game. Not counting Corrupted encounters, we've only failed to get two door encounters so far: The gun trader and the real Morton. Hopefully at some point my luck will tick up for these guys!

-Xaria and Monty come in to do their mooch routine, but this can certainly be a good thing if you encounter them early enough! They have the unique gimmick of being an inseparable pair: you cannot add one to your party without the other. Monty brings pretty solid stats to the table and his unique Monty Special skills. By consuming his Monty Special brew, he can do all sorts of good things like hit the enemy with fire damage and burn, hit the enemy with an acid attack, deal big stunning damage, etc. His Monty Special skills do have the drawback of putting him in a unique stunned state called Catatonic, but there are ways to work around that. Unfortunately, Monty is the single buggiest party member in the game currently. His Monty Special skills are only supposed to consume one brew each, but they'll often consume 2-3 of them, making it much harder to use these skills consistently. Monty can brew additional Specials in battle, but he has to do that constantly. His Battle Brew skill also has a rather unfortunate bug: there are a number of different Specials that Monty can brew by mistake that enter your inventory as consumables. Despite the game stating that he makes multiple of these, the failure brews only ever come in quantities of one. Still, Monty at least has good enough stats to make him not too much of a detriment. Xaria is much weaker on a statistical level, but after enough level ups she gains the most broken skill in the game: Mosh Pit. Mosh Pit costs a whopping 20 STM to use, but gives everyone in the party the unique Moshing status. This status gives everyone in the party a chance to act twice for the rest of the battle! And this "chance" seems to be 100% because I've never seen a Moshing character fail to get a second turn. This skill does have the drawback of Berserking Xaria so that you can't control her, on top of its high STM cost, but cares about that when you turn 3 characters into 6 for the rest of the fight? I wish they had shown up sooner though, we're not really going to be able to use them this LP even if I do luck into another encounter with them.

-Sam is forced to the couch by the Metalhead duo, allowing you to now use that as a bed.

-Someone let me know if I was just blind in the video, because I have no clue what the heck Sam and Xaria were talking about regarding "Juice Box". I'm thinking it's another unimplemented plot thread.

-The sequence triggers in this file also seem to be a bit screwed up, which might be due to the game updating mid playthrough. Xaria and Monty don't typically answer your knocks until about 12 in-game hours after they enter the apartment when in the video they answered immediately. I also did not suffer from hunger or hygiene problems at all when doing crosswords despite the fact I didn't eat or shower at all (in-game of course). Normally crosswords tank those stats and you pick up the associated penalties in short order.

-We finally reunite Sophie with her mother, removing both of them from the game permanently! You're supposed to be able to visit them in Apartment 22, but that area currently is not implemented in the game. You get a good cache of healing items for your good deed though... just be sure to scrutinize Harriet because sometimes she's not quite who she says she is.

-We eventually encounter Ernest, who is pretty notorious for being the hardest character to recruit in the game. Aside from the random nature of door events in general, Ernest must be encountered AT LEAST three times and can only be recruited on the third if you adequately fed him the first two times. This is only my second time managing to recruit him, and like the previous instance he's joined after I've exhausted most of the experience in the game. Someday I'll figure out what this guy is capable of!

-Our first ending, No Going Back, is the standard ending for exhausting all 15 days of the game. Even if you play much more sluggishly than I did, you're really only ever going to see this ending if you actively waste time. Sadly, there are no modifications to it based on what you actually did in the game leading up to it. This is sadly true of all endings in the game.

-The scoring system of Look Outside is just a bit of a fun novelty. Even though I got the worst ending for points with no bonus for time, I still got a perfect SSS rating (albeit just barely since the minimum for that is 8,000 points). For the longest time, this system was bugged on Normal mode and always gave you an erroneous score. For me, I always got a C ranking with 1160 points.
Last edited by Cullen on Thu May 15, 2025 2:05 am, edited 1 time in total.

User avatar
I would just like to highlight this comment on the video from Hannacrusis, who did the digging to figure out what was going on with Sam and Xaria having an imaginary friend:
Hannacrusis wrote:Been following along while reading about the game (since I wasn't likely to play it myself) and apparently "Juicebox" is a currently cut character. Not much to him from my understanding: he's a heavily mutated but otherwise harmless friend of the delinquents, and their ultimate attack was planned to be summoning him for a powerful attack following a turn delay. The leftover dialogue branch is the only indication of his existence (at least for now).
Largely what I expected, though the idea of Monty and Xaria having some kind of dual tech involving their mutated friend (and being the only characters with something like that) is a pretty novel and funny one.

User avatar


Part 11 is out! This time around I take a page out of the Book of Enlightenment and restart the game to approach things differently. This video is a completion of Look Outside stripped down to its bare essentials to finish the game without simply running out of time, getting all the special challenge achievements along the way. If you're not interested in seeing a minimalist speed clear, the sole time stamp of the video this go around takes you straight to the ending, where the main new stuff happens. Now I'll fully admit, I conceived up a route for this but did not actually practice it at all before hitting record. Partially to see if I could do it in one sitting, partially because I figured it would be more entertaining if things went wrong and I had to improvise. I think I succeeded well enough in both cases.

Extra Notes

-This video is devoted to two things. The first is doing the bare minimum to get a "proper" ending (though not necessarily a good or fulfilling one) and the other is completing all the special challenge achievements, as mentioned previously. The achievements are as follows,

Miasma: Complete the game without ever showering. I believe you can brush your teeth still, though that does little to stunt your ever decaying hygiene.
Insomnia: Complete the game without sleeping. A pretty brutal restriction as sleeping gives a generous heal, and exhaustion from not sleeping limits how many skills we can use.
Gamer's Bane: Never play a video game. Not too big a deal since most game skills are situational anyway and we're mostly going to be avoiding combat for this run. Very easy to work into a standard playthrough if that's more your speed.
Loner: Must beat the game solo, having never recruited anyone. Easily the most brutal restriction, solo combat is not easy for Sam, especially with all the other restrictions we have to deal with. That said, it can be easily cheesed by simply wasting time until you get No Going Back.
Ascetic: Cannot use the stove to prepare meals. You CAN still use food items you find throughout the game world though, which do abate Sam's hunger and are still effective items in their own right for most of the game. Not too difficult to work into a standard run.
Long Weekend: Must beat the game before Day 4. Obviously this rules out No Going Back as a possible ending, and it's dubious how attainable any other ending saved for Failed Ritual is to get with this, especially when you stack in a challenge like Loner.

Now on their own, none of these challenges are really that tough, and honestly due to the way unlocks work, all but Long Weekend can be cheesed out by just wasting 15 days since Hunger can't actually kill you. That's boring though, so we do it the more honest way. Thankfully, the game has no requirement for getting an ending that involves a Final Boss, so Failed Ritual (turn in 4 incorrect offerings to Jasper and head to the roof) is perfect for this.

-For that matter, you're not required to play on Normal mode to get these either. You can totally get them on Easy Mode where the game auto-saves constantly and enemies are much weaker.

-For Failed Ritual, there are two item combos you can spring for to bungle the ritual: Cinnamon, The Photo Paper, a Painting and a Blank Tape, or you can get Cinnamon, Photo Paper, and the two incorrect manuscripts. I decided to go for the latter, my reasoning being that there was only one tough mandatory fight while the former would require me to duke it out with several Fredericks. Having done this now though, with how buffed up the late game enemies have gotten with patches and how little we have to work with under these conditions, the Painting route is definitely the easier one since Tumor Fred, Bright Fred and Shadow Fred can easily be melted with Turpentine with only a bit of damage incurred in the process. Hindsight is 20/20

-Throughout the video I constantly misspeak and say the Elevator Monster is the only fight we "need" to do. As usual, some words get lost in the travel route from my brain to my marble filled mouth. I meant to say it was the only meaningfully difficult battle we would have to do.

-The Pistol and the Cleaver is good enough for any incidental combat we need to do, particularly the rats who are difficult to avoid. The Cleaver also works quite well in Mr. Henderson's apartment, though it's ideal that you just don't get into any fights after the initial scuffle with the home invaders.

-We start running into some obnoxious things that cause problems due to me not practicing the route. I assumed Jasper's Telescope Room Key is supposed to let us get into the Stargazer's apartment on a run like this, but instead it's just an item for a dummied out quest section: it does nothing. Annoying because I wanted to open Edwin's safe for the huge cash prize. The bus escapees also have broken intangibility frames on the current patch, forcing you into an immediate re-fight with them should you try to run from them. This one's not my fault for once, it's just an annoying potential failure point I needed to be wary of.

-The Landlord dungeon is one of the biggest stumbling points for this run, as we need to scrounge up 1,125 dollars to proceed, and there's just not enough money outside the apartment that's easily obtainable with just Sam. A little scrounging did end up being required, but I was mostly able to ignore most of the rooms in the dungeon

-One thing I should have done was looked for D-Clogger, as not having Acid Flasks later came back to bite me. Fortunately, I was able to improvise with other things that happened to be available.

-It's around this point where we start suffering the effects of our hidden stats declining. Thankfully, steam user Llamakazi has written a very thorough achievement guide that also includes some smaller details about the game's mechanics. Relevant to this current point, they figured out what happens when each stat decays to certain thresholds.

Social: As you explore without anyone in Sam's party, his Social stat begins to decay and he will eventually acquire the Lonely status. You can abate this by viewing Social Media, but that's not really worth the time. I'm not sure how many screens this takes, but a Solo Sam will eventually become Lonely, getting a penalty to his evasion and the Attack command becoming ....Attack? There are two more tiers of loneliness after the initial status is incurred, but they have no additional impact on Sam's stats.

Calm: As you explore at high danger values, Sam's Calm will begin to decay. If it decays enough, you'll be afflicted with Anxiety. This happens much faster than Lonely, and the penalties are a bit more severe. Once Sam has Anxiety, your EXP gain is reduced by 50%, and you get penalties to your accuracy and crit rate. Like Lonely, there are two more tiers of Anxiety after the initial status hits you, but the penalties do not worsen. In both cases, this just means it takes more effort to purge the negative statuses.

Energy: This is tied to sleeping. If you go a day and a half without sleeping, Sam will become tired, having his STM reduced by 25%. Unlike the previous statuses, this can get worse. Should you go about 3 days without sleeping, Sam becomes Exhausted, losing 50% of his STM, 25% of his Agility, and getting an evasion penalty. It's not possible to clear this run before Tired kicks in, but thankfully we do clear it well before Exhausted kicks in. I believe Coffee and stuff like Cola/Energy Drinks can abate this, or at least the game implies that they can.

Hunger: If Sam does not eat, he will become hungry. Fortunately, I do know for sure that the food items we pick up and can use as restoratives do abate the decay of this stat, and we clear the run without Hunger ever becoming an issue since we're only forbidden from using the stove. If you go a whole day without eating, Sam will become Hungry which reduces his max HP by 25%. Go another day without eating, and he'll become Starving, getting knocked down to 50% Max HP and having both his melee and ballistic attack stats reduced by 25%.

Hygiene: As time passes, your Hygiene decays. Let it decay enough, and you'll become Disheveled. This reduces your luck by 50%, makes you more vulnerable to status ailments, and increases the range at which enemies can detect and aggro towards you. There's not much we can do to stop this from happening in this run since brushing our teeth is nowhere near effective enough to abate the decay of this stat, but thankfully it's not really as big a deal as it sounds. This is another status that has two tiers past when the negative effect kicks in that don't actually cause the penalties to get any worse.

Morale: I'm actually not sure what causes Morale to go down. There are some games that consume it if you play them, but otherwise I just have to guess that it decays if you just laze around the apartment and not do anything. Obviously not an issue in this run. If it does decay enough, Sam becomes Depressed, increasing all damage he receives by 50%. A disastrous debuff to be sure, but it's essentially impossible to ever encounter it as the game currently works.

-With the Landlord Dungeon done, things smooth out a bit from here. We can ignore most of the basement in this run since the side rooms really have nothing helpful for us. Steve is scary but easy to bribe out of the way. As long as we're moving quickly in the Boiler Room, we're also not under much threat in that section of the game.

-The Parking Garage is loaded with annoying to dodge enemies that are extremely hazardous to us. We're low level and light on gear, so we have to hope escaping works out. Like most RPGs, failing to run from a fight increases the odds the next attempt will be successful, but you can still get caught in failure loops with attempting to run. Thankfully, I don't have too many issues with that in this recording.

-The Elevator Monster ended up being a quite a wall for me, and I had to get creative. Luckily, Mutt was selling the Pickelhaube, a pretty good helmet that combined with the Elbow Pads I lucked into, boosted my defense enough to tank enough punishment and shoot the thing to death. Acid flasks would have been really nice here.

-Thankfully, that's the last tough part. The Typewrither is so passive we can just run in and grab his spare manuscripts with no issues, and the Elevator allows us to easily reach Jasper and turn his booby prizes over to him.

-Be careful when giving items to Jasper. You do not get the option to take them back, and Cinnamon is the only one that carries a warning against turning him over.

-Once you reach the roof, there's no turning back. Make sure you have everything you need before opening that door if you're due for a final boss!

-There's quite a few variations of what can happen on the roof. Naturally, we'll be going through a few of these as we get more endings!

-Each challenge gives a sizable point bonus (with the exception of Miasma, which gives a paltry +10) for your final score. Stacking these altogether on Normal mode secures you a triple S score regardless of anything.

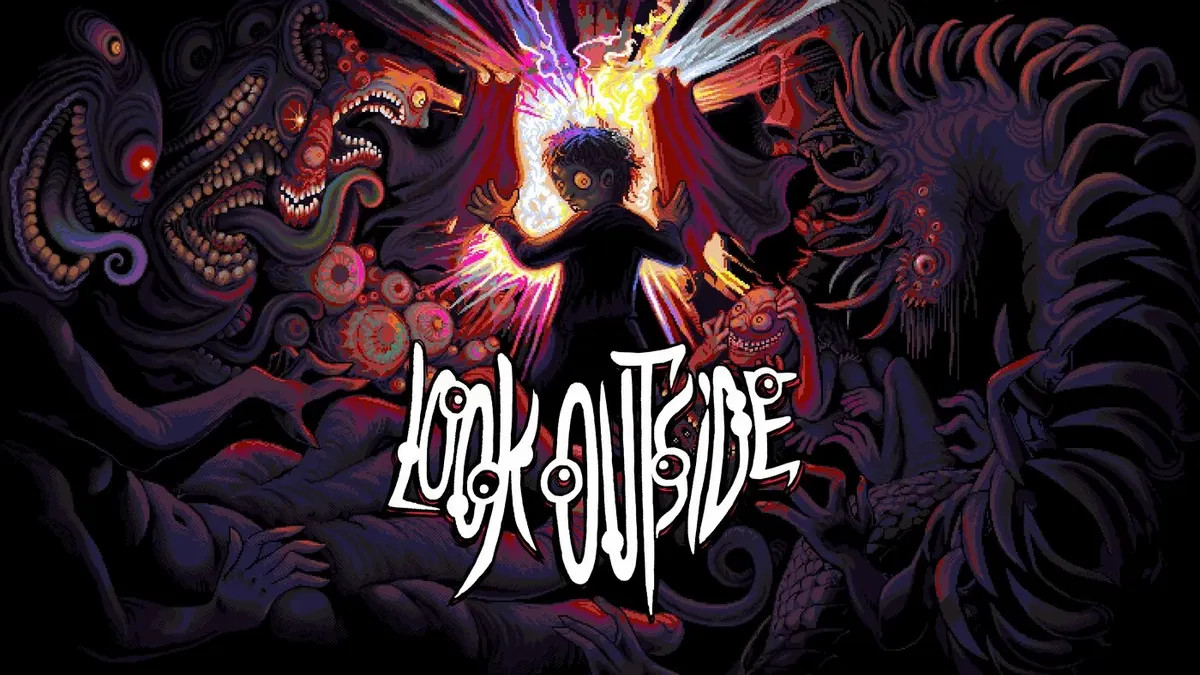
User avatar


Part 12 is out! Sadly, we're just too late to save the Janitor. If only we could have gotten to him sooner. He gets eaten no matter what, don't worry. Moving on from that, we meet Papineau once again and move along to fully clear out the apartment before finishing off the game. For this video I focus on the Boiler Room and the Herbicide doors. There's still a handful of miscellaneous things left to do that I can use to add some length to the next couple videos, but aside from getting the video tape we've done most everything there is left to do in the game. For now anyway.

Extra Notes

-The trash worm is another boss that you could originally kill well before the graphics for him advanced to their final form. He gets a bit further now, but I still kill him well before the janitor becomes a factor. If you're curious, here's what the final stage looks like,

Image

Grody

-Like the SMG Special, there is a normal Magnum in the game that you can potentially get before the Silver Magnum, but you're at the mercy of RNG door visits producing the gun vendor, and then you're dependent on RNG AGAIN for him to even have a Magnum. Magnum ammo is quite rare, with the bulk of it being what Eugene sells, so the Silver Magnum is pretty obviously best saved for either bonus bosses or the final bosses.

-The Saturn Disc currently has no function, there is no door in the game that can be opened with it.

-The computer for reading the disc images is mostly just useful for figuring out what the Negative Disc does. Most of the rest of them can be easily deduced from Trial and Error (such as the Sun and Pluto Disc) or the planet chart in Edwin's room just outright tells you.

-The unlabeled cartridge is the one video game that has no skill to award you. It's unclear if it's supposed to be a part of some unimplemented quest, or if it's just there to deliberately raise questions. Actually playing it yields little answers.

-Should you have Papineau, he has a handful of extra lines during this fight as the janitor was his subordinate.

-Papineau is really not worth your time to use at this stage of the game unless you somehow got here without a full party. He joins at Level 4, and there's just simply not enough EXP left in the game to get him on par with the people you've been using up to this point. He's probably worth subbing in for someone like Sophie or the Rat Baby, but that's about it.

-If you're curious, I paused the playback during editing to see what Hellen said, since it's not super interesting: "He's strong. A little self-righteous. It's your call."

-Incidentally, Papineau and Hellen either have some kind of history or they're just born rivals, as they have a fairly intense back and forth that can happen during meals. It's certainly the most you'll ever hear out of Hellen at once!

-Between the Herbicide from the janitor closets and the one Eugene sells, plus the one we got when we first reached the Ground Floor, there's enough Herbicide in the game to open all but one of the fungal growth doors. You can also potentially get Herbicide from trash cans, or you can craft it by mixing Vinegar and Cleanerex. Herbicide itself can be used to craft Explosives when mixed with D-Clogger, if you happen to have anymore after opening all the doors.

-The Ice Salt we picked up allows us to fully explore the frozen apartment now for what little we couldn't get before. Thankfully there's enough Salt in the game to melt every ice block regardless of how you decided to progress through the frozen apartment.

-Returning to the Boiler Room, we quickly find ourselves in conflict with the Boiler Beast again. This guy used to be a bit of a chump, not getting a free Gore Vortex to open the fight, only getting two actions per turn, not really being that strong, and he could easily be taken down by hurling about 6 acid flasks at him. Now he has the free Gore Vortex, acts 3 times per round with a chance to use Gore Vortex again, always uses a defense piercing HP drain attack every round, and has about double the HP he used to. This guy is now well worth the warning he carried when we first unleashed him, and this fight was real knock-down, drag-out slugfest that required me to throw everything I had at it.

-We get to see the cons of the Hellsword, the once beefy Hellen was brought down pretty low by it, making it something of a liability against an enemy we can't delete in a single hit.

-Hunting the ticks is as simple as following the tubing from the central Furnace of the boiler room, though they don't always cleanly lead you to the ticks. Think of the Boiler Room as a giant clock, and you want to run the entire face in order to find every tick.

-Ticks are weirdly evasive, but thankfully Joel's Teethstorm bypasses that malarkey and deletes most of them instantly.

-The Furnace is in the same boat as the Boiler Beast, he didn't originally used to be too special in the earliest versions of the game, but recent patches have buffed him up to truly frightening levels. His initial attack scalds your party for huge damage, and while his turn to turn damage is much less than the Boiler Beast, his explosion once he charges up is devastating if you don't have Heat resistance. Even if you do, guarding is highly advisable. I just barely take him down before I get incinerated. It is highly advisable to make more use of Bleed and Roach DoT effects than I did in this fight. He has quite a bit of HP, and stacking those effects causes him to passively lose huge chunks of it as the fight goes on.

-Other notable changes the Furnace got: originally you didn't get a warning when entering his encounter. You were forced to fight it out, which at the very least wasn't as big a deal at the time. He also only awarded EXP, Money, and an achievement for defeating him. A later patch gave him the Furnace Edge as a unique weapon reward for defeating him. The Furnace Edge... kind of sucks actually. It's a very slim upgrade over a Combat Knife, and it is a pure Fire type weapon. It is not a Slash hybrid like the Hellsword or Sewer Blade. This means Hellen cannot use her unique skills with it. This sucks because the weapon itself doesn't actually have any skills. If you were to just use Carve with a Combat Knife, that would generally trump the damage the Furnace Edge would. It is at least a one-handed weapon so Sam can use it no matter what, but I'd rather stick with a Combat Knife for him just for the occasional use that Bleed DoTs have.

-To get the Flawed Ritual ending, you must give Jasper at least one correct offering, up to 3 of them, with none of the improper offerings being Cinnamon the Guinea Pig. If you're like me, this will almost assuredly be the first ending you get, likely because you just handed stuff to Jasper and didn't realize he wouldn't allow you to take it back.

-None of the endings require you to leave your allies behind, and largely the endings don't reflect their presence. Funnily enough, Flawed Ritual IS the one ending where the ending sequence itself is impacted by the presence of allies, though it still assumes Sam went up to the roof by himself.

-If you're curious, each Astronomer presents a specific offering. Jasper presents the manuscript, Beryl presents the video tape, Aurelius presents the painting, and Aster presents the Photo. There's a number of vary mild variations regarding who survives to present their offering, though it's not anything too particularly deep or interesting.

-It turns out when you enter the fight without a full team carrying high powered guns and loads of explosives, the final fight can be rather long! That said, the Chorus of One mostly uses Percent Damage attacks, so he's not super hazardous to your health. Definitely set up Bleed on him faster than I did, it would have sped up the fight tremendously.

-You can fight 1 of 3 bosses depending on how many correct offerings were made, the alternatives to the Chorus of One being known as the Duet for two correct offerings and the Triune for, naturally, three correct offerings. These guys aren't too much tougher than the Chorus, but they do have quite a bit more HP.

User avatar


Part 13 is out! As the game currently is, this will serve as the penultimate part for the LP until I feel there's enough substantial additions to the game to warrant making a new part. Tossed onto the Termina pile, though ideally this game won't have the same catastrophe mid-patch development Termina did. Disregarding that, of the bad endings in the game currently, the batch featured here are definitely my favorites.

Extra Notes

-Perhaps fittingly for a guy deeply involved in the building's upkeep, Papineau has a decent number of points where he chimes in. Alongside Sophie, he can also remind you of Mr. Henderson's name should you have forgotten it.

-Poor Claire, no proper transformation, and no acknowledgement from Papineau.

-Share Lunch is a fantastic way to extend your time out of the apartment and it's a way better use of Papineau's lunch than having him take a break. Unfortunately, it can't be used outside of battle and it's a low priority skill inside of it, so be mindful of that. It can only be used once per day, but you'd be surprised how helpful it can be!

-How useful Mutt's special items are does depend a lot on how early they show up combined with how quickly you're advancing through the apartment. I've played the game enough that I can easily clear huge chunks of the apartment before he has the chance to sell anything super useful. Still, if good stuff like the Lockpicks and the Coffee Machine are available when you first reach him, absolutely grab them!

-The Trophy has a base price of $200, which is the standard for Mutt's most expensive items. If you've been buying up everything he has, it can be quite pricey by the last day when he finally places it out! Remember that every purchase cause the next item to become 25% more expensive, applied to its current price rather than its base price!

-You only get scant differences in the Flawed Ritual and XIN-AMON endings if you give more than one correct offering. Assuming you know the minimum requirements to get these endings, there's not any practical reasons to give more than one correct beyond challenging yourself.

-If you decide to peak on Lyle, then you better be sure you imprinted the photo paper with the right disc! He's not coming back out to develop another photo for you.

-If you developed the wrong thing by accident, you can either get more photo paper from Lyle's dark room directly by killing him, or ask him for more.

-Cinnamon isn't just there as a means to botch the ritual. He does serve a purpose beyond that, which we will be seeing in action next time!

User avatar
I'll be recording what will be the last video for awhile tonight (until I feel the game adds enough content to be returning to), so I'd like to take this chance to spotlight a channel that's been very helpfully running through some of the more niche/time consuming events in the game. VintyRobot (who also made the Steam Achievement guide) has made several video compilations for some of the more varied/RNG driven events of the game that I'd like to link here since it's good for showing off aspects of the game that I don't have quite the free time I'd like to demonstrate them personally. I won't link all their videos since some surprise is good to leave for those who want to check out the game for themselves, but I will plug the ones that cover events that can take an extremely long time to do yourself.


All Fred interactions and rewards! You have to do many playthroughs or keep reloading the same save over and over again to see all these, so it's an obvious one to share since we only got to see a few outcomes within the LP.


All video games with their additional party dialogues! There are only 5 games left that I haven't collected, 4 of which come from a door vendor, so I think it's fine enough to plug this now. Getting all the party members for this also intersects with RNG, which we've seemingly already rolled a dud for with Morton.


Fungus lair alternatives! Again, we ran through a good chunk of these, but not every bit of detail. It's another thing that requires multiple playthroughs or multiple reloads to see yourself.


All possible door encounters, plus killing said visitors! Easily the most RNG dependent thing to show off in the game, so I am eternally grateful this video exists. Some encounters like Corrupted Party members simply can't happen if you've already recruited the respective party members, so this one would just outright require me to do another playthrough and hope I get lucky since I already got Dan.

Check these out if you're curious!

User avatar


Part 14 (which is the soft finale) is out! We scoop up the final batch of endings we can get, and tie up the scant few loose ends that remain within Look Outside. Someday I'll come back when the game is more complete to cover what's been added/polished, but for now this is it! I'll let the video speak for itself, though friendly reminder that if you aren't interested in sections such as Massacre Princess, there's handy dandy time stamps to jump around to more interesting things.

User avatar
Exciting news, the 1.5 update for the game dropped today! you can find the full patch notes at

https://store.steampowered.com/news/app ... ?l=english

To give the cliffnotes on notable things added:

-Ernest now has an abode on the first floor, and can be temporarily recruited provided you arrive with not enough people recruited, similar to Papineau though the notes stress this is a temporary arrangement. This is the most interesting new thing to me, as Ernest is ungodly annoying to recruit in normal gameplay and this gives you some avenue for using him.

-You can now craft from learned recipes, simplifying the process a bit! Additionally, new crafting items have been added in addition to being able to craft things such as stimulants and elixirs. There is also a new healing item available exclusively through crafting.

-Cooking has been buffed, with meals now restoring a percentage of HP and Stamina in addition to the flat amounts they originally restored. Sam also becomes more proficient with cooking as you do it, improving the effects of meals! You probably noticed I did cooking less and less as the LP went on, and when I did do it, it didn't restore very much. Big fan of this change since it keeps cooking as healing relevant for the whole game.

-Encounters have been buffed up and consolidated in the Boiler Room, with new encounters also being added to the mix. This should make things interesting, as the only super threatening things in the Boiler Room originally were the boss type monsters like the Boiler Beast, Enforcer and of course the Boiler itself.

-Juicebox has been restored into the game, appearing a day after you recruit Xaria and Monty. Now there's no longer an orphaned punchline!

-New door encounters and tweaks to old ones. The notes are coy on what these are, so I'll have to look through this myself.

-New additions to Eugene and Rafta, which again the notes are coy about. Proper resolution to the Rafta/Nestor quest? I'll have to see!

-The enemies in the Stargazer's apartment have had dialogue added, and have gotten new dialogue in the case of Spine.

-Marbles are no longer a finite ammunition type. Should you have Sophie recruited, she can find some when a new day starts, provided you have less than 15.

There's various other things in there, but these are the ones that stood out to me. Will I be making a new video to cover these? Maybe. I need to see them in action before I decide. Currently there's no new endings or additions to the main plot, and the changes are somewhat spread out, so it might be difficult to structure a video around them. I'll likely take some time this weekend to play around with the new patch, and see if I should wait for another update or if there's enough present to eke out a post-script update.

User avatar


Kept you waiting, huh? As of August 27th 2025, Look Outside has updated to version 1.6, two patches out from the informal and invalidated finale of this LP! Since we last looked outside averted our gaze, the game has added new faces, new songs, new quests, and new spins on familiar elements, making the journey markedly different from my last outing. Naturally, I'll be covering the most juicy bits that have been added to the game, and taking a side glance at anything notable that catches my eye along the way. There's a lot more to see than you might expect, so let's get cracking!

Extra Notes

-First and foremost, Sam's apartment has had a nice layer of polish applied to everything in it. When I was doing the LP previously, the current patch cycle had broken the potted plant, and it just died no matter what you did. This has since been fixed, and now the game gives you better notice that the plant needs to be watered. There's also something new added to further improve the plants health that we will see in due time. Crafting has been retooled, with several new recipes and some old ones being shuffled around. You can now also directly craft from recipes, rather than just needing to slap items together every time. The Game Shelf now lets you know which games are new and untouched, which are in progress, and which have awarded you their skills. Wizard Hell and Myrmidon also award you their skills sooner if those strike your fancy. Finally, cooking has been buffed considerably. In addition to the amount each meal originally restored, they also restore an additional amount of health and stamina that's based on a percentage of Sam's max HP and STM, determined by Sam's cooking level. As Sam prepares meals, his cooking level will go up, yielding better restoration and a higher chance of producing leftovers. The highest cooking level I've seen is 7, which caused most combined ingredient meals to restore around 80 HP and STM, and I've seen upwards of 11 leftovers being produced by a single meal! This helps cooking stay relevant the entire game, and it's very useful for keeping some allies topped off.

-Several old foes have received new animations and various other graphical touch ups. Many bosses have also gotten their own battle themes! I'll definitely be showing these changes as I come across them.

-For general exploration, it's worth noting that the Danger Meter has had the rate it builds tremendously reduced. This means you need to strike out farther to qualify for a Save opportunity, and that you're also getting considerably less experience from exploring in and of itself. Shade enemies have a bit more prominence in the current build of the game, with their Black Ooze item boosting the Danger Meter if you consume it and also serving as a crafting item for several new recipes.

-This is something I actually didn't know before because I kept missing the tutorial for it, but your escape chance in battle becomes near guaranteed once turn 3 rolls around. I had suspected this was the case, but if you fail to run from the Gawker on the first two turns of its encounter, the game just outright tells you. I don't think this is a new addition, it's just something I missed.

-The Grinning Beast is quite a bit tougher to beat as of 1.5, having more HP and less resources available to take her down with. In particular, we're only guaranteed 1 Molotov in the game now when this fight happens, meaning we have much less damage to work with against her. I opted for combining Bleed and Burn with an interrupting Stun to defeat her, but another valid option is collecting the Pool cue from the Basement entrance and using its defense piercing Impale skill to lay out enough damage before she kills you.

-Something that changed while I was previously doing the LP but didn't have a chance to mention is Leigh no longer runs her own store, likely removed alongside the entire concept of trading with allies. This does rob us of some early supplies, but recruiting Leigh is still worth its own weight in gold.

-When exploring the First Floor, the vending machine has a coin flips chance of appearing by the elevator. You can easily just enter and exit a room to force it to spawn.

-To complete the vending machine quest, you need at least 6 dollars worth of coins. The machine also only has 8 Advice cans, and if you exhaust those before the sleeping vending machine event, the quest becomes impossible to complete. This isn't too likely to happen to you thankfully, due to the limited amount of Loonies and Toonies in the game.

-As long as you only have one or no people recruited, Ernest will gladly join you for the price of a sandwich, and will stick with you until Midnight. On Easy Mode, the first time he joins you will be for free. Once you reach the ground floor, the next stage of Ernest's proper recruitment request begins, and this removes him from being temporarily recruitable. We'll go into what you need to do to get him permanently next time. It's also worth noting his original recruitment quest is no longer in the game, which is fine by me because it was a three-layered mess of RNG originally that seldom happened early enough for Ernest to actually be usable.

-You must now swear fealty to the Rat King and survive his salvo of charming Ichor if you want to get the Rusty Crown. This makes the fight a lot scarier on the opening turns, but you must do it or the Rusty Crown will permanently be destroyed. It's a good idea to come in with Molotov Cocktails and get DOT set up on him before he has a chance to lob the Ichor at you.

-I neglected to show this, but the Rusty Crown can translate Colonel Squeekems dialogue for you, same as any other rat.

-All your quarters should be saved for the Candy Machine, there's a ton of permanent stat boosting candies in it, and they can be quite useful for specific party members.

-Keep Marshall the Toilet Man in mind, he'll be important later. Those of you with good memories of this game's sidequests will know why!

-If you go to bed with Ernest in your party, he automatically leaves during the night.

-You may have noticed random flashes of text popping up while I'm moving about the apartment. We'll be getting into what that's about next time. This did happen in prior versions, but they pay off to this only just recently got added in version 1.5.

-The sleeping vending machine event comes after exactly 4 dollars worth of Advice cans have been purchased from it, so avoid spending anymore money on it after you've done that. Also keep in mind you want to pick friendly dialogue choices with the vending machine to get the best resolution for this quest, particularly when you discover her sleeping.

-Audrey is the new party member that has been added in Version 1.5. She's also just received a buff in 1.6, so what better time to go over her in detail! Audrey has very high base HP, STM and Defense, but cannot use weapons, head gear, or footwear. She can use most accessories and Jewelry, and some new body equipment has been added for her in this patch. Her basic attack is awful, but she has a decent skill in Machine Tackle, which uses a combination of her current HP, Defense and Agility to determine its damage. It's a decent Crush attack, but you'll need particular equipment to get the most out of it. Keep The Change is terrible, an AOE attack that is pretty much 1-1 with her Ballistics stat, which can only be boosted so much and not at all right now. She has two more skills, Refreshments and Spit Can. The former costs 35 STM to restore the party's STM, which isn't that helpful. Spit Can is a slightly better Ballistics skill that does decent damage and can stun a single enemy. Machine Tackle is the main thing you'll be doing with Audrey. Audrey has another drawback in that healing items used on her are about 40-50% as effective as they are for other characters, which hurts pretty bad for STM restoratives since she's so dependent on having STM to do anything. Still, it's not too hard to make Machine Tackle effective, and who can resist the appeal of having an eldritch coke machine as a party member? Note that cooked meals (though not prepared snack items) give Audrey the full effect of their healing, so that's a good way to keep her STM topped off.

-Stargazer is much more threatening now, and can easily run roughshod on your team if you are unprepared like I was. I'd definitely recommend buying some throwable items from Eugene before going into this fight now, as he can easily blast through your team's HP.

-The Rafta-Nestor quest is more-or-less complete now and has several ways it can go in the current versions of the game. I decided to show the worst outcome for fun at the end of this video, but there's a handful of other things I'll need to show off with it.

-There are other new game over scenarios besides becoming Rafta's new beau, in particular unique death scenarios against Baby Teeth and the Rat King. For Baby Teeth, you just need to die in general against her to get one of two death scenes, while against the Rat King you must specifically die after being hit with the Ichor. Fortunately, someone has uploaded these specific game overs!


User avatar


Part 16 is up! We lead off with the biggest piece of added content that's currently available, and then it's mostly just me replaying the game and bringing attention to the changed and polished bits as we stumble across them. Fortunately, next time we'll have several new quests to tackle, and I have a save file in the pocket where I can go over a storyline addition that certain other party members have gotten in case the RNG on my current file isn't too agreeable.

Extra Notes

-You don't need the Rusty Crown to save Ernest, but obviously you're much more likely to assume Colonel Squeakums has gone feral if you don't have it. There will also obviously be much less commentary from the rats you're facing off against, and we just can't have that.

-Rat Hell is stupid generous with EXP, so it's a good source of level ups if you're willing to commit the resources to battling the enemies it contains this early in the game.

-I'm not 100% sure on this, but I think there might be a time limit to actually access Rat Hell and save Ernest. In my previous playthrough, I recruited Ernest but never followed up on the Rat Hell portion, and when I checked his room later in the game Colonel Squeakums was just gone. Luckily, the area isn't too difficult so it's not the biggest rush you'll ever be put on.

-Spine is the only resident of the inverse Apartment 33 that actually has any meaningful interactions past her initial encounter. I sandbagged on Confusion and Stretchface just for the sake of seeing their dialogue.

-Obviously if you choose to kill Spine (which you can do before the option to spare her even comes up), her interactions in Apartment 33 will cease.

-The Worm no longer drops Jeanne's laundry and instead you collect it from another washer in the room. It's more important to keep in mind than you might expect, since the Laundry previously did nothing it can be pretty easy to miss the fact that you didn't get it.

-The Landlord Dungeon has seen a handful of new enemies added and a layer of polish applied to a couple of its sidequests. While you still can't dig for treasure, the land mine sidequest now does have an actual practice mine you can practice your timing on. Enemies in the dungeon now also have a chance to drop dog tags, allowing you to make more money that way. The Radio sidequest and sapper charge sidequest as still as unfinished as they were when we last saw them.

-There are several enemies that, when defeated, will drop a new piece of equipment for Audrey (but ONLY if she's in your active party when you defeat them). These equipment pieces are of varying usefulness and only one can be equipped at a time, so think carefully on which you want to use! For my money, the first one we get with the Tank Treads is probably the most useful. It's a good damage boost to Machine Tackle and gives Audrey better odds of flatlining the enemy before it can do anything. Naturally, I'll be getting all pieces regardless. This is actually something that just got added as of version 1.6, previously there were no equipment pieces to get for Audrey and she also couldn't have healing items used on her period.

-Every time we go to bed going forward will prompt some kind of interaction from Spine, though the game does eventually start recycling a canned response. You can keep these interactions as cordial or hostile as you like.

-We can actually get that 50 dollars from Jeanne now, but I think giving her a good laugh is the more worthwhile reward.

-The Trench Digger has been slightly buffed up, but not by much from when we last saw him. If you've done what I have at this point, you'll stomp him with no issue.

-The Tank Gun improves Spit Can and makes Keep The Change do somewhat appreciable damage, but the Agility penalty it incurs weakens Machine Tackle by a bit, so I'm not a huge fan of it.

User avatar


Part 17 is out! This time we're taking care of a couple loose ends I couldn't fit into the last video before getting into the next major bit of new content. The Boiler Room has been heavily reworked, with a new major sidequest besides killing off the furnace ticks and new enemies galore!

Extra Notes

-I'll admit I was expecting the Rat Duelist to be a more interesting fight.

-I never minded the ticking clock, but hey if you hated it then version 1.7 has got you covered.

-Provided the enemy isn't Crush resistant, the combo of the Tank Treads and the Training Belt makes Audrey's Machine Tackle ludicrously powerful, even better than the Aimed Shot from the War Rifle. Keeping her STM fueled is a bit tricky, but you can always buy more Energy Drinks from Eugene to help her out a bit. It's nice that you can actually use items on her as of this patch, even with the 50% effectiveness reduction.

-I've double checked it, and Wriggly Fred is the only Fred that has gotten a new reward. Hopefully we see more Fred interactions in coming patches!

-I went into the new Wriggly Fred events blind, so just to be clear: After making him the real Fred, he'll move into your Fridge the following day. When cooking meals afterwards, he will award you his ring and also spice up your meals, improving their effectiveness! I was going to mention this but not show it off originally, but as luck would have it the 1.7 Update applied a key fix to this event: Originally the Wriggly Fred fridge interactions were in the standard pool for meal time events, meaning it could take forever for them to actually happen depending on how many party members you had. The 1.7 update corrected this and made Wriggly Fred's events take precedence if he's moved into your fridge if they haven't happened yet.

-The Sewer Kids can be rescued in any order, but you must talk to David first before you can save any of them. And of course, to get Roxie you must talk to Zachary first and get the Chew Toy, but luckily he's on the direct path to David anyway.

-Make sure to return to David after rescuing a couple of the kids! He'll give you a couple of Healing Sprays for your efforts thus far, but that reward does not fold into his ultimate reward for saving all the kids and can be lost permanently. This is likely an oversight, considering Fred has a similar mechanic and gives you all the items he has queued up for killing Freds.

-You can fail to identify the children as much as you like, there's penalty for doing so.

-A handful of new combat items have been added to the game, Healing Sprays and Fire Bombs being among them. The latter are pretty easy to craft, while the former will take a bit more doing to get. Frustratingly, the Black Ooze from Nightmares can also be used in crafting, and I haven't had much luck getting them to drop it with the encounters I've gotten thus far.

-Hmmm, a man covered in Ticks...

User avatar


Part 18 is out, and with that the LP will be going back into hibernation again! We've pretty much already hit the major additions that are a solid enough foundation to be the focus of their own video, so this is more of a super cut of miscellaneous additions and some slightly longer sidequests, plus anything I feel is interesting that I bump into along the way. The current ETA for the next update (described obliquely by Frankie as a "major content update") is, of course, Halloween, though it may end up being slightly later than that. No specific word on what's going to be added, but I have heard a rumor that a new Hard difficulty will be introduced to the game, which will definitely be one way to spice up my replays when the time comes!

Extra Notes

-A good chunk of the enemies in the Parking Garage have had their HP significantly increased to make them more threatening. The car near the entrance, in particular, has about double the HP it used to, making it a longer and more resource intensive fight. I'd highly recommend avoiding him, but the other cars do have rewards if you have Audrey.

-....that said, the Audrey equipment from the Parking Garage isn't really that great. Probably the most interesting one is the Chobham Armor, which you can combine with the Training Belt to make Audrey nearly immortal. Defense doesn't seem to boost Machine Tackle as much as Agility does though, especially since the Armor also causes you to lose Agility when you equip it, and Audrey is already durable enough so I'm not really a fan.

-The Elevator Thing is way more dangerous, the carriage drop in particular is devastating even if you defend it. I'd say the route I took to get the Loner achievement is pretty close to non-viable now, as defeating this guy as Solo Sam is a tall order. I'd definitely go for the Convenience Store route if I were to do that again.

-There is an alternate encounter with the Limb Thief you can get if you've already recruited Xaria and Monty, or if it's just early enough in the game that he hasn't had to chance to kill them yet when you encounter him. Obviously, the Xaria and Monty variant means you can no longer recruit that duo, and the sidequest associated with them is permanently locked off for that playthrough. He also has slightly different dialogue if you have both your arms still, as you'd imagine.

-The Potting Soil can upgrade your plant to an Excellent condition if you use it, though it doesn't really do anything besides make you feel good about caring for it properly. Hilariously, caring for the plant at all doesn't really matter for the achievement for talking to it. Sam will obliviously confess his love to the plant that has already died if you let him.

-Leaving the plant in the window light stalls out the plant romance quest entirely, with Sam just endlessly saying the same thing over and over again to it. Since you only get one opportunity to take it out of the light, be sure to do so if you're going for that achievement. Presumably the plant is going to become either a boss fight or a party member at some point in time if you leave it in the light, but the resolution to that just hasn't been added yet.

-Due to their use in various crafting recipes, the mushrooms in the fungeon are now well worth your time to grab. Now that Eugene regularly restocks his healing supplies and crafting ingredients, you can make a good number of valuable items such as Healing Sprays with them. They're also necessary for converting your D-Clogger into Acid Flasks, though since Eugene now refreshes his stock of Acid Flasks pretty regularly, this is less necessary compared to previous versions of the game.

-The Taxidermy Dungeon has gone from an early game boon to an end game area in its own right, which can be a little frustrating as the equipment it awards you hasn't really scaled to match the difficulty it can take to now get it. Granted, you can dive in and avoid enemies while grabbing all the goodies here, but it can be quite a risk to do that as many of the enemies can outright one shot you if they catch you. To say nothing of the Taxidermy Monster himself, who's not going to fall over to a team of 3 at level 6 anymore.

-I can see the new final phase of the Taxidermy Monster fight getting a buff in succeeding updates, currently the HP on the heads is low enough that a couple Fire Bombs can completely trivialize the final phase. Excellent music and visuals though.

-Aside from the HP and STM drain, there's no strict drawback to carrying Tickle around. His skills can be pretty interesting, so it's a fun way to add some flavor to Sam's skill set. If you hand him off to Henri, you can come back for him at any time which I'm sure Henri would appreciate.

-The Furnace is now actually a worthy Superboss, with his end of turn steam bursts causing significant damage that can be hard to outpace. I'd definitely recommend securing some Healing Sprays before tackling this fight, I was relying a little too hard on Audrey's durability to carry me through it. Fire resistant equipment is also a great idea to have here.

-One thing I didn't notice in the recording is that Ernest's buffs dissipate immediately if he gets knocked out. Makes sense, he's not really able to keep performing his songs if he's unconscious!

-Ernest's Double Hit song can be very good in the right team compositions. If you have Hellen with the Hell Sword and Leigh with something like a Claymore, them doing double normal attacks can easily outpace their skill damage, and is competitive enough with the damage of the War Rifle.

-Sam's Mirror Breakdowns can go a variety of ways depending on which choices you take, with his internal monologue becoming more guilt ridden or unhinged if you take the right options. He'll always snap out of it, but he can give you some pause about the things you've been doing in the game without even thinking about it. These Mirror Breakdowns are frustratingly rare, and they never want to happen when I've been recording, this being the first one I've gotten on recording period. The other one I've seen is Sam having an internal crisis over what happened with Joel's family and Baby Teeth, which itself has a variation dependent on if you killed, recruited, or abandoned Joel.

-The Nestor and Rafta quest now has proper resolutions, and the other parts of Nestor that fled are no longer dropped plot threads. There are many variations of how this quest can go down now, from Nestor rejecting Rafta and you being the hapless worm host now, saving Eugene but leaving Marshall to his fate, defeating the Hand and Foot to save Marshall but abandoning Eugene, being too late for the both of them, and finally deliberately being too late and waiting a day for the parts to grow. Ironically, the latter version of this quest is the most rewarding, with the overgrown Nestor parts rewarding an Elixir upon their defeat.

-This isn't a change to the Nestor and Rafta quest per se, but robbing Eugene and killing him now results in you getting his apartment key. Eugene's apartment has a number of good rewards when it comes to supply, on top of getting his powerful unique handgun for your own use, but the game wastes no opportunity to guilt trip you over it with the letter in his sewing studio. He was a good man. Mercy killing him after the Nestor event makes that sting a little less, but you did still set up a good Samaritan to be killed in a horrible fashion in that event.

-For the record, now that Eugene actually properly restocks his store, killing him is a TERRIBLE idea. The supply of crafting items and throwing items he sells that now can be purchased multiple times are invaluable for dealing with the toughest fights in the game, so you really want him around. Nestor taking over Eugene removes the restocks, and Nestor will not allow you to keep haggling once his patience has been exhausted. The option is permanently disabled and will not refresh the next day. Oh also if you kill Eugene, the potentially glitch punishment of each consumable stack only actually giving you one item when you steal it still persists.

-We encountered Hobbs a little too late for him to be useful to us, but his mechanic is that he awards you cooking experience relative to the amount of food you give him. If you encounter him after you a bunch of cheap rice and veggies from the Food Trader, you can quickly boost up your cooking level by unloading those items on him. Hobbs also has a mutant variant that you can encounter, so it's not always safe for you to open the door for him.

-Upon meeting Harriet, Apartment 22 is now available to you. This means if you meet Harriet before finding Sophie, you no longer have to rely on RNG to reunite the pair anymore. You can simply drop Sophie off at Apartment 22 directly. As an added bonus, Sophie no longer disappears from the game if you reunite her and Harriet. You can add Sophie to your party by visiting her in Apartment 22. Amusingly, for awhile you still had the option to kick her out of her own apartment, which cause numerous buggy interactions with your party, with one particular variant allowing you to have 5 party members instead of 4. Frankie has since removed the option to kick Sophie out of her own apartment.

-I'm not sure if Harriet can be mutated if you've unlocked Apartment 22 anymore, but that event can definitely still happen if you encounter Sophie before you encounter Harriet. Always be mindful to scrutinize the door encounters when you see them.

-Father Andrew is another new door encounter, and a pretty interesting one. You can get supplies from him, but the more unique thing you can have him do is bless your apartment. With a blessing from Andrew, you have reduced odds of getting mutant encounters, which can be very nice if you encounter him early on. I'm not quite sure what effect donating to him has, but it might be like the Pizza Guy where if you tip him generously, he's more likely to show up again in the future.

-We saw most of the new door encounters, but one new variation that we didn't get to see is the Pizza Guy. It's now possible for him to be a mutant encounter, though a fairly unique one compared to the others. He can bring you a mutant pizza that you must fight in order to claim it as your delicious meal. Unlike other mutant encounters, since you don't actually kill the Pizza Guy in this case, he can still show up again after it happens.

-Juicebox is the mother of all time consuming sidequests in the game, with a reward that is decent on paper but highly unlikely to be useful in any given gameplay context. Juicebox will show up a day after Xaria and Monty have become available to take out for exploration. As a reminder, it takes about 12 in-game hours for Xaria and Monty to want to explore, and you have to wait a full day after that for Juicebox to finally show up. His quest is pretty simple though, similar to the plant in execution really. Just talk to him every day, with his card trick happening on the 7th day you talk to him. Juicebox's magic card is a decent accessory, but even if you get Xaria and Monty as soon as the first day, that means you're not getting it until Day 9 at the earliest. As my LP has demonstrated, you can have done literally every combat encounter in the apartment by the time that day rolls around! The succeeding Juicebox conversations don't lead to anything, though possibly that cut team attack with Xaria and Monty will be reintroduced at some point considering the final event is Juicebox getting a gun from somewhere.

-When I hit record for this video, I had intended to play until I got the Perfect Ritual-Truth ending, but by the time the Juicebox sidequest had finished I had been recording for 3 hours and 7 minutes and it was 10:30 PM. I was pretty spent at that point so decided to just call it there, I'm sure we'll get time in the future to see the updated rooftop. A lot of the rooftop creatures have had light animation added to them, and most of the endings have gotten new artworks and some modified text. Thankfully, the youtube channel Cranky Templar has uploaded a compilation of all the updated endings for version1.6, so you can check that out at the video below!


User avatar


After a sizable delay, Part 19 is out! Once again we find ourselves at the start of the game, but things are far from what they were when we started this LP. We're on version 2.0 (okay 2.01 but you get what I mean) which features not only a ton of new things to go over, we also have the new Cursed hard mode to deal with! This mode itself also introduces several bits of exclusive content, so we're going to be pretty flush with new things to go over. It's like a whole new game at this point, so don't be fully comfortable in everything you already know!

Extra Notes

-As mentioned at the start, there's now an achievement for never saving with Sybil and you can tell her to buzz off at the start to ensure you never even have the temptation. This is a new challenge achievement, and currently it is obtainable on Explorer (formerly known as Easy) mode where you can get around Sybil via auto-saves though that probably isn't going to be the case forever. One thing I neglected to mention is that a couple new wrinkles have been added to the Challenge achievements: you must get a Ritual ending and it must be one with a final boss. If your ending route is the Xin-Amon route, you must win the fight against Xin-Amon. This means the previous video where I stacked the achievements in one run has been invalidated. The Elevator Thing has also been buffed since that video, so the specific route I went with is even harder to do.

-We need to get to the Parking Garage on either Day 5 or Day 6, so we don't have much time to screw around. This isn't necessary if you're just trying to get to a Perfect Ritual, but if we want a specific failed ritual, we need to do this. We also need to befriend the Shadow in order to get the Rose. Fortunately, once this has been done, we'll no longer be on a time crunch and we can ease up on the gas a little.

-There are several strategies you can use to escape Floor 3 on Cursed mode. One is to play Super Jumplad and Madwheels 97 to completion, giving you two of the best skills in the game and several levels, leaving Sam more than capable to handle any fight he comes across before he can get any allies. Another is to just wait until Dan, Hellen or Xaria and Monty show up, since even on Cursed mode they will just join with no fuss. If you're doing the latter under the same time crunch I am, you can just keep restarting the game until one of their encounters spawns on the first day. I went for raiding Vincent's bedroom though, as the Clogs and Machete are very good equipment pieces for this stage of the game. Sam is probably going to be wearing those clogs for the rest of the game, to be honest.

-Speaking of door encounters! I actually more or less know how these work now. The game does in fact seed all of your door encounters ahead of time, specifically when a Day begins, and this can be exploited. Just save at the start of the day, waste time with crosswords and video games until someone knocks, and then note the time they arrived at after answering the door. Once you've scouted enough encounters for your liking, reload your save to avoid wasting time! By keeping those arrival times in mind, you can know when to return to the apartment to get desirable encounters such as party members and merchants. If you're looking for party members specifically in the interest of recruiting everyone, instead you can save before going to sleep, and then reload the save if the game didn't roll any party encounters for you.

-As for when encounters happen, there are several time ranges throughout the day where a random hour is picked, and if you are in the apartment during that hour, you get the door encounter. For Day 1, these time ranges are

08:00 (8 AM) - 12:00 (Noon/12 PM)
13:00 (1 PM) - 18:00 (6 PM)
19:00 (7 PM) - 22:00 (10 PM)

And then for Day 2 and onward, the times are

07:00 (7 AM) - 10:00 (10 AM)
11:00 (11 AM) - 14:00 (2 PM)
15:00 (3 PM) - 18:00 (6 PM)
19:00 (7 PM) - 22:00 (10 PM)

So we can get up to 4 encounters a day with the exception of Day 1. Combining this knowledge with the scouting method, it suddenly becomes a lot easier to get those pesky party members that show up randomly!

-On Cursed mode, unless you know a Vendor will be selling something you want, you should just kill them when they show up for free money and items. All of them are complete pushovers, especially if you have a fully party. As of the current version of the game, merchants respawn even if you kill them, so there's no long term penalty to doing this (or long term benefit really, since getting them out of the encounter pool would actually be helpful.) The Gun Trader is especially worth your time to kill, as he gives you 3 of the best pieces of equipment in the game.

-Speaking of respawning, Cursed encounters such as Monster Morton or Monster Dan can happen multiple times, and they don't actually preclude you from encountering the real person if they happen. Frankie has confirmed that the Cursed encounters are doppelgangers. I'm not sure if the Limb Thief is an exception to this, since he isn't really trying to pretend to be Xaria and Monty.

-Defeating the Grinning Beast is pure RNG as solo Sam, but the method I demonstrated is reasonably consistent. Naturally I had LP luck here and had to do the fight 4 times before it worked, in both my practice playthroughs I got the fight on the first try.

-If you fish at least one door encounter with a merchant, you can either kill them or sell them some junk in order to afford the Pistol from Leigh. I didn't really care to do that and we can easily pick the Hunting Shotgun and the Old Rifle to fill our current fire arm needs, so I just let Leigh have a little snack.

-I didn't draw too much attention to it, but Fievel has a new portrait! And some new mechanics, which we'll be delving into once we're able to take him on expeditions.

-As long as you don't use any of the Cleanerex you buy from Eugene in crafting, fulfilling Papineau's Cursed Mode conditional is no big deal. If you don't have the Cleanerex, then definitely pick up a party member to void his appearance, since we can't afford to wait on the Junk vendor or something before initiating the bus crash.

-Incidentally, if you have Ernest as a guest party member, having him around even if it puts you over the one recruit limit does not void the ability to recruit Papineau.

-We can get some interesting items and see more body horror if we leave Joel's family alive, so I make sure to do so. Clint will be a nuisance prowling the halls for the next few days but it's not that a big a deal. Similarly, we want to do Ben's play session since it will help us out later.

-I've briefly mentioned Joel's ability to permanently gain HP from devouring enemies, but now we're actually going to make use of that fact. This mechanic is actually relevant to Joel being one of the best Cursed mode party members, though do not mistake that for him being a particularly interesting one to use. When all you have is a Toothstorm, everything is a target of Pierce damage, I'll just say that.

-Painful Stab is incredibly useful in Cursed mode, both for it's direct effects of applying a DoT to an enemy and minimizing the damage they do to us, and also the fact that it's a relatively weak skill that softens up the enemy while also letting us scout their HP to set them up for being devoured by Joel. When the Pain only ticks for 2 damage, you can be almost positive Joel's next chomp will swallow them.

-The secret door under the stairs can only be checked when Sam is on his lonesome. You can also only check it once, and if you are unable to open it, it disappears for the remainder of that playthrough. We'll get into how you open it and the benefits of doing so in due time.

User avatar


Part 20 is out! We have quite a bit of old ground to cover here, but fortunately past this point we're going to be seeing a ton of new things, even in Mr. Henderson's apartment! For now though, we have a variable mix of Cursed mode changes plus all new content added in the 2.0 update to break up the same old same old.

Extra Notes

-Due to me having to redo almost everything from the last video, the RNG for Day 2 decided to throw Dan my way, which is nice since he has a new sidequest to take care of! With the numerous buffs Dan has gotten and the greater need for healing, his Calm Stream skills actually prove to be quite valuable. I'll probably take care of Audrey's recruitment quest next time in order to get the Energy Drinks that she provides just so Dan has more fuel for his skills. He'll probably get benched as we pick up new party members though, as you only need him to be level 7 to do his sidequest.

-Beyond being the means to initiate the ritual to contact the visitor, Jasper is now the center of a dialogue chain that gives us access to multiple new endings. It'll be a bit before we can follow up on that though, just keep it in the back of your mind for now.

-You can always grab the Cell Phone regardless of anything, but it only leads to anything if you've recruited Leigh. You get a new text each day, with the final one coming 4 days from when you grabbed it if you have Leigh in your apartment. The earliest you could possibly resolve this questline is Day 5, but because we wanted some time to breathe in order to save Ernest, we'll be resolving this one on Day 6 instead.

-The Frozen Apartment has tons of Cursed mode exclusive enemies, making the place a good deal more dangerous to explore than in Survivor Mode. The enemies towards the front are relatively easy to handle, but I'd advise waiting until you have everyone up to about 12 defense before trying to breach too deep into it. One nice thing is that all the enemies have chances to drop winter gear that gives you protection against cold.

-Something I haven't had the chance to comment on since we've only just now began to open them, but all safes have had their cash payouts reduced. Thankfully, equipment obtained from them is unaffected, but the reduced money will only exacerbate our financial woes going into the Landlord dungeon.

-Speaking of Safes, it is a huge boon if Mutt is selling the lockpicks this early on. Absolutely grab them if you see them, they more than payback their 50 dollar cost. Cursed mode does nerf the lockpicks slightly, as there is now a chance they will break when you use them. That said, it's not a particularly high chance, and as long as you stick to the most valuable safes first, you can still make back several times the money you spent on them.

-The Rat King is the first of several bosses to gain health regen in Cursed mode, though his is pretty light and easily beat over by DoT effects.

-Rat Hell is dangerous, but the high EXP payouts for all the fights you get into within it make it more than worth your while to go through. Just come in with a good supply of battle items and you'll be fine.

-The vendor Rat is very much worth keeping around, so do your best to avoid him when first reaching the First Floor. In addition to the Elixir and Sewage Blade, he also sells 5 pieces of Junk, making him useful to hit up if you want to recruit Morton as soon as possible (who is tragically still also a pure RNG door encounter).

-Lyle is now a party member! Get the photo developed and give him two smooches, and he just decides to crash in your place. Not that we'll be complaining as he is incredibly good, with a reliable form of the rare Acid damage type, a superior version of Hack Away that doesn't risk a broken weapon, and some unique tricks he'll pick up as he levels. Lyle is honestly a top tier party member for Cursed mode, though he is slightly hamstrung by being unable to change his robe or use footwear, reducing the stats he can get from equipment. Since footwear often provides a decent Agility boost, this also indirectly weakens Lyle Kicks.

-Louis is the center piece of a mini-quest to get an interesting equipment set, though sadly there is no peaceful way to go about this. Beat him down, and then keep an eye on his corpse in the coming days.

-Charlie's condition will continue to worsen as days go by, so check on him periodically to remind yourself life could be a lot worse!

-Kaeley does not permit the use of lockpicks in her Key Maze, but at least on Survivor mode she'll let one usage of them slide. If you continue to pick the locks, a fight is inevitable. Of course, having the lockpicks in general makes Kaeley's Key Maze easier to complete since you no longer need to use your keys on the Safes and Doors around the apartment, giving them continued purpose once you have the picks. Similar to the return on investment for the lockpicks, you can also just periodically come to Kaeley to buy a key and use it on a safe for a neat profit. Her price can go as low as $0 if you go enough days with buying a key from her, though buying for just $15-20 is also perfectly worthwhile.

-The wretched Pierre is the central figure of a very extensive sidequest that has a slight RNG component to continuing, though the game seems pretty consistent about setting that stage of the quest up as soon as possible. Unfortunately for Sam, we will be seeing a lot more of him in the coming days.

-As if it wasn't bad enough already, the Landlord dungeon has had a significant price hike, with the total amount we need to pay back coming to $1,500! With money most certainly being an object on Cursed mode, we're going to have to scrounge everything from the dungeon in order to pay our rent through. Thankfully, all enemies within the dungeon drop their usual amount of cash, and all the sidequests also pay out the same amount they day in the lower difficulties. Unfortunately, there are loads of dangerous new enemies within the dungeon on Cursed mode, so be prepared for that.

-At any point in time, you can gank Jasper and go onto the roof, though obviously this precludes you from the best endings. It is still possible to get variants of a failed ritual if you had given offerings to the other astronomers and then personally inform them they need to go to the roof. This new option is one of the bigger reasons you can no longer get the challenge achievements from the Failed Ritual ending, as while Jasper is slightly dangerous to fight you can kill him really early in the playthrough with the right battle plan.

User avatar


Part 21 is out! It's Landlord Dungeon time again, and you'll be relieved to hear I just stuck to the highlight reel once again. There are some interesting things to say about it, both post update and Cursed mode specifically, but it is still a serious drag on your patience and your resources to go through. And also the Radioman STILL does nothing, which is just so funny because he's the first sidequest NPC you meet in the place. After that bit of busy work, we Speedrun the Basement and make our way into the back half of the game, where a greater density of changes await us! On brighter news also, we made it to the Parking Garage just before Day 6 kicked in, the fastest we could have gotten there while being able to complete the new ending sidequest, mechanically speaking. With that taken care of, we can ease up on the gas a little and take some time to smell the roses and check out places in the apartment we just didn't have the time or resources to mess around with.

Extra Notes

-If you don't want to just cheat out your crossword code, then the next best way to get it is to just complete forgo sleeping and use the late night hours to grind out puzzles. Sam will become Exhausted and rendered with no Stamina before long, but that's ultimately not that big a deal. Not sure why Sam refuses video games over sleep but not the crossies, but hey it makes it easier to spam out the puzzles and complete them with minimal interruptions.

-To my knowledge, you don't need to talk to Marvin to advance his sub-event, he just keeps mutating every day until the final point where you can fight him for the valuable item he drops. It's either day 6 or day 7 that he fully mutates, so be sure to swing by around then.

-We've been getting less money on this mode and the Rent prices have also suffered the global price hike, so we really do need to fight almost everything and scrounge every bit of cash to finish this place. Obviously if you got the lockpicks from Mutt, you can raid Safes to ease some of the money farming, but we weren't so lucky this playthrough.

-Do not mess around with the Commandos, these Cursed mode exclusive enemies can absolutely slam you with damage, especially since we're somewhat bereft of powerful armor this playthrough. This place is what we've been mainly reserving our Slash weapons for, as the universal weakness the Hand enemies have to Slash really makes a big difference here.

-There is now an achievement for completing Juicebox's Magic Card event, so we'll be sure to talk to him once he shows up to get that done again.

-The Meat Dimension is probably the biggest new area added to the game, spanning close to the entire apartment complex in size. Entering it via leaving Edwin's apartment in the dark is probably the first glimpse of it you'll get, but it'll be a bit longer yet before we can explore it properly.

-I glossed over it, but the big reward for completing the Medical Tent is the Combat Surge syringe. This syringe gives you 3 turns of double actions at the cost of increased damage received. We're going to be saving it for a very particular secret boss later down the line.

-The Writhing Shade is the first of many Nightmare bonus bosses we will be seeing in this playthrough. The Nightmares got a big rework as of this update and have a far more pervasive presence throughout the game. Every Cursed offering is guarded by a Nightmare, and all of them can be brutal if you're unprepared. They all get 2-3 actions, bombard your team with a litany of ailments, have thousands of hit points and are resistant to all damage types save for Fire, their sole weakness. DoT effects are critical to defeating these guys in a reasonable time frame, so they're another thing you want to keep blades in reserve for. Once you get to the Parking Garage, it is very much worth your while to grab the Flamethrower for dealing with these guys, as that is by far the most consistent and reusable raw damage you can use against these guys.

-There are yet still a couple new enemies in the Landlord Dungeon once you make the final rent payment, but my completionist tendencies forbid me from defeating Trench Digger and the APC without Audrey, so we'll just be saving those for later.

-In order to continue Pierre's sub-event, you have to sleep at some point. Doing so will update the door encounters, and sooner or later we'll have a special encounter pop up.

-The Rose is the immediate thing we needed from the Shadow, and with it in tow we are ready to complete the sidequest in the Parking Garage. We actually do also want to invite the Shadow into our apartment once Day 6 rolls around, as he is also critical to a new ending to the game.

-Completing the Landlord Dungeon gave us enough experience to get Teethstorm for Joel. This skill is the main reason Joel is top tier in Cursed mode. Teethstorm costs a third of Joel's HP to use, and once that deduction is made, half his remaining HP is used to determine the base damage e.g. if Joel has 100 HP when using it, it'd cost 30, reducing him to 70 and dealing a base damage of 35. By maximizing Joel's HP, this skill becomes by far the most raw damage any non-percent based damage skill in the game can do. It is also affected by resistances, so against Pierce weak enemies it can deal 800-1000 damage with enough HP. It's slightly lesser against Pierce resistant enemies, but still good enough for our purposes. We'll definitely get the Patchwork equipment from the Taxidermy Dungeon to augment Joel for this further, but the Training Belt alone still gets us up to over 200 damage at full health with all the devouring we've been doing.

-I'm really not a fan of how Joel is balanced now, all that being said. Teethstorm is the only genuinely good option he has now, Roundsaw Jaw is ridiculously weak and far to expensive on Joel's STM pool to be useful. Joel no longer has his passive STM regen, hurting that skill further. Teeth Cannon is similarly weak, and using Teething just gets you the same result Joel would get using his skills two turns in a row, plus it damages him lightly. I think his other skills could stand to be slid back to their stronger variations we saw at the start of the LP, considering how much tougher the game has gotten.

-The Taxidermy dungeon now opens on Day 5 instead of 4, giving you a bit more time to prepare for it. Now that Teethstorm is online, we'll definitely swing by it for extra HP boosting equipment.

-Antoine is brutal, and now you HAVE to fight him in Cursed Mode. Come in with Acid Flasks and do not give him a chance to mutate further. Yanma Kick and his acid drool will quickly obliterate your party, and leave you in a really bad way for finishing out the additional phases of the fight Cursed Mode adds. Once Antoine is down, ironically Esther and Noah are considerably less threatening and can be beaten over at a more relaxed pace.

-Steve also gets a Cursed mode ally, though obviously that's only a factor if you lack bandages for him/refuse to hand them over.

-Oddly, the Boiler room has absolutely no Cursed mode additions, though obviously the global buffs Cursed mode applies makes the Boiler Beast that much more threatening. If you get cornered by him at this point, it's almost assuredly a game over.

-The Crimson Ring is another key component of Teethstorm spam, now we don't need a steady supply of Bandages to make sure it deals enough damage to brutalize every encounter we get into. Joel does lose a bit of Max HP from equipping it, but it's well worth that cost for the resources it saves. The STM debuff is pretty harsh though, between that and the Training Belt, at max Level Joel will only have enough STM to use one Gum Up The Works.

-Incidentally, there's now enough EXP in the game for you the see the level cap, which is 20. We will definitely see Sam and Joel hit that cap by the end of the game.

-If you're wondering what Lyle said to Musette, he just said "O-oh, um, th-thank you very much! I'm starving!"

-Talking to Beryl is key to beginning a dialogue chain that leads to two new endings, though I believe I've currently missed a conversation topic with Jasper that lets you pump her for the critical information. We'll come back to that, but talking to Beryl in and of itself also got us a nice fringe perk!

-The Prisoner's Room is not the only way to get the Strait Jacket! Continuing with the ongoing LumpyTouch reference and similar to the EvilDead Easter Egg, entering Sam's name as Lumpy at the start will prompt a unique reaction from Sybil and start you out with the Strait Jacket.

-Charan is the reason we've been rushing so much. They are inadvertently blocking the path to a Cursed offering, and we most offer them the Rose to get them to leave pre-maturely. Day 5 is the earliest we can accomplish this, and we managed the ideal situation of getting here by then. Day 6 is also fine, but Day 7 removes the option to give them the Rose, so it has to be either of the former two days we do this. Charan automatically leaves on Day 8, sealing the hole and area they occupy. Not sure why them leaving pre-maturely doesn't also do this or why the hole still seals itself on Day 8 after they already left, but hey, video game logic. Perhaps they're just not big enough yet in the former case.

-Charan is strongly implied to be one of the Hundred Gods, with their reference to mutations being like a lottery a direct call forward to the text of the No Going Back ending. That ending paints the Hundred Gods as purely malevolent and tyrannical forces, so it is interesting that the one potential God we meet in the course of the game is a benevolent one.

-There's nothing in the game that confirms this but if I'm allowed to theorize, I personally think Joel's sister Rosie AKA Babyteeth is also one of the Gods. Her mutation considering she's a baby is a tremendous size increase, and as you can probably intuit from what's going on with her home, it's only going to get worse. Her ability to enact her mutation on others is also a fairly uncommon trait of the mutated people we meet throughout the game, giving me more reason to think this. Kind of sad really, Godlike power but absolutely no means to even comprehend what's happening to you due to being in the earliest stages of development. I can only imagine the pain involved in being a physical manifestation of teething also.

-Aster formally joins once you have at least spoken to all the Astronomers! He used to have the requirement that you couldn't have recruited more than 3 people by the time you had done that, but that requirement was stupid and was quietly removed in the 2.01 update. Aster is another humanoid that is able to use melee weapons and guns, though he's less flexible than Dan and Leigh since he has some unique equips you cannot remove from him. He mostly focuses on inflicting mental ailments for his unique skills, which are less useful for the player by and large, but he does have some unique buffs that have very helpful niche uses. He's kind of mid-tier, but there is one specific fight he is amazing to have around for.

-If you failed to recruit Joel and talk to Ben by Day 5, that door is forever shut to you, quite literally. They mutate further into non-sapient abominations of teeth on Day 5, and the apartment itself seals until Day 9 when Noon rolls around. You could kill Clint and Madison right now, but there is some extra stuff you can get if you don't. Formerly, once Joel's apartment sealed itself, it was a permanent event. The 2.01 update added the re-opening, and we'll have a new area to explore once it is opened.

User avatar


Part 22 is out! Now that we've made it to the Parking Garage and have already given Charan the gift for their boyfriend, we can slow our roll a little bit and start exploring areas we haven't been able to duck into since it would have eaten too much time on the clock. We've actually had to leave quite a lot on the backburner, so this video and the next are going to feature a lot of clean up before we finally reactivate the elevator. Luckily, there's still plenty of new things to fit in between all that! Just for context on how hefty the 2.0 update is, last time the game had a major content update it only took me 4 videos to cover all the interesting and new bits. We're 4 videos deep into Cursed mode and we're not even close to the end of it yet.

Extra Notes

-Thanks to Chaosbrain for pointing out Esther has her own final phase for the Antoine battle, I'd have totally forgotten to show it off otherwise. Esther's phase feels kind of half implemented due to it lacking art for her devouring Noah and having less dialogue also, but her battle sprite is pretty funny so it was worth checking out for that.

-If you've recruited Leigh and collected the Cell phone, one final message will come in on the phone 4 days after you collected it (the first 3 happen regardless of if you have Leigh or not). The 4th text is the trigger for Leigh's character quest, just talk to her after you've gotten it and you can go complete it!

-The Fiber Dragon equipment set is pretty good if you want to make a super tanky character, and Sam does have a Taunt skill he can learn from Blood Ghoul Orgy that could probably make good use of it, but I find the Agility penalty these equipment pieces give you to not make them worthwhile.

-I prefer getting the Martin's Ring reward from Leigh's character quest since being able to control the Grinning Beast directly from the jump is a more generally useful thing to have than a stronger Beast that is uncontrollable for longer. As an added bonus, the Martin's Ring is a fairly potent accessory in its own right and it's NOT exclusively a Leigh piece of equipment. It's a nice way to get some extra stats onto characters like Lyle, Roaches or Audrey who have equipment restrictions that deny them from more stats from conventional gear.

-Even if you're considering it, letting Leigh embrace The Beast is a terrible idea currently as the option is bugged. Unleashed Beast is supposed to make Leigh only target enemies when berserked and gain a 100% damage bonus instead of 50%, but as it is right now, it is identical to the normal Grinning Beast and is a waste of an option.

-Audrey is no longer a freebie save for the coins you have to use on her, the Vending Machine key is now a Special Offer item with a base price of $150. We had already bought the Training Belt so our total came out to $187 this playthrough. Obviously if you've been buying more Special Offer items, it just gets more and more expensive to get Audrey. On the front of Blessing-in-disguise, while we had to save money which meant we couldn't really recruit Audrey right away, there weren't many Special Offer items that were worth wasting money on either, so the Vending Machine key remained relatively cheap.

-You do need to enter Charan's hidey-hole before Day 8 rolls around, or else it will be sealed regardless of if Charan has already left it or not (which I half suspect might be a mistake but who knows). Fortunately, once you've gotten past the Bat and opened the door leading into the underground area, you no longer need to stick around if you don't feel you can take on the Moaning Shade. I pressed on regardless because that makes for more exciting videos.

-You can grab the Flamethrower without needing to fight the Hell Car, which is quite a potent tool against Shades. To be honest, I'll probably kill the Hell Car in the next video regardless because it's a surprisingly unchanged fight in Cursed mode and you get a bunch of Tonics for doing it, which I could use pretty badly.

-With all the set up we've done for him, Joel's Teethstorm makes quick work of the Hydra buds, saving us a ton of money on grenades and sparing us the potential for our blades breaking. The Leather Jacket and Motorcycle Helmet would have been nice to have earlier, but they just weren't worth the risk at the time. Jeanne actually has a new bit of dialogue a day after you return her laundry, so we'll be sure to check in on her in the future!

-I'd strongly recommend picking up the Patchwork Equipment now and just avoid as many fights as possible while doing so if you're playing this yourself. Getting Joel set up with the remaining HP boosting equipment he wants is naturally quite useful, but on a personal level I'd like to get as much of a task completed without leaving parts undone like we have been doing until now. That said, we were light on cash and some valuables were right in the front, so I quickly raided the Taxidermy apartment for that. We'll return for the rest of the goods in the near future.

-With Audrey in tow, we can access Stuart's parts shop! In addition to being another vendor we can unload crap on, he also has some miscellaneous goods he can sell us without having to wait for Eugene to stock them. The big draw is his parts for Audrey though, most of them granting new skills or light stat boosts. My preferred equipment piece here is the Coffee unit, which let's us using Espresso Shot. Espresso Shot is a powerful Ballistics skill that deals Fire Damage and has a high chance to cause the Burn status, which is useful for several reasons. At 16 STM a shot though, it needs to be used sparingly since healing items are half as effective on Audrey. The Cooler Unit gives us the Freezing Shot, one of the only ways you can Freeze enemies in the game, but that isn't nearly as universally useful as Burning Shot. The Carbonator let's us use Explosive shot, a 20 STM Ballistics attack that can stun enemies, and is one of the few non-item sources of Blast damage in the game. Each Unit also provides a 30 STM support skill, with the Coffee Unit giving us Hot Drinks to restore the party's STM, the Cooler Unit giving us Refreshments to restore the party's HP, and the Carbonator giving us Fizzy Drinks to give a boost to the party's attack power. I don't really make use of these due to the high STM cost, but there is a trick later in the game you can use to HEAVILY abuse these abilities. The Quad Wheels and Spiked Bumper are Feet gear for Audrey similar to the Tank Treads, and while they mostly are just there for light stat boosts, the Quad Wheels do give Audrey the Reckless Driving ability, and AoE crush skill that does damage relative to her Agility and Current HP.

-Audrey still has the problem that she has little to do beyond soak up hits and serve as an anchor item caddy once her STM runs dry. I really wish her basic attack utilized all of her stats rather than just her anemic attack stat.

-It's highly advisable to just grab the Basement Key and flee the Landlord Dungeon like I did in Cursed Mode, as the one-two of the Rocket Launcher Unit and the buffed Grave Digger is daunting to take on after being worn down by everything the dungeon has already thrown at you. Again, now that we're not on a time crunch I was able to more adequately prepare for these hurdles.

-Funny thing about the Tank Treads from the APC, it's SUPPOSED to give Audrey a skill called Ground Anchor, but is currently bugged and does not do that. Were it to work properly, it is a self-buff that boosts Defense and Ballistics but reduces Agility for 3 turns. Not really sure if it'd be worth it in a damage economy sense, but equipping the Tank Gun from the Grave Digger locks Audrey's Agility to 0 anyway, so the penalty would at least be non-existent.

-Pierre has a relatively high chance to be a door encounter shortly after Sam has his Clown nightmare, and it's actually fairly unlucky it's taken this long for us to encounter him. Once you do get him at the door and talk to him though, he becomes a new daily task with scenes each day you return to talk to him in his room. We can actually begin on this the same day we see him at the door, but I'll save that for next time since the video was running long anyway.

-Roaches also has their new character quest, which thankfully doesn't require much effort on your part and just progresses day by day after you formally recruit them. Do note that there is a benefit/bane related to this quest happening in general that will start up on the second day of it and is worth keeping in mind if you're using Roaches. Completing the quest is just another daily task where we have to talk to the Roaches each morning to resolve their political disputes.

-Oh hey finally cleaning up the Overgrown Apartment! This place has it rough from a routing perspective, it's fair too difficult to go into this place early on, but there isn't really the spare time for it once you are strong enough to survive in it. The fact that the enemies are only weak to Fire and neutral to Slash also makes it undesirable to go here, as it is a huge drain on your resources if you want to fight effectively here. We're mostly coming here for EXP for Fievel, but cleaning it out a little also sets us up to quickly check on Marvin when he fully mutates and also let's us quickly address a future character quest.

-We've been getting several events for Fievel, and it's worth noting that a lot of these have follow up events that now either grant new skills to Fievel or open up new opportunities for other characters. We've been getting a lot of the starting events, but not really any of the follow ups, which is unfortunate.

-We get to see our first Secret party member that does not have an associated Steam Achievement for recruiting them: Spine! If you have spared Spine and talked to her at least once after doing so, attempting to leave the Twisted Apartment as solo Sam will prompt her to join you in exploring the Meat Dimension. She can only be used within the Meat Dimension, and only ever if Sam is by his lonesome. She has no unique skills and unremarkable stats, so this is mostly just a fun novelty more than anything. The other Secret party member is even more obtuse to get than Spine, but is both much stronger and does not have any restrictions on using them. It'll be a minute before we recruit them.

-As you can imagine, attacking the Visitor does not exactly pan out into anything worthwhile... but what if we could defeat The Visitor? Are there any skills in our arsenal that could do this? Hmmmm...

User avatar


Part 23 is out! I'm afraid I've been pulling a trick on you by saying we've still got a lot to do, as we've reached the True Ending! Witness as our heroes vanquish the Visitor and restore peace to Montreal. I know there are dangling plot threads like Sybil, the Cursed Offerings and the Shades, but it doesn't really matter because this resolves the bulk of our problems anyway! The rest of the video is just icing really, but some cool things happen there too! Hope you have enjoyed this LP and I hope to see you again for whatever I make next!

Of course, this is a joke ending that resolves nothing, so maybe we'll keep going after anyway, just in case.

Extra Notes

-For a Cursed encounter (as in, a mutated visitor rather than something difficulty specific) the Mad Pie is surprisingly lucrative and worth your while to fight. A good supply of a fairly potent healing item with a minor and potentially inconsequential draw back and a reasonably strong weapon for Sam. If you have the 50 bucks to spare, definitely go for it.

-We have another new daily quest in Lyle's Mazes & Wizards campaign! Bring Lyle's board to him and encourage him to DM, and you'll be able to engage with your current active party in a Mazes & Wizards session between the hours of 5 PM and Midnight! You can do one session per day with any team of your choosing, though Lyle cannot be in the active party for it since he's the DM. Every single recruit has their own character for the session, and there are some pretty funny configurations you can make for the campaign. Note that you don't need to have Lyle recruited to play Mazes and Wizards, if he still resides in his apartment you can also play with him there.

-Speaking of daily quests, Pierre's exposure therapy! Just come talk to him once per day to advance this questline. Can Sam overcome his fear of clowns? He won't, but the end point is pretty funny.

-Jeanne has a new follow up conversation the day after you return her Laundry, so we'll be sure to see that because more Jeanne is always a good thing.

-We've been able to do the Frozen Apartment for awhile, but we just now have got the free time to actually clear the place out as much as we can with the Ice Salt we currently have. The previously useless Mercury and Venus discs now actually have a purpose when it comes to getting two of the new endings, so be absolutely sure to grab them!

-Since we didn't get to see it, it's worth noting that Frankie finally got around to fixing Claire's fungal form should you leave the Fungus Lair early! Here's what she looks like,

Image

-Speaking of Fungus Lair jank, there's a bit of an amusing exploit you can do with the dummy survivors for a bit of extra EXP. If you return to the entrance after freeing one, kill them and then return to free another, the previously slain Fungus fake will revive and stand alongside the newly freed survivor. I think that's too tedious to do for a negligible reward, but it is pretty funny.

-Yes, Phillipe can now be saved and made a permanent party member! To compensate for him coming fairly late into the game, he has by far the fastest turn around for becoming a party member compared to other characters who don't join immediately like the Rat Child or Roaches.

-Man, the Taxidermy apartment just keeps getting more dangerous for the same rewards it's always given since the game launched! That Taxidermy Abomination is genuinely more threatening than the boss of the area. Still, the Patchwork set works wonders for Joel, allowing him to break 800 HP which is about all he needs at this stage. The set is also quite good for Bear Hug spam with Papineau, if you're using him but not Joel.

-Similar to Aster, Morton will come in clutch for a specific bonus fight/area, though unlike Aster this is an entirely new bit of content for him to tackle rather than something pre-existing.

-Once the Roaches have their political schism come to the forefront, they divide into two Neighborhood Watch creeps! This halves the stats of the Roaches party member, but gives Roaches the unique ability to act twice, effectively making them two party members in one and allowing you to have 5 characters! Now on the lower difficulties, this is basically a flat upgrade since Roaches mostly revolves around their unique Roach Swarm DoT effect which does damage independent of stats anyway. Being able to max out your swarms in a single turn is highly valuable. The stat hit is a more prominent problem on Cursed mode, where enemies frequently hit hard enough that the low HP and defense can be a serious problem. If you're willing to grapple with that, it can be a strong option! We'll have the choice to make this a permanent change or to resolve their dispute for an interesting and variable reward come the next day.

-The Suture Kit is now directly dropped by Suture Wire rather than being found in their room. Cursed mode also nerfs the number of uses you have for it, only allowing it to be used 6 times instead of 10. Still saves us on First Aid Kits though, so I'll take it!

-While the Hell Sword is of minimal consequence, that Eye Ball door past the Hell Ride is supremely important for later. Note you don't need to fight the Hell Ride to get the Flame Thrower, you can easily escape it before it forces you into a fight. I just took care of it since I was there anyway and it's surprisingly easy by the standards of bonus bosses in this game.

-We finally have Hellen! Hellen also got a new character quest, and this one is contingent on your plant's health. If you've been taking good care of it, she should approach you to initiate her quest within a couple days of entering the apartment. Unlike Dan's quest, you don't have to use Hellen at all to begin this quest, but you will need to bring her along to advance it once it starts.

-As mentioned, there is a much more overt clue to how to play the Elevator Game, but getting access to it has several potential drawbacks. I'll show off the clue later, but for now let's just enjoy the fact we can play the game no problem if we already know the solution!

-The Metro Ticket is stuck in a random trash can, so be sure to check every one of them thoroughly until you get it!

-Marc Andre is a weird addition, a pseudo-party member who occupies your inventory if you let him kill your party and then avoid bursting his bubble afterwards. He has a number of actions he can randomly perform every 1-2 turns, and while most are positive, sometimes he'll randomly throw one of your tonics at an enemy and heal them. His mechanics are pretty convoluted, the wiki has a write up for him if you are so inclined.

-The Flame Thrower is fantastic for Shade type enemies, being a reliable form of effective damage that also consistently applies the Burning DoT effect. We'll want to use it sparingly though, as it requires Gas to reload and we'll need to make some Fire Bombs for an upcoming bonus boss.

-We're now more than capable of slaying the High Danger Shades. These have been reworked as of the 2.0 update, with a unique Boss Shade occupying each floor at High Danger. Once you slay it, it will never be seen again. Slaying all 5 High Danger Shades is necessary for unlocking one of the most absurdly well hidden secrets in the game.

-The day after you regain access to the Elevator, a black out now hits the apartment complex, rendering you incapable of... playing video games for the most part, but also shutting down the elevator again. Also everything is dark! A new area opens up for us upon this happening, and as you might guess, that's our destination if we want to restore power.

-Upon the Visitor announcing it's intent to annihilate you, Meteor Strike has its STM cost reduced to 1 and can finally be used. Note that it is actually possible to accidentally drain Sam's STM to the point where he still can't use it, so make sure you have STM restoratives on hand for that potential disaster scenario.

-There is an achievement for losing the Final True Battle just like there is an achievement for getting annihilated by the Visitor, so get used to fighting the Exalted Four to get here if you want all achievements.

-No, you do not need Rabu to use Torment Beam to win the fight lol. Should you abstain from using it, his epilogue is as thus,

"Rabu returns to the Golander Jungle with the Valmar Herb, saving the Rabus from the Curse of Stone. His children and grandchildren are overjoyed to play with him again."

User avatar


Part 24 is out! Apologies for two really long videos back-to-back, I had a very specific goal I wanted to accomplish by the end of this recording session and it got stalled out a bit by something I didn't realize was a timed event. Regardless, we resolve the Black Out issue and now have near full and unrestricted access to the apartment complex! We're actually closing in on a couple legitimate endings now that I can get around with the Earth and Mars discs in my inventory, but we'll have a couple videos to go before we're ready for those. That said, there's just one more Cursed offering to collect, and with our new ally in tow, we may have the fire power to persevere towards the ending related to those...

Extra Notes

-Resolving Roaches character quest is as simple as recruiting them and talking to them each day. It's up to you what's the best reward between permanent multi-roaches, the crown or the sash, but I think the sash sounds the most fun so I went with that.

-Even on Cursed mode, the Olm is a pretty underwhelming foe, so I wouldn't be overly concerned about them.

-Darryl, on the other hand, is BRUTAL. Playing Hide 'n Seek with him is definitely not worth the reward as the weapon he gives is quite weak and he utterly brutalizes your team while you're playing. If Joel didn't have the generous HP we've developed for him, we would have been cooked. Either take him down quickly or just try to get around him to grab the Iris Key as best you can.

-The Iris Key is actually not a one-of-a-kind item. There are several places we can use it, though some are smarter ideas to use it at than others. Using it on a "wrong" door can limit your exploration options considerably unless you're going for a particular ending.

-Fortunately none of the Wiring enemies are terribly threatening, and Joel's Teethstorm now has enough HP backing it that we can fire it off and instantly end most random encounters even if he isn't quite at full. There are some enemies that are easy enough and have enough HP to be worth our time to still devour, but it's not a priority anymore.

-Jeanne gets one more scene after you return her laundry now! Glad to see she's doing well. Sadly this is the last major scene Jeanne gets, though I believe Lyle has some dialogue with her. I'll have to to check that out next time!

-Marvin's final mutation comes through at this point, but unfortunately as I found out, you can only fight him early in the morning. This scuttled my plans for a bit, but we did have plenty of things to pass the time until the next day.

-Not much to say on the Garbage Worm, but it wasn't until I started doing Teethstorm spam that I ever found out the Janitor tongue can actually be killed.

-After running between Jasper and Beryl enough times, you can eventually pump Jasper on information about Sybil and obtain the key to Apartment 12. There are two endings related to what you discover in that apartment, and it'll be a major destination for us in due time.

-It is definitely a good idea to bring Fire damage and Acid flasks to the Typewrither battle, as he has loads of HP on Cursed mode and you'd do well to eke out every source of DoT you can get.

-Defeating the High Danger Shades for each floor removes them from the game permanently, making travel at high danger values much safer going forward.

-Rampage is an incredibly potent skill for Leigh, doing quite well against Crush weak enemies and good enough against things that aren't. If you don't need her to set up Bleed for you, it's a good spammable option for her as a beatstick.

-Angel's Bat giving a good general stat boost makes it worth hauling around without actually using it just for that. Be careful with it, because it can break like any other weapon and it reverts to a normal Metal Bat with no way to repair it once it does.

-Damn, I actually feel sorry for Dan. Never saw that coming!

-Clint and Madison do not need to be left alive for the Teeth Dungeon, but getting them to this point causes them to drop powerful Teeth weapons alongside what you already find there. Joel also has mutations should you fail to recruit him, here's what he looks like,

ImageImage

He drops the Toothy Whip if you kill him in his final form.

-The Teeth Guns are the main reward for this dungeon, being decently powerful firearms that reload with HP instead of bullets. We have plenty of options to replenish HP at this point, so these are effectively infinite use since guns cannot break. Definitely pick up at least the Teeth Revolver if you're not confident you can defeat Baby Teeth.

-We could have blasted down Baby Teeth much faster, but the fight gets a little buggy if you defeat her too quickly. Not in a way that makes it unwinnable, it just renders the battle field as a black screen and you must keep attacking until the remaining appendages are defeated.

-If you did not remind Ben of himself, Baby Teeth will instead die after taking enough punishment.

-Mazes & Wizards is a pretty involved side scenario, with every party member having a role they can play in the session and several branches it can follow if you have the right allies or pick the right starting options for Sam. Once we finish our own game with Lyle, I'll link a video that covers all possible campaigns. You can only play one session per day, and it's available between 17:00 and Midnight.

-If you've been taking care of your plant, Hellen's quest will begin. She does not need to be a certain level for this, she can initiate without having been used at all like has been the case thus far in this iteration of the LP. Just go with her to the back room of the overgrown apartment and water her plant for the next 4 days. If you forget though...

-The Invulnerability Syringe can be put to use in a number of places, but the best place to use it is for the battle with the Secret party member.

-The Spider is hands down the most most well hidden and complicated to discover secret in the game. You must check the door under the stairs that only appears if Sam is alone after having killed all 5 of the High Danger Shades. You only get one chance to check the door, and if you don't open it it will disappear permanently. Then when conversing with The Spider, you must do your best to have Sam act cowardly and timid. If you defeat The Spider in the battle that ensues, he will be impressed by Sam's duality and join permanently! Like Spine, The Spider is a secret party member with no achievement tied to him, unlike Spine his joining is permanent. He is incredibly powerful in spite of being unable to use most equipment, as his Pain and Black Hole skills just flatly hit the enemy for a third of their current HP each time they are used. We'll definitely have him along for the many difficult boss fights ahead.

-If you're curious what the Shade I was trying to avoid under the stairs was, that would be the Crawling Shade,

Image

This guy attacks 4 times per turn, finishing each turn with Dark Knives which is a Shadow attack that hits three times. He only has 320 HP, so he can be defeated with 2 Fire bombs, but it is unwise to engage him with a solo Sam, so it's in your best interest to just avoid him altogether like I did. If you do get caught out by him, probability does favor chucking the Fire Bombs, so go for that and hope for the best if you have them. Attempt to run otherwise.

User avatar


Part 25 is out! We've entered the end game and are poised to get all the new major endings of the game. We'll be starting with one we've been working towards since the start, the ultimate result of collecting the Cursed offerings! We can't just roll into that one though, so we take the opportunity to clear out the rest of Floor 2 to get some power and resources. Once that's done, we finally get an answer to one of our dangling questions: Just who or what is the Shadow? Well, you should have realized by now.

Extra Notes

-Sadly, for all the threads that have proper resolutions now, there are still a couple of loose ends introduced into the game. Currently, there is no resolution to Charlie's mutation once you kill him. Not even any EXP, bizarrely.

-The Saturn disc has one specific use now! We'll be getting to that soon enough, but be sure to grab it if you want to get the new good ending! And the new bad ending that we're not seeing right now.

-It is possible to clear Summer's apartment under the time limit, though it is quite tight on Cursed mode with only 3 minutes given per entry to the apartment. There isn't much time to stop and read the text if you're trying to avoid Drowning.

-In addition to letting us scoop up some EXP for The Spider, there's a lot of good resources in Summer's apartment, so be sure to scour it! I believe this is the only place you can find the specialty crafting items instead of having to tediously craft up mushrooms.

-Drowning is near completely immune to DoT effects, with Painful Stab being the only one I know offhand that still works. You need to have big raw damage on your side to have a hope at winning this fight before it suffocates you. If you don't have Joel or The Spider, other good options are the Special Sub Machine Gun and the Silver Magnum, spam the multi-shot skills with them and have someone chuck out healing sprays when the party hits low HP. Things with Hack n Slash and Lyle Kicks are also good options.

-The cutscene for defeating Lethargy bugs out a little if you kill her too quickly, though it's not as weird as it is with Baby Teeth. Summer's dialogue just stays a black screen if you win the fight before she pops out.

-Of the Glitched Ailments, Glitch Panic is the most abusable. If you can get it onto Audrey, she'll have a source of infinite party healing with Refreshments and infinite STM heals with Hot Drinks. Dan can do the former also, but you do need to build up his viewers for more reasonable healing.

-The most important recipe to know is Mushroom+Vinegar>Pale Fluid+Klysox>Reagent+Tonic=Healing Spray. As tedious as it is, it's a good idea to craft as many of these as you can for every major ending scenario. Glad those Mushrooms we've collected are worth something now!

-Crimson Scourge is in the front running for hardest fight in the game. He obliterates your health with Bleed and high damage attacks, and fuels his own HP by syphoning off your bleed status. Frankly, you should get Nitro Boost up with Sam and then let him and whoever your 4th party member is die. The less Bleed across your team, the less the Scourge is able to heal himself at the end of the turn. This is one of the few fights to hard check you for having a full party. Thankfully, the rest of the cursed Astronomers are much more straightforward to take down.

-It should go without saying, but The Dream Eater only joins you if Aster was in your party when entering the Roof.

-The Mask ending has variable bits of text in it depending on what you've done with the Shadow up to this point. The ending plays out the same once you get to the part about the Rose, since you do need to have the Rose to get all the Cursed offerings. Contrary to what I thought, you don't actually need to recruit The Shadow to get this ending. There's also different text depending on your friendship with him when you see him on the Roof, though since you need to get the Rose to get this ending, I'm not really sure how you get the lowest friendship variant of the dialogue.

User avatar


Part 26 is out! With all that nonsense with The Shadow behind us, we can move onto other dangling plot threads that we have yet to properly address. The big one is of course, the key Jasper gave us. It's time to explore Apartment 12 and get some answers on the astronomer's Sybil.

Extra Notes

-The stalker that appears if you forget to water Hellen's plant and fail her quest is a pretty obvious send up to the primary antagonist of the first two Clock Tower games, Scissor Man! The snipping of shears was the main tell to let you know he just entered the room you're in, much in the same way it informs you of the Stalker's presence in this game.

-Hellen can appear in a variety of location once hostile, mainly the hallways of the different floors of the apartment complex but also within the stairwell and the basement parking garage. They're a pretty nasty encounter if you're careless enough to spawn them in the early game, though given the conditions involved it's not really realistic to have a chance to see them until about day 7, with Day 5 probably being the absolute earliest you could potentially encounter them.

-Even this late in the game, the Cash Sock skill from Honko's Grand Journey is not a worthwhile use of your money, but completing the game unlocks another secret we'll be getting to next time. It's only an investment of 8 in-game hours, so it's pretty easy to fit into any playthrough that's looking to be as completionist as possible.

-Pierre's final exposure therapy session is not a battle you need to win, as obviously he doesn't want to hurt you. Being defeated by Pierre simply means that you don't get the clown wig and nose after. He's not a particularly tough opponent and since he doesn't first appear until Day 4 with this quest continuing at a random point later on, you're not at risk of getting into this fight at a point you couldn't handle it.

-Sophie has gained a pretty expansive new set of mechanics regarding her Slingshot, which are all the more useful if you purchase the Super Slingshot for her. If you have under 15 marbles total, Sophie will find 4 extra marbles each time a new day begins. Sophie now also has Special Marbles, with her finding random powerful Marbles to fire from her Slingshot whenever the day ends and occasionally after battles. On Cursed mode, Sophie will find 2 Special Marbles every night and can find one after a battle every 4 in-game hours. Naturally, this is most useful if you recruit her early in a playthrough, but at this point it's not at all helpful. The wiki has a list of every Special Marble Sophie can find as well as the odds at which she'll actually get them. Most often you'll just be getting Steel Marbles, but there are some very powerful shots Sophie can keep in her back pocket for tough fights should you be lucky enough to get them.

-Returning Sophie to Harriet is an extreme boon since we're always desperate for healing items on Cursed mode. On a more personal level, I also feel no guilt about robbing Harriet blind now, so we clean out her apartment! The extra cloth is very nice to have, and a huge bag of Marbles has been added to the apartment to help Sophie keep contributing. Sophie will leave the apartment under the guise of helping Sam clean his home should you recruit her here, with some additional dialogue whenever you leave and enter Harriet's apartment with her in tow.

-The All-Seeing 8-Ball is a small bit of cross promotion with another indie RPG, Kingdoms of the Dump. I haven't played this game so I'm not sure what the context for this is, but regardless the 8-Ball is a very rare item that has a low chance of appearing in ANY trash can you search. It can be interesting should you find this early in a playthrough. It can only be used in combat, and can be used to grant one of six wishes before being removed from your inventory. The Wiki has more details on this, though probably the most persistently useful effect is wishing for the Junk Sword since that's a fairly powerful weapon. Meanwhile, the Wealth Wish should be avoided unless you're going all in on Cash Sock or something due to its fairly pronounced negative drawback. The other effects are specific to the battle you use them in, so probably not super worthwhile except for maybe one or two of the bonus bosses.

-I explain this pretty poorly in the video, so to go over it a bit more cleanly: Cooking in Cursed is currently bugged in a way that benefits the player quite nicely. Each Difficulty is supposed to have a unique multiplier applied to the final healing from Cooked meals, obviously the lower difficulties making meals more potent while they should be less effective on Cursed mode. Due to a coding error, however, Cursed mode accidentally applies both its own multiplier and the multiplier for Survivor mode, resulting in the HP and Stamina restored by meals to be way higher in Cursed mode than even Explorer mode. Given how strapped we've been for healing supplies, this is definitely a nice boon for us.

-Another cooking related bug that isn't super helpful but is really funny, the effect Cooking has on the Hunger stat is cumulative for every meal you cook e.g. if the first meal you cook restores 20 Hunger and then the next you cook restores 30, that second meal is actually restoring 50 Hunger all together. Because you'll be cooking a ton throughout any playthrough, by the end of the game a single cooked meal will restores hundreds of Hunger points, meaning starvation is completely impossible.

-I haven't really touched on this either but as the game currently works, Sam's "Social" stats have no cap on them, meaning that as long as you're diligent about managing them on the first 6 or so days, they essentially become irrelevant for the rest of the game since they simply won't drop low enough to ever cause their relevant ailments again. I suspect these stats will eventually be capped at some point.

-You need 3 Herbicides to fully explore what's available in Apartment 12, so don't be an idiot like me, double check to make sure you have that before entering.

-Helping the Spider Husk find themself results in a unique piece of equipment down the line. Of course, giving them a sense of identity and self worth is also its own reward :)

-Obsession can be a harrowing encounter if you get through Apartment 12 as early as possible, but they're basically a victory lap for us at this stage. The fact they lack most of the typical Shade resistances really doesn't help them. More than any other Shade type boss, Obsession is far and away the most consistent about bugging out the game's lighting and darkening your screen for awhile after you encounter them.

-In order to get two of the new endings in the game, you must have all the planet discs to operate the projector in Sybil's secret observatory. Finally, the previously useless Mercury, Venus and Saturn discs have a function!

-You do not need to hand the telescope pieces over to the Drooling Husk, this is just another opportunity to get a hint on what to do with them. Avoid giving them entirely if you don't want to have to kill them.

-If you know your code for the playthrough, the Crossword Tomb can be entered as soon as you reach the basement (or as soon as you get the Anime Key from Antoine on Cursed mode). That said, it is very much considered a piece of end game content, so you'd be unwise to make an attempt at it early on unless you know what you're doing and have a good team set up already. Frankie has acknowledged the method of obtaining the code and loading away the time loss, and he currently has no plans to address this trick and is fine with people using it. That said, if Morton ends up getting his recruitment retooled like Ernest did, there's a chance this exploit will get patched out since it would be easier to complete the Crosswords within a completionist run if you could get Morton more reliably, so I'm not going to assume this trick will work forever.

-Though the Crossword Tomb isn't specifically a Morton character quest, his unique value here is probably the highlight of his potential as a party member. For my purposes, I just figured I may as well bring him along for the unique dialogue.

-There is an achievement for getting Wilhelmina's bad ending, so be sure to click that option once if you're going for all of the achievements!

-Wilhelmina is quite the opponent if you don't have Morton to constantly interrupt her hexes, though like so many other bosses, DoT effects still work amazingly well against her. An amusing glitch with her on Cursed mode: all bosses are supposed to have 50% more health on Cursed mode, but the way the game does this is by boosting their HP when a fight starts and then healing back the difference. For bosses like Wilma who have enough HP that this would be over 1,000 hit points healed, the healing is capped at 999 due to an error. This means that Wilhelmina starts 3,599 HP instead of the 3,900 she's supposed to. There are several encounters that have this problem, this is just the first time we've come across a foe with this issue where I'm aware of the bug.

-Speaking of bugs! Painful Stab is actually weaker than I thought. Its DoT effect is supposed to only proc once per turn, and in fact it does but the game erroneously displays ticked damage for every action an enemy does. Originally, it did tick for every action like displayed, but this was unintended behavior and has been corrected as of the current updates. It still displaying damage being done for each action is the current bug with it, and this would explain why sometimes enemies have been surviving hits they theoretically should have been killed by if Painful Stab was draining away as much health as it seemed to be.

-Marc-Andre ended up bopping Wilma before she could fire off her final unique curse, so here's the dialogue for that if she were able to get it out,

Wilhelmina: INFINITUM EPILEPTIS CRESTUS!!! Wreathe my foe in dolorous peroxides!

[if Morton is in the party]:

Morton: Ehhh... excuse me, Kaiserin Wilhelmina. I do not mean to overstep my bounds, but the word you are looking for is paroxysms.
Wilhelmina: I... I... I...
Wilhelmina: ARRRRRRGGGGHHHHH

-Speaking of Marc-Andre, I'd encourage against ever picking him up. While it's nice when he goes in with a flurry of kicks now and again, most of the time he's just going to be throwing away your tonics and randomly stunning a party member, and he only does this more and more as he levels up.

-Wilhelmina's word-based weapons gain additional damage for their unique skills based on a character's Vocab stat, a hidden statistic that every character save for Audrey has. Morton has the highest, as expected, with 40. The next highest is Papineau, who has a Vocab of 22, and notably poor vocab characters are Hellen with a paltry 6, Joel and Roaches with 5, Sophie with 4, and perhaps unsurprisingly the near mute Rat Child with a Vocab of 0. Sam's own Vocab is dependent on how many times he has played Auntie Wilma's Crossword Challenge, the game Mutt sells. His final vocab stat is 10+2 for every session of the game he has played, even beyond the point where it is finished.

-As mentioned, Audrey lacks a Vocab stat due to being unable to use conventional weapons thus making such a stat impossible for her to use. The same logic does not apply to The Spider though, amusingly enough. As a bit of hidden flavor, The Spider has the second highest Vocab stat in the game at 24.

-Entering Apartment 35 and presenting the fixed Telescope to Sybil is the trigger necessary for 2 of the game's new endings. The first trigger simply requires making the promise to her, but the second will require us to... well, you'll see.

User avatar


Part 27 is out! We've hit up basically every major area in the game and can easily perform a Perfect Ritual at any time. Doing so is required for one of the remaining endings of the game, but the sole remaining bad ending of the game requires... a bit of betrayal. Before we get to that though, we've got several tough bonus bosses to get through, with the hardest encounters in the game saved for last!

Extra Notes

-Nestor and Rafta's sidequest has seen a couple additions as of version 2.0, though unfortunately it still renders Eugene's shop essentially dead as the inventory still doesn't refresh. Nestor's dialogue strongly implies the store is supposed to be functional now, but currently it just stays the same after he unlocks the door and resumes business. Placeholder for a future update I guess.

-We probably could have beaten the Boiler Beast much sooner than I opted to, but he'd have been a much bigger resource drain so I figured I'd just clean him up with the rest of the business in the Boiler Room. It is pretty satisfying to stomp him completely after all the harrowing encounters I've had with him.

-If you failed to collect Darryl's Iris Key during the Black Out, the Furnace's key is the only other one you can get outside of the Meat Dimension. If you did get Darryl's key, you can pretty safely ignore it then, as there is exactly one extra key you can find from the Meat Dimension that allows you to fully explore it without ever fighting the Furnace.

-The Furnace and Honko currently lack stat bonuses in Cursed mode, and I believe there's a few other enemies in a similar boat. I highly doubt this is intentional, so enjoy these fights being easier than they otherwise could be while you can.

-If you don't have The Spider and a Teethstorm optimized Joel, it is highly advisable you bring a good number of weapons with Cleave and Fire Bombs to the Honko boss battle. Letting those clones act uninterrupted can spell disaster as they will barrage you with AoE attacks, and your best option is definitely beat them down with the same before they become an issue.

-The reward for this bonus boss is excellent, 10 random Special Candies with a high chance they'll be stat boosters plus a guaranteed Nectar or Hellfire Candy. Since it's a relatively easy fight if you know what you're doing, this can result in some serious extra power for your best party members for any remaining difficult fights in the game. Sadly, we got pretty bad luck and didn't get too many HP boosters to make Teethstorm even more cracked, but I guess at this stage it's overkill anyway. Another unfortunate miss is no Ballistics boosters, which would have been nice for The Spider.

-Marc-Andre has gone from being a nuisance to just outright being detrimental to have around. Not only is he constantly throwing away my Tonics (healing the enemy with them half the time) and not doing enough damage to justify that, because he operates by creating an extra turn for himself where he's the only active character, he's been causing boss regen effects to activate twice! Definitely avoid him or throw him out if you're going for a completionist run like I am. Since the absolute havoc he causes is funny though, I am obligated to keep him around for LP entertainment value.

-Speaking of Marc-Andre making fights harder than they need to be, Comatus! Comatus is just about the most dangerous enemy in the game, with absolutely overwhelming damage and an obnoxious chance to freeze characters on every hit he lands. He also can just shrug off any DoT effect you apply to him, so you really do need good raw damage to keep pace with his high HP and his regenerative Vrksasana stance. That stupid stance getting two activations due to Marc-Andre made the fight insanely perilous considering how beaten down we were when that started to happen. The only reason we didn't suffer too many deaths is because I've been making sure everyone has some form of Max HP boost to tank the high damage Comatus is laying out.

-Be sure to inquire about his past and express interest in Yoga! The Whisperblade is not the only reward we can get from beating this guy.

-We finally properly explore the Meat Dimension, and this place is HUGE. It covers the entire apartment complex plus some of the different apartments within, and it is loaded with nasty enemies. Make no mistake, if you do not have a ridiculously overtuned party like I do, this area can chew you up and spit you out in a hurry.

-Speaking of Chewing Up, Phillipe has learned his Consume Ally skill, the most broken skill in the game for several reasons. For one, it can be used on conscious party members in spite of what the description implies. In fact it seems to always target Sam if you consume a conscious ally, though it will fail if you targeted Sam directly after he's already been consumed. Consuming an ally boosts ALL of Phillipe's stats by 60/80/100% for each ally he consumes, with the exception of his agility which is lowered at a rate of 20/40/60%. Consumed allies cannot be revived but do return after a night's rest. You might assume that Phillipe's stat bonuses go away in that case but uuhhhhhhh there actually is no condition set in the game to clear Phillipe's Consume bonuses, so you can just have him consume the entire party and then sleep that off, and you'll have a full party plus a completely cracked Phillipe running around. This is almost assuredly unintended behavior, so I won't be exploiting this, but Phillipe is hands down the strongest humanoid in the game if you choose to abuse this.

-There is another bug with Consume Ally, it's supposed to fail if you try to consume anyone past the Tier 3 stat boost, but instead it just resets you to Tier 1 and then lets you keep on consooming. Like I said, this is the most broken skill in the game in every way imaginable.

-The Giant Eyeball and the staticy TV only have their unique interactions if you have an Iris key in you inventory. Especially important to keep in mind with the Giant Eyeball since it just kills you outright if you don't have a key.

-To fully explore the Meat Dimension, you must betray and attack Sybil. Naturally, doing so removes your ability to save the game for the remainder of the playthrough, so be ready to commit to this if you do it!

User avatar


I had a wonderful vacation, but was eagerly awaiting the whole time for the chance to say Part 28 is out! And man, do we have a bombshell reveal waiting in the wings for this one! We're scooping up another new ending and our penultimate finale for this iteration of the LP, but trust me when I say this one has by far the most Earth-shattering reveal of the game in store for us. This is easily my favorite of the new endings, and probably my favorite ending of the game in general. Are you prepared? It's time for the truth.

His eyes go funny, you can't place why...

User avatar


Part 29 is out, and with that we've more or less fully completed Cursed mode! What awaits Sam on the rooftops this time around? Well watch and find out! As for the LP, where do we go from here? Hard to say honestly, the game does have a couple obviously unfinished sidequests but the main package feels more or less complete at this point. I can't imagine too much more being added, but I suppose I can be on standby for if there are any new major updates. There are a couple things I unfortunately was not able to show off due to bad luck, but I can probably post some videos from other dedicated players that cover anything I missed in the coming days. For now, let's just enjoy the fulfillment of our Promise to Sybil!

Extra Notes

-If you have the fortune to get it early enough, Octocook is pretty well worth the time investment to play as the Octostrike skill is nearly a 4x damage increase over a normal attack. Since its obtainment time is up in the air and I had already routed my way through the game independent of getting it, I just ignored it for the bulk of this LP.

-I ended up coming down to the wire on finishing the Mazes and Wizards campaign, as it's actually a 6 part session and I foolishly missed a day a few videos ago. Luckily I did keep a back up file from earlier, so we wouldn't have been left on a cliffhanger had I missed the chance to finish the campaign!

-As demonstrated earlier, once you already know the Elevator Game code, you no longer need to sacrifice Marshall in order to access the 4th floor Metro. Although I guess if you want another Elixir, go nuts then.

-The Yoga poses are a hilariously complex mechanic you can only realistically access past the point where they could potentially be of any help to you. If you're curious as to what the poses do,

Tadasana: 80% chance to counterattack when hit. -20% incoming damage. Unlocks Intermediate Poses.

Virabhadrasana: +50% Attack, +50% incoming damage.

Vrksasana: Regenerates 15% of HP every turn. Attack, Defense, Ballistics and Bullet Defense decreased by 50%. Using either this or Virabhadrasan unlocks Advanced Poses.

Urdhva Hastasana: Two actions per turn. Incoming damage is doubled.

Astavakrasana: Standard attacks hit twice. +50% accuracy and critical hit chance. -15% HP per turn.

As you can see, some pretty unique and potentially powerful buffs in spite of their drawbacks here, but what is there really to use them on now? Also as you've probably noticed, I'm not a big fan of abilities revolving around set up in this game as most battles are very short. Why spend 3 turns setting up Urdhva Hastasana when I could do the same thing to the whole party in one with Xaria's Mosh Pit? Tadasana is at least a flat upgrade over your basic abilities, so there's that.

-Kaeley allows you to cheat the Lock game twice before becoming hostile, even on Cursed mode! So consider that when making your way through the lock blocks.

-The NPC that we were supposed to see is Kevin, this guy

Image

Kevin is a piece of Nestor who gained an independent level of sentience, and is willing to cut a deal between worms and humans with Sam as the mediator. Doing his deal gets you an achievement, and he also becomes another unique item trader. Those Worm Eggs you get can be traded to him for a variety of items, at least giving you another avenue of commerce after Eugene's shop is off the table. I'm honestly not sure why he wasn't there, it's definitely been more than 3 in-game days since Nestor mutated. Maybe it needs to be exactly 3 days and he disappears if you miss the chance to talk to him? Hard to say. You can see what he sells on his wiki page here.

-As mentioned before, Mutt is supposed to have a second phase if you fight him on Day 10 or later where he begins to use the Special Offer items against you. This phase currently isn't implemented, but there is a placeholder achievement with an incomplete name that unlocks if you kill him on day where the phase should happen. Note that you can also get the achievement for buying the trophy if you just kill Mutt and hoist it off the counter. This late in the game, most of the items are not really that helpful anymore.

-To be completely honest, I think the Chaos Quartet is a harder fight than the Exalted Four. The barrage of ailments they hit you with and the potential for insta-kills that the Exalted lacks can easily throw your intended strategy into anarchy on Cursed mode. By contrast, I was able to easily beat over the new enemies in the Exalted Four battle and quickly burst that boss down with minimal setbacks.

User avatar
Now that we've finished up Cursed mode (in as much as there is to it currently), I figured I could take some time in the coming days to makes some posts about things I was either unlucky enough to not get in my playthrough or they just otherwise slipped my mind. Starting with something that just slipped my mind,

Rank as of Version 2.0

Previously your Rank topped out at an S rank, and it was fairly easy to acquire the score necessary reach that rank. If you stuck around through the credits though, you'd have noticed that S is no longer the highest rank! In fact, 3 whole new ranks have been added, SS, SSS and the highest Rank of X. The points threshold for these ranks are 9,000, 12,000 and 15,000 respectively. S, SS and SSS all qualify for the previously existing achievement for getting an S rank, while X Rank awards you its own achievement.

As far as new point scoring opportunities go, there is a 2,000 point Ironman bonus for telling Sybil to never check in with you again. Ironman mode still gives you a couple opportunities to save, and if you abstain from using those also, you get a 4,000 point No Saving Bonus! All of the newly introduced endings award a 1,000 point bonus, including the otherwise glorified game over that is the Words of Power ending. The one exception is Promise, which gives 2,000 points, which is kind of funny because it's definitely an easier ending to get than Mask and Unity. Finally, Cursed mode applies a 3x Multiplier to your score, even greater than the 2X that Survivor mode gives! Doing anything resembling a normal playthrough with an intended end to the game essentially guarantees an X Rank on Cursed mode. That being said, it's far from necessary to play on Cursed mode if you're just looking to get an X Rank, and in fact someone uploaded a video showing how to beat the game in 20 minutes on Survivor mode and still getting the rank. The bonuses for not saving do some pretty heavy lifting here, 6,000 points from the jump means that adding in a couple other challenge bonuses essentially guarantees the rank even with a Failed Ritual ending.

As a final thing, though not specifically relating to Ranking but somewhat adjacent, note that the Challenge achievements (Loner, Gamer's Bane, Long Weekend, Miasma, Ascetic and Insomnia though not the new Cold Shoulder achievement) can no longer be cheesed out with a Failed ritual. You can only get these achievements with an ending that involves a ritual and a boss, those being the Flawed Ritual Ending, Screaming Sky, Xin-Amon, Perfect Ritual, Final True Ending (not possible for Long Weekend but doable for the rest), Mask and the Promise endings. Unity does not count for these even though it's definitely harder to get than a semi-successful ritual ending.

Now for something I was not lucky enough to cover,

New Rat Baby Skills and Sidequests

Some of the interactions with the Rat Baby and other roommates now result in the Rat Baby learning new skills! The Rat Baby can learn skills from Leigh, Hellen and Morton. If they get two interactions with said party members, they will learn (I'm just copying these from the achievement guide on Steam)

[Predator Snarl] (Learned from Leigh after 2 home interactions) "Rat gets absolutely deranged." Costs 4 STM. Buffs Rat with [Beastmode] for 4-5 turns, which reduces damage taken, increases ATK & AGI, adds 1 additional normal Attack, and gains immunity to most status effects! Loses control, but luckily Rat will only attack your enemies.

[Prowl] (Learned from Hellen after 2 home interactions) "A Stalked target is more vulnerable to attacks and critical hits." Costs 1 STM. Inflicts [Stalked] on 1 enemy, which lowers EVD & DEF, and interacts with some other Skills.

[Pounce] (Learned from Hellen after 2 home interactions) "Very high damage on Stalked target." Costs 4 STM. Deals extra damage if enemy is [Stalked].

[Quick Bandage] (Learned from Morton after 2 home interactions) "Can use Bandages in combat. Recovers 20% HP and heals bleed." Costs 1 STM. Requires & uses 1x {Bandage}.

[Quick First Aid] (Learned from Morton after 2 home interactions) "Can use First Aid Kits in combat. Recover 50% HP and revive." Costs 1 STM. Requires & uses 1x {First Aid Kit}.

Most of these are pretty useless, but the Hellen skills might actually create some value for the Rat Baby if you're using Hellen as a full time party member. Hellen's Stalk status is purged whenever she uses a skill that gets bonus damage from it (which honestly should be changed since it makes the whole mechanic too impractical but that's a different discussion) making it a pretty slow buffing strategy that generally results in a damage loss. Having the Rat Baby set stalk for Hellen can make moves like Stab a bit more practical as the Rat Baby is pretty dependent for Firearms for damage and isn't likely to accomplish much by themself if they use melee weapons. Not super practical, but it is a way to have them work in tandem. The more interesting thing with Rat Baby interactions that I wasn't fortunate enough to get is that Joel actually has a sidequest with the Rat Baby! Previously, when the Rat Baby destroyed Fuzzy, that was purely a dialogue interaction with no bearing on the game. As of the current version, this results in Fuzzy being destroyed and Joel's melee weapon slot becoming a ball of fuzz when it happens. Worry not, it's possible to save Fuzzy!


Shout outs to VintyRobot for having a video on this sidequest, I'll likely be linking their channel more than a couple times in the coming days. Watch this if you want to see the sidequest in full, but I'll do an abridged write up here if you just want the tl;dw. This is an unmarked sidequest with no achievement tied to it as of the current version of the game. There are 4 possible avenues for repairing Fuzzy once Fievel destroys him.

Option 1: Take Fuzzy to Eugene. Remember how Eugene has a sewing studio? He'll gladly fix Fuzzy for Joel if you take him to him. If Eugene fixes Fuzzy, it will take 1 day and the Repaired Fuzzy will give Joel immunity to Panic, Rage and Confusion. Panic and Confusion are relatively common ailments that do effectively silence Joel, preventing Teethstorm, so there's some light merit to this. Not my preferred bonus though, and there are other ways to get immunities to these ailments.

Option 2: Eugene taken over by Nestor? Well, Nestor can also "repair" Fuzzy, taking a day to shit out Worm Fuzzy for you. This is actually not that bad though, as it is a +3 to all of Joel's main stats along with +20 HP and +10 STM. A global boost to a powerful character like Joel is certainly something I wouldn't turn my nose up at!

Option 3: Eugene and Nestor dead? Well Sam can take the sewing machine for a whirl in Eugene's studio, immediately giving you access to Mangled Fuzzy. This is a +6 bonus to Joel's Defense and Bullet Defense stats. Not terrible, but probably the least of the upgrades since Joel already has great defenses and extra defense is completely unnecessary if you built up his HP like I did.

Option 4: Oof, this one's complicated. This requires having Xaria and Monty recruited. If you've gotten the event where Xaria kicks the Rat Baby, you can force her to apologize provided the Rat Baby has gained the ability to talk. Alternatively, the Rat Baby themselves can get an apology after a couple of events. Once this happens, a future (also random event) will have the Rat Baby ask Xaria to fix Fuzzy for Joel since they feel bad about it. If you manage to get Xaria to do the repair, you get Renegade Fuzzy, which is a +10 attack power bonus for Joel! This is a pretty significant boost to Joel's non-Teethstorm options, but the amount of random events involved in getting it (the bare minimum is 4 if you force Xaria to apologize) means it's not very likely you'll get this without going very far out of your way.

It's a pretty cool sidequest that's unfortunately hamstrung by the randomness tied to it, especially if you want Renegade Fuzzy. While the Xaria events can happen off of Meal Time interactions, getting Fuzzy destroyed is strictly a Rat Baby event, and there are a number of mechanically useless interactions like with Dan, Papineau and Audrey cluttering up that pool, making it very unlikely you'll ever see this if you recruit too many characters. It's not surprising I wasn't able to get this in a Promise ending playthrough where I needed to recruit everyone.

User avatar
Shorter post for today, just highlighting something that I didn't feel was super necessary for me to record in full: Mazes & Wizards!


Youtuber CrankyTemplar did me and everyone else a service, and recorded a video of the Mazes & Wizards campaign that runs it with every possible character. Every single party member in the game (Save for Spine for obvious reasons) can play a character in the campaign, opening up choices for you along the way as well as everyone just having their own amusing color commentary about the campaign. The core campaign is pretty similar regardless of your party config though, so I didn't really feel like running this with every possible combination on my own time. There are also a handful of combined interactions between certain party members, though these are pretty rare.

For a little mechanical discussion, Spine may not be able to participate in the tabletop campaign, but due to a bug it is actually possible to rescue Spine from the Meat Dimension. As we saw in the LP, she is supposed to leave your party instantly if you step through any exit out of the Meat Dimension. The check for this, however, is missing from one specific exit/entrance: the one in Summer's apartment. Spine will stay in your party if you run her out to that one after opening it. Now Spine is pretty bad, so it's not super useful but if you wanted to have her in your final team for the fun of it, it's something you can do currently. Frankie has acknowledged this bug and has confirmed it will be removed come the next patch, so if you're playing this at home, enjoy it while it still exists!

User avatar
Another video plug today, this time regarding endings we've already seen!


Some of the endings in the game have had their art assets touched up or replaced since we've previously looked at them, so I figured it'd be worth highlighting that somehow. The Perfect Ritual endings in particular have had some cool art added. This video also rolls in some variations for the endings I didn't really feel like showing off, so scrub on through if you'd like to see what happens if Rabu Rabu isn't cursed to damnation for all eternity or if Joel doesn't realize his brother is still alive.

User avatar
I was distracted this week and couldn't cover anymore loose ends but now I'm ready to throw some miscellaneous content back into the thread!

Look Outside has a lot of unique game overs, many of which give Achievements through Steam. I covered most, but not all, of these throughout the LP so I figured I should spotlight the ones I missed! I'll be posting timestamped links to prevent this post from being overloaded with video boxes.

One that I've mentioned but was never in a position to highlight was getting eaten by Joel. You're not super liable to hit this one, but if Sam is at low HP or already knocked out, you'd do well to avoid hugging Joel. It's not necessary to hug Joel in order to recruit him provided you've been honest up to that point, so avoiding the hug isn't the end of the world.

https://youtu.be/CJOazV0HhCg?t=262

One can only imagine the psychological damage this would inflict on Joel. This does not have a Steam achievement tied to it.

There's a handful of game overs you can get from meal events in the apartment. One of the more horrifying ones is Sam getting inspired by the Wounded Neighbor to cut his own belly open. This can go two different ways, the obvious way or Sam does indeed have an eyeball within his gut.

https://youtu.be/CJOazV0HhCg?t=124

On a more humorous note, it's possible for Monty to accidentally burn down the apartment building during dinner time by lighting napkins on fire if you don't stop him.

https://youtu.be/CJOazV0HhCg?t=1110

Moving onto a death that DOES have an achievement tied to it, letting the Rat King bathe you in his Ichor and then losing the fight produces a unique game over.

https://youtu.be/CJOazV0HhCg?t=1215

If you are foolish enough to put Toxic Fred's hat on and then staunchly refuse to help him, it goes about as well as you'd expect.

https://youtu.be/CJOazV0HhCg?t=1470

Losing to Marvin produces a unique game over where you are digested. Grody.

https://youtu.be/CJOazV0HhCg?t=1635

Moving back to one that has an achievement, there is actually game over text for staying in the eye room too long as of the current update. Previously this game over had nothing to it, you just died inexplicably.

https://youtu.be/CJOazV0HhCg?t=1677

As you'd probably expect, the 4th floor metro can periodically have a train run on through it. We weren't lucky enough to see it in my run since it just appears at completely random intervals, but you can indeed be run down by the train, similar to the bus.

https://youtu.be/CJOazV0HhCg?t=1808

Though there's no unique text for these situations, there are achievements for dying to Drowning as well as losing to The Visitor on the True Final Ending route, so keep that in mind if you want to Perfect the game!

That's about it for game overs, so now just for some miscellaneous trivia. Remember this guy?

Image

When fighting the Crawling Hand, he states that you "cannot get out". Certainly not something you'd want to do anyway given the state of the world and how just looking outside is a recipe for mutation. This is actually a bit of artifact text, because the Crawling Hand was originally the final boss of the original Game Jam version of Look Outside, where escaping the apartment building was the main objective. As the story for the game developed, the idea of escaping the apartment was dropped and the building on the whole was fleshed out more to better serve as a central locale for the game. One can only imagine how the narrative would have originally developed if you were to move to different building throughout the game. I almost kind of wonder if the 4th floor metro is a remnant from this concept.

And for something that's kind of funny but only tangentially related to the game itself, someone on Steam REALLY hates the 2.0 update to the game, and has made a guide on how to downpatch to previous versions.

https://steamcommunity.com/sharedfiles/ ... 3641772784

Their reasoning is kind of interesting even if I don't agree with it. In their opinion, a cosmic horror story is best served by ambiguity and they found the definite answers provided by the new endings to undercut the horror of the unknown. Now I think this is kind of silly since a lot of the ambiguity in the old versions wasn't a deliberate attempt to stimulate a player's imagination and just existed because the game was released largely unfinished, but I do think there is an interesting "could have been" scenario there where the game grew in a way where the player was deliberately left in the dark on certain concepts and plot threads. If nothing else, I think there's pretty cool historical value in seeing older versions of games on an update cycle, so I appreciate guides like this existing for satiating that kind of curiosity.

Post Reply