All of them, silly!
The Game(s)

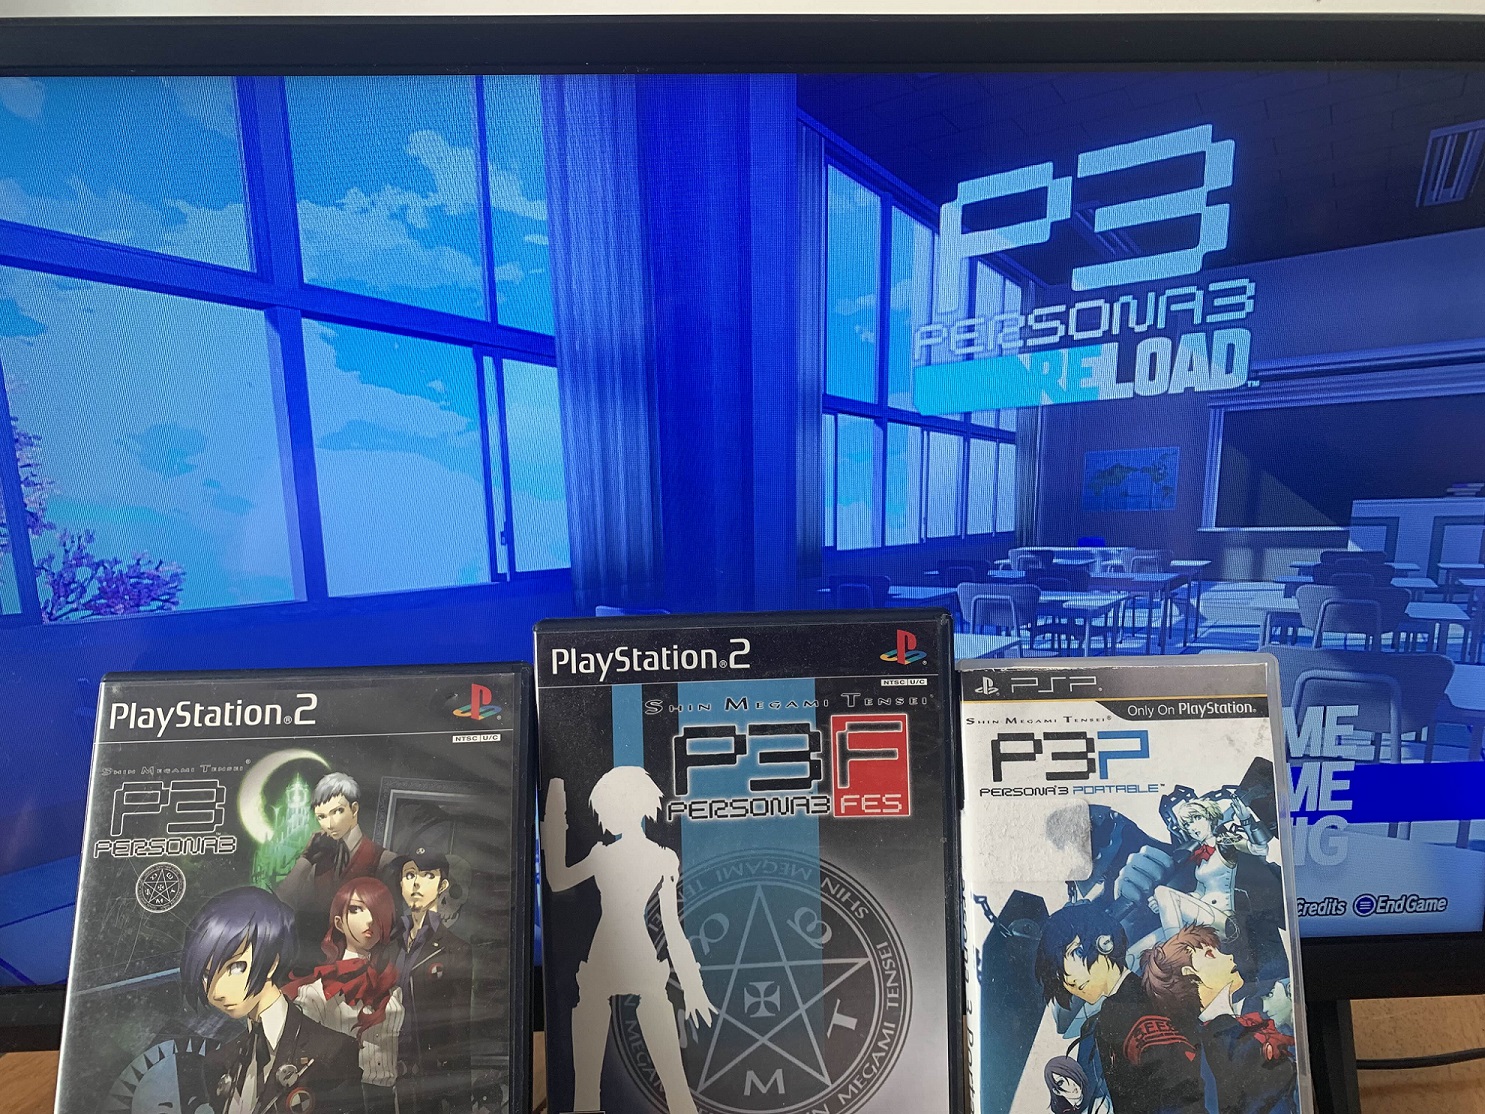
Shin Megami Tensei: Persona 3, first released for the PS2 in 2006 and localized to the US in 2007, is functionally a full on reboot to the Persona sub-series of Shin Megami Tensei. While still retaining some of the urban fantasy elements of the Persona series to this point, Persona 3 introduces and heavily focuses on a social simulation aspect to the series core gameplay. This focus redefined how the Persona series compared to the mainline SMT series, with this particular sub-series going on to absolutely dominate public perception of the SMT franchise as a whole and influencing every game in the series overall going forward. It's not uncommon to see people jokingly and sincerely refer to Persona 3 as the "first game in the Persona series" despite the multiple levels of fallacy loaded into that statement. While there had been games that combined traditional RPG gameplay with social simulators before, I think you'd be hard pressed to find a game more influential on that blend than Persona 3. While Persona 4, the thematic sequel (and technical story follow-up) to this game, definitely blew down the doors and gave the sub-series its mainstream popularity, with the benefit of hindsight I think it's safe to say that games like Fire Emblem Three Houses and Trails of Cold Steel wouldn't exist as they are if Persona 3 wasn't the trailblazer that it was. That all being said, this game is going to be of minor focus in this LP. I'll be covering this game in a series of livestreams where I'll be getting stupidly drunk as a self-imposed challenge, but its actual presence in the videos I plan to make will be fairly minimal. The reason for that is,

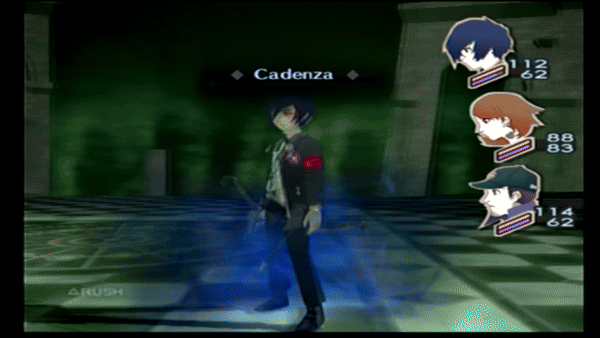
Shin Megami Tensei: Persona 3 FES, released in 2007 and localized in 2008 for the PS2, is the first in a long line of improved re-releases that Atlus would become famous for in the coming years. Persona 3 FES adds a number of new story elements to Persona 3, as well as retooling the social simulator aspect on the whole and making minor changes/additions to the traditional RPG gameplay. Most notable, it adds a second campaign to the game dubbed "The Answer", which is a follow up to the main story of Persona 3 which has since been dubbed "The Journey". Unusually compared to future updated re-releases, FES manages to be somewhat harder compared to vanilla Persona 3 with its core RPG gameplay due to the addition of a brutal hard mode, as well as The Answer being designed to match up with this new Hard mode. If you're curious what the hell "FES" means, it's not an acronym but rather a shortening of the English word "Festival". I'm sure it made sense at the time. Anyway, Persona 3 FES is the definitive version of Persona 3 on the PS2 and my personal favorite version of the game. While it still retains some of the jank that Persona 3 vanilla had in its efforts to be "immersive", the frictional elements of the game make it an RPG unlike any other I've ever played, and it's the version of the game that made me truly appreciate Persona 3. We'll be seeing a lot of the core RPG gameplay of this version of the game, though the social elements will take a slight backseat. Rest assured, I will be showing off how the social elements of this particular version of the game compare to its most modern version, though those will be relegated to their own side videos. The reason for that is,

Shin Megami Tensei: Persona 3 Portable was released in 2009 and localized in 2010 (translation and localization take a lot of work people!) for the PSP, straddles the line between "Updated Re-Release" and "stripped down handheld port". While the story and social additions of FES were retained, The Answer was kicked to the curb. In its place, a new story line revolving around a female main character was added, bringing in new Social Links and reworked dialogue across the whole game to accommodate the feminine perspective. This is the first version of Persona 3 I had ever played, and my introduction to this SMT sub-series as a whole. Persona 3 Portable features its own retools to the mechanics of Persona 3, namely swapping most of them out with mechanics from Persona 4, while sanding off most of the player unfriendly mechanics from the PS2 versions of Persona 3. Additionally, many aspects presentation had to be removed to accommodate the limited amounts of available space on a PSP UMD. Persona 3 Portable plays much more like a Visual Novel or traditional point 'n click adventure for its social aspects, as well as completely lacking full motion cutscenes of any variety. I have a lot of negative things to say about this version of the game, as I think it's the worst version of Persona 3. though it's still very nostalgic for me and I want you to know that I still love it in spite of the criticisms I have. We will be seeing a lot of the social aspects of this game since we will be using the Female Main Character for it, which results in a massive number of changes to the social elements. We'll likely be seeing a lot of mechanical differences between this game and other versions early on, but less and less so as the games press on and we have more powerful options available to us. The differences at that point become kind of irrelevant, save for one critical problem moment. Now the bulk of this LP will take place in and focus on...

Persona 3 Reload (The SMT title has been dropped as Persona has long since become the cash cow franchise at this point) is the most modern version of Persona 3, released in all regions on 2/2/2024. Persona 3 Reload features heavily polished and retooled mechanics, largely basing itself on Persona 5 with its own unique bits of flair thrown in, and a fairly faithful recreation of the script from the Male story of Persona 3 et. all released up until this point. It is the most accessible and newbie friendly version of Persona 3, and I think it's a great way for new players to experience this story. Videos in this LP will likely begin and end in Persona 3 Reload. While I still prefer FES due to its unique elements compared to future Persona titles, I think this is a wonderful way to experience Persona 3 if you've ever had an interest in doing so. I'm not going to dwell too long on describing this game, since I feel like my thought and feelings on it will shine through in the videos. Speaking of!
The Let's Play
I will be doing complete playthroughs of all the above mentioned games, editing them together in a way that I feel is interesting. We'll be covering every social link and defeating all bonus challenges presented. I will also be covering The Answer in FES and its updated re-release as DLC for Persona 3 Reload, which at the time of this OP is launching in September of 2024.
^Me by the end of this LP
This is going to be a massive endeavor for sure, but I've truly come to love and appreciate this game in all its forms, and I want to share that with people! It'll be a lot of work, and not many will see it, but I hope people will come to understand why Persona 3 is pretty great and why it means a lot to me when they watch this LP. I have limited time to work on this project and videos will likely come on a weekly basis, but I am committed and I plan to see this through. With all that said,
The Videos
Part 1, Like A Rolling Stone
Part 2, Bullet With Butterfly Wings
Part 3, Excursions
Part 4, Dirty Harry
Part 5, Midnight Marauders Tour Guide
Part 6, Hot For Teacher
Part 7, Left Hand Suzuki Method
Part 8, Stay Home
Part 9, Iron Man
Part 10, Digital Love
Part 11, Baby Driver
Part 12, Can I Kick It?
Part 13, Burning Down The House
Part 14, Meetings With Remarkable Men
Part 15, Chalk Tablet Towers
Part 16, Longview
Part 17, Gloria: In Excelsis Deo
Part 18, Time To Rock Our Shit
Part 19, On The Run
Part 20, Whatta Man
Part 21, Buggin' Out
Part 22, Cigarette Daydreams
Part 23, One Tin Soldier
Part 24, Blood Sugar Sex Magik
Part 25, Blame
Part 26, Montego Slay
Part 27, Can't Get It out of My Head
Part 28, Homecoming
Part 29, Run Run Run
Part 30, Rock and Roll, Hoochie Koo
Part 31, Go Robot
Part 32, Hangar 18
Part 33, Summer in The City
Part 34, Oh! Sweet Nuthin'
Part 35, Gone To The Movies
Part 36, Doggy Dogg World
Part 37, Kids With Guns
Part 38, Yehaw Partystyles
Part 39, Gouge Away
Part 40, Like Eating Glass
Part 41, Dreams
Part 42, Man On The Moon
Part 43, The Boys Are Back in Town
Part 44, Spaghetti Junction
Part 45, The Diamond Sea
Part 46, Tombstone Blues
Part 47, Mr. Grieves
Part 48, Burnout
Part 49, Get Lucky
Part 50, Youth Explosion
Part 51, November Has Come
Part 52, Bridge Over Troubled Water
Part 53, Kool Thing
Supplemental Information
Character: Protagonist (All Versions)
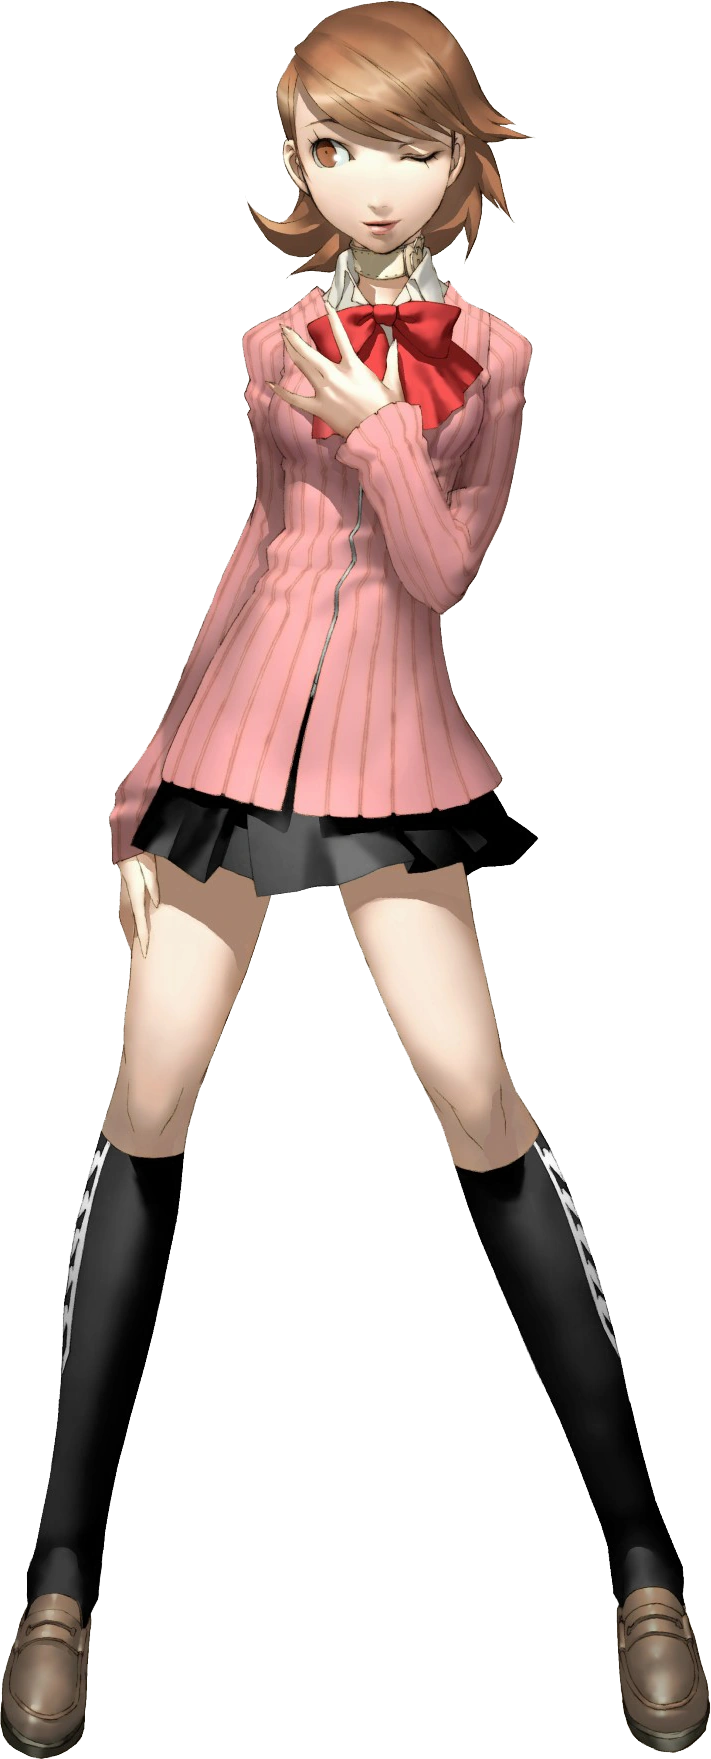
Character: Yukari Takeba FES/Portable
Character: Yukari Takeba Reload
Character: Junpei Iori FES/Portable
Character: Junpei Iori Reload
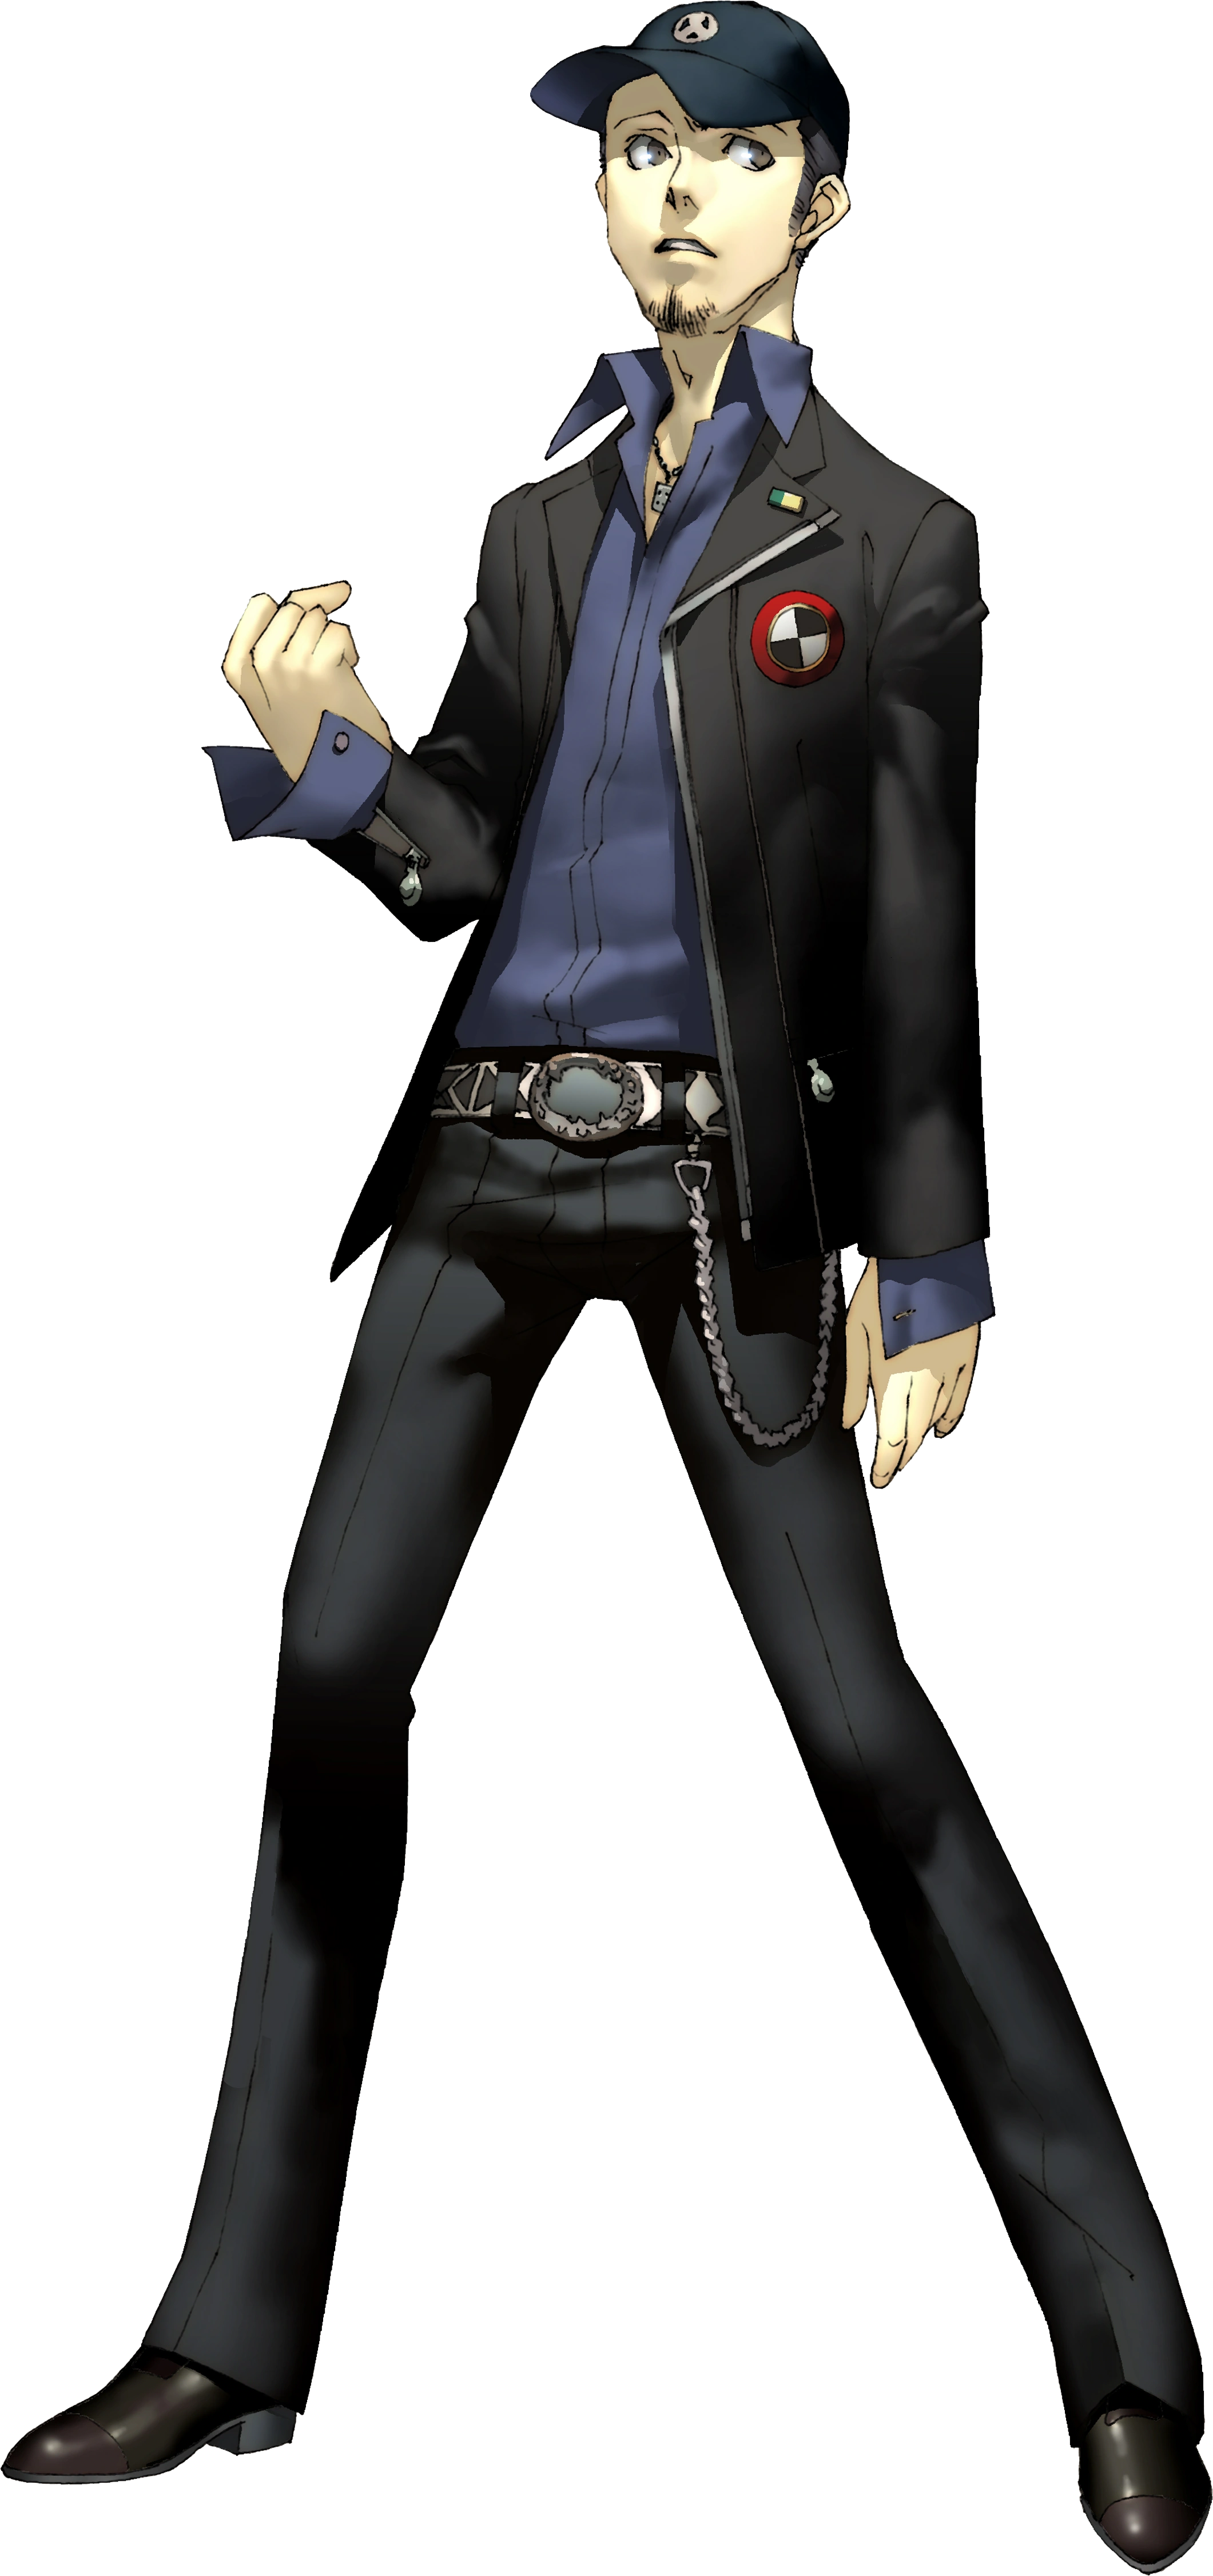
Character: Akihiko Sanada FES/Portable
Character: Akihiko Sanada Reload
Character: Fuuka Yamagishi (All Versions)
Character: Mitsuru Kirijo FES/Portable
Character: Mitsuru Kirijo Reload
Character: Aigis FES/Portable
Character: Aigis Reload
Character: Koromaru FES/Portable
Character: Koromaru Reload
Character: Ken Amada FES/Portable
Character: Ken Amada Reload
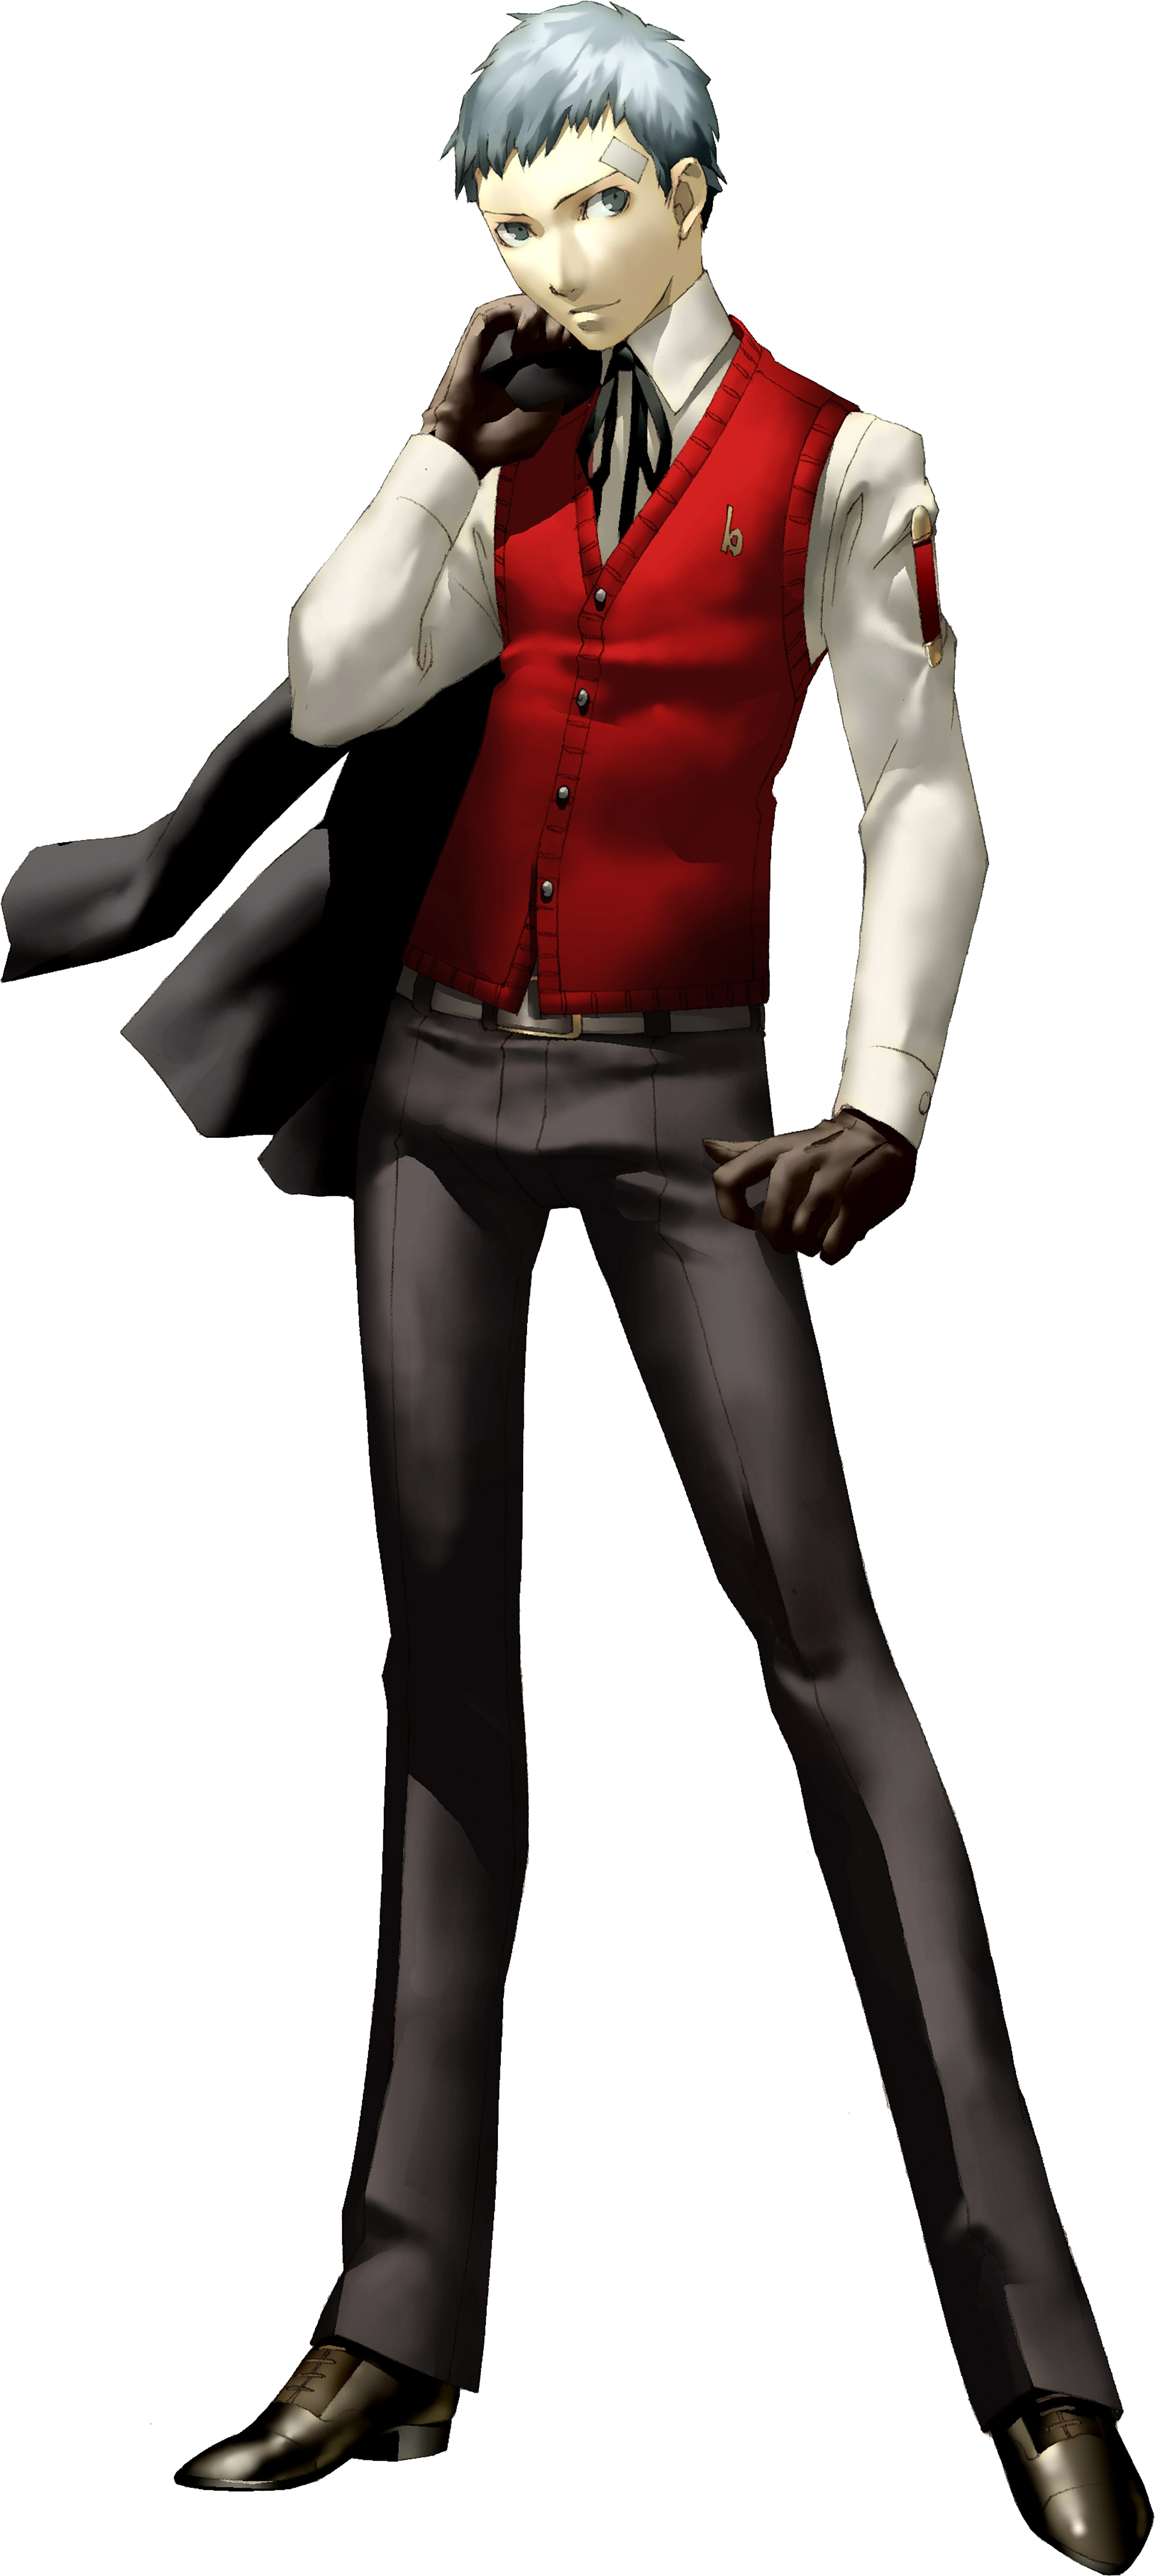
Character: Shinjiro Aragaki FES/Portable
Character: Shinjiro Aragaki Reload
Mechanics: Stats
Mechanics: Social Stats and Scheduling
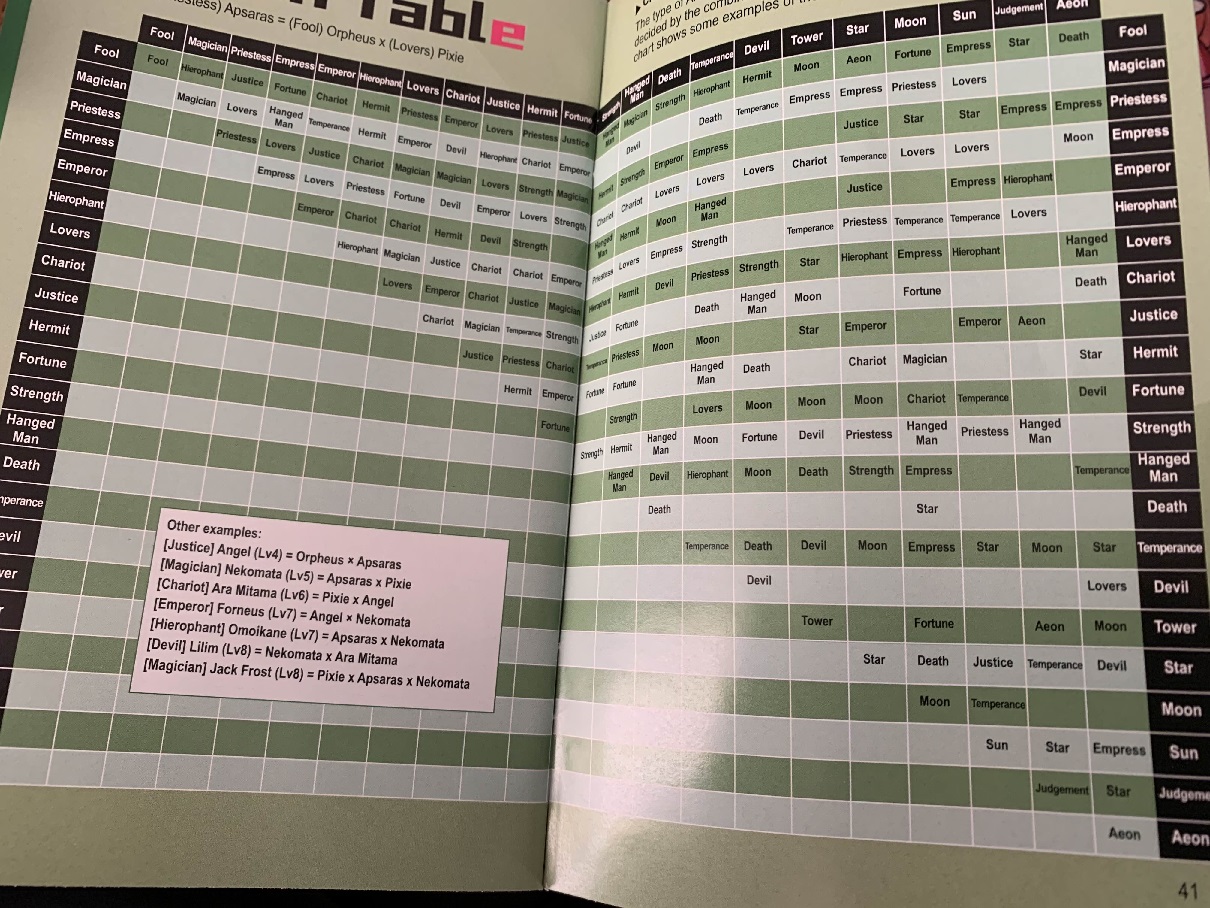
Mechanics: Fusion
Mechanics: Status Ailments
Mechanics: The Antique Store
Mechanics: Item-Bearing Personae
Mechanics: Social Links
Mechanics: Social Links Part 2
Mechanics: Social Links Part 3
Supplemental Videos
FES/Portable Social Links 4/23-4/26
FES/Portable Social Links 4/27-4/30
FES/Portable Social Links 5/1-5/7
FES/Portable Social Links 5/10-5/16
FES/Portable Social Links 5/17-5/27
FES/Portable Social Links 5/28-6/4
FES/Portable Social Links 6/5-6/13
FES/Portable Social Links 6/14-6/21
FES/Portable Social Links 6/22-6/28
FES/Portable Social Links 6/29-7/6
FES/Portable Social Links 7/8-7/19
FES/Portable Social Links 7/23-7/31
FES/Portable Social Links 8/1-8/5
FES/Portable Social Links 8/7-8/9
Summer Festival Dates + FES/Portable Social Links 8/15-8/21
FES/Portable Social Links 8/22-9/1
FES/Portable Social Links 9/3-9/10
FES/Portable Social Links 9/11-9/24
FES/Portable Social Links 9/25-10/3
FES/Portable Social Links 10/6-10/19
FES/Portable Social Links 10/20-10/26
FES/Portable Social Links 10/27-11/2
All Thebel Bosses + The High Priestess
All Arqa Bosses + Emperor, Empress, Hierophant & Lovers
All Yabbashah Bosses + Chariot, Justice & Hermit
Persona 3 Vanilla Streams
Stream #1: My Life is a God Damn Mess
Stream #2, Ghost Stories
Stream #3: Love Will Tear Us Apart
Stream #4: Ghost in The Shell
Stream #5: It's Electric!
Stream #6: Time Takes Its Crazy Toll
Live Stream Playlist
Let's Play Persona 3 Playlist
Like SMT? Boy howdy, do I have you covered because I am a huge fan of this series! I have done complete playthroughs of Shin Megami Tensei:Nocturne, Digital Devil Saga 1 and Digital Devil Saga 2 with all sidequests and bonus bosses cleared, as well as a a 100% LP of Shin Megami Tensei: Devil Survivor Overclocked! If you're hungry for more as this series updates, definitely check these out!
"You are the music while the music lasts."
- T. S. Eliot