7th Dragon 2020 ~ Sympathy for Chisa Inomiko (an LP EOV Anniversary Project)

Part 74: Crimson Scars || SSLP Test Poster mirror.
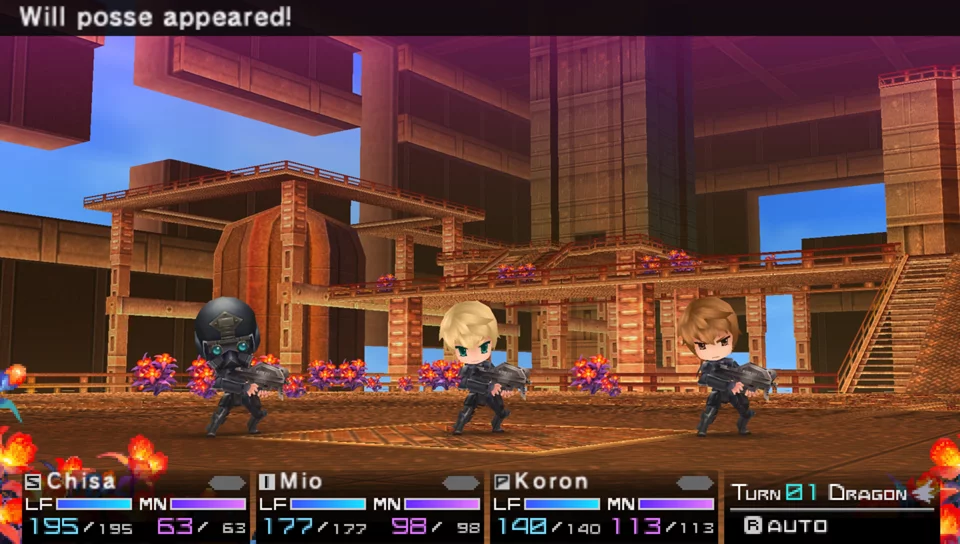
In this one, Fomalhaut provides us an opening act.

Trinitro uh. Well it has a snazzy new look at least? Yeah the inverse difficulty curve continues.


The Imperial Dragon got some statistical changes here. HP got a huge cut, though the rest of its stats got raised to compensate. Gained an aerial weakness though.
It also has a rather simplistic AI file that's been completely unchanged between games.
The Imperial Dragon got some statistical changes here. HP got a huge cut, though the rest of its stats got raised to compensate. Gained an aerial weakness though.
Trinitro's skillset is mostly the same between games. The only change was that High Speed Regeneration was changed to this skill in 2020-II.-Heat Breath: Fire-elemental Breath attack to all party members. MAT-based. 1.5x damage. Cannot miss. 75% chance to inflict Burn for 4 turns. The Burn ticks for 11 damage, multiplies ATK and MAT damage dealt by 0.9x, and multiplies ATK and MAT damage taken by 1.05x.
-Flame Bane: Fire-elemental Ranged attack to random party members. MAT-based. 0.35x damage. Hits 7 times. 25% chance to inflict Burn for 4 turns. The Burn ticks for 8 damage, multiplies ATK and MAT damage dealt by 0.9x, and multiplies ATK and MAT damage taken by 1.05x.
-Tail Blade: Non-elemental Melee attack to all party members. ATK-based. 0.75x damage. Cannot miss.
-High Speed Regeneration: Buffs the user. Restores 2% of the user's LIFE (180 LIFE) at the end of the turn for 5 turns.
-Internal Flare: Buffs the user. Multiplies ATK and MAT damage dealt by 1.25x for 4 turns. Multiplies ATK and MAT damage taken by 0.9x for 3 turns.
-Heat Charge: Telegraph skill.
Which is a pretty big nerf and only amounts to like 1.06% of its HP regenerated per turn.-Turboregeneration: Buffs the user. Restores 70 LIFE at the end of the turn for 5 turns.
It also has a rather simplistic AI file that's been completely unchanged between games.
Over all the nerfs and the lack of changes make it rather pathetic.Routine 1:
-Take 2 actions per turn.
-If self is at or below 55% LIFE, swap to routine 2.
-If counter 1 is at or above 4 and it is the first action in the turn:
--Use Tail Blade. Add 1 to counter 0. Set counter 1 to 0.
-If counter 0 is at or above 3:
--Use Flame Bane. Set counter 0 to 0. Add 1 to counter 1.
-Else:
--1/3 chance to use a Fang attack. Add 1 to counters 0 and 1.
--2/3 chance to use a Ranged attack. Add 1 to counters 0 and 1.
Routine 2:
-Take 2 actions per turn:
-If global counter 2 is at 0:
--Use High Speed Regeneration (Targets the user's side). Set global counter 2 to 10.
-If global counter 2 is at 10 and it is the second action in the turn:
--Use Heat Charge (Targets the user's side). Set global counter 2 to 20.
-If global counter 2 is at 20:
--Use Heat Breath. Set global counter 2 to 30.
-If global counter 2 is at 30 and self is at or below 30% LIFE:
--Use Internal Flare (Targets the user's side). Add 1 to counters 0, 1, and 2. Add 1 to global counter 0. Set global counter 2 to 50.
-If counter 2 is at or above 14:
--Use High Speed Regeneration (Targets the user's side). Add 1 to counters 0 and 1. Set counter 2 to 0. Add 1 to global counter 0.
-If global counter 0 is at or above 7, global counter 1 is at 0, and it is the second action in the turn:
--Use Heat Charge (Targets the user's side). Add 1 to counters 0, 1, and 2. Add 1 to global counter 0. Set global counter 1 to 10.
-If global counter 0 is at or above 7 and global counter 1 is at 10:
--Use Heat Breath. Add 1 to counters 0, 1, and 2. Set global counters 0 and 1 to 0.
-If counter 1 is at or above 4 and it is the first action in the turn:
--Use Tail Blade. Add 1 to counters 0 and 2. Set counter 1 to 0. Add 1 to global counter 0.
-If counter 0 is at or above 3 and it is the first action in the turn:
--Use Flame Bane. Set counter 0 to 0. Add 1 to counters 1 and 2. Add 1 to global counter 0.
-Else:
--1/2 chance to use a Fang attack. Add 1 to counters 0, 1, and 2. Add 1 to global counter 0.
--1/2 chance to use a Ranged attack. Add 1 to counters 0, 1, and 2. Add 1 to global counter 0.
Playing this game in 2020 was a fucking trip, let me tell you!
Remember, kids, don't do nationalism!
I'd say at least Trinitro has better offensive stats but that's offset by the game's higher level curve. Then again Fomalhaut is basically recycling dragons you've already trashed so it's not like expectations are high here.
I'd say at least Trinitro has better offensive stats but that's offset by the game's higher level curve. Then again Fomalhaut is basically recycling dragons you've already trashed so it's not like expectations are high here.
Part 75: Indra || SSLP Test Poster mirror.
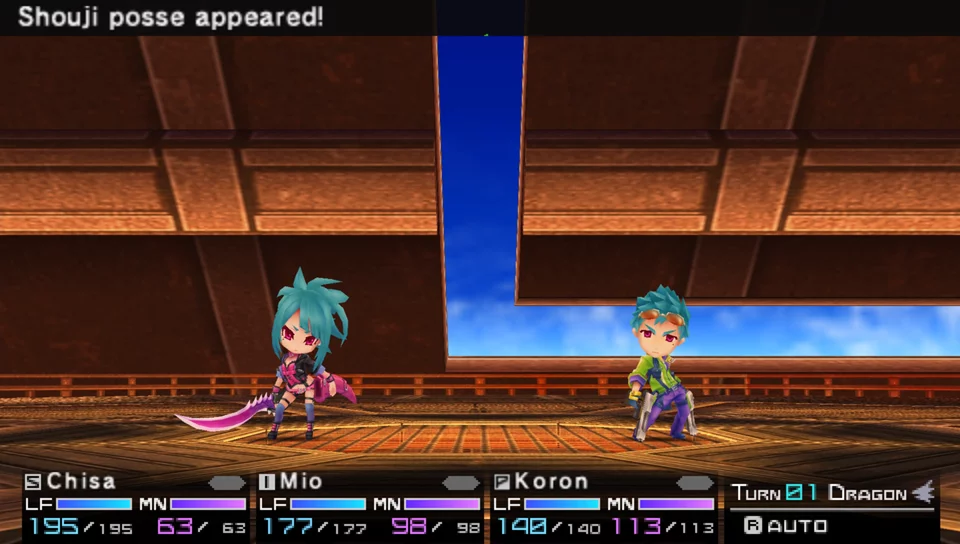
It's my birthday! As a present to myself, here, have the update where Shouji and Izumi get beaten up.
So the reason Trinitro was so pathetic? It was actually the miniboss. (VFD was not the first game to turn Imperials into those.  ) Shouji and Izumi are the real boss fight, and good god are they assholes. They're a very notorious difficulty spike especially after the game was on the inverse difficulty curve for a good long while. The fight with the SKY trio in 2020 wasn't particularly notable and easily taken down. These two on the other hand will gladly blow you up in a few turns if you give them a big enough opening.

Their stats aren't super notable other than Shouji being completely immune to Hack and Curse, but when they're getting 3 actions a turn, they can easily burst you down. Good luck trying to turtle through this onslaught.
Izumi has a somewhat rigid attack pattern, so she is pretty predictable. SECT Combo will be broken out after 3 turns. After that, it has a 50% chance of being used every to 4 turns between uses, with it being guaranteed to come out on the 5th turn.
On the plus side if you manage to take down Shouji first, she basically deletes herself from the battle with that massive defense debuff and her AI forces her to only take 1 action per turn from then on.
Shouji is the main damage dealer and is more bulky. Unlike the Trickster, his version of his regular attack deals full damage instead of 0.55x. And hits twice and can still crit because fuck you. (Though the chance of that is only 5%, like most other enemies and players.)
Shouji's AI is very simple. He just uses Salute or attacks randomly. He'll use either Wide Shot or Grenade once 5 turns have passed, but he won't break out anymore AOEs for the rest of the battle until later. Not only that, unlike most enemies in the game, he's actually smart enough to go for the kill, and will specifically target low HP party members if he can with Salute. So if you're not keeping up the healing, be prepared to see a lot of kills from his end. (Most enemies prefer targeting highest HP party members if possible.)
You can take out Izumi first to relieve the pressure, but be warned. If you do that, Shouji will power himself up with Furious Roar and deal 50% more damage for a few turns. Oh and he'll attack twice for the rest of the battle. Not only that, he regains access to his AOEs and will use them once every 3 turns, along with gaining access to Ricochet. Pick your poison.
You can accessorize to gain blind immunity, but that also means you can't accessorize for defense, lowing their damage output. Again, pick your poison.
Funny thing is I took a completely different strategy from the fight in the update. I took out Izumi first simply because she was way easier to burst down and I found dealing with 2 actions per turn more bearable than 3 actions per turn despite the buffs Shouji gets.
Their stats aren't super notable other than Shouji being completely immune to Hack and Curse, but when they're getting 3 actions a turn, they can easily burst you down. Good luck trying to turtle through this onslaught.
Izumi is an incredibly nasty support, and her 2 actions per turn lets her keep up the pressure too. If she lands any of her blinds, your offensive party members are going to have a much rougher time with a 60% accuracy cut!Izumi (LV. 44/40)
-Air Slash: Non-elemental Melee attack to all party members. ATK-based. 0.9x damage. 0.9x speed. 0.8x accuracy. 30% chance to inflict Blind for 3 turns. Blinded targets have their accuracy multiplied by 0.4x.
-Straight Cut: Non-elemental Melee attack to one party member. ATK-based. 1.3x damage. 0.8x accuracy.
-Pour It On: Multiplies the damage of the next ATK-based attack from all enemies by 1.5x.
-SECT Combo: Non-elemental Melee attack to all party members. ATK-based. 1.2x damage. 1.1x accuracy. 99% chance to inflict Blind for 4 turns. Blinded targets have their accuracy multiplied by 0.4x.
-her blade to hide her disappointment.: Debuffs the user. Multiplies ATK damage taken by 2x for the entire battle.
Izumi has a somewhat rigid attack pattern, so she is pretty predictable. SECT Combo will be broken out after 3 turns. After that, it has a 50% chance of being used every to 4 turns between uses, with it being guaranteed to come out on the 5th turn.
On the plus side if you manage to take down Shouji first, she basically deletes herself from the battle with that massive defense debuff and her AI forces her to only take 1 action per turn from then on.
Shouji (LV. 45/41)
-Attack: Whenever the user uses a basic attack, they will attack their target 2 times for 1x damage per hit with a chance to deal critical damage per hit.
-Salute: Non-elemental Ranged attack to one party member. ATK-based. 0.7x damage. Hits 2 times. 1.2x speed.
-Wide Shot: Non-elemental Ranged attack to all party members. ATK-based. 1x damage. 0.9x accuracy.
-Ricochet: Non-elemental Ranged attack to random party members. ATK-based. 0.95x damage. Hits 3 times. Has a priority level of 5. 0.6x accuracy.
-Grenade: Non-elemental Ranged attack to all party members. ATK-based. 0.6x damage. 80% chance to inflict Blind for 4 turns. Blinded targets have their accuracy multiplied by 0.4x.
-Furious Roar: Buffs the user. Multiplies ATK damage dealt by 1.5x for 5 turns.
Shouji is the main damage dealer and is more bulky. Unlike the Trickster, his version of his regular attack deals full damage instead of 0.55x. And hits twice and can still crit because fuck you. (Though the chance of that is only 5%, like most other enemies and players.)
Shouji's AI is very simple. He just uses Salute or attacks randomly. He'll use either Wide Shot or Grenade once 5 turns have passed, but he won't break out anymore AOEs for the rest of the battle until later. Not only that, unlike most enemies in the game, he's actually smart enough to go for the kill, and will specifically target low HP party members if he can with Salute. So if you're not keeping up the healing, be prepared to see a lot of kills from his end. (Most enemies prefer targeting highest HP party members if possible.)
You can take out Izumi first to relieve the pressure, but be warned. If you do that, Shouji will power himself up with Furious Roar and deal 50% more damage for a few turns. Oh and he'll attack twice for the rest of the battle. Not only that, he regains access to his AOEs and will use them once every 3 turns, along with gaining access to Ricochet. Pick your poison.
You can accessorize to gain blind immunity, but that also means you can't accessorize for defense, lowing their damage output. Again, pick your poison.
Funny thing is I took a completely different strategy from the fight in the update. I took out Izumi first simply because she was way easier to burst down and I found dealing with 2 actions per turn more bearable than 3 actions per turn despite the buffs Shouji gets.
Honestly, same. Shouji gets rude if Izumi goes down but eventually the ATK buff goes away and Izumi is just nasty forever.
What would we ever do without German compound nouns.
What would we ever do without German compound nouns.
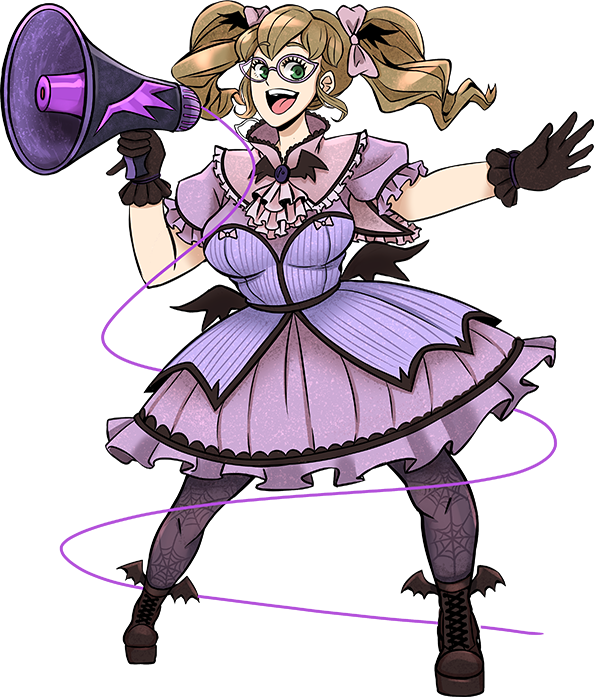
Addendum X: Mio Akaneno (Unit 13's Archivist/Personal Relations Representative, Class: Idol) Tactical Overview || SSLP Test Poster mirror.
Flittering amidst the night, the flapping of a bat's wings put you on edge...
A howl of the wolf resounds through the moonlit chill...
A cold mist blows in, enveloping you and blocking your vision...
Then... she appears, the moon turning a deep crimson! The Dark Countess herself! Mio Akaneno, of Unit 13! FEVER!
Okay but for real, this class is fucking nuts. It's an incredibly flexible class whose role can vary wildly depending on your party and the way it scales can mean it'll have to shift roles constantly throughout the game. It can be a defensive support. It can be an offensive support. It can be a damage dealer. They're really easy to slot into a party, and one of the most common parties to run is Samurai/Psychic/Idol because of the ridiculous synergy they have. (In 2020 it was Destroyer/Trickster/Psychic because of stacking counter attacks.)
When I was data mining this game, I got most of the effects out aside from the Idol's Order Action stuff. Years later I would eventually finally discover how that mechanic worked, and stumbling upon those tables was like staring into the maw of Cthulhu. Deranged class.
Incidentally that hyperlink at the end links to one of my tables, which is a good call cause stuffing that in a class overview and forcing people to scroll through that would not have made for good reading.
Discounting everything about Order Action right now, because that's a fucking massive can of worms to get into. Earlygame they're pretty absurd. Mosquito Pitch and Rush Groove basically makes them top dogs and destroy pretty much all random encounters. Dry Ice will pretty much always be the Idol's bread and butter skill since it's a fantastic way to use their first turn. Be warned that the evasion doesn't stack with the Hacker's Luck Booster, so put on Dry Ice first before applying Luck Booster since it has a weaker evasion buff.
Hoo boy the fever system. It's basically the main limiter of Idol, with plenty of ways to increase it. Dodging always increases fever, which is why Dry Ice is so important to get up. Unfortunately it cannot activate Star Sanctuary. Dodging can only get you up to fever 3, at which point you must use a skill to activate it, and every skill aside from Gift For You, Attack Beat, and Defense Beat, has a minor chance to do so, with higher tier skills having the highest chances. And Star Sanctuary is just a monstrous buff. Idols don't even need it to function. Even though several characters in other games have similar mechanics where they basically need it to function, this isn't the case with Idol. It's just whenever it pops up it's basically them hulking out and getting to kill everything harder. So ridiculous.
Mosquito Pitch is great early for the AOE and damage, but later on the evasion debuff is great for making certain battles way less of a headache, so do level it up.
Sad that Berserk Pitch is bugged. It would have made Idol an insane dodgetank. The reason this bug happens is because the way skills are coded is that they can have up to 4 different back end effects attached to them. Unfortunately the effects don't specify who they target, that's tied to the skill itself. And since Berserk Pitch is an attack, it applies the aggro buff to the target instead. I'm not sure how you'd be able to fix that without extensively rewriting the code. Not the first time they did this for Idol though.
The Beats are nuts. Attack Beat stacks with buffs (but not Defense Beat or itself too well) so it's a massive damage amplifier good god. Defense Beat is nice, though the scaling is weird. Speed Beat is also fantastic speed control as well, and these make Idol a fantastic support. And that's only a small portion of their kit.
Soothing Song is meh healing but a decent chance to wipe ailments? And guaranteed when the Idol is Superstar? Yeah sure.
Not sure why the Idol has 3 whole start of battle AUTO skills but sure.
Shuffle Pitch is absurd. Being a Superstar skyrockets its damage output. Sure ensuring it can hit for the max amount of times is already a big boost, but you're getting a 1.5x damage boost off that thanks to Superstar status itself! So the damage goes from an average of 6.75x to straight up 13.5x damage! Apply EX and you'll have a skill that hits for 20.25x! Which is one of the hardest hitting skills in the game. However the main reason it's not the strongest is because the Idol's attacking stats are mediocre. A dragon with enough MDF will still wall Idol no matter how many boosts they have. (This would be a very different story if buffs operated off of VFD's mechanics...)
Overexposed is an interesting skill. It's basically the dedicated chaos button. That being said, the odds aren't super bad. You may think it's a 50-50 chance to get a good or bad effect, but that's not how the skill works. Even without Superstardom rigging the skill to never backfire on you, it's still rigged in your favor. How the skill works is that the game spins an invisible roulette and decides who the unlucky or lucky player or enemy is, with everyone having an equal chance to be chosen. So against bosses, you won't see the boss be tagged with this skill as often since battles are a 3v1 typically.
Once the target is chosen, it chooses the effects. If a player unit is chosen, you have a 76% chance (More specifically 700 out of 920) to see a buff, and a 24% chance (220 out of 920) to see a bad effect. Enemies instead have a 71% chance (1200 out of 1690) to get a bad effect while they only have a 29% chance (490 out of 1690) to get a good effect. So the skill is biased in your favor. Whether you use it or not is up to you but it isn't as risky as you might think.
Tokyo Arena is a simple EX skill, but great if you want your Idol to become a monster ASAP, or you just need the extra evasion at the start of a battle more than Dry Ice's. +17% is a more sizeable chunk, and can help with some strategies after all.
As for Order Action, hoo boy holy fuck where do I even begin? Okay so when the Idol uses an Order Action skill, the game checks their learned skills to see what's eligible to be used. The game then sorts the learned skills into a roulette, and picks randomly. Higher levels of an Order Action skill and/or having Luck Booster in effect makes it less likely to see a basic attack be used, and for Rock N' Roll Out!, Rock Legend, and Treat Yourself, also makes it less likely to see lower tier skills used as well, if they can even be used normally. If a skill is not learned, it is simply not placed on the roulette. (A basic attack does not replace this.) If no skills are eligible, then a basic attack is guaranteed to be used.
This means you can rig the roulettes by just not learning certain skills, or just refunding skill points at the cost of some levels. That's a thing you can do to min max Idol's Order Action nonsense.
Order Action doesn't work off of a simple percent chance. It uses a weighted RNG system where certain things have more weight than others. So all the available options are added up and then the game chooses the action based on an X out of total weight.
For example, for Rock and Roll Out, the Samurai has these possibilities:
Now how does leveling up the Order Action skill work? The short version is, it makes it more likely for skills to be used. On a more technical front it causes the game to read a different column of probabilities, with level 1 looking at Weight 1, level 2 looking at Weight 2, and so on.
At level 2, basic attacks have a weight of 60, and skills have a weight of 45.
At level 3, basic attacks have a weight of 33, and skills have a weight of 40.
At level 4, basic attacks have a weight of 14, and skills have a weight of 38.
At level 5, basic attacks have a weight of 6, and skills have a weight of 35.
This ONLY applies to the Samurai. Because guess what, all other classes have different weights! There's a more detailed probability table at the end of the Idol writeup if you're that curious on probabilities. But the basic gist for those that don't want their eyeballs to bleed out from looking at excessive numbers is that the higher tier Order Action skills make the chances of using lower tier skills and basic attacks lower as the skill levels up. Luck Booster works by subtracting a certain amount from the weights to ensure you get better results. Again, not easily said, because Luck Booster's effects vary based on the skills in the table.
Certain skills are unable to be called, so if you were hoping for your classes to bust out an EX skill, sorry, but that's not the case. Some detrimental skills are thankfully left out of the table as well. So your Idol will never go tell your Trickster to go kill themselves. Ever.
At any rate there's like so much added code and files just for the Idol themselves and it's. The table for Treat Yourself has 78 skills on it!
The table for SOS has a weight of 50 for recovery and defensive skills. And a weight of 1 for regular attacks for some reason. Meaning there is a very small chance you'll see a regular attack even if there was a skill the party could have used. I dunno why.
Super Mellow Time is a reference to a character in DS. Fortunately this one is simple. If your character can use a react buff and they don't have a react buff active, they'll always use the react buff. There's no failure chance there. They only use regular attacks if they literally can't use the react buff. Being able to use react skills without eating up your party members' turns is genuinely absurd considering how powerful reacts are. Really the Fever 3 requirement is holding this skill back from being grossly broken.
Tokyo Arena Plus is funny. It's an Order Action skill that forces your party members to use their most powerful skills. Some of them have slightly different properties for some reason. Maybe differences in development that didn't get corrected later when the real skills were updated. Sadly the Idol themselves do not partake in the absurdity. Still a strong offensive skill.
The way it was coded in was that every single class actually has a hidden skill in their skill tables that cannot be accessed by normal means, but they know innately. Only the Idol can bring out these skills when Tokyo Arena Plus activates.
Incidentally they haven an unused skill known as Shout. No idea what it was intended for, but the data that remains causes it to heal 10 HP to the user. Which is almost certainly just dummy data.
The game only added in 1 new class but good god it's one of the most deranged classes I have ever seen in a video game!
This means you can rig the roulettes by just not learning certain skills, or just refunding skill points at the cost of some levels. That's a thing you can do to min max Idol's Order Action nonsense.
Order Action doesn't work off of a simple percent chance. It uses a weighted RNG system where certain things have more weight than others. So all the available options are added up and then the game chooses the action based on an X out of total weight.
For example, for Rock and Roll Out, the Samurai has these possibilities:
So at level 1, using a basic attack has a weight of 100. All other skills, if learned, have a weight of 50 each. Resulting in a total weight of 250. You have a 100 out of 250 chance (40%) to see a regular attack come out from the Samurai. And a 150 out of 250 chance (60%) to see them use a skill instead. 50 out of 250 (20%) for that specific skill to be used. If the skill isn't learned, it just isn't added to the roulette. So not knowing 1 skill would cause the total weight to be 200.-Attack
-Whirlwind Roll (Battou Stance only)
-Flying Slash (Battou Stance only)
-Sunset Kata (Battou Stance only)
Now how does leveling up the Order Action skill work? The short version is, it makes it more likely for skills to be used. On a more technical front it causes the game to read a different column of probabilities, with level 1 looking at Weight 1, level 2 looking at Weight 2, and so on.
At level 2, basic attacks have a weight of 60, and skills have a weight of 45.
At level 3, basic attacks have a weight of 33, and skills have a weight of 40.
At level 4, basic attacks have a weight of 14, and skills have a weight of 38.
At level 5, basic attacks have a weight of 6, and skills have a weight of 35.
This ONLY applies to the Samurai. Because guess what, all other classes have different weights! There's a more detailed probability table at the end of the Idol writeup if you're that curious on probabilities. But the basic gist for those that don't want their eyeballs to bleed out from looking at excessive numbers is that the higher tier Order Action skills make the chances of using lower tier skills and basic attacks lower as the skill levels up. Luck Booster works by subtracting a certain amount from the weights to ensure you get better results. Again, not easily said, because Luck Booster's effects vary based on the skills in the table.
Certain skills are unable to be called, so if you were hoping for your classes to bust out an EX skill, sorry, but that's not the case. Some detrimental skills are thankfully left out of the table as well. So your Idol will never go tell your Trickster to go kill themselves. Ever.
At any rate there's like so much added code and files just for the Idol themselves and it's
The table for SOS has a weight of 50 for recovery and defensive skills. And a weight of 1 for regular attacks for some reason. Meaning there is a very small chance you'll see a regular attack even if there was a skill the party could have used. I dunno why.
Super Mellow Time is a reference to a character in DS. Fortunately this one is simple. If your character can use a react buff and they don't have a react buff active, they'll always use the react buff. There's no failure chance there. They only use regular attacks if they literally can't use the react buff. Being able to use react skills without eating up your party members' turns is genuinely absurd considering how powerful reacts are. Really the Fever 3 requirement is holding this skill back from being grossly broken.
Tokyo Arena Plus is funny. It's an Order Action skill that forces your party members to use their most powerful skills. Some of them have slightly different properties for some reason. Maybe differences in development that didn't get corrected later when the real skills were updated. Sadly the Idol themselves do not partake in the absurdity. Still a strong offensive skill.
The way it was coded in was that every single class actually has a hidden skill in their skill tables that cannot be accessed by normal means, but they know innately. Only the Idol can bring out these skills when Tokyo Arena Plus activates.
Incidentally they haven an unused skill known as Shout. No idea what it was intended for, but the data that remains causes it to heal 10 HP to the user. Which is almost certainly just dummy data.
The game only added in 1 new class but good god it's one of the most deranged classes I have ever seen in a video game!
It's just rock 'n roll!
It's only rock 'n roll, oh
We'll stay out all night
if the feeling's alright
down in your soul

Sumie Kazuki's Reminiscence, 1 ~ The Girl from the White Room
Sorry about the wait. By all rights, that will be the last remaining gap in updates—from here, updates should remain consistent. Thank you for your patience.
It's only rock 'n roll, oh
We'll stay out all night
if the feeling's alright
down in your soul
Sumie Kazuki's Reminiscence, 1 ~ The Girl from the White Room
Sorry about the wait. By all rights, that will be the last remaining gap in updates—from here, updates should remain consistent. Thank you for your patience.
It's covered in scars, Your Heart
You stand on the street corner like you're nailed to the floor
It's all gone now, your Chance, Chance
It's just the same old story, same bad situation
They're getting worn out, Your Dreams
That's never going to stop if things stay the same
Show them you can change—More, More
You've still got time, y'know
Sumie Kazuki's Reminiscence, 2 ~ Blood of the Ancients
Passing to the other side of the door that nobody knows,
I've been singing a song of prayers all by myself there
My heart is mourning, fearing, exploding, and hoping
There's no way I'll be getting away from this nightmare
Over here in the darkness, where somebody lives
I've been singing a song of prayers all by myself there
My memory smothers, chokes me and stains my pillow
Sumie Kazuki's Reminiscence, 3 ~ At the End of Memory
Thank you for your patience. This marks the final Reminiscence segment. Normal updates shall resume now.
I've been singing a song of prayers all by myself there
My heart is mourning, fearing, exploding, and hoping
There's no way I'll be getting away from this nightmare
Over here in the darkness, where somebody lives
I've been singing a song of prayers all by myself there
My memory smothers, chokes me and stains my pillow
Sumie Kazuki's Reminiscence, 3 ~ At the End of Memory
Thank you for your patience. This marks the final Reminiscence segment. Normal updates shall resume now.

Part 76: Endless Crisis || SSLP Test Poster mirror.
This marks the beginning of Intermission 2. In this one, a certain someone makes a house call.

Part 78: The Sacred Ground Far Away || SSLP Test Poster mirror.
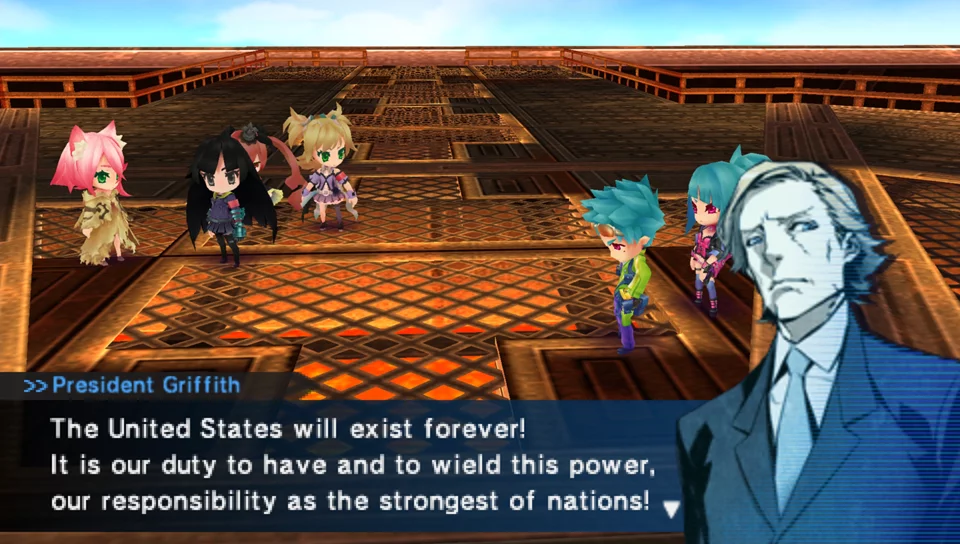
In this one, politicians butt their heads in.
Part 79: ASH TO ASH || SSLP Test Poster mirror.
In this one, we get to the actual gameplay of Intermission 2.
Okay I never expected to see unironic usage of that outside of VFD given the sheer cost that comes with using it, but uh. Wow. Okay.
This is the first time this game makes use of Raging Tyranny, the 2nd Dragon theme from the last game, and it plays throughout the area and still stays in battles. Quite a fitting track, but it only plays for the randoms. Yeah, those are in this segment, but the sheer amount of dragons and the density of all that make it a bit unlikely to get into too many of those. However for the actual dragon battles, Wings Beat Back plays instead.
(Satanic Dragon is a breather compared to the 70 million dragons swarming the diet building but eh, people probably assumed that anyways, the game wants you dead on the pavement in that segment.)
Part 80: Shadows Fore and Aft || SSLP Test Poster mirror.
This marks the beginning of Chapter 5. In this one, Kirino achieves a startling victory.
Ah yes, the consequences of SECT11 misplacing its sole braincell. Also congratulations, Richter.
Part 81: Electric Guitar Ambience || SSLP Test Poster mirror.
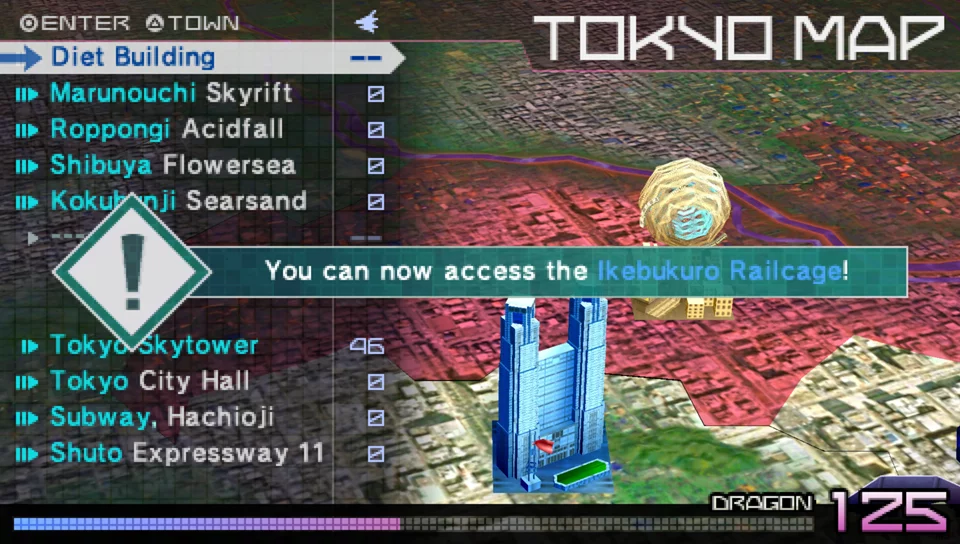
In this one, let's ike to 'Bukuro, hero-tachi! Or something.


Part 82: Hunting Party || SSLP Test Poster mirror.
In this one, we learn a secret about Homura Akaneno.

Part 84: I Made It All Up || SSLP Test Poster mirror.
In this one, Richter explains the technical properties of his work.
Alright so now that we're at this point, to explain a couple of things from the intermission, for one, you actually don't have to clear out the floor in 1 go. You can actually interact with the elevator in the back to go back to the warehouse and restock and rest up. Mind you that segment is still a difficulty spike! The sheer dragon density and (the lower power levels for those of you reading the VFD LP, this series did used to have some semblance of balance at some point. ) means that you'll be dealing with dragon chains in battle very frequently and the dragons are difficult to clear out quickly before they pile up.
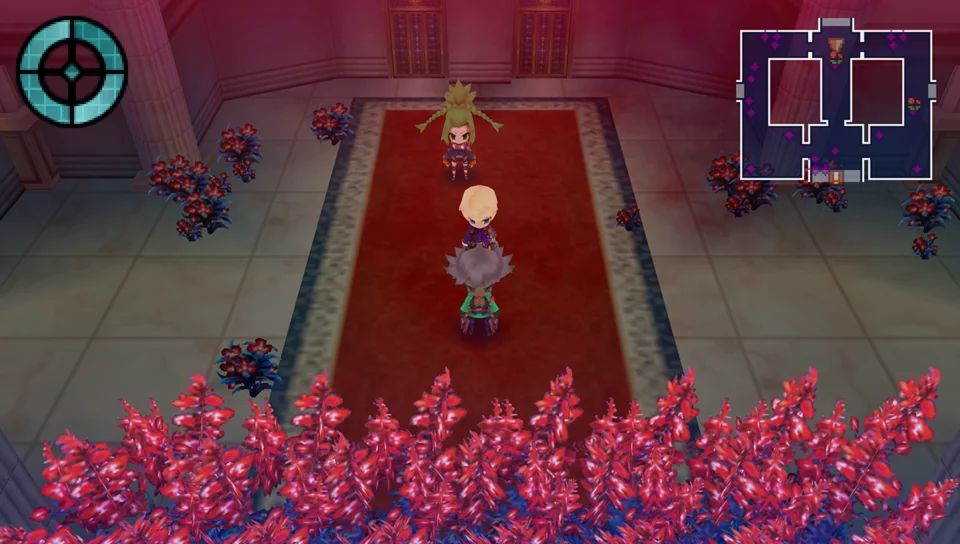
You also do not have to kill any of the dragons. You can head straight for the Satanic Dragon and that'll clear the intermission. This is far easier said than done, because there's not a lot of room to maneuver in the Diet Building, and trying to do that without killing any of the dragons will frequently result in you getting surprise attacked because they are aggressive and very fast.
The reason I bring this up now is because well, what happens when you skip the intermission 2 dragons? They don't auto die. They actually all get sent to the empty side area of the railcage that was just explored in the update. So no missables there. I don't recommend skipping the dragons since that puts off the sheer Dz you get by forcing you to deal with them in the railcage, which is not a good idea for several reasons unless you're doing a speedrun.
Also for whatever reason, the game script in both English and Japanese refers to the boss of the intermission as an Imperial Dragon, even though it's not. There's not much to the boss itself though it certainly has a unique design.
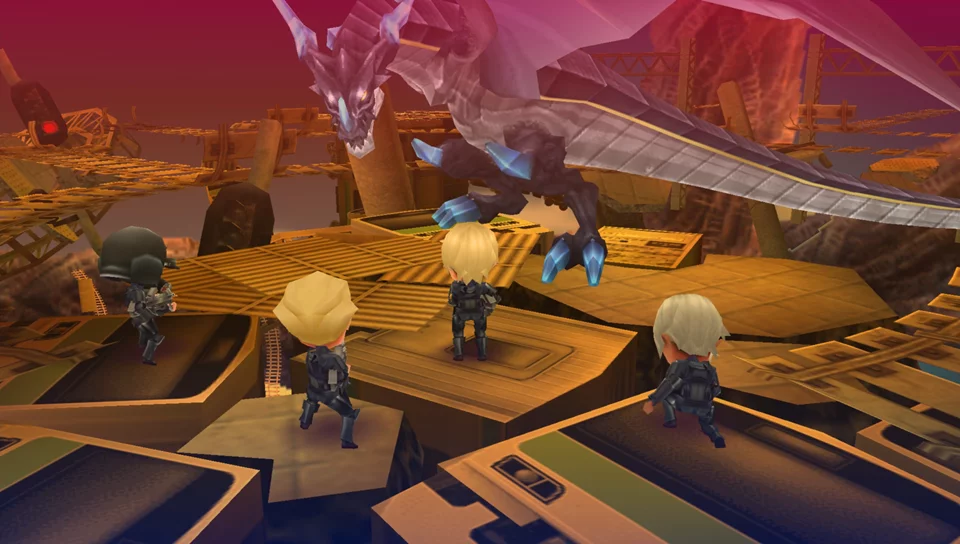
As for the railcage itself, this dungeon is actually tougher to get through in 2020-II. The layout of the thing actually makes this dungeon more harrowing in 2020-II due to the game's changes. The encounter rate is much higher in II overall, and the monsters and tougher dragons can wear you down. What makes this dungeon especially rough are the railguns. Those things are straight up minibosses now instead of the event battles in 2020 you cleared without a second thought, and there's quite a few of them you have to fight.
The Freeze Dragon got some upgrades to its skills and AI to be a proper miniboss for this cutscene. Rainbow Shield can be a bit of an annoying wrench to deal with.
You also do not have to kill any of the dragons. You can head straight for the Satanic Dragon and that'll clear the intermission. This is far easier said than done, because there's not a lot of room to maneuver in the Diet Building, and trying to do that without killing any of the dragons will frequently result in you getting surprise attacked because they are aggressive and very fast.
The reason I bring this up now is because well, what happens when you skip the intermission 2 dragons? They don't auto die. They actually all get sent to the empty side area of the railcage that was just explored in the update. So no missables there. I don't recommend skipping the dragons since that puts off the sheer Dz you get by forcing you to deal with them in the railcage, which is not a good idea for several reasons unless you're doing a speedrun.
Also for whatever reason, the game script in both English and Japanese refers to the boss of the intermission as an Imperial Dragon, even though it's not. There's not much to the boss itself though it certainly has a unique design.
As for the railcage itself, this dungeon is actually tougher to get through in 2020-II. The layout of the thing actually makes this dungeon more harrowing in 2020-II due to the game's changes. The encounter rate is much higher in II overall, and the monsters and tougher dragons can wear you down. What makes this dungeon especially rough are the railguns. Those things are straight up minibosses now instead of the event battles in 2020 you cleared without a second thought, and there's quite a few of them you have to fight.
The Freeze Dragon got some upgrades to its skills and AI to be a proper miniboss for this cutscene. Rainbow Shield can be a bit of an annoying wrench to deal with.

Airsoft Training really does rule, but I continue to sit here wondering... why Airsoft? What does that have to do with a spontaneous healing effect? Training I can get, if the idea is that its between-turns practice, but what does Airsoft have to do with it? Still, a delightful boon after they messed up Regenerator so dang hard
FWIW the JP name of the skill was something along the lines of Survival Game Knowledge IIRC?

Part 85: To the Bottom of Memory || SSLP Test Poster mirror.
This one has my least favorite boss in this video game in it.
Unlike the other zombie Imperials, Jigowatt puts up way more of a fight than those two. The inverse difficulty curve is gone now, and you're going to have to scrap harder with the dragons from here on out.


Jigowatt got some serious buffs since it was moved from a chapter 2 boss to a chapter 5 boss. Gained more status immunities, ice's power against it was toned down, and throws a middle finger towards Gun Tricksters and Idols just because. Oh and they fixed the issue where its 2nd basic attack was accidentally flagged as ranged when it should have been melee.
Its HP is higher. Much higher. In fact it has one of the highest HP bars among all maingame enemies. However it's defenses aren't really that much higher than the Satanic Dragons, and it takes considerably more damage from magic attacks. That being said the amount of HP it has adds on some serious bulk to the boss.
Jigowatt's AI is exactly the same as it is in 2020. It has a fixed rotation of attacks depending on whether it's at 55% HP or higher.
-Ranged Attack
-Ranged Attack
-Clean Sweep
-Aimed Shot (Targets the party member with the highest HP)
-Ranged Attack
-Clean Sweep
-Rail Charge
-Rail Charge
-Railgun
And then it repeats until you hit 55% HP, at which point it changes to this pattern for the rest of the battle:
-Discharge (Never accessed again on future rotations)
-Attack (1/3 chance for ranged, 2/3 chance for melee)
-Attack (1/3 chance for ranged, 2/3 chance for melee)
-Clean Sweep
-Aimed Shot (Targets the party member with the highest HP)
-Attack (1/3 chance for ranged, 2/3 chance for melee)
-Clean Sweep
-Discharge
-Clean Sweep or Aimed Shot (Only on the 2nd rotation or beyond)
-Rail Charge
-Rail Charge
-Railgun
Unlike Trinitro, it's AI didn't need the buff. That's because its skills are where things really get spicy.
The 2020 skills for reference:
Clean Sweep got considerably weaker. It went from being a very accurate attack to one that can very easily miss with enough evasion buffs, probably to give dodgetank Idol an actual use in the fight. That's the only breather you get.
The big buff Jigowatt got with its skills are the fact that it has 2 ailments it has access to. You can't just slap on Paralysis immunity and be done with it, now you have to pick your poison. Discharge got turbo buffed being able to inflict Stop. Sure the infliction rate is lower, but the impact of Stop landing is greater.
The Paralysis from Discharge on the other hand got moved to Railgun, making it a far more nasty attack. In 2020 you can just heal up after guarding. Bit of a momentum loss, but it's recoverable. In 2002-II, Paralysis can end up really setting your party back, making it much more easy for Jigowatt to clean up and cause a wipe. And if you enter phase 2 at a bad time, it'll immediately use Discharge after Railgun, which can just cause a game over right there.
Some walkthroughs I've seen recommend you gear up for Paralysis immunity instead of Stop immunity if your party is fast enough. This is because it makes recovering from a Railgun turn much easier, and that if your party is fast enough, the Stop from Discharge only lasts for 1 turn during a period where your party is healthy, which isn't as much of a setback as Railgun. Also after the first Discharge, the only times it uses Discharge are right before a Rail Charge turn, so you have a breather there.
Another thing you can do is to make use of Decoy Mirror to block the Railgun for your Psychic if you have one, keeping up your party's momentum. It's especially a good tactic in this game since it'll block the Paralysis proc as well.
Overall, definitely can be a nasty boss if you're unprepared.
Jigowatt got some serious buffs since it was moved from a chapter 2 boss to a chapter 5 boss. Gained more status immunities, ice's power against it was toned down, and throws a middle finger towards Gun Tricksters and Idols just because. Oh and they fixed the issue where its 2nd basic attack was accidentally flagged as ranged when it should have been melee.
Its HP is higher. Much higher. In fact it has one of the highest HP bars among all maingame enemies. However it's defenses aren't really that much higher than the Satanic Dragons, and it takes considerably more damage from magic attacks. That being said the amount of HP it has adds on some serious bulk to the boss.
Jigowatt's AI is exactly the same as it is in 2020. It has a fixed rotation of attacks depending on whether it's at 55% HP or higher.
-Ranged Attack
-Ranged Attack
-Clean Sweep
-Aimed Shot (Targets the party member with the highest HP)
-Ranged Attack
-Clean Sweep
-Rail Charge
-Rail Charge
-Railgun
And then it repeats until you hit 55% HP, at which point it changes to this pattern for the rest of the battle:
-Discharge (Never accessed again on future rotations)
-Attack (1/3 chance for ranged, 2/3 chance for melee)
-Attack (1/3 chance for ranged, 2/3 chance for melee)
-Clean Sweep
-Aimed Shot (Targets the party member with the highest HP)
-Attack (1/3 chance for ranged, 2/3 chance for melee)
-Clean Sweep
-Discharge
-Clean Sweep or Aimed Shot (Only on the 2nd rotation or beyond)
-Rail Charge
-Rail Charge
-Railgun
Unlike Trinitro, it's AI didn't need the buff. That's because its skills are where things really get spicy.
The 2020 skills for reference:
And its 2020-II skills:Jigowatt
-Discharge: Non-elemental Ranged attack to all party members. MAT-based. 0.65x damage. Cannot miss. 75% chance to inflict Paralysis for 4 turns. Paralyzed targets have a 45% chance to not act.
-Rail Charge: Telegraph skill. Display message: "Jigowatt is storing energy!"
-Rail Charge: Telegraph skill. Display message: "The energy charge is complete!"
-Railgun: Non-elemental Ranged attack to all party members. MAT-based. 4x damage. Cannot miss.
-Clean Sweep: Non-elemental Ranged attack to random party members. MAT-based. 0.4x damage. Hits 6 times. 1.5x accuracy.
-Aimed Shot: Non-elemental Ranged attack to one party member. MAT-based. 1.5x damage. Cannot miss.
Some of the damage on the skills were toned down, but that's to counteract the stat boosts Jigowatt got so it wouldn't vaporize you.Jigowatt (LV. 52/48)
-Discharge: Lightning-elemental Ranged attack to all party members. MAT-based. 0.65x damage. Cannot miss. 40% chance to inflict Stop for 2 turns.
-Rail Charge: Telegraph skill. Display message: "Jigowatt is storing energy!"
-Rail Charge: Telegraph skill. Display message: "The energy charge is complete!"
-Railgun: Non-elemental Ranged attack to all party members. MAT-based. 3x damage. Cannot miss. 70% chance to inflict Paralysis for 4 turns. Paralyzed targets have a 30% chance to not act.
-Clean Sweep: Non-elemental Ranged attack to random party members. MAT-based. 0.3x damage. Hits 6 times. 0.8x accuracy.
-Aimed Shot: Non-elemental Ranged attack to one party member. MAT-based. 1.4x damage. Cannot miss.
Clean Sweep got considerably weaker. It went from being a very accurate attack to one that can very easily miss with enough evasion buffs, probably to give dodgetank Idol an actual use in the fight. That's the only breather you get.
The big buff Jigowatt got with its skills are the fact that it has 2 ailments it has access to. You can't just slap on Paralysis immunity and be done with it, now you have to pick your poison. Discharge got turbo buffed being able to inflict Stop. Sure the infliction rate is lower, but the impact of Stop landing is greater.
The Paralysis from Discharge on the other hand got moved to Railgun, making it a far more nasty attack. In 2020 you can just heal up after guarding. Bit of a momentum loss, but it's recoverable. In 2002-II, Paralysis can end up really setting your party back, making it much more easy for Jigowatt to clean up and cause a wipe. And if you enter phase 2 at a bad time, it'll immediately use Discharge after Railgun, which can just cause a game over right there.
Some walkthroughs I've seen recommend you gear up for Paralysis immunity instead of Stop immunity if your party is fast enough. This is because it makes recovering from a Railgun turn much easier, and that if your party is fast enough, the Stop from Discharge only lasts for 1 turn during a period where your party is healthy, which isn't as much of a setback as Railgun. Also after the first Discharge, the only times it uses Discharge are right before a Rail Charge turn, so you have a breather there.
Another thing you can do is to make use of Decoy Mirror to block the Railgun for your Psychic if you have one, keeping up your party's momentum. It's especially a good tactic in this game since it'll block the Paralysis proc as well.
Overall, definitely can be a nasty boss if you're unprepared.
I'd say that honestly I don't remember Jigowatt being that big a deal but I also never played the game without a Samurai and Psychic so.
Addendum XI: Sumie Kazuki (Unit 13's Treasurer, Class: Trickster) Tactical Overview
It's the end of an era... the last class overview...