In this let's play, I'll be going through each character's Story Mode campaign. I'll be doing them in the order they appear on the character select menu, as well as giving a quick rundown on their play style and movesets. First off is our main protagonist: Jotaro Kujo.
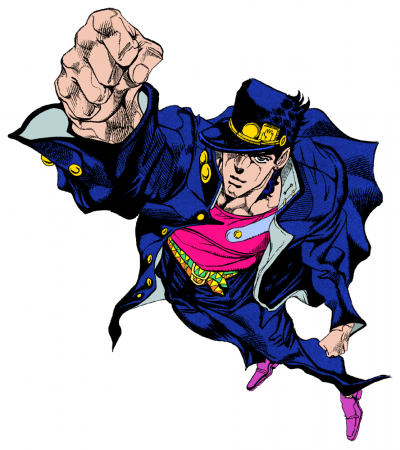
Jotaro is a very powerful close range oriented character with very good normals and fast attacks that can easily cause a Stand Crash. He has a very strong pressure game and devastating specials. A lot of his combos lead to hard knockdowns. His only major weakness is the fact he has no long-range attacks, so you'll have to get pretty close to your opponent to get good hits on them.
Movelist:
Blazing Fists
Quarter Circle + Any Attack
ORAORAORAORAORAORA! A flurry of punches from Star Platinum that does hefty amounts of damage. Mash the button to extend the attack duration by a few seconds. Don't spam it too much, though, because it's extremely punishable.
Blazing Strike
Quarter Circle Back + Any Attack:
Star Platinum lunges forward with a punch. Confirms from a lot of moves, and does decent damage.
Star Finger
Forward, Down, Down-Forward + Any Attack:
This move is great for mind gaming, because you can delay when the attack comes out by holding the button, and also walk around during this. The attack's hitbox has decent range, and apparently becomes unblockable if you hold it long enough (though you won't see it being used in competitive play because it takes too long)
Specials:
Jaguar Varied Assault
Quarter Circle + Any two attack buttons:
A more beefed up version of Blazing Fists
Star Breaker
Quarter Circle Back + Any two attack buttons
A more beefed up version of Blazing Strike. Always causes a Stand Crash if it lands.
Star Platinum: The World
Forward, Medium, Light, Forward, Stand (Level 3)
This is one of the few Time Stops in the game. You'll stop time (yes, including the timer), and freeze your opponent in place. This leaves them wide open for you to attack them repeatedly for a few seconds. Your Special meter will rapidly drain during this, and the Time Stop will end when it runs out. The downside is that it has tons of start up lag, meaning you either have to space yourself far away from your opponent so they don't cancel the move, or find a way to confirm into it. And it also doesn't last that long to begin with. You can extend the Time Stop by conserving your Super Meter, but good luck getting it anywhere above 4 or 5, because that's easier said than done. Time Stops have an extremely broken mechanic that I'm assuming is a bug. If you knock out your opponent, immediately use a Time Stop so it rolls over to the next round, and then land at least one hit on them, the game will consider it a second knockout for some reason, and you'll instantly win the match. I don't think this was ever fixed in any of the ports, so feel free to be cool, and abuse this if you want to. There's also an Easter egg with Time Stops. If someone else uses a Time Stop on you, you can input your command to regain movement. I'm sure you know what this is referencing.
Before we begin our first Story Mode campaign, I'll take this time to point out that this game has skins. Like in most arcade fighting games of the time, the skin you get is based on what button you press when you select your character. Light Punch is the default skin. I believe "HD" simply has a menu that lets you select which skin you want instead. Most if not all of the skins are based on various colorations from things such as manga covers and promotional illustrations (because the color schemes Hirohiko Araki uses are wildly inconsistent, which is why the anime adaptation often changes the color palette during the more dramatic scenes).
Two things I wanna point out about Jotaro's skins. First off, his Medium Punch skin is his Diamond is Unbreakable outfit, which is a nice call forward to that part. Secondly, if you prefer Jotaro's anime color scheme, the closest one is the Start button skin.
Jotaro Kujo locks himself in jail, claiming that he has been possessed.

Something evil is inside of me... It must have happened recently
Jotaro's mother appears on the scene.
HOLLY: Jotaro!
HOLLY: I must tell Uncle Jospeh about this...
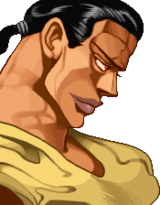
Stage 1 - Avdol


Jotaro! Get out of there! You can come home with me!
Leave me alone! I don't need you!
I see... Avdol, it'syour turn to convince him.
Mr. Joestar, I apologize if I have to be rough...
I don't care! Just get him out!

You...!
For most of Jotaro's campaign, you can mostly just spam Blazing Fists, and you'll win. This is a pretty easy first fight, if you know what you're doing, that is. Good luck!
Well, I got him out... My job is done...
So it seems...
The "evil" you refer to is the "Stand" , a force created by your vital energy.

And DIO is the one responsible for all this!
Yes, and it is our destiny to fight against him!
Stage 2 - Kakyoin

Wha... What's this!?
Could this be your doing?

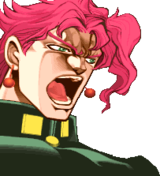
Jotaro Kujo... I'll destroy you!
Kakyoin's a pretty tough opponent. Especially for this early on in the game. That's because he's got plenty of ranged attacks and projectiles that are pretty hard to dodge. It's not impossible, but just barely manageable. That being said, he's not the worst character to deal with in this game when it comes to zoning (oh, we'll get to that. Believe me).
Don't move Kakyoin. I'll remove the evil implant now.
..........
Uwoooooooohhhhh!!

(fortunately, this scene's not as graphic as it is in the manga (or the anime for that matter). In fact, this game in general is pretty tame, come to think of it. Which is odd, considering JoJo is well-known for its gore. Technical limitations or executive meddling I'm guessing?)
Why did you save me...?
I don't know...

One morning, Holly developed a "Stand" . As a result, she became very ill.
Tell me! What can I do to save her!?
You must kill DIO and release his curse! That is the only way!
I can sense him! DIO is in Egypt now!
(yeah, that's skipping over quite a bit of what happened in Stardust Crusaders. Like I said, this game
loosely adapts Part 3. It's still rather faithful, don't worry, but it takes some liberties where necessary)
I also sensed his whereabouts. I, Noriaki Kakyoin, will go with you.

Okay then, let's go!
Jotaro, Joesph, Avdol, and Kakyoin travel to Egypt...
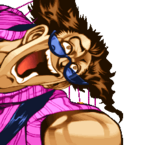
Stage 3 - Soul Sacrifice
Hey, you! I can sense your evil intent! You must be my enemy.
(again, that's not how that happened in the manga. Like, at all. Jotaro doesn't even fight Soul Sacrifice in this arc. That's someone else.)
I'm Soul Sacrifice, the wielder of the Devil Stand!
Ebony Devil!!
Urahhh!
Heh heh heh heh! You've done it, Jotaro!
You've given me all I need to curse you!
What do you mean!?
You fool! I wanted you to punch me! Now, I shall curse you to death!
This fight's pretty annoying. That's because Ebony Devil is tiny, so most attacks won't be able to hit it. That, and Ebony Devil has a few rushdown attacks that are hard to dodge and predict.
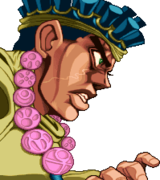
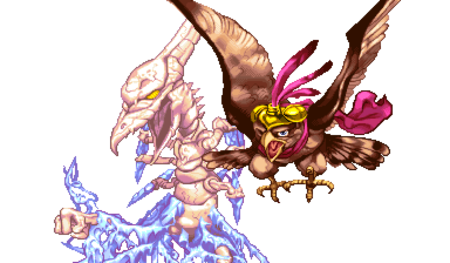
Bonus Stage - N'Doul
Our new comrade is supposed to join us here.
(Polnareff joined us off-screen, by the way. No introduction, he's just there. I told you this game took liberties)
You know, Iggy loves coffee flavored chewing gum,,.
.........
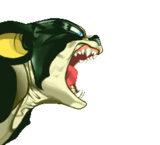
(chomp, chomp...)
Is that... our new comrade!?
It can't be...!
Hey! Are you saying this DOG is joining us in our fight!?
Don't get any closer! You don't know what you're getting yourself into!

Wah! No, no! Hey, help me! Get this dog off of me!
(Just wanna point out that Iggy farts on Polnareff afterwards in the original. Yep.)
Watch it!!

N'DOUL: Ha ha! They've finally realized that I can attack them from here with my Stand!
Here's this game's bonus stage, apparently named "The Earth God Geb". It's a pseudo platforming/beat 'em up segment against N'Doul and his Stand, Geb. Punch through the arms made out of water, and do your best to avoid the holes he creates. Get to the end and give N'Doul a surprise attack to complete the bonus stage. Completing this stage without getting hit unlocks an achievement in HD, but that's easier said than done.
Your disappointing performance only fuels my anger!
Stage 4 - Chaka
So, you are Jotaro! I'll slash you to ribbons!
(again, not what happened in the manga at all. Okay,
technically this is accurate, since Jotaro does fight Anubis in this arc, but not Chaka.)
You....
Not much to say about the Chaka fight. It's easy, and straightforward.
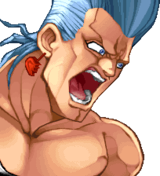
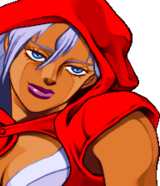
Stage 5 - Alessi
Gwaaahh!
That's an odd sight, seeing someone fall from a window like that....
(why did he fall out of a window, exactly? Well, there's a key scene we're missing here. But, IIRC, we'll find that out later)
What did you say!? Are you talking about me!?
Isn't it obvious?
I know who you are! You're the new Stand wielder, aren't you!?

Impressive! Good job!
You....
Oh boy, Alessi... This is one of the most annoying characters in the entire game. I'll go over this in more detail when we get to his campaign, but here's the gist of it. The main reason Alessi is a pain to fight against is because of his Stand, Set. Not only does its attacks have absurdly large hitboxes, but Alessi's AI likes to spam a move known as "Shrink Wrap 'Gakinchiyoga'". Basically put, if he uses this move on you, you'll turn into a child for a good bit, and you'll be severely limited to one jump, and a basic attack. Sure, conceptually this is funny. But in practice, it's hella annoying, because Alessi is free to land hits on you since you have almost no defensive options during this state. Best advice I can give when fighting Alessi is to keep your distance from him as much as possible, and avoid standing on Set itself. Of note, in HD, if you somehow manage to KO Alessi while in child form, you get an achievement. Yeah, good luck with that.
Fortunately for me, Alessi didn't use his Special on me once. Usually, I struggle fighting him whenever I do playthroughs of this, and it always gives me trouble. He was still annoying (the gun command in particular gave me trouble) but other than that, it was pretty easy. Must've gotten lucky.
Stage 6 - Cool Ice
Jotaro and company arrived in Egypt and are looking for DIO's mansion....
Where on earth is it...?
Hey! Check it out!
Okay then, let's go!

This must be the mansion!
I can sense an overwhelming presence of evil.... He is here!
.............
Our journey has finally come to an end!
Seeing there's no one to greet us, we should let ourselves inside....
Joseph and the other break up into two groups and sneak into the mansion.
What could have caused this?
Avdol's group must have run into some trouble!
Watch out!
They were lucky enough to escape, but I won't make the same mistake on you!
You....
(he sure is saying that a lot, isn't he?)
Midboss time! Here, we fight one of DIO's high-ranking adversaries: Cool Ice with his Stand, Cream (get it?). Cool Ice is actually a playable character here, but the boss version is considered its own separate character that plays completely differently. He has two main cycles. First is an attack where he uses Cream to turn into a void (portrayed here by a circle whose sprite is part of the background turned greyscale). You can easily jump over this, but it's a good idea to have your Stand out for some extra security via the double jump. The second cycle has it fly across the screen, and then zoom into the camera. You can avoid this by crouching.
This was really tedious. Cool Ice kept spamming commands. Sure, they weren't hard to dodge, but he only left himself open for like a second each time before I could even land a hit. It wasn't hard, just time consuming.

Die, Jotaro!!
You....
Gwaaaaaaahhhhhh...!

So he was a vampire after all....
Cool Ice was reduced to a pile of ashes after being exposed to sunlight....
DIO's room could be upstairs....
Check out the scum I found....

Joseph: Pol... Polnareff! Where are Avdol and Iggy?
They couldn't make it here alive.... They sacrificed themselves to save me....
(what exactly happened is up to speculation, considering the scene played out entirely differently in the manga)
I see....
Hey, Loser! Take us to DIO!!
LOSER: N...No.... Please don't hurt me!
Jotaro and company are led to the top floor by Loser, one of DIO's men.
Is DIO inside of that coffin?
Loser, open that coffin!
(they sure are bringing up his name a lot. I don't think they ever mentioned it in either the anime or the manga. I had to check to see if he had a localized name just to be sure. Turns out he does)
LOSER: Sir DIO, I only brought them here so you could kill them. I haven't betrayed you!

LOSER : Wha...What am I doing here!?
Huh!? Why is Loser inside of the coffin!?
Something is very wrong here.... Run!!
I felt it too.... If we stayed there like that, he would have killed us easily!
This is not good. The sun has set.... His time has come....

Ha ha!
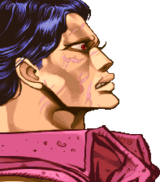
Stage 7 - DIO
Jotaro! Stay away! Get out of here!
Let's start with the old timer..."THE WORLD"!!
I've finished Kakyoin as well.... You're the next to fall, Jotaro!
Here we are, the most iconic scene in the entire franchise. Jotaro's fight with DIO. There's two phases. The first phase is a sort of miniboss nicknamed "Jacket DIO". Because his sprite has him in his iconic yellow jacket that he wears for the majority of Part 3. The only major differences between Jacket DIO and normal DIO is that he only does Medium Punches, has no aerial attacks unless he has The World out (at least, his AI won't use them), and he won't use any of his Specials. Yes, it is a shame that this version isn't the one that's playable. Good thing MUGEN fulfills that niche.

Joseph's blood is so tasty... I feel refreshed now Jotaro!!
Y...You!
I'll show you no mercy!
It doesn't matter to me by what method victory is achieved.... You will die now!
The second phase is a fight with the playable DIO on the iconic Cairo bridge from the arc's climax. Rarely have I ever seen DIO's AI actually use his Time Stop during this fight, if you can believe that. Oh, he can use it, don't you worry, but it's not guaranteed.
Ha ha...! Die, Jotaro!

No.... It can't be! ...How could I lose? DIO cannot be beaten!!
There was a reason you lost.... You pissed me off....
By transfusing the blood of DIO, Joseph has been revived....
Now, my debt to DIO has been paid!
Jotaro places DIO's body under the light of the sun. DiIO s reduced to ashes....
So.... It's finally over....

We survived.... Thanks to our friends....
Kakyoin! Avdol! Iggy! Thank you! We've finally won....
At the airport, Jotaro and Joseph prepare to return to Japan....

I'll miss you. Really...I will.
Call me anytime if you need me. I'm here for ya!
Even after all of the problems...I feel I enjoyed this experience....
Take care, you old timer and his cheap grandson! Don't ever forget about me!
See you later! That is, if you don't hate me.... You weird-haired freak!
Your "wonderful" personality will keep me from forgetting you! Good luck!
Holly: !? ...They are returning!! Yes!! Dad and Jotaro! They are coming back!
And that's it! That's Jotaro's campaign! Hopefully, you got a feel for the gameplay loop. Join me next time for the next campaign, where we'll play as Muhammad Avdol. Also, if you were wondering about the massive time gap between my pevious posts and this one, blame the forum for not saving my post and cutting it off every time I made a mistake in formatting (or just failing to post all together). Sorry about that!


 ........................


 You can't help but touch what is forbidden....


 Hee hee hee.... Once drawn, I can control the one who drew me....
