What's the most you've ever lost in a coin toss? Let's Play Fear & Hunger! [Viewer Discretion Advised] (Finished)

Put your Let's Plays in here.
User avatar
Supplemental: The Penance Armor

Image

The Penance armor is the ultimate armor of the game, which we discovered in D'arce's run and actually equipped in Cahara's run. The Penance armor requires either completing a lengthy sidequest or the Steal skill to obtain, as it is only obtainable if you have the Vault Key item gotten from Trortur. This key is one of the few items that cannot be Empty Scroll'd and the door leading to the Penance armor cannot be forced. For the sidequest method of getting it, you must Talk to Trortur in battle and inform him of Buckman's hiding spot. Selling out Buckman gives the option to do the same to Jeanne should you rescue her in the Ancient City. Upon returning her to the Gollum expy, he'll reward you with the Vault key as well as telling you how to reveal the path to it (lighting all wall lanterns in the Inner Hall). If you already know about lighting the torches, you can instead get the armor much earlier by using the Steal skill on Trortur in the fight. Cahara can do this from the start if he has Steal from his backstory, while other characters need to either Empty Scroll the skill or kill Cahara for the Endless Soul and use two lesser souls to grab it. Trotur disappears from the game, along with killing Buckman, once you enter the Ancient City so the sidequest ends there and you cannot use the Endless Soul from Nilvan to learn Steal for this purpose. You can also botch the quest by selling out Buckman and then turning around and ratting out Trortur to Ser Seymor, who will kill Trortur in a rage. This denies you the key, though probably weren't aiming to get it anyway if you opted for such a pointless resolution to the sidequest. If going for the Steal method as a non-Cahara character, you'll want to dive into the courtyard well to enter the Level 2 Basement in order to bypass Trortur until you have the skill. You'll also need enough Tinderboxes to light the lanterns, but since you always get 5 if you find them in a crate, it's very unlikely you'll have a run where you aren't able to do that.

Now what does the Penance armor do for you after all this hullabaloo? The Penance armor offers great pros as an armor while mixed with some sizable drawbacks,

Pros

-The best defensive bonuses in the game. The Body Armor and Helmet pieces have a combined damage reduction value of 42.5% for slashing damage, 55.25% for piercing damage, and 59.5% for blunt damage. Only the Gaunt Plate Mail and Gaunt Bascinet match these values, and the Penance armor can be gotten much earlier and much more safely.

-The helmet grants immunity to the Confusion status, same as the Gaunt Bascinet.

-The Armor affords you limb protection, giving you immunity to Arm and Leg loss. Field sources of limb loss like Bear Traps, Hurting from the Yellow Mages and Bonesaws can still hack you up.

-Makes you immune to the lunge attack of the Night Lurch, which isn't really that helpful but it's there I guess. Figures I got nailed by that just before I got the armor in Part 11.

Cons

-The armor pieces cannot be removed once equipped, as it imbeds itself into the wearer with innumerable spikes.

-By extension, it prevents sex related actions such as the Bunny Mask orgy, Showing Love, as well as the Wolf Mask Feast which requires nudity to partake in. Even if the armor could be taken off non-fatally, the mutilation rendered on your character would prevent them from sexual activity regardless.

-Shortly after donning it, the game will begin running checks to inflict you with the bleed status every few moments. This can be treated with Cloth Fragments but will quickly return. The Ring of The Still Blood will cure it, but that can't be unequipped. The Salmonsnake Soul will also cure it for as long as it is worn, but the bleed will return in due time when it is unequipped. For best results and Body efficiency, keep the Salmonsnake soul on your character anytime they're not partaking in a fight where someone else would like the limb protection.

-While the Marriage can wear this armor despite their deformities, the Abominable Marriage cannot as it is far too big and irregularly shaped to fit in it.

-Less a specific con of the armor and more a related problem with it being unequippable, Confusion is the only status ailment it protects against. While this doesn't matter too much for most ailments, it is a serious problem with Blindness. Be very cautious fighting the Crow Mauler with this armor on, as you will not be able to protect against blindness nor cure it by equipping the Iron Mask if it gets inflicted.

With all that said, is it worth it to equip this armor? Up to you. Its drawbacks are fairly manageable and there's a lot of value inherent in its raw defense and limb protection. If you can get it, I'd generally say there's no reason not to from a purely practical stand point. The one situation I would advise caution for when taking it is if you need to fight Crow Mauler, something you may want to do for Ragnvaldr's S Ending. Since you can't protect against Blindness or cure it with this armor on, you need to make sure your strategy for fighting Mauler doesn't leave any room for Ragnvaldr to get hit.

User avatar
Supplemental: The Final Enemies

The last enemy post for the LP! My how time flies. This post will be concerning the last two enemies I have yet to cover, that being the final boss of Ending A as well as the T&S/Hard Mode exclusive boss found in the Void. At the time of this writing, we have yet to see the latter fight within the videos and will not be seeing it until I get to Enki's S Ending route which requires that you fight it. If you're not interested in learning about it until it appears within the videos, I'd advise against reading this post further.

The God of Fear and Hunger

ImageImageImageImage
Image

Phobia(s) Triggered: The God of Fear and Hunger actually INDUCES phobia, causing the status even for characters who normally can't suffer from it like Moonless and Nas'hrah.

Image

More or less the true final boss of the game, The God of Fear and Hunger is the ascended form of The Girl. This God is well beyond the power of Godhood offered by the throne of ascension, as the unique soul of The Girl mixed with the essence of the God of The Depths results in a deity on par with the Old Gods. As such, the fight against is a lengthy multi-phase battle of increasing danger. In Phase 1, the mutating Girl does little more than soak up hits. Starting with Phase 2 and Phase 3, she can begin to launch weak multi-hit attacks that are not terribly threatening. The fight starts to become a concern at Phase 4, where she becomes considerably more durable and will use the Stampede of Arms attack, which can hit for up to 30 damage. Once her final Phase rolls around, things become dire. If you're lucky, the God of Fear and Hunger will engage in self mutilation and waste a turn doing negligible damage to herself. Otherwise, she can attack with the powerful Purifying Ember, which hits for about 30 fire damage and causes Burn. She can also force a coin flip attack on your protagonist which deals hefty Body and Mind damage if failed or not guarded against. Fortunately, like so many other bosses she can easily be bested with DoT effects. Likewise, while you will be down a party member as obviously The Girl isn't helping you anymore, having 3 characters in this fight gives you a reasonable safety buffer. If you have it, it's not a terrible idea to up the Blood Golem in the first phase for the extra help. As long as you come into this fight with good equipment, it shouldn't be too much of an issue. One amusing oversight is that if you manage to deplete the bosses True HP in Phases 2-4, it will actually end the fight early. While this is unreasonable for Phase 4, it's more than doable in Phase 2 and 3 with the right loadout. Not that it really matters, much like Gro-goroth the God of Fear and Hunger is way beyond the pale of humanity, and your attempt to best it merely succeeds in confusing her before she awards you a swift death.

The Traces of Sylvian

Image
ImageImageImageImage

Phobia(s) Triggered: Erotophobia, Teratophobia

Image

Sylvian is exclusive to the harder difficulties, attacking you in the Void on the path to your ascended character or Le'garde. She serves as an alternate final boss for Ending D and Ending C-II in this sense. As you'd expect of an Old God, she is no joke. The inner tentacles can attack for 25-30 damage, which can be very painful if she focus fires a single character. The outer tentacles, so long as at least one of them is still up, will Entangle a random character at the end of the first turn and bind them for 3 turns. The attack repeats every 4th turn after the initial use, meaning that once she lets go you only have one turn of your party back at full strength before she entangles someone else. This move makes the fight almost impossible to win as a solo character. The Tumor in the center will transform gradually, forming a facsimile of a random protagonist character around the end of the third turn. Each of these tumor clones can take actions derived from the character they are based on.
-The Cahara Tumor while either attack with Critical Stab to inflict bleed or critical state, or launch a double attack that has a high chance of cutting off an arm. Both of these deal about 35 damage on their own.
-D'arce's tumor has a 50% chance to use Leg Sweep, attacking the entire party for 30 damage with a guaranteed chance to take off a leg. She can also double attack, like Cahara.
-Enki's tumor has a 50% chance to cast Hurting for 50 damage as well as destroying a random limb, otherwise he will use Locust Swarm to stun your party for two turns along with light damage.
-Ragnvaldr's tumor will use his insta kill coin flip attack 50% of the time, and will otherwise launch an attack that does about 35 damage with a high chance to cause Bleed.

Naturally all of these are pretty nasty, some moreso than others, and make a perilous battle even moreso. Aside from these actions, Sylvian can also cast Color of The Unknown, a Mind damaging attack that hits the whole party for about 30 Mind damage. That's not all though! Sylvian is the only notable boss that resists Poison and Burn, reducing the chance of those ailments hitting to 10% of their normal value. So an attack augmented with the Black Witch Soul only poisons 10% of the time while Combustion only inflicts Burn about 6% of the time. There is one crack in Sylvian's armor though: she's pretty much the only major boss in the game not immune to Confusion. Locust Swarm can almost completely shut her down, only allowing Entangle and Color of The Unknown to go through. This strategy can have problems if your main character gets Entangled, as they are the only ones who can use that spell. It's a good idea to have the White Angel Soul on them for this fight so you can act more quickly after being released. Another thing that can help is Leg Sweep. Leg Sweep in this fight destroys the inner tentacles, robbing Sylvian of the ability to do Body damage until the Tumor forms. It's a good thing to keep in mind if you can work it into the build. Be sure to bring plenty of Elixirs of Mind to this fight, you will be casting a lot of high cost spells in this battle and combining that with Mind damage from Color of The Unknown, you will quickly find yourself too crazy to cast spells without Mind healing. Once all the tentacles and the tumor have been destroyed, this fight is essentially won and all that is left to do is grind down Sylvian's massive HP pool. Unlike Gro-Goroth and The God of Fear and Hunger, Sylvian simply grows bored with us and lets us go after enough damage is dealt, allowing us to get our regularly scheduled Ending.

User avatar


Part 12 is out! There are no extra notes for this video, you just have to experience it.

But that's not all, it's Second Video Saturday! That means we also have our first Hard mode run for your viewing pleasure, and because I did it off the back of the previous recording and was already burning out on commentary, it's scuffed and messy as hell!


Part 13 features D'arce as our protagonist once more, and we speed towards her exclusive S Ending in Hard mode, The True God Of Fear & Hunger! This does not result in the birth of The True God of Fear & Hunger. This is by far the fastest "real" ending to get in the game and is another speedrunning staple. We'll have extra notes for this video of course, but two questions to answer before we get to that.

How Do You Get This Ending?

There is a two step process to getting this ending.

1.) Collect the instructions to craft the scroll to teach you Rebirth of the Beloved. There are 3 Torn Instructions items you need to grab to accomplish this, all located in the Grand Library of Past Ma'habre. They can be found at the following locations,

-The stack of journals by the cage in the southeastern entrance to the Library. (It's the room below the experiment room that has the ritual circle in the present) This journal will always say the same thing, but you can grab a Torn Instructions from it if D'arce is in the party on Hard mode. (Note the phrasing there)
-In Valteil's chamber, to the right of the second to last ladder leading to his boss battle. Valteil himself can be ignored.
-In the main entrance foyer of the Grand Library, it'll be in the bookshelves on the second pillar to the right of the entrance.

Grab all these, craft the spell scroll, and learn Rebirth of The Beloved from it.

2.) Confirm Le'garde's body. If you know Rebirth of The Beloved, D'arce will proceed to use it on him when examining him again.

That's all. This ending can easily be gotten within 15 minutes if you know what you're doing.

Is It Canon?

Maybe? Certain events in Termina all but confirm Le'garde made it out of the dungeons in some capacity, but whether it was this way or the Void is up for debate. I'm skeptical the resurrection played out exactly as it does in this ending for a variety of reasons, but I can't rule out that something like this occurred.

Unique Items Available

Rebirth of The Beloved: This is the unique skill I did not elaborate on in the original Hidden Skills post. The instructions to learn this spell only appear on Hard mode, and only if D'arce is in the party. I word it like that because it is actually possible to get D'arce in your party in Hard mode regardless of who you play as. The game has what are known as Dev Spots, which are essentially debug tiles. These do a variety of things, but the one in the time stamped video linked puts Ragnvaldr and D'arce in your party. (Or just D'arce if you are playing as Ragnvaldr) They are fully functional as if you recruited them normally, and D'arce specifically allows you to get Rebirth of The Beloved if she is present. Learning and using the spell as a different main character will result in their S Ending playing out, logic be damned. This is its own speed run category known as WRONG END%. Naturally the dev spots are tantamount to cheating, so I won't be using them, but they are available if you'd like to make things easier on yourself.

Extra Notes

-Your equipment matters very little in this run. The Arm Guards load out is better if you end up squaring off against Guards in the prison, but the Leg Guards loadout gives you much better survivability against Yellow Mages. It's up to you what's more important, but there's more pressure on to actually fight the mages.

-Soul stones do not matter in this run since the Ending is obtained on Level 7 with no need to backtrack beyond that. As such, you do not need Blood Portal for this run.

-You can check on Le'garde before getting the instructions but there's not much reason to. Crow Mauler can burst through the wall like the Kool Aid man just outside Le'garde's cell on Hard Mode, so it's really just needless risk to go there before despawning him.

-You don't need to loot too much in this run, but it's still worth your time if you get lucky with securing a Cursed weapon like I did.

-If you're willing to just soak up the field Hurting spells from the Yellow Mages, this ending can be obtained with zero combat encounters, making it the only ending besides E where that's possible.

User avatar


Part 14 is out, in which we get Cahara's exclusive ending! This was almost a really clean run that had everything I wanted except for one disaster that appeared about a third of the way through. It wasn't a huge deal in the long run, but it was definitely an annoying bit of forced improvisation I've had to deal with. It's wild to say this, but the LP is almost over. If all goes to plan next weekend, I will be recording the last two videos for this series. The ultimate challenges available in the game, Enki and Ragnvaldr's S Ending. I'll more than likely employ a little cheese to expedite Enki's playthrough if the game is willing, but I plan to do a mostly honest run for Ragnvaldr's S Ending. Look forward to that.

How Do You Get This Ending?

Cahara's ending is definitely on the shorter side of playthroughs you can do in this game, but it's considerably more complex than D'arce's. The following things need to be done,

1.) Reach the Level 7 Catacombs to spawn Isayah, and of course grab the Cube of The Depths along the way.

2.) Buy the treasure maps from Isayah, do not kill him to steal them. This will require 50 Silver Coins. 40 of those can be gotten from Buckman, the remaining can either be gotten from Cahara's backstory or you can try to depend on loot RNG.

3.) Locate both of the treasures. Upon obtaining your second treasure, Isayah will ambush you in an attempt to steal the treasures from you. Kill him in this fight, and when you loot his body you will get Map #3.

4.) Enter the Old Passage. You will either need to solve the statue puzzle in the Tomb of The Gods to get the Old passage key or simply Empty Scroll the key into your inventory. Follow the map to where it leads to in the Old Passage and claim the King's Crown.

5.) Confirm Le'garde's death. This can be done at any time in the run, but it's safest and most efficient to just do it as you leave the Ancient City.

6.) Return to the Entrance Courtyard and leave through the mist.

Do all this, and you will obtain the sardonically named "Happy Ending", likely in around 30-40 minutes of playtime.

Is it Canon?

Ha ha. No. This is the one S ending that almost assuredly did not happen by the time of Termina, in any capacity. Someone had to escort The Girl to the depths, and the other characters have more concrete evidence pointing to their ultimate fates, leaving Cahara as the privileged ascendant attendee. While some people like to theorize that maybe Cahara was ultimately spared death and escaped, even I think that's a little too idealistic and he most likely just died in the wake of the God of Fear & Hunger. Admittedly, Termina does have a broad strokes approach to the outcome of this game, where there are a couple conflicting events that nevertheless happened in Canon, but given the tone of the series it's very unlikely Cahara escaped the dungeons with his life.

Unique Items Available

Map #3: Should you choose to purchase the maps from Isayah instead of stealing them, you gain the potential to access this map. Simply defeat Isayah when he ambushes you, and search his body for it. You can obtain this map in any mode, but it is pointless to do so outside of Cahara's Hard mode.

King's Crown: The treasure of the final map, this is the main thing you need to get Cahara's S ending. Once you confirm Le'garde's death, you can skeedaddle with this pricey bauble and secure Cahara's fortune. Sadly money only goes so far in treating severe PTSD and inflated paranoia.

Extra Notes

-I would recommend taking at least one of the money options in Cahara's backstory, but it's up to you if you want to forgo Escape Plan or a utility skill like Lockpicking. I was confident enough to go in without Escape Plan, and if not for one random event that would have been the completely correct choice.

-You can go through the Basement 100% guaranteed if you have Lockpicking, but since we want to save Buckman for the reward money and I wanted to learn En Garde, it was more efficient to take the front entrance and risk a fight with the Jaggedjaws. Since it's right at the start, I can easily reset if I screw up and get mauled.

-Like D'arce's run, there's not much point to learn Blood Portal. It's a little more useful here, but I don't think the time it would save is all that much and En Garde is more helpful overall.

-This was almost a really clean run, so of course I got the slaughtered village event to throw me off my game plan and force messy improvisations. This is the third time I've gotten this event in the course of producing this LP, which is some phenomenally bad luck.

-I mention this in the video, but it's important to note that Isayah spawns when you reach the Catacombs. (Possibly he spawns sooner than that, but there's not much reason to backtrack to the Entrance until you reach the Catacombs) It's often falsely stated you need to find Le'garde to get him to spawn.

-Don't jerk Isayah around. If you're unable to afford the maps, he will leave the Dungeon after a certain amount of time passes. Absolutely do not talk to him unless you have the money for the maps, or the ending risks becoming unobtainable.

-If you have really bad luck with Explosive vials, you can get the guaranteed one from the Level 6 mines. This will require evading Miner Spectres, but it's easy enough to do if you're careful.

-It's far from necessary to Empty Scroll the Old Passage Key, it's just easier and a lot faster. I've already shown off the puzzle, so I figured I'd just Scroll the key if I had the opportunity.

-The King's Crown can be obtained in any mode, but it only has a purpose in Hard mode. In lower difficulties, if Cahara is in the party and you grab it, he will ask you if you will give it to him. Refuse, and he will flee the party at the next screen transition with the crown in tow. Give it to him, and he'll stick by you in gratitude.

-Even though obtaining the crown seemingly implies you can leave right away, you do need to confirm Le'garde's death before Cahara is willing to leave the dungeon.

User avatar


Part 15 is out! This go around we're checking out Enki's S Ending, which is the second hardest one to get. Had a couple false starts, but fortunately the full run ended up being amazing. This is probably the best item RNG I've gotten in awhile and it made the route I took an absolute breeze. There were several things I did not need to do, but I wanted to stick as closely to my original game plan so it was clear what I'd do if I found myself RNG screwed. We've just got one more run and by extension one more video, and I've saved the hardest for last! Before we get to that though,

How Do You Get This Ending?

This one's a little esoteric but it's not really any more complicated than Cahara's broadly speaking.

1.) Step out of the shadows when encountering Nosramus in the entrance to the mines. Politely introduce yourself, which sets the first flag for Enki's S Ending. It's important to note, YOU DO NOT need to talk to Nosramus in his first hideout in the mines. This is very commonly listed as a requirement and it is not true. Doing this requires defeating the Old Knight, which greatly complicates the route due to the party limitations you have to contend with, so I want to emphasize this every chance I get. If you do happen to visit Nosramus though, make sure to avoid pissing him off. Stealing from his chest while he's in the room will terminate the quest line.

2.)After collecting the Cube of The Depths and reaching the Catacombs, visit our old pal Isayah again to steal his maps. We will need Walk on Water to finish this run, and the 70 silver coins can also come in handy as a fringe perk.

3.) Defeat Valteil and talk to him in the present Ancient City right after. Enki will get additional dialogue here in Hard mode about the path to Enlightenment, which sets the next ending flag.

4.) Nosramus will have moved to his second hideout at this point, which is where we need to talk to him next. If you have spoken to Valteil in the present, you'll be able to inform Nosramus of what he said which will prompt Nosramus to provide you with the Spirit Anchor, an equippable accessory. This is the final piece needed to get Enki's S Ending, now it's just a matter of actually getting to it.

5.) Enter the Golden Temple of the past, defeat Francois and sit upon the throne to enter The Void. For the purposes of this run, I just Empty Scroll'd the King's Passage Key, but you can feel free to get in the legit way if you want to challenge yourself more.

6.) Once in The Void, make your way to the Ascended Enki and fight the T&S/Hard mode exclusive boss along the way. Once the fight is over, equip the Spirit Anchor and approach Ascended Enki. While Ending D seemingly plays out like normal, so long as you have the Spirit Anchor equipped you will get Ending S instead once the Ascended Enki "battle" concludes. It's important to note this is the only point where you actually need to equip the Anchor, you're more than welcome to use a more helpful accessor everywhere else in the Void until this point.

Overall, this is a pretty simple ending to get all things considered, it's just a matter of knowing the steps to get the Spirit Anchor and the game becomes a standard run once you have it. The limited capabilities of Enki and the skeletons can make this run pretty hard if you approach it without Empty Scrolls, especially if you don't get the amazing luck I did, but there are plenty of things you can do regardless of anything to give you a good shot at success.

Is It Canon?

Yes, and most likely almost exactly as it's portrayed. The Skin Bibles in Termina are actually penned by Enki and contain the knowledge of the older Gods as well as The God of Fear & Hunger that he gained while studying in the Grand Library. The only thing that's unclear is if Enki is still alive by the time of Termina. While the ending itself establishes Enki discovered the secrets to a prolonged life much like Nosramus, whether he chose to live unto eternity or decided to bow out after a point is left ambiguous.

Unique Equipment Available

Spirit Anchor: This actually does have an effect beyond being necessary for Enki's ending, though it's a pretty useless one. The Spirit Anchor gives you immunity to the Mumbler and Greater Mumbler's Soul Binding Skill. Mumblers are pathetically easy to kill even without going for head shots and Greater Mumblers are easy to avoid, so this is probably the most worthless status protection in the game.

Extra Notes

-Enki has by far the roughest early game, so while you do want to pick up Blood Portal eventually it might not be a terrible idea to dedicate his early soul stones to picking up Loving Whispers or learning attack magic. The short sword is complete trash and it'll be a little bit before you can secure better equipment.

-If you're trying to beat the game without Empty Scroll usage, take God of The Depths as your max affinity instead as Locust Swarm is very important for the final boss of this run and you can't get it otherwise. Since I wasn't banning Empty Scrolls, I took Gro-Goroth so I could get Necromancy ASAP.

-Definitely dedicate all your lucky coins to Bookshelves, starting with Alchemilla Vol 1 means Enki has one less thing to pull from bookshelves before the Grand Library and greater chances to get Loot Loops.

-Relatedly, it's totally possible to just keep reloading your starting save file and fish for good books from the Level 1 bookshelves if you so desire. I accidentally end up doing this since I got eaten by Jaggedjaws after entering the dungeon, but you can totally use this strat on purpose if you want.

-One thing that has not come up in runs to this point is that you cannot form a Marriage in S Ending runs, it will terminate the quest lines for them. This is most unfortunate for Enki since his equipment restrictions really hurt him in combat. Funnily enough though, you CAN still use the Penance Armor and Enki has no restriction from equipping that, so you can potentially route it into a run if you avoid Trortur and secure an Empty Scroll for Steal early on.

-As stated before, you just need to make a good impression on Nosramus to set the first flag for the S Ending. Talking to him until the next trigger is hit is a waste of time and resources. It can still be worth it to defeat the Old Knight since there's a guaranteed Empty Scroll in the first Nosramus lair, but I'd just save that for later if the RNG has been unkind to you.

-Once again, just kill Isayah for his maps. We'll be doing this for one last time in Ragnvaldr's run as well.

-Valteil can be super random, so don't approach him with anything less than the best stuff you can manage for the fight. I was fortunate enough to be able to get all the best gear possible for this fight, which ended up not being necessary since he spent all his turns doing nothing save for one where he threw the weak headbutt move.

-You can talk to Nosramus in the second hideout before talking to Valteil, though this accomplishes nothing so may as well just visit him after you get the Valteil flag set.

-Combustion is a cheap and effective attacking option, so there's no reason not to grab it while you're there. One thing to note is that Skeletons can use Combustion as well, which is a worthwhile option if any one of them has been disarmed.

-I really would not recommend fighting the other New Gods to gain access to the Golden Temple, but if you choose to do so it's a good idea to pick up the Salmonsnake Soul and Pheromones for this task. For Skin Granny, redirect her attacks onto you defensively strongest skeleton and make sure you have double turns by any means necessary to stay ahead on damage and healing. For the Tormented One, bring explosive vials to jam the wheels of Torment in a single action and poison him, and just deal with the fact your skeletons will take a huge HP debuff from fracture.

-Locust Swarm isn't fully necessary for Sylvian with the loadout I had, but it does make the fight much safer. The White Angel soul is ideal for Enki in this fight because it is totally possible he'll be ensared by Entangle, and that can be a disaster and a half depending on how many of the tentacles actually decide to attack. Leg Sweep is a good opener since it effectively halves the chance Sylvian will deal out any damage.

-Sometimes the ending still bugs out and shows you the front of the dungeon for a half second before switching to the proper still. Given the nature of how you get this ending, it can be a very harrowing image to see.

User avatar


The grand finale is out now! We finish with the toughest challenge in the game, Ragnvaldr's S Ending done relatively honestly. While I don't hesitate to make use of any advantage the game throws at me, I do go about obtaining this ending via the intended method rather than using Empty Scrolls to simply skip the toughest parts. I got pretty good luck with items in this run, so a number of the things I had in my RNG proofed game plan were skippable allowing for a fairly clean run with not too much backtracking. Let's break it down.

How Do You Get This Ending?

Ironically despite being the toughest ending to get with the longest playthrough involved, the conditions for Ragnvaldr's ending are ridiculously straightforward. There are only two conditions to be met and then you can waltz out the front of the dungeon to get your ending, but the first condition is very involved.

1.) You have to obtain every unique soul in the game. While the plotting of this ending makes it clear this is meant for proof of the kill rather than having any special significance, this does mean there's an amusing work around where you can skip problematic boss fights with Empty Scrolls if you want. While I do use Empty scrolls, I do go about using them to just make doing this the intended way less of a hassle. It's also important to keep in mind you need Soul Stones for a good chunk of these, though not for the New God souls thankfully. For a refresher on the unique souls and a little breakdown for obtaining them,

Black Witch: The Black Witch can be fought in the Level 2 Basement Flipside or the Ancient City Library, but her soul can only be obtained in the Library so that settles that decision. Not a terribly difficult fight if you have a full team of Skeletons, it's just advisable you're capable of laying out 400 damage in a single turn so you can eliminate her Black Orb casting left arm. En Garde also simplifies the fight. Not worth an Empty Scroll if you want to go that route, but amusingly in earlier versions of the game you had to Empty Scroll this one since the Witch could only be fought in Flipside.

Iron Shakespeare: Very easy to kill since he has very low torso HP, often you can one shot him if you got the Sergal Spear like I did. Not worth an Empty Scroll in any capacity.

Butterfly: You don't need to kill for this one, you just need to slice the organ in the present day Golden Temple. We have to fight all the New Gods anyway, so we'll be heading there regardless. Obviously not worth an Empty Scroll.

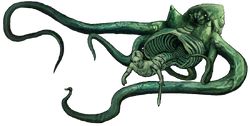
Crow Mauler: Definitely worth an Empty Scroll. You absolutely need a Red Vial to fight Mauler safely or risk a decapitation, so that's one piece of RNG to deal with. Additionally, we have heavily constrained options for engaging him since he despawns when we enter the Ancient City. Ma'habre has a number of useful items as well as ritual circles to build affinity, so getting prepared without going there is a hassle. Fortunately, most of the stuff we need to beat him solo are guaranteed. Loving Whispers, the Iron Mask, and the Eastern Sword for damage are all obtainable with no RNG, and Mauler does low enough damage that we can just wing shots at his torso and hope for crits while healing as we need to. The Red Vial is the only thing up to chance, and fortunately we were able to obtain a throwing dart for the safer poison kill strat. If you're able to get Necromancy before entering the City, you can also use Ghouls as punching bags. If you don't plan to Empty Scroll the Soul, setting up for Crow Mauler should be your first priority for this run because of the issues he presents.

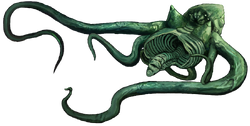
Cave Mother: Ridiculously easy if placed at the end of the run. Just equip limb protection and you're fine. As demonstrated, her torso HP is so low that the Sergal Spear one shots her. Not worth an Empty Scroll.

Salmonsnake: Definitely kill this guy as soon as you have a full team of Skeletons. He's fairly unthreatening in terms of damage and has lowish Torso HP, so you can kill him without much issue. Not worth an Empty Scroll for the most part unless you want to take on limb destroying enemies with no risk ASAP.

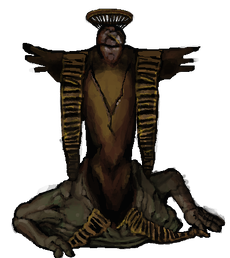
White Angel: He's fairly easy to kill if you have Limb Protection, and En Garde makes the fight no hassle at all. Two Sergal Spear shots is enough to kill him. Definitely have limb protection if you can't secure an ambush. I find attacking the Heart to be too unreliable, so I recommend setting up for Torso shots. Taking him on after the Skin Granny means you can get En Garde without having to Empty Scroll, removing an RNG element from that strat. Not strictly worth an Empty Scroll, but the soul itself is quite useful like the Salmonsnake, so that might be something to consider.

Old Guardian: This guy has big damage potential but is a serious glass cannon. With a full team, he's easy enough to kill in a single turn with no issue. I Empty Scroll'd the Old Passage Key to get to him, but you can cut out the middle man and just Empty Scroll his soul directly. It's a bit of a time and torch investment to go out of your way for this guy the proper way, so it's definitely a worthwhile consideration from that angle.

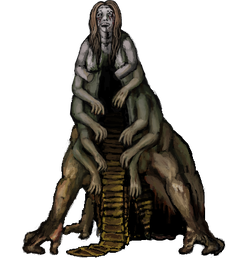
The Endless Soul: Skin Granny is scary, but with the right set up she is not much of an issue. As long as your skeletons are kitted out properly, you can just have Ragnvaldr War Cry and Guard while they go to work. Fast Attack is a good idea for this fight so Ragnvaldr can heal himself if the RNG is unkind on the arms getting destroyed. The biggest consideration is that the Endless Dream takes a bit of time to go through, is out of the way, and the Endless Soul itself gives access to a bunch of good skills. Give it consideration for an Empty Scroll.

The Tormented Soul: The Tormented One is really obnoxious to fight with skeletons since you have no control over what wheels they attack and both outer wheels need to be hit in a single turn in order to make him vulnerable. Fast Attack can take the RNG out of this, but of course I made a typo on the Empty Scroll and screwed myself out of that skill. He's not too difficult overall, just kind of annoying. I actually wouldn't recommend Empty Scrolling him, since you need to actually kill him to get access to White Angel, meaning you'd need another Empty Scroll if you skipped him.

The Enlightened Soul: Actually very easy to beat if you have the Eastern Silk Robes and the Salmonsnake Soul. I decided to just risk Ragnvaldr getting slammed with Black Orb and Headbutt instead, which isn't the smartest move but it ended up going okay. Definitely could have done this fight cleaner. I'd only really recommend Empty Scrolling this guy if you have absolutely no otherworldly protection and are super paranoid about Ragnvaldr getting deleted by the rare whombo Combo.

The Dominating Soul: Francois is essentially a free kill, but your skeletons can cause problems for the fight if they smash his torso down. Pay close attention to how many hits his torso eats and guard if it looks like the phase switch is going to happen before you can destroy his arms. Keep the White Angel Soul on Ragnvaldr so you can use the talk command on your Extra Turn if necessary. Not really worth an Empty Scroll since you need to enter the Golden Temple anyway to cut the organ there, so you may as well just fight Francois the intended way.

2.) Confirm Le'garde's death. We can leisurely do this on our way out of the city as we backtrack to pick up the Cave Mother and Butterfly souls.

After those two conditions are met, just return to the entrance and leave through the mist.

Is it Canon?

Most likely, though the finer details are probably a bit different from how they're portrayed in the game. Le'garde definitely makes it out of the dungeons, so if Ragnvaldr confirmed his death then D'arce would have done Rebirth of The Beloved shortly after. Ragnvaldr's lineage persists in the time of Termina, so in some capacity or another he made out of the dungeons, and this seems like a fitting path for him to take.

Extra Notes

-Picking the short bow and getting Marksmanship can make the early game safer in places, but having the Axe allows me to equip all my skeletons if I get bad book RNG and can't obtain Blue Sin. I ended up getting a bunch of equipment options that rendered the axe worthless, but it's unwise to bank on that so I'm confident the choice I made was a good one. The wooden buckler is a nice bonus.

-Food is basically no issue in this run due to Devour and skeletons not needing to eat, just be mindful to not eat anything you want to harvest a soul from.

-As mentioned at the start of this post, I had a number of RNG proofing plans in place, but I got really good RNG in this run. I'll make note of what I would have done if not for certain lucky loot drops.

-With the Axe, Ragnvaldr pretty consistently deals enough damage to the Guards to destroy their cleaver arms in one shot, but you do have to still worry about misses. That secure us our one and only reset for the run.

-This is the one time you absolutely want to enter the Thicket in a Hard mode run as opposed to taking the Mines route. The sooner we get the Eastern Sword the better.

-As mentioned previously, dealing with Crow Mauler is the first important thing of this run. The guaranteed things we want are Loving Whispers (just need to do the orgy and get a Soul Stone), the Iron Mask and the Eastern Sword. (Worst case scenario, we could take the Explosive Vial from the Level 6 mines and just deal with running around the Miner Spectres.) The RNG objects we have to contend with are the absolutely necessary Red Vial and the not required but helpful Throwing Dart. If I was unable to get a Red Vial after searching every loot spot in the dungeons, I'd have just said screw it and Empty Scroll'd the Crow Mauler soul.

-Once Crow Mauler is dealt with, that's when we're good to begin with making our team. If you didn't get Greater Blood Magic like I did, I'd recommend buying Elixirs of Mind from the Bug Eyed figurine to make sure you can cast Necromancy as much as you need to.

-The Penance Armor was not in my route plan at all, but I did have the option so I took it. If I couldn't have gotten it, The Gaunt Armor has the exact same defensive values minus the limb protection, so I'd have gone for that. The Penance Armor does make the run a little harder in some ways, because it doesn't protect against blindness and since it can't be taken off I cannot sub in the Eastern Silk Robes for the Valteil fight.

-The Ghouls aren't necessary to resurrect, but they are an easy way to get the Sergal Spear, which is very helpful in this run.

-With the Sergal Spear, Eastern Sword and Miasma as things we can collect guaranteed, we have the Axe left over for our final skeleton in the absolute worse case scenario. Luckily for me, I was able to set up a Bone Shears comp, so I didn't need to waste time grabbing Blue Sin even though I did get the capability.

-If you skip out on the Sergal Spear, I'd recommend keeping the Purified Eastern Sword on Ragnvaldr. His crits with the weapon go way beyond anything the Skeletons could hope to accomplish with it.

-It's definitely a good idea to kill the Black Witch before taking on any other bosses, Poison is just too good.

-The best way to deal with Valteil is to have Ragnvaldr equip the Eastern Silk Robes and Salmonsnake Soul, and then have him War Cry. He can heal as needed, has protection against Hurting blasting off his limbs, and the skeletons can do the heavy lifting. Alternatively you can Pheromones a Skeleton with the Robes and Soul equipped. I screwed up on learning Pheromones and had the Penance armor, so neither of these strats worked out and I decided to play the Valteil casino.

-If you Fast Attack or some other method of getting a speed buff, the Tormented One fight is much simpler. The central wheel takes ludicrous damage from the Sergal Spear, making the fight go by way faster than how it went in the video.

-Remember that the White Angel only becomes active after defeating Tormented One, so you'd need two Empty Scrolls to get both their souls if you want to skip the Tormented One.

-Skin Granny is super easy with the Penance Armor/Gaunt Armor and a Salmonsnake Soul, just War Cry and Guard while your skeletons go to town. This is another situation Fast Attack would have helped a lot with since the Sergal Spear can do enough damage to oneshot the Granny's arms as well as giving me opportunities to heal if I got bad RNG.

-The Old Guardian is a massive time sink to get to the intended way, making the Old Passage Key the one Empty Scroll I fully intended to use to get to him no matter what. I'd recommend cutting out the middle man and just Scrolling the soul itself to save time in a more casual run. (As casual as Hard Mode runs can get in this game anyway)

-Again, be mindful of how much your skeletons are hitting Francois' torso for. His Coin Flip attack goes through even if you have the Penance Armor and getting hit by it can be a disaster scenario.

-One Tooth Bite is the ultimate in RNG screws with its random limb destroying attribute, so I really would just recommend saving the Cavemother for one of your last kills. Sergal Spear makes the fight a cake walk.

-You can also take out Iron Shakespeare on the return trip for the Butterfly soul, but I wanted his Empty Scroll so I took him out earlier.

And that's a wrap for the LP! If you're interested in seeing more hardcore versions of this run with riskier strategies used, Garen Oak has a clear with absolutely no Empty Scrolls used. Some of his choices are questionable for how he got through this, but it's an impressive accomplishment regardless. Fear & Hunger speedrunner and certified mad man Ihukne has the current world record time for clearing this run glitchless. By throwing all caution to the wind and letting RNGesus take the wheel, he cleared the ending with a ridiculously fast time of 33 minutes and 16 seconds. Makes my video seem pretty inadequate, eh?

Post Reply