Supplemental: The Hexen
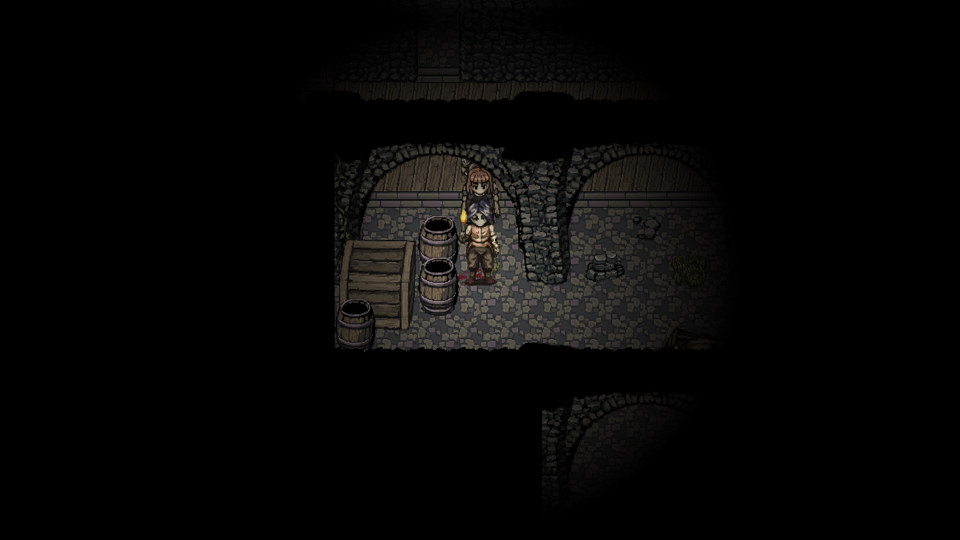
It has taken awhile due to my absent mindedness, but as of the last video we have finally seen all functions of the Hexen, so now I think is a good time to properly break down what the Hexen is, how you use it, what you can get from it, and the smartest picks from it as well as things to avoid. The Hexen is the primary way to gain new skills in this game, as well as being an option for obtaining stronger equipment, making it tantamount to being a level up system in a game that otherwise lacks that kind of growth for your characters. To begin with,
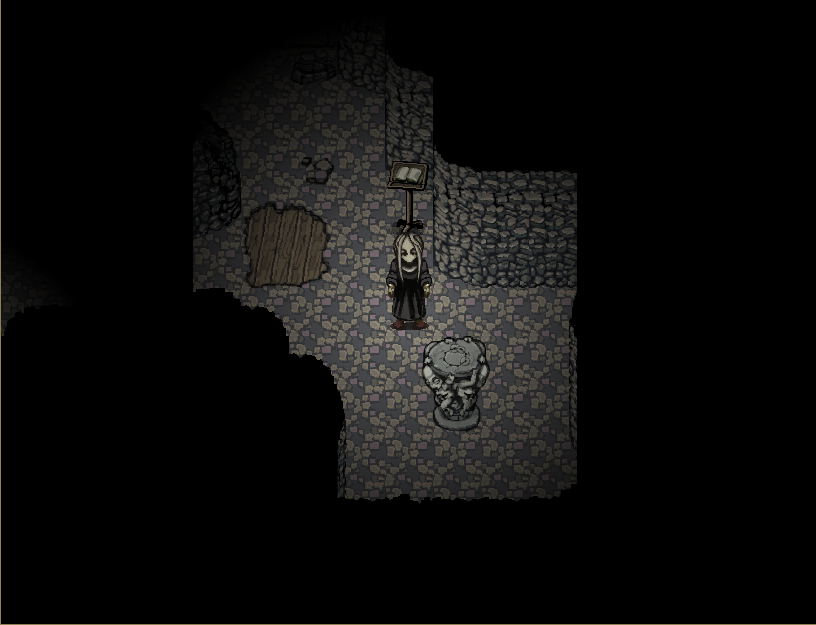
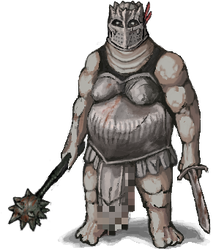
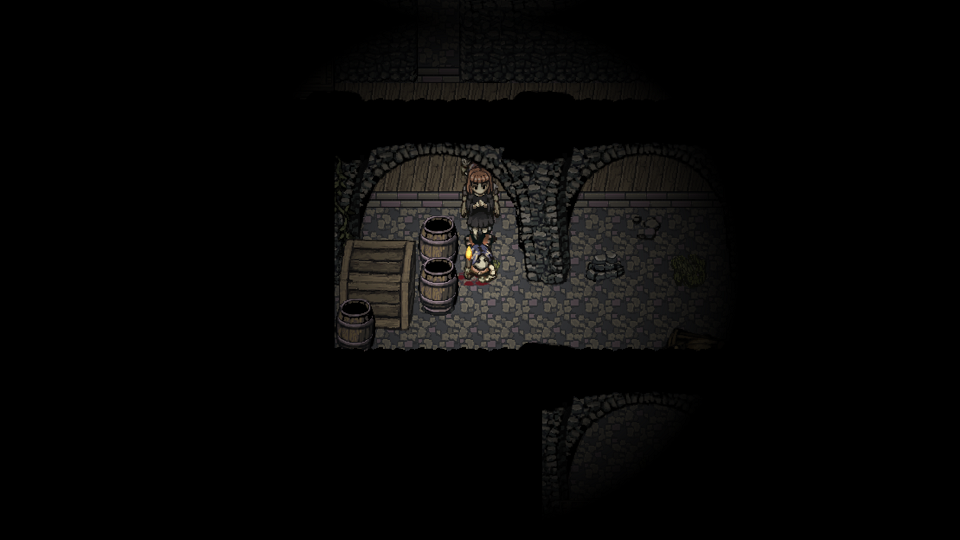
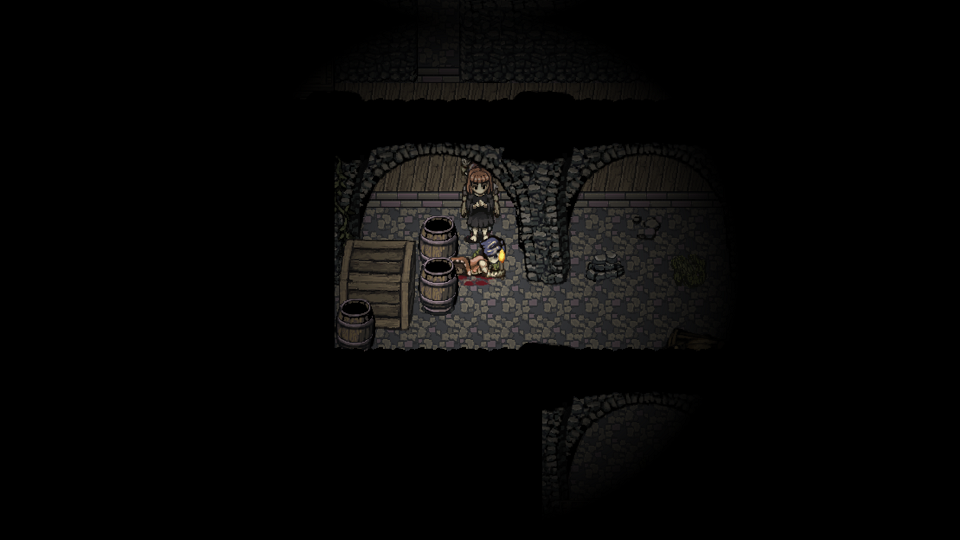
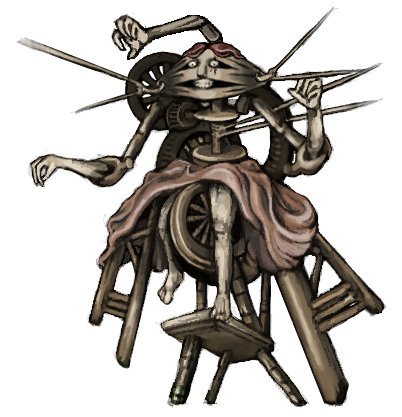
The table in the above screenshot is a Hexen. ~Useless Trivia~ As revealed in Fear & Hunger Termina, the proper name of the table is the Tes'tich Table, while the Hexen is the grid etched into the surface of the table. There are two Hexens usable in the game. The first is located on Level 1, either in the bottom right of the Entrance Hall or in the Courtyard, depending on the layout you rolled for Level 1 when selecting your character. To get to it, you need a Purifying Talisman or the Counter-Magic skill, the former fortunately being a guaranteed drop from one of the Dark Priests in the Inner Hall. The second will be located in Nosramus' first hideout in the Level 5 Mines. This Hexen is guarded by the Knight Spectre, and cannot be accessed until the Old Knight has been destroyed. This is of no issue on F&H mode, but can make it very hard to access this Hexen on harder difficulties where the armor pieces of the Old Knight are much tougher. Regardless, both are located in close proximity of Ritual Circles, so it doesn't matter too much which one you want to use so long as you have Blood Portals set up for both Levels.
Now to actually use the Hexen, you need Lesser Souls. All functions of the Hexen take lesser souls as a fee, and it is otherwise a useless hunk of rock without them. To obtain Lesser Souls, you must have a Soul Stone and then use it on the corpse of a normal enemy to claim their soul. You can only claim one soul from an enemy, and the corpse must be intact, so try not to devour every corpse you create. Most things in the game give Lesser Souls when exposed to a Soul Stone, though as we have seen a number of bosses award powerful accessories instead. Now Soul Stones are pretty uncommon in the early game. In fact, the only one you can get 100% guaranteed with no work on your part is the one in the Cavedwellers Village. Otherwise, you need an explosive vial to claim the two in the thicket, you must fight the Dark Priests for what is likely the first soul you'll get in the game, and two more can be obtained from specific chests if you win their coin flips. If you're super lucky, occasionally the Yellow Mages will have Soul Stones as their dropped item when searching their robes. Soul Stones become more common in the second half, being able to purchase them at that point as well as a number of them being scattered around the Ancient City, but unfortunately they're less useful at this stage since you'll have way better equipment and accessories to work with. Bearing that in mind, our early picks for what to use our soul stones on are very important. But what can we get from the Hexen?
Option 1: New Skills
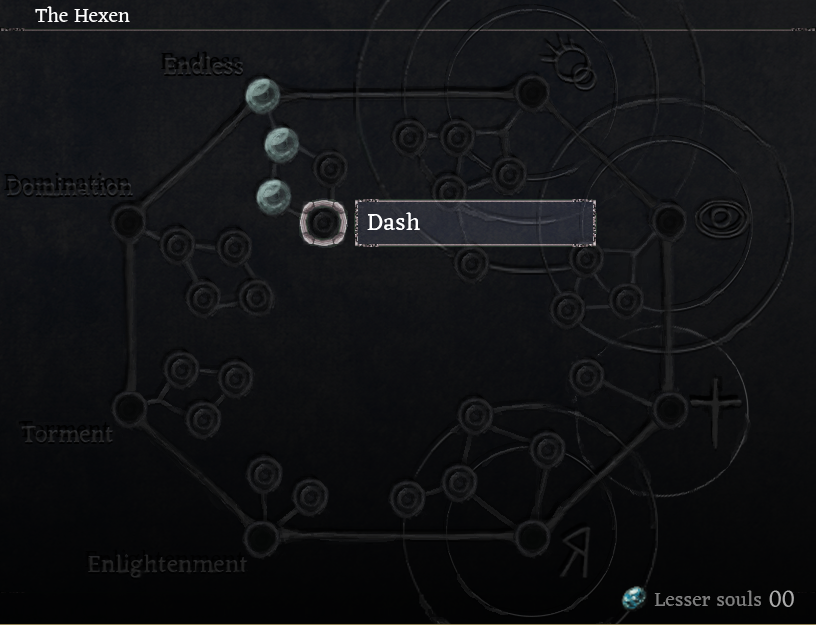
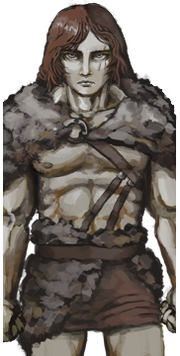
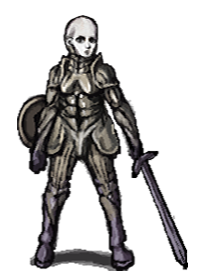
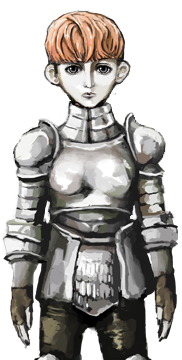
This is the screen we are presented with when using the Hexen. It is laid out into two halves, the left half being what I like to call Soul skills. These are tied to the birth soul of your chosen character, and each category can only be accessed by a specific character at the game's offset. Ragnvaldr has the Soul of Torment, Enki has the Soul of Enlightenment, D'arce has the Soul of Domination, and Cahara has the Soul of The Endless. These characters can only learn skills from these designated categories by default. Now you can have skills on a Hexen tree you don't have the Soul for by either learning the skill from a scroll or most commonly you'll see this if you have Dash from your backstory, but you cannot actually use the Hexen itself to learn these skills without being in possession of the associated Soul. Fortunately, you have some options for obtaining these Souls to expand your skill choices.
1.) Slay the New God associated with the Soul. This is the only method we're going to see in the first playthrough, and easily the least helpful since we're past the point we'd care about picking up most of these skills.
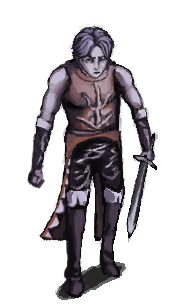
2.) Slay the associated main character of the Soul and use a Soul Stone on them. This is a cold and pragmatic way to do it, and is good for efficiency if you can make due without the party member. You may be wondering, yes these Souls will also pull double duty for their intended story function if you get them this way.
3.) Empty Scroll the Soul into your inventory. Another pragmatic way to do it, though this one is more for bypassing the boss fights you'd normally have to do to get them instead of for expanding your skill choices. Most trees only have one or two good skills, so you may as well just Empty Scroll them directly to cut out the more costly middle man.
With that said, if you have a lesser soul and the corresponding birth Soul, you can use the former to learn something from the latter. I'll go over what these skills actually do in the respective character bios for the characters that possess them, this post is just meant to cover how the Hexen specifically works. It's important to note that you can only learn skills along the Hexen through a preset path, as small as they are. Going back to Dash, having the Endless Soul and Dash learned does not mean I can use Lesser Souls to learn Steal and En Garde because they are adjacent to it on the Hexen. Lockpicking is a pre-req for both of those skills, and you must know it to learn either one. By that same token, Steal and En Garde are a pre-req to Dash if you don't already know it, though you only need to know one of the skills to be able to pick up Dash. The skills and the way they flow is as follows,
Endless Starts with Lockpicking, which then allows you to learn En Garde and Steal, and knowing one of those will let you learn Dash.
Domination begins with Defence Stance, which will allow you to learn Fast Attack and Counter next, and one of those skills will let you pick up Leg Sweep
Torment begins with both Devour and Bloodlust, and knowing either one will let you pick up Marksmanship
Enlightened starts and ends with Counter-Magic and Greater Blood Magic. You do not need to know one to pick up the other, and Enki starts with Counter Magic so he has the dubious distinction of being the only character who has one skill he can learn at the start of the game.
That covers the Soul half of the Hexen, the right half of the Hexen is dedicated to the Gods. You cannot learn any God associated skills from the Hexen at the start of the game, and must instead build affinity with the Gods if you want to learn their magics with Lesser Souls. There's a variety of ways to gain affinity with the Gods, but the most common one is prayer. Pray to a God at a ritual circle, and you will gain one "step" of affinity. After three steps, you will gain a full level of affinity with said God, and will be able to learn skills from them based on your level of affinity. There are also monuments dedicated to specific Gods that you can pray at for an affinity step with that God exclusively. Should you reuse a circle you prayed at, or should you offer a prayer at a God statue to the incorrect God, you will lose a Step of affinity with that God and can actually have negative affinity, though this will not lower your level for accessing skills at the Hexen. For God specific methods of gaining affinity, I will go over those in their dedicated sections. Not all Gods are represented equally on the Hexen, each of them having different max levels and number of skills you can learn, so I'll cover them in order of least skills and lowest level to most skills and highest level. I'm not going to go too deep on what any of the skills do as I plan to make a dedicated post for explaining what each spell does.
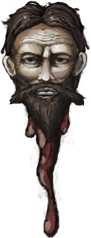
Alll-Mer has a maximum affinity level of 1 and only conveys one skill via the Hexen. Aside from praying, you can sacrifice the crucified man in the Inner Hall for one Step of Affinity, and pray to Alll-mer's statue in the Courtyard for another step. Combining this with the Level 1 ritual circle, you can max out Alll-mer within minutes of starting the game. Blood Portal is the sole skill you can learn from Alll-mer, and it's the only one I'm going to spend any amount of time talking about in this post. Blood Portal of course allows you to create Portals that link ritual circles together, creating a convenient fast travel system. It is near universally recommended you use your first Soul stone on this skill as doing so allows you to more easily return to the Level 1 Hexen later, and in general creating Blood Portals asap will save immensely on resources in the long run. Very rarely is it a good idea to skip this skill or get something else before it, save for one specific ending run.
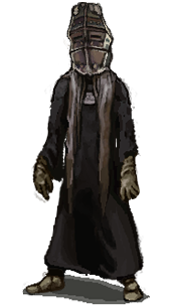
Sylvian has a maximum affinity level of 2 and 3 skills to learn. You can get a full level of affinity from participating in the Bunny Mask orgy, and can repeat it for full Sylvian affinity should you be willing to risk a game over on the coin toss. Alternatively, you can Show Love to a party member on a Ritual Circle as another means to get a full level of affinity. Do note, you do not want to Show Love on a circle that you've already used to pray towards Sylvian or if you have negative affinity. Sylvian will take offense to this and you will get a game over. There is a Sylvian statue in the Level 4 caverns you can pray to for one step of affinity with Sylvian. At affinity Level 1, you can learn Loving Whispers and Pheromones from Sylvian. At affinity Level 2, knowing either of the former spells will let you learn Healing Whispers.
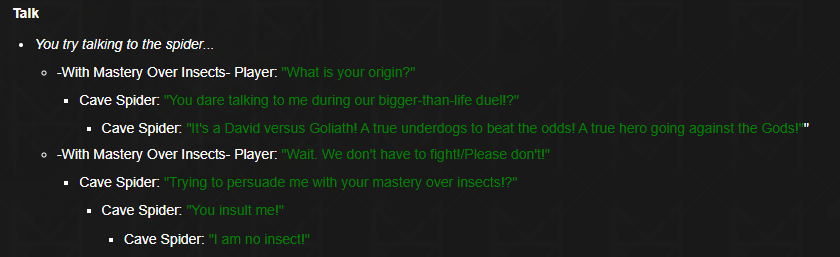
The God of the Depths has a maximum affinity level of 2, and can teach you 4 skills. Notably, he is the only God you cannot pray to. You can only gain affinity with him by doing quests for the Cockroach King. There's a bit of a Catch-22 here, as you need Mastery Over Insects to talk to the Cockroach King... which requires God of The Depths affinity to learn from the Hexen. Mastery Over Insects isn't too helpful save for a bugged (heh) conversation it unlocks, so it's of dubious use to Empty Scroll and frankly you should just dedicate that scroll to a skill you'd actually want from the skill tree, but whatever. Enki can start with Mastery Over Insects, but for reasons he can only do one quest with the Cockroach King, so he cannot max out his affinity with the God of The Depths this way. If getting access to this skill tree wasn't a complete mess, you can learn Mastery Over Insects and Needle Worm at affinity Level 1. Mastery Over Insects unlocks access to Flock of Crows and Locust Swarm when you have level 2 affinity, while Needle Worm only opens up access to Locust Swarm.
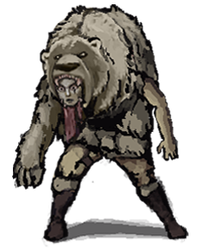
Gro-Goroth has3 levels of affinity and 5 skills to learn. Unique ways to get affinity from Gro-goroth are participating in the Wolf Mask feast for a full level (which is repeatable like the Bunny mask orgy with the same risk), performing sacrifices at Ritual Circles (most party members will balk at you trying to do this to them, but Ghouls can be sacrificed no issue), and there's a Gro-Goroth statue in the central square of Past Ma'habre you can pray to for one step of affinity. At level 1 affinity, you can learn Pyromancy Trick and Blood Golem. At level 2, you can learn Necromancy if you know Blood Golem and Hurting if you know Pyromancy Trick. At level 3, you can learn Black Orb if you know Hurting.
While like I said, I won't go deep on any of these skills right now, notable picks for your early game soul stones are Blood Portal, Loving Whispers, Pheromones, Blood Golem, and Necromancy. I would not bother ever trying to use Lesser Souls on God of The Depths, the only super helpful skill that is potentially critical is Locust Swarm. Just Empty Scroll that for when you need it, trust me.
So that's our first option for powering up at the Hexen. What's our other option?
Option 2: Cursing Weapons
Cursing weapons is essentially Fear & Hunger's take on a forging system. For a nominal fee of Lesser Souls, you can lay a curse on most, though not all, weapons in the game. This often results in a sizable attack power bump, as well as the weapon picking up the Otherworldly attribute. This creates a composite attacking type based on the weapon that was cursed, i.e. a Cursed Long Sword is an Otherworldly/Slashing Weapon. I mentioned Etrian Odyssey in the first video, and like that series when a composite attacking type is used, whichever type of attack would yield the greater damage result is what the game uses for determining the final damage. Now to be honest, this system isn't all that helpful. The early game soul stones are better used on skills, while later in the game you can just simply find equipment that is much stronger than cursed weaponry. Still, it's something to keep in mind if you happen to obtain any of the soul stones tied to RNG, and there are a couple cursed weapons that can be really worth your time to route into a run. I'll be going through all possible cursed weapons and give my thoughts on them.
Cursed Short Sword: This takes 1 lesser soul and a short sword to create. It has +40 attack power as opposed to a normal short sword's +10. Now Enki starts with a Short Sword, so you could get this at the start of the game if you so desired, but frankly it is negligibly stronger than almost any random weapon you'd get from a chest or weapon table, so I can't really say it'd be a good investment. Even if the Short Sword is a complete piece of shit, I don't necessarily think upgrading it to be less so is really a worthy endeavor. This is one of the few cursed weapons that is in the RNG pool for Chest items.
Cursed Long Sword: For 2 lesser souls, a Long Sword can be cursed to take it from +35 attack power to +70. D'arce can start with a Long Sword, so you can obtain this consistently. We see our first major problem with cursing weapons, many of them require multiple soul stones to lay a curse onto, and at the time their power would be helpful, soul stones are at a premium. By the time you can dedicate two lesser souls to cursing weapons, you can likely access stuff like Miasma and Blue Sin. One thing to note though is that the Cursed Long Sword rolls about as much damage as a Hurting spell would deal, so it provides similar utility for the same soul stone cost and no potential for mind loss. I'm still not a fan.
Cursed Iron Spear: For 2 lesser souls, you can take an Iron spear from +42 attack power to +70. Now this is just trash. D'arce can start with an Iron Spear, but frankly having a two handed weapon with the same attack power as a one hander is a foolhardy decision. The Cursed Long Sword would provide the same offensive benefit in almost any fight, and allow you to benefit from having a shield equipped. Never curse an Iron Spear. It's worth noting that this is identical to the
Cursed Ritual Spear, so may as well check that one off here as well.
Cursed Iron Mace: For 1 lesser soul, you can bring an Iron Mace from +30 attack to +60. Now this can actually be worth it if you have an Iron Mace. The general trend you'll notice is that the weaker a weapon is, the more you tend to get back for cursing it. The Long Sword and Iron Mace get double their attack power from curses, and the Iron Mace does so for one lesser soul. Unfortunately, getting an Iron Mace is RNG, so it's hard to bank on this. It's not uncommon to see one every couple playthroughs though, since it's in the loot table for Chests. This one is worth considering.
Cursed Short Bow: For 2 lesser souls, you can take the short bow from it's pathetic +10 to a respectable +50. If this only took one lesser soul, I actually would recommend it. This would let you just keep the bow equipped all the time for convenience since it's no longer a completely trash weapon. Two lesser souls makes it a lot more dubious, but keep it in mind if you get some extra soul stones through RNG.
Cursed Scimitar: For 2 lesser souls, you can take the Scimitar from +27 attack to +69. It's a sizable upgrade, but you're only going to have this sword as Cahara most of the time and he has way better options than cursing his crappy starting weapon, especially for that cost. If it was 1 lesser soul, it'd worth considering.
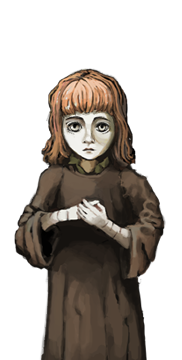
Cursed Dagger: For 1 lesser soul, the Dagger goes from +5 attack power to +35. If you don't plan on grabbing Combustion, this is a way The Girl can actually do some damage. Not super helpful, but it's not impossible to route it in if you so desire.
Cursed Meat Cleaver: For 1 lesser soul, this takes a Meat Cleaver from +30 attack power to +60. It's the Iron Mace as a slashing weapon, but unlike the Iron Mace you can usually get it from slaying a guard. It's a decently strong weapon for a 1 lesser soul investment, so if you feel like you can take out a guard for a chance at this, it's not a terrible thing to go for.
Cursed Morning Star: For 1 lesser soul, the Morning Start can go from +38 attack to +75. If there was a guaranteed Morning Star in the game, this would totally be worth picking up. That's a huge damage bump for 1 measly soul. Sadly, there isn't one, so this is just in the realm of the occasional thing you can route into a run if the RNG is accommodating.
Cursed Bone Shears: For 3 lesser souls, the Bone Shears can go from +95 attack power to +117, but it will not lose the 50% accuracy penalty. This is the second strongest weapon in the game, but even if it was 1 lesser soul and you had Eyeglasses, I still couldn't recommend this. The number itself is impressive, but it's a marginal upgrade when you get right down to it. The high cost and inherent drawback of the weapon just completely sinks it, pass on this.
Cursed Axe: For 2 lesser souls, the Axe goes from +36 to +68. The worst return on investment for a starting weapon. It's a better boost than what the short sword gets, but that one only costs 1 lesser soul. Definitely pass on this one.
Cursed Shark Teeth: For 2 lesser souls, the Shark Teeth goes from +37 to +75. A slightly better Long Sword, and not too terrible honestly. There's a guaranteed Shark Teeth in the Level 6 mines, so I could see a Hard mode run making room for this.
Cursed War Scythe: For 3 lesser souls, the War Scythe goes from +15 attack to +23. It does not lose the massive accuracy penalty it has, still only having 30% chance to hit. This is a weapon we haven't seen yet and will talk about at a later date, but holy balls that is a terrible investment. Like the Bone Shears, even if you have the eyeglasses, this wouldn't be worth it even if it only cost 1 soul. This is like the Bone Shears times a million for terrible deals.
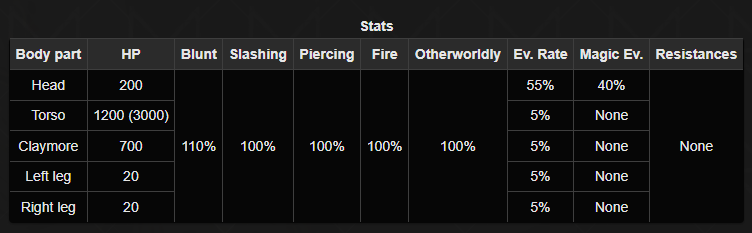
Cursed Claymore: For 3 lesser souls, the Claymore goes from +80 to +100. The Claymore is rarely gotten in runs due to the highly specific ways you can get it, and 3 lesser souls is way too much. This is one of the strongest weapons in the game, but it just isn't worth the cost.
Cursed Blue Sin: The most expensive weapon to curse, costing a whopping 4 lesser souls. On its face, this is a terrible deal as it only takes the Blue Sin from +85 to +92, putting it at the same strength as Miasma. Uniquely though, Cursed Blue Sin has a 70% chance to inflict the Burn status. Burn is as effective as poison as a DoT, and combining it with a certain soul can let you inflict Burn and Poison in a single strike, absolutely melting bosses in a matter of 2-3 turns. If you're getting Blue Sin, you should strongly think about Cursing it. It's a great weapon on its own, and cursing it puts it over the top. It's the one cursable weapon that actually takes advantage of the fact Soul Stones are much more common in the game's second half.
And that's cursing weapons. Truthfully, I rarely use this system save for Cursing Blue Sin, but it is a good idea to keep it in mind for the odd runs where you're over budget on Soul Stones before entering the Ancient city. Next mechanics post will likely be dedicated to all the spells mentioned in the previous heading.


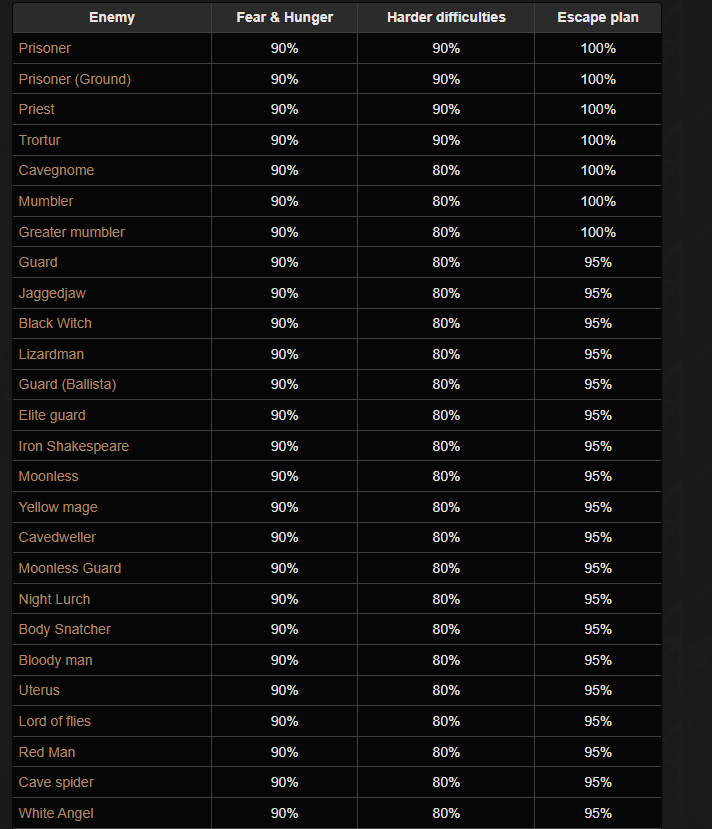
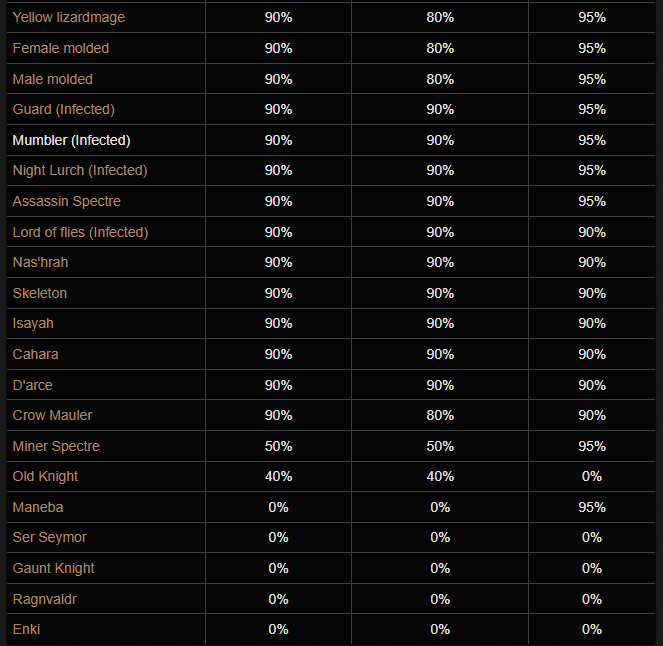
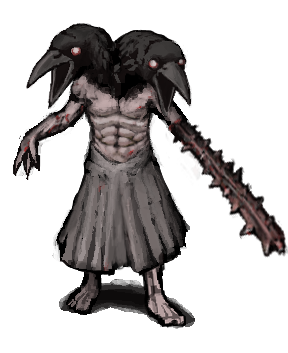
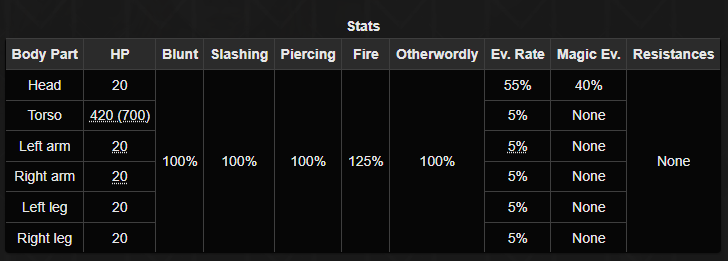
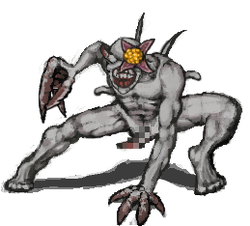
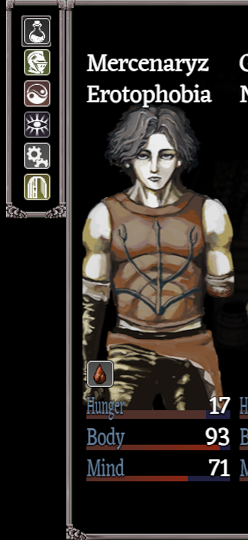
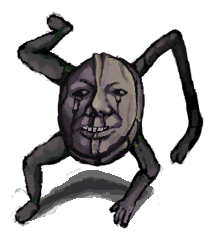
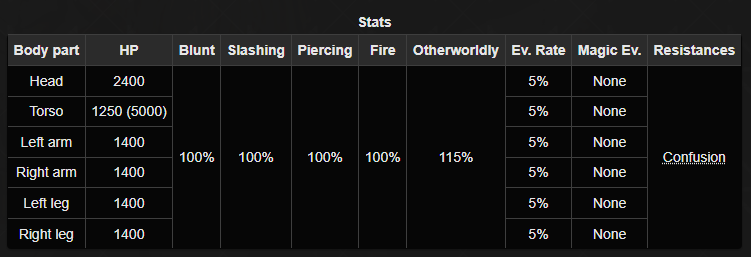
 Phobia: This is the indicator an enemy you're fighting triggers your character's phobia, whatever that may be. When a Phobia is triggered, enemy's get a flat 50% damage bonus against you, as well as ignoring 50% of your evasion. The latter is fairly unimportant but the former can easily cause you some problems depending on what you're fighting. There's not really anything you can do about Phobias, they're just something you have to weather in combat. Some Phobias are much more rarely triggered than others though, so certain ones are more desirable to have. There is an accessory that nullifies Phobias so long as you have it equipped, but I would really say it's worth it.
 Confused: This one can be a problem. Confused stuns your character for 2 turns, rendering them unable to act. This is a battle only ailment, curing at the end of battle should it still be in effect. Not many enemies in the game can do this to you, but the ones that can also spam it if you're unlucky. There's not too much you can do about this ailment, though some helmets give you immunity to it should you be lucky enough to find them. Always be mindful of things that can hit you with this. You do have the ability to use Confusion on the enemy with a specific spell, and it is absolutely broken if you can maintain the mind cost.
 Fracture: Sticks and stones can definitely break your bones in the dungeons of Fear & Hunger. Fracture reduces your maximum Body by 20% when afflicted on you in battle, leaving you with a maximum of 80. Once out of battle, this penalty quickly drops to 4% but is a permanent effect. There is no standard item to cure fracture, and the methods that can cure it require some degree of sacrifice in order to attain. It's definitely annoying to have to deal with, but unfortunately at least one or two of your party members is going to be saddled with this condition before the game is over.
 Bleeding: A damage over time effect that persists in and out of battle, Bleeding causes you to lose 3% body in battle, and periodically bleed out and lose Body when exploring the dungeons. This can be cured by using a cloth fragment, or by equipping an accessory that nulls the status, thus removing the ailment. Bleed can be annoying in the early game, but it's not too hard to hoard cloth fragments to treat it, and it becomes a complete non-issue around the mid game. Bleed can be inflicted on the enemy as well, with the same effects in battle as it would be to the player, but it's easily the weakest DoT in the game and one of the most difficult to actually inflict, funnily enough.
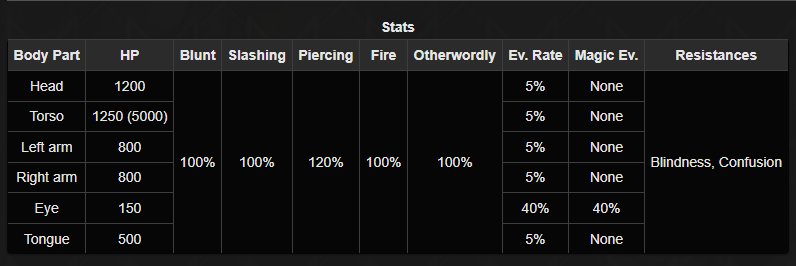
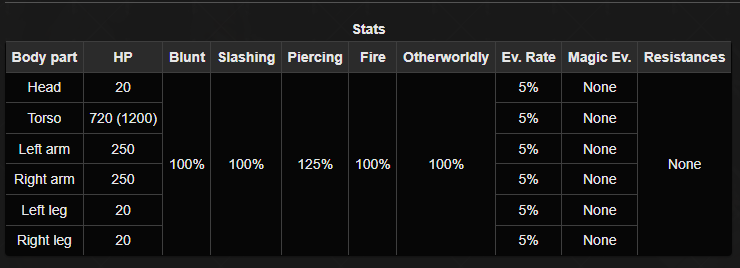
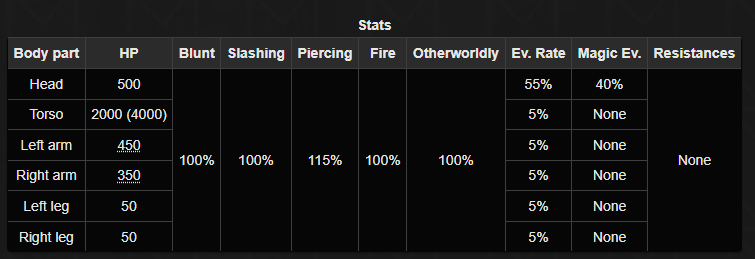
 Poison/Toxic: A traditional RPG DoT, Poison causes you to lose 10% BP per turn in Battle, while Toxic costs you a staggering 20%. These statuses are actually relatively rare though, so you won't frequently have to suffer them. These can be cured with a White Vial, or with a Red/Green herb mix. There is an accessory that nulls poison, but it is a bad idea to use it as it cannot be removed. Poison is another ailment you can inflict on enemies, and it is devastating towards them if inflicted on their Torso, cause most enemies to keel over in 3 turns due to the way the damage is determined.
 Infection: Another common newbie killer, Infection doesn't do anything immediately. Instead, it forces a counter on your character that goes up with every screen transition. After about 7 transitions, Infection will kill your character if not treated. Infection can be purged with Green Herbs, and that's the preferred way to handle it, but Green Herbs are MUCH rarer in this game than the sequel and cannot be purchased. In an emergency, you can use a bonesaw to remove the infected limb... if you have one and are desperate enough to save the run that way. Fortunately there is an accessory that gives you immunity to it, so once you have that it ceases to ever be an issue again.
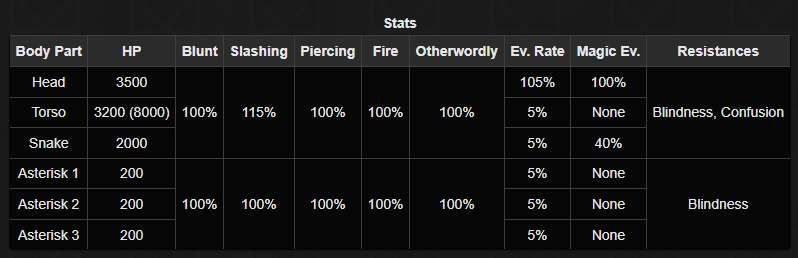
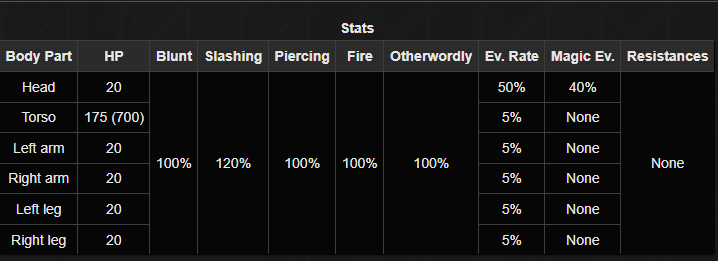
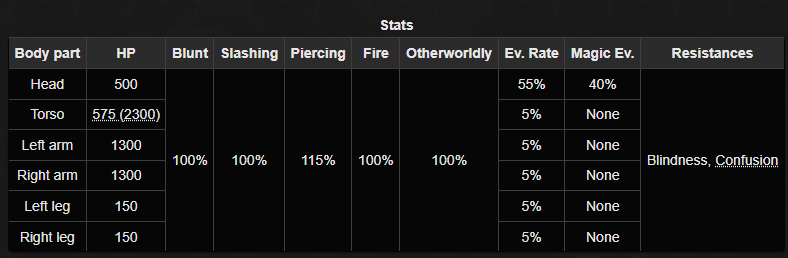
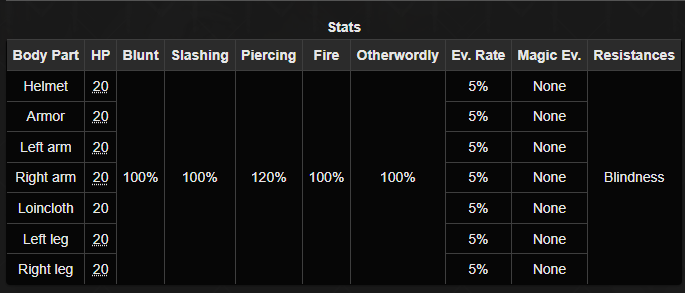
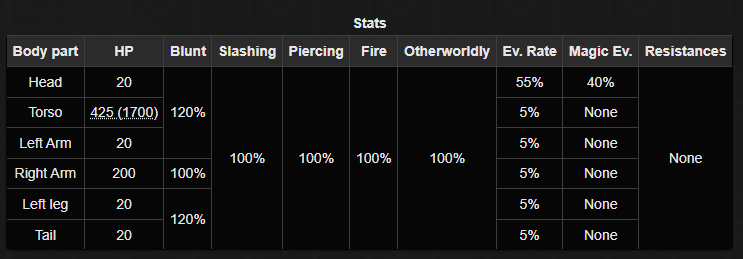
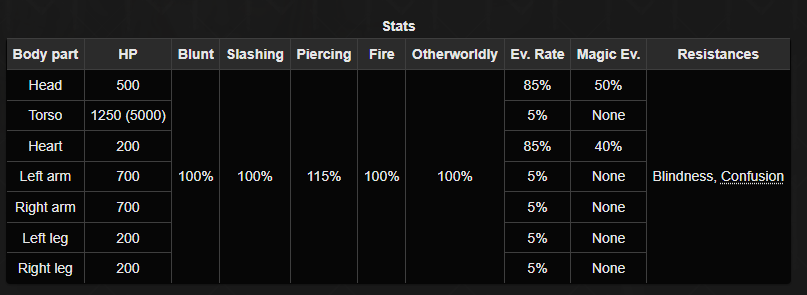
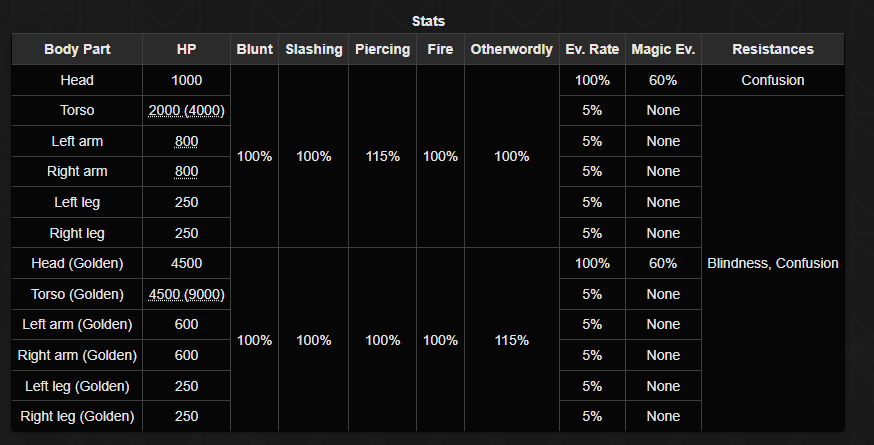
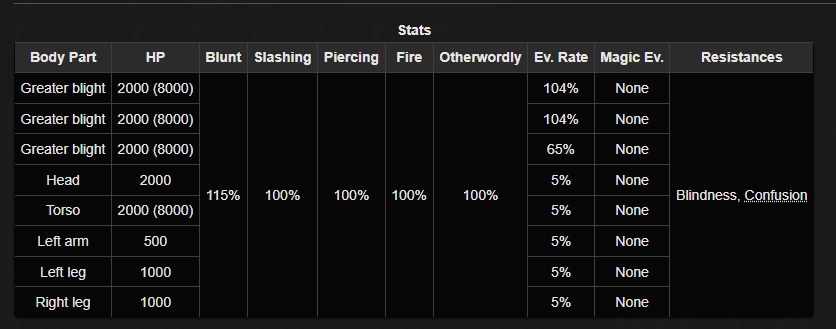
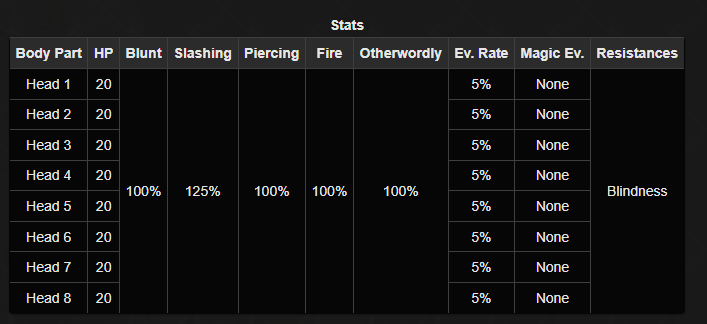
 Blindness: Blindness reduces a character's physical accuracy by a staggering 75% (Magic attacks are unaffacted). Additionally, if your main character has this, the screen in the dungeon is turned to pitch black and you can no longer see where you are going. There is no intended item to cure this, and the only intended way to cure it is the previously referenced one shot methods of curing Fracture, so in most cases getting this on your main character is a game over. That being said, there is a helmet that can prevent the status, and due to the way status resistance is coded for equipment, it actually can also cure blind if you equip it. Pretty funny, I have to say. Blind can also be inflicted on the enemy for the same combat penalty, though it's handled a bit weirdly. It can only be inflicted on the Head, understandably, and the turn it is inflicted it will only reduce the Head's accuracy by 75%. Every turn after, all of the enemy's limbs will have the penalty. Effectively this means that unless the enemy uses a Head based attack, Blind doesn't actually do anything until the turn after it is inflicted. Bear this in mind if you go all in on Blind based attack plans.
 Critical State: This one is rare but is a problem waiting to happen when it can be inflicted on you. Critical State is a battle specific ailment that will cause the next attack your character receives to reduce them to 1 BP, regardless of how much they had left. The ailment is purged upon that, and you're left with a character who can die from being sneezed on. There is no way to cure it save for having an accessory that nulls it equipped, so be very cautious when it's in play.
 Burning: The final DoT of the game, this one also does 10% damage per turn to you. It is the only DoT the expires upon the completion of a battle, though it can also be cure in battle by using a Water Vial. Once again, there's an accessory that can nullify this. It's fairly rare though, you're not liable to see it come into play outside of fighting Dark Priests. There are number of skills and items you can use to inflict this on the enemies, and like poison it is devastating to enemy torsos. It can also be stacked with poison, resulting in an enemy melting within 2 turns.
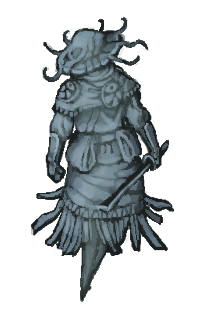
 Paralyzed: One of the rarest ailments in the game, but boy howdy can it be dangerous. Paralysis is a battle exclusive ailment that causes the afflicted character to skip their turns indefinitely. It cannot be cured save for ending the battle, so if a solo character gets hit by this it is essentially a game over. Thankfully only two enemies in the game can even potentially hit you with this, and they're both uncommon and easy to avoid.
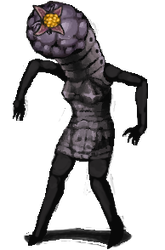
 Parasites: An extremely rare form of ailment where the penalty is exclusive the dungeoneering portion of the game, Parasites causes your hunger meter to fill up at double the rate. If anyone sees the later stages of Hunger, odds are they are suffering from this ailment. It's pretty uncommon in terms of being use against you, as only one enemy can do so, but there is the possibility of self inflicting it. Should you be low on food supplies and have to eat raw or rotten meats, you will be given this ailment for your desperation. It can be a bit of a problem since there is only one way to cure it, the dedicated curative potion Worm Juice.
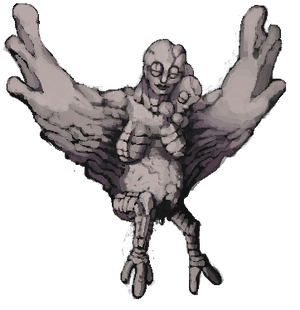
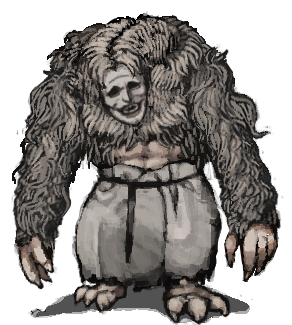
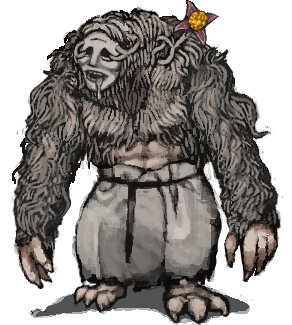
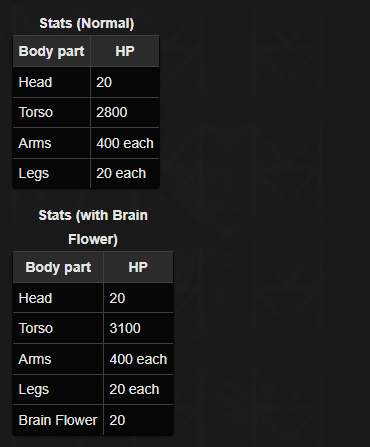
 Brain Flower: This is the ailment that functions like the more typical version of Confusion you see in RPGs. A character afflicted with a Brain Flower will have their accuracy reduced by 50% and begin to attack randomly, potentially targeting allies. It can only be cured with Worm Juice, so it can be quite the problem if you get hit by it. Thankfully, it's not too common of an ailment to contend with as more often than not the game gives you layouts upon starting a playthrough that doesn't have any enemies that can even use this against you. Always be wary when you see an enemy with one of these flowers, though.
 Severe Anal Bleeding: Oh lord you knew it was coming. If you've heard anything about the mechanics of this game, you've probably heard of this ailment. Severe Anal Bleeding is a rare ailment that is set upon you in rare cases when you lose to a Guard and more commonly a possibility of something a Night Lurch can inflict on you. It can only be cured with the one shot methods for curing Fracture, Blindness or limb loss. If afflicted with it, your character will randomly pause on the field and expel blood from their inflamed orifice. This doesn't actually deal damage, but it happens constantly and locks you in place when it occurs. It can be a problem if you're being chased by something, but typically it's not a game ruiner. The constant fart noises as blood flies out of your anus gets annoying pretty quickly though.
 Curse: Curse is a countdown type status effect exclusive to battle. When afflicted on a character, a counter will display over them each turn, starting at 5 and counting down to 0. At the end of the turn it hits 0, the character afflicted will die, no questions asked. This ailment only shows up in two boss fights, and amusingly it's bugged in the first one you can see it and doesn't actually do anything, made extra ridiculous by the fact it would take a whopping 10 turns to die from it with how it is used in the fight. In the more threatening fight where it comes into play at the fight's beginning, it can be cured with a Purifying Talisman though this itself is also bugged and can causes the fight to soft lock if another attempt at cursing a character is made. Basically any time this status comes into play, just focus on winning the fight as quickly as possible since that's the most pragmatic and effective way to clear the status.
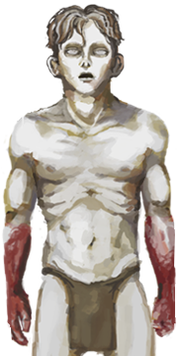
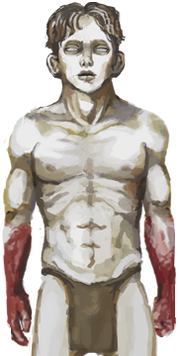
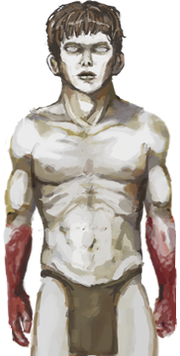
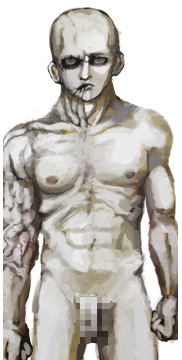
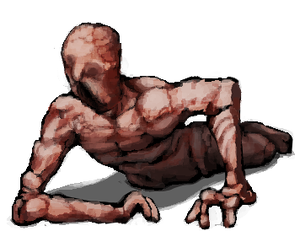
 Hunger I-V: One half of the game's very title, Hunger is a constant concern when exploring the dungeons. It comes in stages, with each stage carrying harsher penalties. At 30 hunger, you get a warning and no status marker. At 49 Hunger, you reach Stage 1, losing 10% of your maximum Body and having your attack power halved. Stage 2 is at 69 Hunger, reducing your maximum Body to 80%. Stage 3 is at 79 Hunger, and reduces your maximum Body to 70% as well as reducing your attack power to 30%. Stage 4 is at 89 Hunger, reducing your maximum Body to 50%, and disabling your legs, forcing you to crawl. If somehow you don't think to eat at this point, then at 94 Hunger you reach Stage V, being struck blind until you actually eat and having your maximum Body reduced to 30%. Naturally if Hunger reaches 100, then you die of Starvation. Despite all this, you'll seldom ever see anything further than Stage 1 Hunger unless afflicted with Parasites, as the game is relatively generous with food. Going too slow can increase the odds you'll run out of food, but frankly most players will die to other things in the dungeon if they're having trouble before this becomes a problem. Later in the game, there's an easy to obtain infinite food method that essentially eliminates the problem of hunger, though on the higher difficulties it doesn't help much with other resources you need to worry about.
 Fear: Here's the other half of the title. To my knowledge, these icons actually never appear anywhere on your status screen or in battle, but the game does consider it an ailment so I may as well mention it. Fear is the result of your mind lowering, and it only really comes in two stages. At 50 mind, your character will gain the option to commit Suicide, ending the game at any moment you feel is appropriate. Should the Mind gauge reach 0, your character is permanently struck with Panophobia, triggering the Phobia penalty against anything that actually triggers a phobia. Aside from that, the game will occasionally flash creepy messages at the bottom of the screen as your mind gets lower. Unlike Termina, there are events that can happen relative to the Mind of your party members, and these events can occur in specific areas when party members have less than 70 Mind. Otherwise, Panophobia is just as real a concern for them, and they also occasionally have creepy messages populate the bottom of the screen when their mind is low.

 Stat Buffs: Not all player afflictions are negative in this game! We also do have your standard stat buffs to work with. STR up gives you 50% more attack power, EVA up gives you a flat 50% bonus to your chance to dodge an incoming attack, and SPD up doubles your speed. The last one is very good as it gives your character an Extra turn, taking place after the main combat round finishes. Spd up also increases your odds of success with the non-skill variant of the run command, giving it a 100% success rate against anything you can run from if you're a solo character. It's worth noting that Str up and Eva up only last 5 turns, while Spd up lasts the entire duration of a battle.
 Counter: One of the various stance style buffs D'Arce can obtain along with Spd up via Fast Attack, Counter makes it so that when you get attacked (though not necessarily hit, generously enough), you will launch a fully powered reprisal to the limb that attacked you. Not that great honestly as this very rarely allows counters to go to the Torso or Head and instead will often result in an attack going to an arm. This buff is much more useful in the sequel where it is central to a nearly unbeatable combat strategy, but it just kind of exists in this game.
 Perfect Guard: Another stance buff, this one makes you immune to limb loss for 3 turns. Pretty solid, though there is a guaranteed form of limb protection you can get as an accessory. Still, this can available from the start of the game and can come in clutch for some emergency situations.
 Bloodlust: Absolutely dreadful buff that Ragnvaldr can start with. Bloodlust puts your character in a berserk state, robbing you of control and making them attack random limbs of the enemy. They get a 50% damage boost for this, but it is very rarely worth it. Admittedly, getting access to the standard Str up status is much more inconsistent, but frankly the bonus this provides is so inconsistent and negligible, that it's not at all worth sacrificing your tactical options for. It only lasts for 3-4 turns in contrast to the 5 Str up lasts, and can even be dispelled when you take damage. Terrible skill, only even potentially helpful in a small handful of fights.
 Happy/Depressed: Two permanent joke afflictions that don't actually do anything. A certain individual with deep pockets gives you the choice between one of these two mindsets, and you'll retain it for the remainder of the game.


 This is an accessory crafted from a recipe obtained from another rare crafting book, in this case the Pinecone Pig Instructions. You can Empty Scroll either the book or the Pinecone Pig itself into your inventory. The Pinecone Pig is simple to craft, requiring a pine cone and a stick to create, and when equipped he has a chance to bring you one of a number of items at the start of a battle. Notably, the Pinecone pig can appear in any fight, including unlosable ones like Doors or the Human Hydra. Thus, the Pinecone Pig can be used as a farming method for a number of valuable items if you have the patience for it. I don't, but some people like it. The odds for the Pinecone pig are as follows: