Peaceful Days Are Over, Let's Play Devil Survivor Overclocked! [Finished]

Put your Let's Plays in here.
User avatar
Demon Race: Snake

ImageImage
ImageImage
ImageImage
Image
*Yurlungur is exclusive to Overclocked

Snakes as a whole are physical bruiser demons, but they often come in with magic oriented commands and defensive passives. This makes it hard to for them to hit the ground running, but they are some of the most lopsidedly powerful and/or tanky demons for their stage of the game if you can manage it. Pendragon in particular enjoys ludicrous ST for when he becomes available, and Quetzalcoatl is a near unbreakable physical wall. Past that, Snakes become a bit more balanced with a noticeable emphasis on bulk, with high HP and decent VI and MA and great resistances with a single weakness to cover. Yurlungur boasts no weaknesses at all and can easily cap his ST and VI off of a good fusion. It's a bit hard to recommend specific Snakes since the Race as a whole grows pretty linearly and the back half becomes available at a point where demons who simply specialize better and come in with better skills start to hit the scene while Snakes begin to generalize their stats. Still, it's far from a bad idea to have multiples of the highest available tier (With the exception of the Unique Ananta of course) for one particular reason.

Constrict is the Snake Race skill. This is a non-conditional passive that has two effects. The primary one is much less useful, restricting the Move range of adjacent enemies to 1. This mostly is intended to work against you in the handful of times you square off against Snakes, and like Bind it can be countered with Devil Speed. The secondary effect, on the other hand, is ridiculously good: when an Enemy initiates a skirmish against you, you'll get +10 initiative in the turn order. This essentially eliminates the enemy's initiative and gives you the same turn order advantage you'd get from being the one to initiate the skirmish. Combine this with something like Tailwind, and suddenly situations where you'd have the potential to take a ton of damage instead become clean sweeps in your favor. You can very easily slap a Snake onto a team and have them hold down an area solo and detonate any enemy team that runs into them. This is also pretty much the ideal way to grind free battles. I had a very negative opinion of Constrict until I realized this aspect of, and now I'd say it's probably one of the best passive Race skills in the game. Does the primary effect of this skill have any use? Well, unlike Bind you can pull in a Snake in the middle of a turn to utilize this, so it has that going for it. Anytime I thought this might have use though, I was always able to find alternative solutions that work just as well or better. If you know any situation where the move restriction effect of Bind is amazing, don't hesitate to let me know, but in my mind this aspect of it is purely meant to be used against you.

User avatar


Part 23 is out! With the Mari situation resolved, now we move onto Keisuke. There are three ways Keisuke's fate can play out on today, and we're going to explore them all! There's a variety of bonuses you can obtain depending on which solution you end up taking, though the one with the greatest potential gains overall is probably resolving the battle at 13:00 peacefully. For this let's play though, we'll elect to kill Yama and proceed with the game from there. As a random aside, I fought Kudlak without the Day 4 death buff on the new game+ file, and that version of the fight has him with way more HP and more defense, but he doesn't hit nearly as hard. Interesting how they balanced that out.

Demons Available

Pazuzu (Lv. 35): We won't actually have access to him in the succeeding videos, but I may as well mention him here since I most certainly won't remember later. We can end up unlocking both Pazuzu and Yama for fusion on Day 5, but Pazuzu is the only one we can fuse at the moment due to Yama being Level 45. He's kind of pointless in any playthrough except one that is ignoring Free Battles, as at this point we can already fuse a superior Vile in Abaddon. He's far from bad for today, and he has pretty decent stats and resistances, but he'll rapidly be outclassed come Day 6. Fuse him if you want him, but I can't really recommend since he comes too late. We'll have a chance to pick him up later in the game, where he'll be even more useless.

Skills Available

Agidyne/Zandyne (Command): This is our first real opportunity to grab -Dyne spells, so I'll actually elaborate on what these are now. -Dyne spells are immensely stronger single target spells of each element, costing 12 MP to cast but boasting roughly triple the damage. Naturally this ramps up further if you apply the relevant Boost/Amp. Now if a Dance skill rolls three hits on a single enemy, that will still deal more damage than a -Dyne spell, but the -Dyne spells are way more consistent. When I was younger I mostly stuck to dances, but these days I prefer the -Dyne spells as a reliable way to nuke single enemies off the face of the earth. They aren't perfect for every situation, particularly if you really need to spread damage around, but you also can't go wrong with a line up of single target nukers either. Additionally they're much more sustainable than Dances, so they have that going for them too. I highly recommend having your best casters run these.

Fire Amp/Force Amp (Passive): Again, our first real chance to pick up these types of skills. 50% bonus damage to an element is killer, and Yuzu and the Hero can easily one shot anything with this combo. Despite my excitement at seeing these in the video, reviewing the cracks unfortunately reveals that most of these overlap on the units we can crack them from, meaning we aren't really able to pick up Amps and -Dynes at the same time in the Kaido & Midori battle, though you can snag Ice Amp and pick up Bufudyne at the start of Day 6. We'll get all of these with time regardless, but I guess if you feel augmenting your multi-target magic is more prudent than getting strong single target magic right now, you can go for these.

Magic Yang (Auto): Missing out on the Yama battle also causes you to miss this skill, but thankfully it's not a one-shot and you can get it later. It's pretty darn good, though. Halving MP costs is one of the easier ways to keep your team from running dry, and for most of the game this is a price cut that essentially keeps the team that has it from ever running out of MP. It's great for the Hero who has miserable MP compared to other casters for most of the game, but Midori can also make use of it if you'd rather focus your Hero for maximized damage.

Fire Repel (Passive): Man, Black Frost really makes me wish Joint Skill Cracks were a thing in this game, he'd be a new skill piñata if they were. Anyway, this nullifies incoming fire damage and bounces it back at the enemy. Rarely does this result in good damage since enemies casting fire spells tend to be resistant to them, but it is extremely likely to nullify the enemy's extra turn and grant the reflector one in exchange. Do be mindful though, this is a game where repelled spells can trigger the Drain resistance. Nothing like having the enemy bounce there own spells back at themselves to restore hundreds of HP.

User avatar
Demon Race: Dragon

ImageImage
ImageImage
ImageImage
*Fafnir is exclusive to Overclocked

Get excited, this is the first time I'm going to have a mostly negative opinion in one of these breakdowns. Dragons are pretty bad, often having really generalized stats in their level bracket and a serious problem to contend with in their Race skill. I'll cover that more below, but it's pretty hard to recommend any of these demons due to the associated problems Evil Wave has on your teams as a whole. The high point for Dragons is probably Day 5. Ym has decent stats and access to Holy Dance, while Python has really good stats and excellent skill flexibility. Making a strong Python is probably worth your while if you can run it on a team that can consistently close out skirmishes on the first turn. Other than that, Culebre is valuable to have multiples of for one specific fight on Day 6, and past that Dragons will always have situational use but I'd never recommend having them in a team full time.

Evil Wave is the reason why I have such a hard time trying to sell anyone and myself on these demons. Evil Wave is a non-conditional passive that extends your attack range to 2, letting you attack enemies without directly being adjacent to them. This also works on defense, allowing you to counter enemies that also have Evil Wave, rather than being completely defenseless. On its face, this sounds pretty good... and it is! HOWEVER, because it's so good, Evil Wave has two extreme drawbacks to it. First off, Evil Wave prevents you from having Extra Turns, period. Even a skill like Extra One which otherwise guarantees you have an Extra Turn, does not overturn this penalty. The big problem with this penalty is it still applies even if you attack/defend at range 1. This flatly makes any team that has it weaker, and for almost any stage of the game this will prevent you from wiping out any enemy you are evenly matched with in a single skirmish. The other major drawback is that this increases the amount of turn delay from Attacking and Defending by about 50%, meaning that your units will take much longer to get their next action which can devastating. (Infuriatingly, most enemy units blatantly cheat and ignore this penalty and seemingly even get a bonus, scoring way more turns than you could over hope to get while having this ability) If Evil Waves penalties only applied at Range 2, it'd be a much easier recommend from me, but they way over corrected in making sure this ability wasn't broken and instead made it a massive liability in most fights. I can only ever advocate using Evil Wave on defense, pulling out a Dragon when you're parked in the range of an enemy that also has Evil Wave. More loosely I guess it also has use if it extends your attack range enough to kill the last enemy in a fight and end the battle. Evil Wave is a severe detriment to the entire team when it's not useful, and all Dragons have way less potential because of it. As an added kicker, the Vile Race has a stronger version of this skill and much stronger demons in their ranks, making Dragons look even worse in practice.

User avatar


Part 24 is out! After a rather chaotic previous installment, this part is remarkably straightforward. And by that I mean we get a MASSIVE exposition dump thrown our way. Several dangling plot threads are resolved while a good number more are opened up. And for the first update in awhile, I don't have any new skills or demons to write about. Crazy.

User avatar


Part 25 is out! We have a relatively uninteresting battle to blast through, after which we get more exposition. Thankfully, all these things will be coming to a head within the following Days, so things will begin to pick up rapidly and the game becomes a lot more difficult at this point.

Demons Available

Avian Rukh (Lv. 43): Our next Avian, and essentially just an upgraded Babd Catha, swapping out the Phys Resistance for higher VI and less weaknesses. One thing he has going for him is that we can fuse him off of Cu Chulainn by combining him with a Legion, creating our next demon with Pierce and Phys Amp. I've done so off screen and pulled Cu Chulainn back out of the compendium, so now we have 3 very potent physical attackers between Rukh, Cu Chulainn and Berserker. Phys specialists really take off at this stage of the game and it's not a bad idea to fuse as many as you can.

User avatar
Demon Race: Avatar

ImageImage
ImageImage
ImageImage

Oh sweet, we're on a roll with another Demon Race I really dislike. Avatars have the dubious distinction of being the only Race besides Elements and Mitamas to not get new reps in the transition to Overclocked, which sets a good tone for the under cooked nature of these demons as a whole. Now being completely truthful, these demons aren't really bad per se, in terms of raw stats they're usually more combat capable than the average Avian at most tiers. The problem is that none of them really excel at anything, either being low grade tanks or underwhelming jacks of all trades. Both of those archetypes are pretty lousy in Devil Survivor due to the micro battle nature of combat, making it genuinely hard to advocate for any of these demons. Even as fusion material, most of them just lack anything I really care about. I guess Shiisa is an easy way to fuse Power Hit onto something, and Airavata is the earliest access to Zandyne and Force Amp for fusion if you level him up. Past that, there are just always more specialized demons who hit the ground running compared to Avatars, resulting in me never sparing a glance at any of these chumps. For all the problems I have with Evil Wave and Chaos Wave, those at least give Dragons and Viles situational use, so I do end up using those demons semi-regularly. With that being said,

Switch is the Avatar Race skill. This is a command skill that costs about 12% of the demon's MP to use. This allows the Team that uses Switch to swap locations with another team up to 6 spaces away. This is by far the most useless Race skill in the game and I legitimately struggle to think of uses for it. Maybe you can use it as a means of movement to slingshot a team deeper into the map, but the combo of Devil Speed and Animal Leg is much easier to use and set up. Maybe you can use it to fish a damaged team out of a difficult spot, but that's a situation that can easily be avoided by just playing smarter. This skill is the big reason why I feel no Avatar is worth using. Even if they have similar stats to demons that are good, the fact they have a dead slot for their Race skill means they just inherently contribute less than most any other demon. While this doesn't actively hurt you to have like Evil/Chaos Wave, it does really beg the question of why don't you just use a demon that can aid a team with it's Race skill? If this had any kind of secondary perk, like giving a turn order bonus to the Team that was swapped away from their position, maybe it'd have some interesting situational uses. Alas, it doesn't and it just drags down Avatars as a whole. I try not to bring up Devil Survivor 2 since obviously nothing in that game has any bearing on this one mechanically, but when given the opportunity to buff this skill into something not trash, instead the dev team just gave the upgraded version of Switch an even larger range you will never make use of. Grand.

Now I did get a reply from Lord Koth on SomethingAwful about Switch's potential use in escort focused missions. While I find this to be inferior to smart usage of Devil Speed and Animal Leg/Double Up, it is at least something worth considering if you happen to have a well fused Avatar in your line up.
Lord Koth wrote: From what I recall, the main thing about Switch is that it can be used on friendly NPC teams too, so in a number of the "don't let civilians (or whoever) die" scenarios you can just Switch them to a safer place. The ability is still very niche, and of extremely minimal use when only your teams are on the field, but there is some use for it.

User avatar


Part 26 is out! We finally catch up with Naoya, who's willing to give us some more concrete answers if we can impress him with our power. While he does raise some questions of his own, we do mostly walk away with a cleared idea of what needs to be done. Day 6 is up next, and this is when the game begins to wake up and actually throw some more meaningful challenges our way. Additionally, while this day doesn't have distinct routes like Day 5 did, it does quite a few variable events depending on what has and has not been done up until this point. I doubt we'll be able to cover all of them, but we are at least set up to unlock every ending route in the game.

Demons Available

Fallen Decarabia (Lv. 44): This guy is remarkably balanced, with a sub par VI stat being offset by having innate phys resistances. With completely open passive slots, Decarabia can flex onto anything but his innate commands makes Fire casting the smart idea. The real reason you'd want this guy, though, is due to his access to Shield All once leveling up. This is an extremely powerful defensive buff that you will absolutely resent seeing when used against you, but is extremely helpful when you can apply it. I'd highly recommend picking up something that has this for Day 6's boss fight, but we're also at the point in the game where we can pretty cheaply fuse any skill onto any demon, so Decarabia himself isn't strictly necessary to have it. We'll go over this more once I can put it in action.

User avatar
Demon Race: Megami

ImageImage
ImageImage
ImageImage
ImageImage
*Ishtar and Black Maria are exclusive to Overclocked

What's there really to say about Megami's at the end of the day? They're just some of the most straightforwardly useful supports in the game, and having high MA naturally also gives you a lot of potential as a fighter. Megamis have one of the straightest lines to follow from tier to tier in the game, with every Megami available having good MA and balanced stats across the board, often with solid resistances and one or no weakness. They'll come kitted out with the best healing you can have at the points you can fuse them, and they have flexible passive lists giving them good combat potential if you write onto them with Mag Overloads, as I demonstrated with Ishtar. Amazingly, only 2 of the 8 Megamis in the game are Unique, meaning most of them can be passed around to every team via the compendium if you are so inclined. If I can recommend specific demons, Laksmi is quick and easy access to Mediarahan and Samarecarm, two very useful skills. Norn has excellent resistances and can be fused with Phys Repel to become a phenomenal wall. Black Maria is notable for being up for purchase in the auction hall, making her cheap and easy to access if you just care about Affection, and just in general you can't really go wrong with these demons. Sometimes we'll need certain race skills in missions with secondary objectives, but for knock-down, drag-out slugfests (which we'll see a lot more of in the end game) there aren't many demons that give you an advantage in the damage race like Megamis, since they can often just completely undo the damage being thrown your way.

Affection is the Megami Race skill. This is a command type race skill that costs about 20 % of the MP of the demon that uses it. It's a stiff cost, but Affection makes up for it by being hands down the best healing race skill and just one of the best healing spells in the game. This skill can target any ally team within a 4 space range, healing all members of said team with a spell that has about triple the base power of Media. On top of healing for a huge amount, Affection also cures all ailments the targeted team may be suffering. It is wild how good this skill is, wild how much it invalidates the other healing race skills, and wild how rarely you're limited from using it by the demons that have it being unique. Once you have reliable MP restoration, you can spam this skill like crazy and invalidate any non-lethal damage the enemy throws your way. Now, because of the frequency of time sensitive secondary objectives like escorts or escaping enemies in this game, you can't always have this skill out on every team since you'll need stuff like Devil Speed, Phantasma, Flight, etc. But as mentioned previously, when secondary objectives aren't at play and the mission is comparable to a kid crashing his actions figures together and making explosion noises, there are few skills better than Affection for keeping your teams alive. And hell, even in escort missions, the massive range of this skill makes it by far the best way to heal those you are escorting if you're in a situation that calls for it. Always make sure you have a good Megami on hand for any situation, Affection always has the potential to save the day.

User avatar


Part 27 is out! The 6th day starts with a battle double feature, one mandatory and one tied to a sidequest. We've got a lot of story events to punch through today, so you can expect the next video to be heavy on the dialogue.

Demons Available

Deity Yama (Lv.45): Our reward for rescuing Keisuke, Yama is none too shabby with the right inheritance considering he has innate Fire Amp and picks up Agidyne. Like a lot of Deity's though, he has a conflict of interest with a disposition towards magic in his innate skills but having stats that lean more towards physical attacks. Yama does still have pretty potent single target damage and good spread damage with Berserk, but he also has to contend with low MP for this point in the game. He's definitely got more going for him than Pazuzu, and the damage potential off of Awakening definitely makes it appealing to try and make a good one.

Fairy Vivian (Lv.45): Not too much to say here, Vivian has good stats and excellent resistances albeit slightly held back by a cluttered skill list. Still, Holy Dance gives her an easy way to contribute in any fight and she's worth picking up so we can swell our ranks with strong casters again after physical bruisers have taken a sudden dominance of the game. It's worth noting that at this point, any demons that can rank up via Element fusion are ridiculously cheap and easy to make that way and it's likely how we'll be getting most of our demons who have the option. Getting good passives into those fusions does require a little more attention to detail, but by now the catalyst cost for creating an Element is nothing and it doesn't take much more money to get fusion fodder with the skills you want.

Skills Available

Null Ice (Passive): If you need to nullify Ice attacks, here you go. That being said, Ice attacks are weirdly uncommon in this game, at least in the context of being used against you, so this isn't exactly super critical compared to other resistances.

Anti-Most (Passive): Anti-Most has obvious consolidation value. Why make yourself resistant or immune to one Element when you can be resistant to almost all of them? True it's not the absolute best damage mitigation, but it definitely gets you the most bang for your buck when dedicating a passive slot. Combine it with Null Phys or better and you've got an absolute tank of a unit on your hands.

Dual Shadow (Passive): An interesting passive, Dual Shadow gives you a 25% chance to repeat the action you just took, be it attacking physically, magically or even healing. The follow up strike does have the same HP/MP cost of the initial strike, so it is possible to not be able to launch an extra attack if the Dual Shadow user is already on empty. Right now I wouldn't really recommend it, because while it does technically double your damage, it only does so rarely. Later in the game, we'll have a specific team build that makes this skill ridiculously powerful, but for now it'll just be gathering dust in the skill pool.

Revive (Auto): If you have any dead demons at the start of a fight, this triggers and revives them with a relatively weak Recarm spell. This skill is mostly intended for tankier builds, and the game helpfully demonstrates what you'd want to use this for: a team with bulky demons that have Endure and Paladin Soul. This does falter against multi targeting attacks, but in your hands the build can be functionally immortal against single target attacks so long as you have the MP to keep activating Revive. I'm not a huge fan of it, but maybe you'll like it.

Null Phys (Passive): One of the more important resistance passives. Physical attacks are very scary at this point in the game and they only become scarier going into Day 7 and 8. This walls them out in any situation where you don't see Pierce in the skill list, and it combos great with Anti-Most. This skill is why a minimum of 12 ST is desirable, as it'll cover you against physical attacks in 95% of the combat situations in this game.

Ban Phys (Auto): The other Ban skill aside from Curse that's actually worth a damn. As I said, Physical attacks get nasty at this point and being able to prevent even just one of them being thrown your way has at least some situational strategic use. Just be mindful, as this does also work against your own team until the Ban is triggered.

User avatar
Demon Race: Divine

ImageImage
ImageImage
ImageImage
ImageImage
*Sraosha is exclusive to Overclocked
**Remiel is a special Fusion, and must be unlocked by clearing the final battle of Yuzu's Day 7, or the first battle of Naoya/Kaido's Day 7
***Metatron is a special Fusion, and must be unlocked by either clearing Amane's Day 7 or Naoya/Kaido's Day 8

A race of demons whose main draw is supporting casters yet themselves tend to be sub optimal casters. In all seriousness, Divines are a demon type I feel like should be awesome but I seldom ever use them. For the most part, they tend to be good but not great on the stats side of things, and rarely do they bring unique or interesting skills to the table. The big problem for a lot of the game is that almost none of them can be bought from the auction hall, and they need to be fused off of demons who are usually more specialized and effective in combat. When it comes to magic they tend to underperform when stacked against Faeries or Megamis, and when it comes to physicals they're usually outclassed by Genmas, Snakes or Toukis. When it comes to MP sustain, Tyrants usually offer a much greater degree of support in that area. Obviously good fusion inheritance can offset their inherent problems, but it just requires a degree of meticulousness with fusing that I seldom bother with since it's far from necessary or even useful. That said, they do get quite the effectiveness bump come the late game, with Sraosha having great MA and Prayer access, and Remiel and Metatron being outright designed to be some of the best demons in the game. Earlier than that, Lailah is perfectly serviceable as a multi-target nuker, and Kazfiel has well rounded stats that let him function in most any role. If you're willing to invest the funds into making strong Divines, there is certainly a pay off there, but I've just never been a fan of these and usually ignore them until New Game +.

Blood Wine is the Divine Race skill and the primary reason you'd use them. This is a command skill that, in exchange for about 20% of the demon's HP, will restore the MP of a team by about 12%. That's not a terrible trade, and using it every turn will likely allow you to kill everything you come across well before running out of MP becomes a concern. There does need to be some healing support to keep this one going, both in order to use it and in order to make sure the Divine doesn't waxed on defense, but Blood Wine is by far the most consistent and easy to utilize form of MP sustain. Tyranny can falter if your damage output isn't there, and Sacrifice requires that you make Uber Fallens to utilize without sandbagging, but Blood Wine is a simple fire-and-forget MP restore that can be put onto any and every team due to most Divines not being Unique.

User avatar


Part 28 is out! We now begin the process of finalizing our options for Day 7, which fortunately is pretty simple. There's enough free time to set yourself for every ending route and every bonus character on Day 7, but we'll also detour for secondary events with the magic of back up saves. Just remember the key characters to clear out are Atsuro, Naoya, Amane, Kaido and Gin. Speaking of Gin, his meet up with Azuma has finally come, and it's up to us to get him through this alive. This video has one of the better performances I've seen from Gin but that actually is kind of bad for us since it robs us of some skill cracks. Such is life.

Demons Available

Jaki Kudlak (Lv. 46): One of two demons we've unlocked from saving Ms. Mari, and definitely the lesser of the two. Kudlak has fairly balanced stats, albeit with relatively low MA, and the only skill he has by default is Drain Hit. He has decent room for customization, but he's not going to light the world on fire. He's probably the best Jaki demon in the game, and even at their best Jakis are just kind of mediocre.

Genma Kresnik (Lv.46): Kresnik on the other hand is amazing. We can fuse him up from Cu Chulainn via Element fusion, giving him all the good skills Cu Chulainn had plus a hefty stat inheritance. There's not that much that will be able to survive a Mow Down from Kresnik at this stage of the game, so I expect he'll be a boon in many battles to come. The fact he has really high AG and will often go first in battle is just icing.

Snake Seiryuu (Lv. 46): Finally another Snake demon! In relative stats, he's not quite as dominant as Quetzalcoatl, but he's still good enough to get his job done. Once again we can just do an Element fusion to snag this guy off of a compendium pulled Quetzalcoatl, and we can expect good things from that inheritance. One nice thing about him is that he's a lot faster than Snakes we've had up to this point, meaning the huge initiative bonus from being on Defense will often guarantee him a first turn.

Skills Available

Ban Elec/Force/Ice (Auto): The last of the Ban skills we can grab and these are all trash. Most bosses we fight from here on out get multiple actions per turn, so they can easily circumvent Bans, and these are of no help with trash mobs. Literally the only reason I grabbed Ban Elec was because of skill crack conflicts making it a quick and easy thing to grab without costing me anything else.

Hassohappa (Command): This is essentially an upgrade to Mow Down, a multi-targeting physical move with a higher base power, as well as getting bonus damage from having high HP. This honestly is kind of tempting to grab, but not at the expense of other skills available in the Gin and Azuma battle. Unfortunately, that ended up being a moot point since very unusually Gin actually managed to mop up his marks instead of constantly being on the ropes. We'll have an opportunity to get this later with no trouble.

Phys Amp (Passive): This would be wonderful to grab, but it also depends on Gin being an absolute failure in combat which he was not this go around. Still, 50% extra physical damage is a wonderful thing to have, and thankfully we will be able to grab this later today. (In the next video, in fact.)

Null Fire (Passive): You'll absolutely want this for later, considering who we're going to be fighting. It isn't super critical to have this, but every bit of damage mitigation you can get against Belial is good to have. Just make sure you have to 10 ST to actually equip it.

Shield All (Command): I've mentioned this skill a couple times in the past, and let me tell you it is AWFUL to have to deal with when the enemy has it. This gives every member of your team a shield that nullifies one incoming attack. The only skills that can get around this are Almighty Skills, Pierce physical attacks actually do get blocked by this. The one thing that is overpowering about this skill is that it has insanely high priority, seemingly the highest in the game. Unless the user is significantly slower than the opposition and is on defense in a skirmish, this skill almost always goes first. How helpful is this skill for us? Generally it's not worth setting up, but it is great for boss fights and you definitely want to have at least one user of it before the day is out, though preferably a demon instead of one of your team leaders. Picking it up mostly has value for writing with Mag overloads.

Null Elec/Elec Repel (Passive): More nullification passives! Not worth grabbing at the expense of anything else really, we're not dealing with much Elec magic for today aside from the occasional Vivian here and there. We can easily get these later on.

User avatar


Part 29 is out! We have a relatively straightforward battle that mostly serves as an opportunity to crack some skills we missed starting out, and afterwards we begin to lock in our ending choices for this playthrough. Once we finish out Day 6, I'll write up a post organizing all the ending requirements so it's easier to follow along with what you need to do.

Demons Available

Mikazuchi (Lv. 42): This guy was available last time but I completely forgot about him. Woops. Anyway, Mikazuchi is our next Kishin demon and he's already pretty outclassed. His level will quickly fall behind the curve and we already have physical specialists that surpass him. The main reason to create him is to have easy access to the next Kishin we can make once we have the ability. To that end, I'd just make him with an Element upgrade off of Nalagiri and then get him leveled up enough to learn Phys Amp. Afterwards, he can go on stand by until we unlock the next tier of Kishin, which thankfully happens in a much quicker time frame than it took to unlock Mikazuchi.

Vile Taotie (Lv. 47): The first unique Vile you get if you didn't unlock Pazuzu, and he's pretty alright. Finally we have one of these without a physical weakness weighing him down, and it's pretty easy at this point to patch out his Curse weakness. The main draw of Taotie is that he is our first access to Megido, the tier 1 multi targeting Almighty spell. Megido is very powerful with the right skills and stats to support it, and it's a good idea to develop trash mob nukers that have as soon as you can.

Dragon Culebre (Lv.47): Our next Dragon, and he's basically designed for the Belial fight. Coming in with innate Bufudyne, we can use our now irrelevant Lailah to create an Aquans that can upgrade Python with Ice Amp in the mix. It's a good idea to do this and then pull one or two more Culbres out of the compendium so your other teams can support your designated frontline fighter for the Belial fight. Culebre himself isn't anything too special, like most Dragons he has overly balanced stats with a slight focus on MA. Definitely a downgrade from Python relative to the opposition we face.

Divine Aniel (Lv. 47): This guy is ludicrously durable. High HP, good VI, 3 resistances (including the always valuable phys resist), an immunity and no weaknesses? Aniel is bar none the tankiest demon you can make at this stage of the game, and he has good ST so making him a bruiser isn't out of the question. I'm not a fan of Divines and I generally like the other physical attackers we've made up to this point more, but Aniel certainly has potential if you have a good fusion set up for him.

User avatar
Demon Race: Kishin

ImageImage
ImageImage
ImageImage
Image
*Okuninushi is exclusive to Overclocked. Additionally, he is a Special fusion that is unlocked by completing Amane's 8th day
**Mikazuchi is a Special fusion, unlocked by completing Gin's confrontation with Azuma on Day 6
***Zochou, Koumoku, and Bishamon are all special fusions. They are unlocked in rapid succession on any Day 7 that isn't Yuzu's.

Here's a demon race that's hard to write for, because as you can see from all those extra notes, Kishins pretty much fail to exist on your first playthrough. While admittedly unlikely, it's entirely possible a player wouldn't get access to something better than Nalagiri until Day 7, and mind you that he becomes available roughly halfway through Day 3! Additionally, once you do start unlocking more, they're all Unique so you can't really run more than whichever one is closest to your current fusion level on a fresh new game. Given all these limitations, how do they fare when you can use them? Well, Ubelluris and Nalagiri are both pretty unremarkable by early game physical specialist standards. The former is easily outpaced by Gozuki while the latter is handily beaten out by Afnac. As this let's play has demonstrated, Nalagiri has plenty of situational use with his Race skill, but he's hardly a cornerstone of a good offense. When you DO start unlocking more Kishins.... they're alright I guess? This race is essentially designed for upgrading via elemental fusion, so there's really no reason not to just feed Nalagiri a beefed up Erthys once he can be upgraded. Mikazuchi can learn Phys Amp and continually carry that down, so you may as well just keep upgrading once you hit the required levels to do so. For what it's worth, Okuninushi is an absolute beast of a demon with great stats across the board and innate Anti-All, so he's well worth making for the ultimate bonus boss. That kind of sums up Kishins as a whole though, they're cool to play around with in New Game + but are hardly a consideration on a first playthrough.

Double Up is the Kishin race skill. This is a conditional passive that allows you to initiate two skirmishes in one turn. Do note that the Kishin does need to be present in the initial skirmish, the ability does not trigger by simply summoning them after already partaking in a fight, which is actually kind of unfortunate. The obvious perk of this skill is that it enables your best fighter to... well double up on bosses or problematic enemies and engage them twice in a single turn. (Best demonstrated by the Beldr fight) This is seldom useful outside of boss situations in terms of defeating a single enemy formation, but it's fantastic for using a single team to wipe out multiple enemies. This skill has great synergy with Animal Leg, as Animal Leg gives you a second move refresh off the second skirmish. This is a great way to have your best fighter cross the entire battle field while picking off enemies along the way. In particular, the Double Up/Animal Leg combo is the best way to quickly clear missions in New Game +. Sadly, most of the Kishins in the game unlock at a point where there aren't really anymore time sensitive missions with secondary objectives and are instead just straightforward slugfests, so this combo and Double Up in general are seldom viable on a fresh new game. I did make my best effort to show off all the situations where I feel Nalagiri can be put to good work at least.

User avatar


Part 30 is out! This is an episode of landmarks I'd say, finally getting some answers to the remaining questions we had, getting poised for the end of the game, and in a certain sense we get our first ending of the game, although it's more of a glorified failure state than an actual resolution to the plot. Battles are starting to seriously pick up in intensity as well, as though it probably didn't look like it in the video, the battle in Ueno can go wrong in a variety of ways if you're underprepared or use bad tactics.

Demons Available

Megami Laksmi (Lv. 48): Our next Megami comes in at a time where we could probably really use more healing. Laksmi herself isn't too special, but she can easily be fused off of Vivian and secure a nice MA inheritance and Holy Dance that way. Laksmi also picks up Mediarahan in 2 levels and Samarecarm at level 52, making her one of the best healing supports we can hope for at this stage of the game. Definitely pick one up and ideally get her to level 52 and registered for an easy way to pick up a bunch of healing support.

Skills Available

Fire Repel (Passive): Our last option available for nullifying Fire damage in the Belial fight, and it's probably the least practical due to the high stat requirements to equip it. (14 ST and 14 VI) Probably best for if you use Atsuro as your dedicated Belial fighter, though I wouldn't really recommend that for a number of reasons.

User avatar
Demon Race: Deity

ImageImage
ImageImage
ImageImage
Image
*Susano-o is exclusive to Overclocked. Additionally, he is a Special Fusion that must be unlocked by completing a specific battle on Amane's Day 8
**Yama is a Special Fusion, unlocked by saving Keisuke on Day 5

Here's a demon race that like Divines have a bit of an identity crisis. Deitys have a Race skill that is geared towards buffing up magic attacks, while most of them are mixed attackers or physical specialists. The only one explicitly geared towards MA is Odin, and he doesn't come with any good skills innately setting him towards magical offense. On top of that, all of them have pretty awful MP growth and have a tendency to run dry pretty quick if they do run magic oriented set ups. That being said, Deitys also possess pretty good stats across the board (with the exception of Thor) and fantastic resistances (especially Shiva and Susano-o), so they are always a pretty solid addition in combat. Yama is the first one I feel is really worth adding to your line up, as he comes with innate Agidyne and Fire Amp giving him an easy in for dealing good damage, and having good ST gives him good coverage options with Berserk or Hassohappa. Shiva and Susano-o are also fantastic for their great attacking stats and excellent resistances making them phenomenal tanks. I'd dare say the natural Phys Repel makes Susano-o a better demon then his technical superior Asura, though Asura himself is far from a bad demon. If you're running a high powered magic build, particularly once you have access to Holy Dance and other Almighty spells, you'll definitely want good Deitys to get the most out of those builds for a very particular reason.

Awakening is the Deity Race skill. This is a command type race skill that costs about 20% of the demon's MP (Although Thor has to use a staggering 50% of his MP to use it for some reason) that boosts the first magic attack used in the next skirmish you initiate by 50%. Notably, this damage boost applies to every hit of a Dance skill, making it great for bolstering Holy Dance. If you want to hit big damage numbers with magic, this skill is a must have. Stacking it with other damage mods like Amp skills, Blitzkrieg, or especially Magic Yin you can result in some silly damage being doled out. This is the magic equivalent of Aggravate I mentioned many moons ago, and it's generally a much better skill due to the full effect on multi-hit skills and the fact it's a bonus you can't just potentially get without using a skill on it. The major things holding this back are 1.) All Deitys with the exception of Mahakala are Unique and cannot realistically be run on every team and 2.) you need some MP sustain to keep this going the whole fight as the cost for applying it is pretty steep and most Deitys have awful MP. As long as you can deal with those though, this skill is amazing for most boss fights in the game, especially once Day 7 rolls around.

User avatar


Part 31 is out! We've got a longer video this time, cleaning up the remaining optional events and opening up the rest of the ending routes. The battle against Belial that's been hyped up since Day 4 finally happens, and I like to think I do well enough in taking him out. We're now in the end game, and a bit of a shake up awaits us when we make our decision on how to resolve the lockdown.

Demons Available

Femme Rangda (Lv. 49): Rangda is mainly notable for the same thing she always is in any MegaTen game: Rangda has natural Phys Repel as a resistance and is an unbreakable wall against physical attacks because of it. (At least until SMT5 unceremoniously removed Repel's immunity to the Pierce effect) As far as her actual combat capabilities go, there really isn't much to say about Rangda. She's a more physically oriented demon in a Race that tends specialize in magic focused demons, and she's not really spectacular as far as physical attackers go at this point. She's an impressive wall if you get Anti-Most onto her, certainly, but I've never been a fan of defensively oriented demons in this game. What is worth noting is that she picks up Phys Repel as a skill at level 52, making her your first option for fusing that skill around. Definitely keep it in mind if a demon can pick this up without losing access to something else they care about.

Skills Available

Maragidyne (Command): Our first multi-targeting Dyne spell, these spells cost a hefty 40 MP to cast. In exchange though, with high MA and an Amp skill these spells can absolutely smoke any formation not fully resistant to them. It definitely pays to pay close attention to the resistances of what your characters are fighting at this point, as we're about to unlock a bevy of options for deleting enemies before they get a chance to do anything provided we bring the right skills.

Deathbound (Command): Here we go, this is a fantastic physical skill and arguably one of the best in the game. Deathbound is another 2-5 multi-hit move and is a bit weird, rather than scaling of your ST it instead gains power from your VI as well as Level have a greater weight in the damage formula. This does mean our demons with uber ST stats don't actually get as much out of this move as you'd expect, but its higher base damage over Berserk means it still usually hits harder even when the demon or team leader his middling VI in comparison to ST. Atsuro has VI on par with his ST, so this deals great damage for him. Another small perk is that it does not care about HP like Berserk does, so it isn't gradually weakening as you use it. This is an obvious lock for Atsuro, combined with Phys Amp this skill can shred things with minimal effort.

Gigajama (Command): Another skill that inflicts Mute. Why are there so many mute infliction skills in this game? Anyway, this one is single target but has the highest odds of actually landing the ailment. This make it worse than any of the previous mute skills because if you cared to inflict it, you'd probably want to shut down as many things as possible rather than just one. I guess it can cripple a problem enemy? Honestly I'd just optimize for killing them more efficiently. No real loss we couldn't crack this.

User avatar
Demon Race: Tyrant

ImageImage
ImageImage
Image
*Lucifuge is exclusive to Overclocked
**Loki is a Special fusion, unlocked by clearing specific battles in Yuzu's, Naoya's, or Amane's routes
***There is one more Tyrant in the game above Loki, but I'm electing to keep him a secret until the final update

What's there to say about Tyrants, really? They're essentially boss monsters you can fuse, and the majority of them never have to be faced down so they purely exist to help you. They are often the best or among the best demons in their level brackets, with well distributed stats with clear offensive specializations, excellent resistances which often make them very tanky, and they typically come with some of the most useful skills in the game. To keep things interesting at least, I'll give a quick run down of who's hot and who's slightly-less-than-hot. King Frost is fantastic for his leg of the game, coming in with a useful multi targeting skill, decent MA and a boost to go along with it. He also comes at a time where you pick up a bunch of useful skills for Magnetite writing giving him good room for customization, and it's fairly easy to patch out his sole weakness. Lucifuge is probably the most tepid Tyrant, with stats that are overly balanced, but he is your first access to a Dyne spell and it's not too hard to get Fire Amp onto him if you so desire, giving him an obvious role as a single target deleter. Hecate is a premier magical wall, comes with a great healing spell, and can easily put in good work with Holy Dance and her above average MA. The only real problem she has is a cluttered passive list with a completely useless Pierce passive hogging space. Astaroth switches things up by being a physical specialist, but his MA is his next most prioritized stat when leveling, and it's easy to fuse him with capped ST causing MA to also speedrun to the cap. He is a little hurt by starting with a physical skill that runs off of his miserable VI stat, but that's an easy enough thing to fix by the time you can make him. Loki is great, but outside of Yuzu and Amane's route he unlocks too late to be a serious contender in any first run composition. He's a shoe in for the ultimate bonus boss, at least. Of course, Tyrants being good demons in combat isn't the sole reason they're great to have, there are plenty of other demons that have that going for them too. Additionally, Tyrants have to contend with the fact every single one of them is Unique, limiting how many can be used in team building and how much time they can realistically stay on the battlefield. Tyrants have one ace in the hole that makes them a shoe in for adding to your roster.

Tyranny is the Tyrant Race skill. This is a conditional passive that activates in battle. On completion of a battle, this restores MP for the entire team based on how much damage has been dealt to the opposing team. Additionally, this creates extra turn delay for the defending team in a skirmish, potentially robbing them of an action that would have let them go before anyone on your team could go again. While the latter aspect usually only matters in boss fights, the former aspect is one of the best MP sustain abilities in the game. If you kill the entire enemy formation, you get back any MP you spent, or close enough to a full refund that you will never realistically run out in a fight against mobs. A Tyrant on a well made casting team eliminates any MP concerns you could ever have, making them obvious candidates for the teams of the Hero and Yuzu. This is even better if combined with Deitys, giving out extra powerful spells while entirely refunding the cost of Awakening. Tyranny isn't flawless, it's noticeably less impactful against bosses if you're not laying out oodles of damage, and you're in serious trouble if you're dealing with MP damage and Tyranny fails to outpace that. Remember, you only get MP back if you manage to actually deal damage, and having all your MP drained on a casting team obviously hampers that. This leaves room for Blood Wine and Drain to still show their usefulness as these are much more consistent forms of sustain and restoration, though these are definitely rarer situations than what you can typically expect to deal with. The main thing holding Tyranny back is the fact you can't realistically use Tyrants on more than a single team, at least not without any additional teams using them having a load in combat that dies in one or two hits. It's still a great ability though, and whoever happens to be your best caster can always benefit from running alongside the most up to date Tyrant when combat is the only concern.

User avatar
Mechanics: Endings

I've gone over the requirements for getting the various ending routes in the game several times throughout the let's play, but I thought it'd be nice to write up a quick breakdown to have everything in text for those playing along at home. For those reading this thread in the future, I'd advise not reading further into this post if you're interested in avoiding mild spoilers.

Devil Survivor has 6 potential ending routes available to you at the conclusion of Day 6. Some of these routes in Overclocked advance to an 8th day epilogue, while some of them end at the conclusion of the 7th Day like the original DS release. In sharp contrast to most other MegaTen games, the multiple endings of Devil Survivor do not seem to be tied to any kind of hidden point system, and are instead purely unlocked by activating the required event triggers. It is possible in a single playthrough to hit every key event trigger and have your choice of every possible ending route available, though there isn't much practical reason to do this. The available ending routes are as follows,

Yuzu: Yuzu's ending route is the "wildcard" path. There are no specific requirements for unlocking it, it is always available to you regardless of how much or how little you have accomplished. It is one of two endings in the game that can still be obtained even if Haru died on Day 4. This ending route also continues onto an 8th Day in Overclocked. The only thing to consider for this ending route is that if you want the ideal outcome for the 8th day scenario (Or rather, it's your first playthrough and you want to unlock the sidequest achievement from Yuzu's 8th Day) is that Gin needs to be alive. Gin is tied to a special sidequest that you can perform on Yuzu's 8th day, and said sidequest hits a complete dead end if Gin is 6 feet under. Since Gin can only potentially die if you pursue his ending route, you can just avoid setting him up to encounter Azuma and not have to worry about saving him later.

Atsuro: Atsuro's ending route is remarkably simple to unlock but also somewhat unlikely for someone playing for the first time to see. Atsuro's route has only one key requirement,

-You MUST save Keisuke on Day 5. If you have done so, Atsuro will have an event on Day 6 that opens this route for you.

That is it, anything else is irrelevant. Normally I wouldn't bother listing out things you don't have to do, but just in the interest of clearing up some misconceptions,

-You DO NOT have to uncover the truth of the UEM field to get this route. This is the most commonly false reported requirement for this ending and it's not exactly clear why people think you need to have done this beyond "it's an Atsuro related sidequest." The revelation of the UEM field actually runs directly against what Atsuro plans to do and honestly it kind of makes him look an idiot if you've uncovered this bit of information. More on that when we actually get to Atsuro's route.
-You DO NOT need to save Haru. This is the only other ending besides Yuzu's that can be obtained without Haru being alive, as despite how important Haru's songs are made out to be when it comes to controlling demons, Atsuro cooks up something without her in this ending route.
-You DO NOT need to get Naoya's notes from Azuma on Day 5. None of the information gained from that sidequest is relevant to what you end up doing in this ending.

Atsuro's route ends at Day 7, which is kind of a shame since I feel like this one had potential for an epilogue.

Amane: This is one of the easier routes to unlock. The requirements for this one are very straightforward,

-You MUST save Haru on Day 4. You'd have to be pretty dense to sincerely let Haru die, so this is pretty much a non-issue.
-You MUST See Amane's final event on Day 6, which becomes available around 16:00. If you fail to watch this event, you will not be able to get Amane's route.
-POSSIBLY you need to maintain a friendly relationship with Amane. I'm actually not sure on this one, I've just seen it postulated. Still, this would be as simple as responding positively to her emails and giving positive responses in her dialogue scenes. The Ueno battle on Day 6 may be a factor here if you side with the demons against the angels, but I'm really not sure on that.

Amane's ending continues onto an 8th Day. Amane's 8th day is the most clear cut and straightforward with no special sidequests or aspects to it, but it does probably have the hardest final boss.

Naoya: Naoya's ending route is remarkably uncomplicated to unlock all things considered, though it does require a little bit more than just attending story events.

-You MUST save Haru on Day 4.
-You MUST be successful in Naoya's challenge at the end of Day 5. As a reminder, the challenge is to rout 6 demon teams before the Hero takes and completes 3 turns. This is really easy to do if you have any degree of tactical acumen, but people who optimize purely for combat tend to struggle with this. If you fail Naoya's challenge, his ending route is closed.
-You MUST see Naoya's event on Day 6 before 18:30 rolls around. Fail to see it, and the ending route is closed.

Surprisingly, you do not need to collect Naoya's notes from Azuma, as the information contained in those is not critical for this ending. As far as I'm aware, there are no relationship components to this ending route, but I suppose it can't hurt to side with the demons or eliminate both the demons and angels in the Day 6 Ueno battle. Naoya's route continues onto an 8th Day, and it is the most complicated 8th Day with 2 distinct routes through it and a sidequest available to do on one of the routes.

Gin: Gin has by far the most involved set of requirements for unlocking his ending route, and his key events become a factor the earliest of anyone's.

-You MUST set up Gin's confrontation with Azuma. You get the key event for starting this sidequest on Day 4, though you are free to complete it at any time before 12:00 on Day 6 rolls around, after which the opportunity is lost. Naturally, you must attend the battle tied to this encounter or Gin dies and the ending route is closed off.
-You MUST save Haru on Day 4. Same old same old here.
-You MUST collect Naoya's notes on Day 5. Remember, this sidequest begins on Day 4 with an Atsuro event, which then leads to an event where you coordinate a pick up with Azuma, and then finally you can collect the notes from an Azuma event on Day 5. This does chew up a bit of free time, but Day 4 doesn't have much in the way of sidequest content anyway so it's not a huge deal.
-You MUST clear Naoya's challenge on Day 5. What Naoya tells you confirms Aya's role in the Shomonkai and makes the importance of Haru's sequencer clear. Without this information, the route hits a dead end.
-You MUST attend Gin's story events after saving him from Azuma to finalize access to the route.

Once all of the above is done, Gin will appear after saving Haru from Belial and lay out his plan for resolving the lockdown. This ending route has a definitive plan for resolving the demon situation, and I'm not surprised it doesn't lead into a Day 8.

Kaido: Kaido's ending route is a bit unique and I'm actually not going to go too in depth on it because I want to leave certain aspects of it a surprise. For accessing it though,

-Once again, you MUST save Haru on Day 4. Funnily enough, she doesn't really have any role in any ending but Gin's, but Belial is critical to Amane and Naoya's endings and he doesn't show up if Haru is dead.
-On Day 6, you must see all events involving Kaido. Between the second and third event, there's a brief event at the Shomonkai facility you must see that thankfully doesn't eat up any time. Report your findings from that event to Kaido, and you'll have his ending route.

What's so special about Kaido's ending route? Just watch the videos and find out!

User avatar


Part 32 is out! This is purely a story focused part, with a major shake up to the status quo. Things are about to get really interesting going forward.

User avatar
Units: Naoya, Kaido, Mari and Black Frost

The moment we locked in our ending route for the game, we suffered a mass desertion (lousy ingrates) with only Atsuro staying behind to support us. Fortunately, we got a whole new batch of people to more than make up for the lost manpower. Let's take a look at them, shall we?

Naoya

Image

Naoya's Starting Stats:

HP: 402
MP: 212
ST: 13
MA: 23
VI: 17
AG: 16

Naoya's Stats at Level 99:

HP: 774
MP: 417
ST: 23
MA: 40
VI: 30
AG: 25

Naoya is basically the replacement Yuzu. In contrast, Naoya isn't as fast as Yuzu but he is considerably more durable. For most of the rest of the game, I'd say this actually puts Naoya ahead of her, though the extra AG for Yuzu is probably more valuable in the ultimate bonus boss fight. Naoya also has the standard Move of 4 and 50 Speed, so he doesn't need Move support as badly as Yuzu in exchange for slightly more turn delay on action. I'd call this a net positive, Move is much more important than Speed and Yuzu's Speed was only a slight help anyway. If you failed to unlock any of the extra party members, Naoya is definitely going to be putting in a lot of work as Atsuro and Kaido struggle to work together due to the way the skill system is for human characters. He's less crucial if you got Mari and Black Frost, but he's still good enough that I'd call him a lock for all missions going forward.

Kaido

Image

Kaido's Starting Stats:

HP: 497
MP: 87
ST: 24
MA: 8
VI: 21
AG: 12

Kaido's Stats at Level 99:

HP: 966
MP: 169
ST: 40
MA: 14
VI: 39
AG: 21

Say hello to probably the most specialized character in Devil Survivor. Kaido is a wall of beef and hits like a truck with physical skills, but his MA is abysmal at any stage of the game. This puts him in a rough position, as despite his high HP, he gets absolutely shredded by most enemies in the game, making him a serious liability without extreme caution. It definitely does not help that we are going to be seeing Phys Repel decently often for the remainder of the game, completely walling him out from hurting certain enemies. If you're willing to work around this though, there is not much in the game that can survive Phys Amp'd Deathbounds and Brutal Hits from Kaido. His low AG does cause some problems with getting his licks in before the enemy attempts to flash fry him, but Life Surge or Endure can help a ton with surviving that. If you unlocked Black Frost, I wouldn't recommend using Kaido, but if you failed to then I'd say he's more worthwhile than Atsuro. Kaido has 4 Move and the dubious distinction of being the only character with less than 50 Speed. That last bit doesn't hurt him too much, but it is something to keep in mind if you run Dragons or Viles on him.

Mari

Image

Mari's Starting Stats:

HP: 358
MP: 216
ST: 13
MA: 22
VI: 19
AG: 12

Mari's Stats at Level 99:

HP:696
MP:417
ST:22
MA:40
VI:35
AG:18

An optional character, Mari is as awesome as you'd hope a missable character could be. Mari is very much a stone wall, with sky high MA and VI, making it very tough for the enemy to take her out when she has ally demons out. Naturally she can dish out some excellent damage as well. Her HP growth isn't as high as Naoya's, but it's a negligible difference and in most cases Mari will still have the better survivability. Not much to say, she's another great mage and beats the hell out of having Midori as your fourth. If you find yourself in the situation of having to choose between Keisuke and Mari, Mari definitely gets my vote for the rescue, especially if you're going Naoya/Kaido's route. Mari's biggest drawback is her low AG, which like with Kaido means she's going to get beat on before she can layout the beating a lot of the time. Mari doesn't sweat at the sight of Megido or and Amp'd spell like Kaido does though, so it's hardly a worry most of the time. Mari has 4 Move and 53 Speed, putting her on even footing with the Hero when it comes to tactical use. Easily one of my favorite units in the game, I really wish she joined outright on Day 5.

Black Frost

Image

Black Frost's Starting Stats:

HP: 357
MP: 210
ST: 18
MA: 20
VI: 15
AG: 13

Black Frost's Stats at Level 99:

HP: 676
MP: 402
ST: 34
MA: 35
VI: 24
AG: 22

Another optional character, and he's a bit more involved to get, with several optional events across multiple days that the game doesn't explicitly draw your attention towards. Go through the effort of clearing those though, and you'll get one of the most unique Team Leaders on the Naoya/Kaido and Gin routes. Black Frost is the only non-human team leader in the game, and correspondingly he comes with the unique aspect of two innate immunities and one weakness. The weakness is easy to work around, so defensively Black Frost is flatly superior to most characters, at least for magic attacks. Statwise, he's a mixed attacker with nearly even ST and MA, making him viable as a caster or a physical attacker depending on who you have available. Since we have Mari, I'll be gearing him towards physical attacks, but the high MA does give him some flexibility for the situations that call for it. The biggest downsides of Black Frost are his lowish HP and mediocre VI, making him vulnerable to physical hits, and the fact that he only has 3 Move. At least he's not under average Speed like Kaido, but he may need some Move support from Wilders depending on the situation he finds himself in. I'd strongly recommend fielding Black Frost over Atsuro and Kaido, because he has much more focused offensive prowess than Atsuro and no crippling magic weakness like Kaido. Hee-ho!

User avatar


Part 33 is out! We begin our campaign for the crown of Bel, starting with Jezebel first. Naturally, this puts us in conflict with Amane and Remiel. Day 7 sees us engaging in battle almost non-stop, with no optional story events and close to no events that don't have a battle tied to them. Naturally, we're going to be getting bombarded with new skills and demons.

Demons Available

Tyrant Astaroth (Lv.51): Astaroth is basically going to be the last Tyrant we get access to in the game, as the one above him only becomes available to use in Yuzu or Amane's Day 7. (Though we can potentially unlock him on Naoya's 8th day, it'll be well past the point he'd be competitive with the level curve) Astaroth is much more heavily geared towards physical attacking, and is an extreme glass cannon with atrocious VI. You'll have to get a different physical skill onto him if you want him to flex that ST, as the Deathbound he comes with runs off of VI instead and he isn't helping it too much with it in that regard. Fortunately, Astaroth's second most prioritized stat is MA, so if you can fuse him with capped ST, all level up points that would have gone there will funnel into MA instead and he'll become an extremely potent mixed attacker. We have pretty good flexibility with fusion at this point, so it's not hard to get whatever skill you want onto him.

Skills Available

Megido (Command): We haven't seen an Almighty skill since Holy Dance, nice to finally have more options! Megido hits all enemies with a decently powered Almighty spell at a hefty MP cost of 50. Having good MA and stacking damage modifiers is key for decimating enemies with this skill. Awakening and Magic Yin can allow it to delete flanking demons in a formation and leave the team leader reeling and poised for clean up. You'll want a combo of Drain and Tyranny to support it, but I'd definitely recommend setting someone up to perform this kind of combo.

Mediarahan (Command): For 45 MP, this restores the HP of everyone on a team regardless of the MA stat of the user. Obviously this is extremely useful and you'll probably want at least one demon or leader on any team to have this going forward. Mediarahan is the ultimate filler skill, great for physical attackers with their MP that otherwise goes unused.

Maziodyne/Mazandyne (Command): We'll gradually pick up the remaining multi-targeting Dyne spells throughout today. These skills are powerful, but enemy line ups are becoming more varied in the resistances they have, so you do need to be very carful with these skills to make sure you're not bouncing high powered magic back at yourself or healing the enemy for 100's of HP.

Samarecarm (Command): Revives a defeated demon or character with full HP. Like Mediarahan this is obviously good and you'll likely want this on at least a few things. Ideally you won't find yourself in situations where you need it, but it's great to have when those situations do crop up.

Mana Aid (Passive): The MP counterpart to Life Aid and the much more useful skill in my opinion. This is a solid 10% MP restore at the end of every battle, and at this stage of the game this can easily blunt MP costs enough that it can prevent running dry, especially when combined with other MP sources. Good thing to keep in mind for the strong casters with lower MP maximums.

Critical Heal (Passive): When you land a critical hit with a physical attack, this restores some of your HP. There's this skill called Drain Hit that does the same thing to a negligibly smaller degree with EVERY physical attack. I have no idea why you'd ever waste time with this garbage but it's there if you want it.

Magic Yin (Auto): An auto skill that gives a 50% bonus to all magic damage you deal. It's like an omni-amp! There are some stiff drawbacks however. Magic Yin doubles the cost of spells, and costs a not insignificant 16 MP itself to set up. Additionally, you cannot use physical attacks when it's in effect. And unlike its counterpart, Magic Yang, all aspects of it only affect your team rather than the enemies team too. This means you aren't having high powered magic tossed your way for using it, but the enemy definitely has more options than you when it's in play. If you can manage with these cons though, Magic Yin gives amazing returns when stacked with other damage modifiers. Combine this with Awakening and elemental Amps, and anything nailed by a Magic Yin spell will certainly be feeling it in the morning. I was a much bigger fan of this skill when I was younger, but these days I do think there are a couple superior builds to Magic Yin builds. This one is still great though, and it's actually available for the bulk of the end game so it has the edge there.

Strengthen (Auto): Here's an interesting auto skill, Strengthen nullifies any weaknesses your team might have, making them register as Neutral resistances when struck. This is an easy way to cover for weaknesses on your team if you don't feel like or simply can't make good fusions to cover them via passives. I'm not a fan of this, though I suppose it has use with Black Frost who is the only team leader with an innate weakness and can actually benefit from this skill.

Diajama (Command): I always forget the Curse status ailment exists in this game because it comes in so late. Anyway, Diajama is a single target ailment skill with a high chance of inflicting the Curse status. This status is much like the ailment of the same name from the Etrian Odyssey series, not in effect but in the fact that it mostly exists to be used against you rather than anything you can make serious use of. The Curse status prevents a unit inflicted by it from restoring HP and MP. This scarcely matters for the AI but is phenomenally annoying for you to have to deal with. Thankfully, Affection can cure this ailment and still heal you in the same action. Anyway, this spell is trash for you and should be ignored.

Phys Repel/Phys Drain (Passive): The last of the physical resistances, requiring 15/15 and 16/16 ST/VI to use respectively. These skills are why it's a good idea for your Hero to hit 16 ST at some point so that he has access to the full selection of physical resistances, though honestly I'd say Phys Repel is the most important one and you only need 15 ST for that. It's a good idea to have at least some form of phys resistances from this point on, as Deathbound and Hassohappa can hit for some fierce damage.

User avatar
Demon Race: Vile

ImageImage
ImageImage
ImageImage
Image
*Baphomet is exclusive to Overclocked. Additionally, he is a Special Fusion unlocked by clearing Yuzu's 8th day
**Pazuzu is a Special Fusion, unlocked by either defeating him on Day 5 or joining with Naoya and Kaido on Day 7.

The last standard demon race to talk about and they sure are similar to Dragons! Like Dragons, their Race Skill is their main draw. Also like Dragons, they tend to have generalized stat spreads which make them functional at whatever they end up inheriting (With the exception of Orcus who is highly slanted towards physical attacking). And finally like Dragons, it's a bit hard to judge them on their own merits due to drawbacks inherent to their Race skill that drags the whole team down. Broadly speaking though, Viles tend to have a bit more going for them than Dragons due to having more interesting skills from the word go and usually fusing off of powerful demons that ensure a tidy inheritance. They also have the boon that their Race skill is just better for the intended purpose it has than Evil Wave. Viles are largely unavailable in the early game, but quickly pick up representation in the late game, especially in vanilla Devil Survivor where Fafnir doesn't exist and Viles essentially operate as a straight upgrade to Dragons. For specific recommendations, Abaddon is great fusion material due to having Bufudyne and Anti-Most, and he's a phenomenal tank if you put in the effort to get anti-phys onto him. Tao Tie is our first access to Megido and does great in Magic Yin comps, and has full passive flexibility, giving him excellent room to improve through Mitamas. Arioch can put in great work with modestly powerful Deathbounds, great resistances when given Anti-Most, room for good damage augmenting passives, and he is remarkably quick for a bulbous vagina demon. Baphomet and Nyarlathotep (Yes the Lovecraftian horror) are good in a vacuum but they're both new game+ demons so it's hard to really talk about them in the context of the game proper. You will absolutely want Nyarlathotep for the ultimate bonus boss though. I've made multiple mentions of the Vile Race skill, let's talk about that now, shall we?

Chaos Wave is the Vile Race skill. This is a non-conditional passive that extends your attacking range to 3. In addition to the drawbacks that Evil Wave had (No Extra turns and increased turn delay), Chaos Wave reduces your Move by 1. The turn delay increase is also more significant than Evil Wave, essentially doubling the amount of delay generated from engaging in combat, both on offense and defense. Pretty stiff penalties, and it technically does not increase your effective range any more than Evil Wave does due to the Move penalty, on top of having the same problem of these penalties applying even if you aren't using the extended range. That being said, you can work around the Move penalty by simply not having the Vile in your default line up and instead summoning it as is needed. There's even situational value to starting with an empty slot just to minimize turn delay from bringing the Vile in. Viles are also helped by the fact that it's essentially mandatory to have a couple of them in the late game, as the final battles of the game spam the hell out of Viles and Dragons, to the point where your vanguard needs them if they don't want to get sniped into oblivion. Much like Evil Wave, the AI transparently cheats the turn order to accommodate Viles, to even more absurd degree than Dragons. (I've seen Viles in the sequel get 3 turns to the 1 turn the unit they are attacking gets) Now on their own, I think both Evil Wave and Chaos Wave blow chunks due to the harsh penalties that apply even when you aren't making use of them. But Chaos Wave is both the better skill on the whole and generally is backed by stronger and more interesting demons, so I'd say this usually wins out when you have the option between the two. Just make sure any comp that has it is set for maximizing damage, as they can easily struggle to finish their plates without Extra turns in the mix.

User avatar


Part 34 is out! The war for the crown of Bel continues, as we set our sights on Jezebel and proceed to demolish her in short order. Before we can continue the conquest, Naoya let's us in that we need to smash the barrier between the human and demon world, and the mini-quest to eliminate the 4 Devas begins. Just an aside on something I forgot to mention in the video, the power bonus we got for defeating Jezebel was another 15% bonus for our maximum MP. In the span of two boss battles, the Hero goes from having one of the worst maximum MP stats in the game to the absolute best, gotta love it.

Demons Available

Avatar UkanoMitama (Lv.52): Our skill gathering drive resulted in a slew of demons becoming available, and this guy is definitely the least among them. UkanoMitama has badly distributed stats focusing on AG too much and no good skills. Now admittedly now that we can do Mitama fusion, the latter isn't too important as we can use that and Magnetite Overloads for a great degree of demon customization. Those processes, however, are expensive for the former and slow and boring for the latter, so I'd rather set my sights on demons that provide a quicker payoff, especially ones that are very like to cap an attacking stat on fusion. So yeah, this guy sucks, ignore him.

Touki Yaksa (Lv. 52): The next Touki and he doesn't light the world on fire like Berserker. Level scaling makes him a necessary evil though, so I fused him up regardless. He could definitely use some Mitama respeccing for optimal passives, but the hefty ST he started with should be fine enough for my purposes, and he has good enough AG to more consistently attack first on offensive engages.

Beast Cerberus (Lv.53): Cerberus is quite good if you set him up with Anti-Most and Pierce. He has decent bulk and good enough ST that he can lay out some pretty mean Hassohappas or Berserks. We're past the point where Animal Leg really helps us much with anything, so I'd only really go for this guy if you have a really impressive fusion for him on your hands.

Genma Seiten Taisei (Lv.53): Kresnik 2 basically. Everything that was good about Kresnik applies to this guy, and he has pretty solid stats across the board save for MA. It's probably in your interest to set him up with Anti-Most, magic can really ruin his day, but otherwise upgrading Kresnik lands you another impressive physical beater. Highly recommended.

Wilder Catoblepas (Lv.54): We finally get another Wilder, but like Beasts we're kind of past the point where it's super critical to have their Race skill on hand. I'd still recommend picking up one of them though. Catoblepas himself is more of a jack of all trades, but if you upgraded him from a Mothman like I did, he'll likely be more magically inclined. So much the better, he has decent MP which means it's actually pretty helpful to set him up with Mediarahan for support. Definitely pick this guy up, he can put in some good work with an Amp'd spell and his innate Deathbound.

Fairy Spriggan (Lv.54): It's an upgrade bonanza here! Spriggan is pretty solid, with immense bulk and great resistances, plus the MA to layout some damage. Upgrading him off of Vivian results in a phenomenal Holy Dancer, but be wary that his innate MP is rather low. I'd recommend getting anti-curse or anti-most onto him to cover the one weakness, and thankfully he can pick up Mana Surge from Vivian to pad out his gas tank. Once he levels up to grab Dual Shadow, he can really pop off if the RNG favors him.

Megami Norn (Lv.55): Finally a demon we can fuse that doesn't directly involve Elements, Norn is... actually kind of bad? She has really balanced stats for a Megami, and her MA is considerably lower than other casters we have at this point. (For comparison, she has 22 MA while the lower leveled Spriggan has 24) Norn is, however, our first access to Prayer, which is Mediarahan and Amrita rolled into one skill. This is pretty great, and it only costs 10 more MP than Mediarahn, so it's not that much of a mark up. Best practice for Norn I'd say is cook up a fusion that lets her get Phys Repel or Phys Drain alongside Holy Dance and mostly treat her as support. Might be a good Shield All user.

Vile Arioch (Lv.56): Oh lawd he comin. Anyway, Arioch is remarkably quick on his feet for such a portly individual and amazingly tanky to boot. He can fuse right off of Hecate, picking up Anti-Most and making him nearly immortal. Big drawback of that is that he has horrible MP, so even with a hefty MA inheritance he'll not be able to contribute much without MP support. Still, he also picks up Pierce in the fusion and has good enough VI to do decent work with the combo. Good idea to pick this guy up.

Avian Huoniao (Lv. 56): A Magic focused Avian, what a novel concept! Huoniao is actually pretty solid with 23 MA, but he's not a good upgrade since Rukh is a physical demon. He's another demon with Megido in his skill lists and he has fully flexible passives, so if you have a good fusion to make him and like what you see, I actually could advocate this guy. Just be mindful that he has bad MP, so he's dubious for Magic Yin builds.

Fallen Agares (Lv.57): Another overly balanced Fallen, nobody cares about this guy for his combat ability. It is all about that innate Phys Drain, a wonderful defensive passive to have and Agares is the easiest way to get it. His clutter command list makes it hard to gear this guy towards anything but Deathbound or Holy Dance spam on fusion, so that's probably what you should shoot for should you want to use him. Sacrifice pales in comparison to Tyranny and Blood Wine or even just Drain at this point though, so I'd just keep this guy in mind for fusion.

Divine Kazfiel (Lv.58): Another sub-par Divine, you love to see it. This guy is pretty slow but any of his other stats can easily be his focus depending on what you fuse him with. Again, anti-most makes a great tank here, and he has pretty solid VI for Deathbound spam. I don't really care for him though, so again he's mostly just there if you happen to have a really good fusion laid out for him.

Skills Available

Judgement (Command): Oh goody, another skill that is useless to you but unbelievably annoying to go up against. Judgement is a Curse attack that halves the HP of the entire opposing team if they don't resist or null it. This straight up is never a better option than you can manage with standard spells on a well made team, but the AI loves to dump this on your head when they have it to chip you down. Like Shield All, it has ridiculously high priority, making it hard to defeat enemy teams before it goes off. I'd never recommend using it yourself, Megido will trounce it every time with a strong caster.

Attack All (Passive): Turns your normal attack into a multi-targeting one. This actually does make an attack that is stronger than Mow Down, though weaker than Hassohappa. Now in the sequel, there's a skill combo that makes this passive amazing, but the critical skill for it doesn't exist in this game . While you can still pull off most of the combo, the fact that it's walled by Phys repel makes it too much of a liability at this stage of the game. We don't even have the Auto skill for the combo at this point anyway, so it's moot regardless. I wouldn't recommend this, but it's fine if a demon has it I guess.

User avatar


Part 35 is out! A fairly breezy edition, the only thing we do is dismantle the borders between the human world and demon world and invite Armageddon should we fall in the war for Bel. It gives us great leverage for strong arming the military into giving us time to see this through.

Demons Available

Kishin Zouchou (Lv.50): Our next Kishin we can fuse and there is very little to say about him because he is immediately invalidated in the same fight we unlock him. He has stats that are probably too balanced for his archetype, but he does have good skill flexibility at least. Moving on.

Kishin Koumoku (Lv.57): Zouchou but he's 7 levels higher and is weak to elec instead of Force. His stat distribution is pretty unremarkable for a physically focused demon, but if you've just been upgrading from Mikazuchi like I have, this guy should have pretty solid ST and VI bonuses, so he can put in work with Deathbound and Brutal Hit. Brutal Hit especially does well from the Devas as they have extremely high HP stats. If you've hung onto Mikazuchi, then definitely make this guy, Element fusing is dirt cheap at this stage of the game.

Snake Orochi (Lv. 59): Speaking of upgrades, here's a guy with excellent stats out of the gate and will likely be on the cusp of the ST cap if you upgraded from Seiryuu. If you opt to boost him with a MItama and get some extra skills onto him to augment his physical attacks, so much the better. Definitely grab this guy if you've been using Snakes up to this point.

Genma Tschaggatta (Lv. 60): Another Genma so soon after Seiten Taisei? Not that there's much to say about this guy, he's not a good upgrade from Seiten Taisei as he has bottom tier ST. He can run Deathbound, however, due to a solid VI stat, and it can make for an interesting mixed attacking build with his modest MA stat. I don't really care about this guy, but he has potential at least.

Skills Available

Tetrakarn (Command): Tetrakarn throws up a reflective barrier on all team members in a fight that repels one physical attack and dissipates. Repel damage is rather low in this game, so you mostly care about the nullification effect first and the Extra Turn impact it can have second. Personally, I prefer Shield All immensely when I want this kind of effect because it blocks all forms of attack, is cheaper, and still usually secures Extra Turns if you have good AG. I suppose the advantage of this in the context of human characters is that you can run it on someone else in addition to one person having Shield All, but I feel these skills are better to stick onto demons anyway.

Force Repel (Passive): Another Repel skill, nothing special to say about it. Keep it in mind though that the game is providing you with a passive to nullify Force damage specifically.

User avatar
Demon Race: Elements and Mitamas

ImageImage
ImageImage
ImageImage
ImageImage

Our final demon breakdown, and due to the non-standard nature of both the Races, it's a two-for-one special! You know when I first started writing these as a fun way to add to the LP, I optimistically figured I'd be done with it halfway through the game, and now here we are over 30 parts in and approaching the ending. Anyway, Elements and Mitamas are formed under unique fusion circumstances: Elements are created via fusing two demons of the same Race with the resultant Element dependent on the Races used with a 1000 Macca catalyst fee require to fuse them, while Mitamas are created by fusing Elements together and take a 3000 Macca catalyst fee to fuse. As you can see from the skill lists, neither Race has a Race skill and are not intended for use in combat or tactics. Instead, Elements and Mitamas have unique effects when used in Fusion, and are key for customizing demons with skills they'd have a hard time getting without extensive fusion chains.

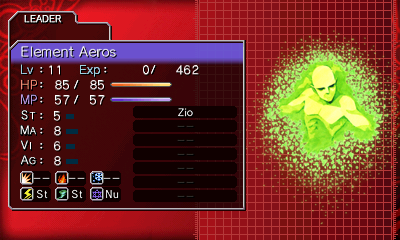
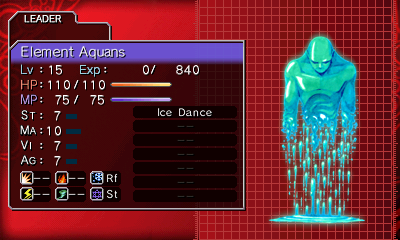
Let's start with Elements. Elements have the unique property that when used in fusion, they will cause the demon they fuse with to either "Rank Up" or "Rank Down". Essentially, they move demons along the tiers of available demons within their race, eg. fusing a Jack Frost with an Aeros results in a Pyro Jack, the next highest leveled Fairy demon from Jack Frost. The exact effect each Element has on each Race is compiled in this handy-dandy chart that was made by Gipig on GameFAQS.

Image

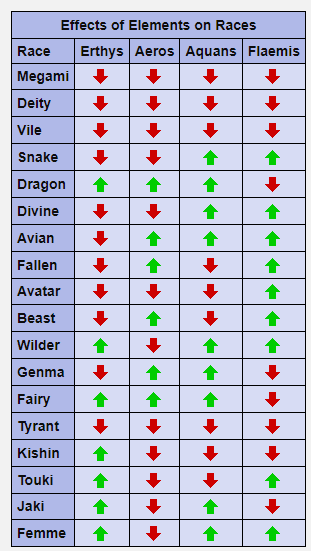
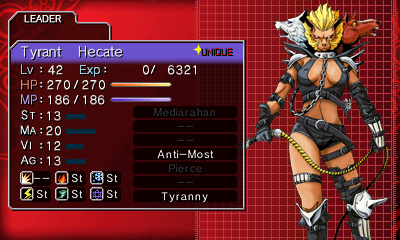
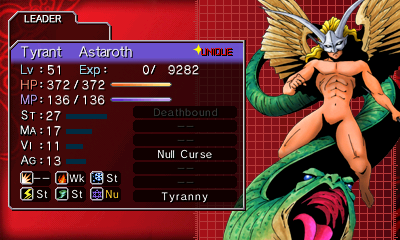
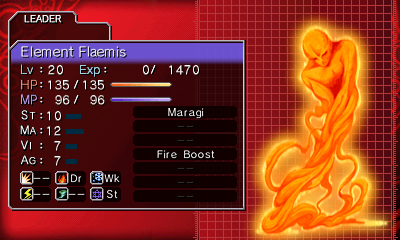
As you can see, most Races have at least one Element that results in an upgrade, while Megamis, Deitys, Viles and Tyrants can only ever Rank Down. For the most part, the main draw of Elements is what I've been doing towards the back half of the game, converting your existing demons into stronger new demons that become available as you level up. Since demon races tend to follow similar builds throughout their roster with only the occasional outliers, this can allow you to carry down useful skills and a tidy stat inheritance through fusion. As demonstrated with demons like Cu Chulainn, this can be very effective in maintaining a strong archetype demon throughout the game. I know what you're thinking, is there any purpose for Ranking Down? For the most part, not really. It's helpful for obtaining missed demons in the compendium, just fusing the strongest thing and continually depowering it to hit all missed spots, but as far as practical use goes I can't really think of a reason you'd want a weaker demon in the main game. It does have some use on New Game +, where you can create a strong Loki and then rank him down to create a strong Astaroth and then a strong Hecate, but that's about it. You do need to be mindful of Inheritance when using Element fusion, as just raw fusing an element can result in the gradual loss of bonus stats overtime. Fortunately, there's nothing stopping you from grabbing the weakest demons of a Race, powerleveling and then fusing them together, and then scooping up a few levels for the Element to get some extra inheritance into the mix. Are any of the Elements particularly notable beyond their Rank Up ability? Well, Flaemis actually does have some use beyond that, as he has Maragi and Fire Boost by default. Around the time you can initially create him, this is a very powerful skill combo and can be used to easily create strong casters on Day 3, provided the targeted demon can rank up from being fused with Flaemis. Past that, Elements are only ever going to be as notable as the skills they can reap from the component demons to create them. It is worth noting that in the early game, the catalyst fee makes Elements too expensive to use and they generally impart poor inheritances, so I wouldn't pay them much mind up until about Day 4. Past that point, the catalyst fee becomes an increasing non-factor while the benefits of upgrading your existing demons start to become more substantial. They're even more worthwhile once we can easily create Mitamas and gain greater control of the skills on our demons.

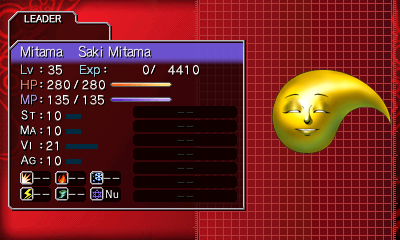
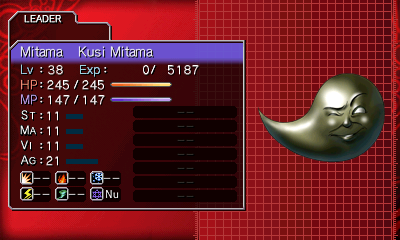
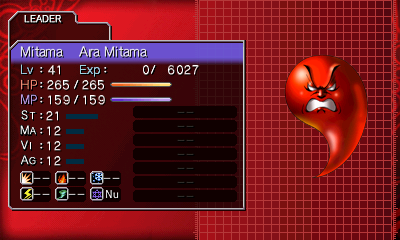
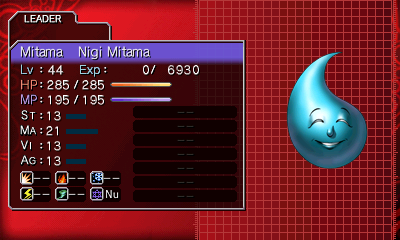
Mitamas have an even more unique impact on Fusion. When a Demon is fused with a Mitama, the end result is actually the same demon that was being fused off with the Mitama. (eg. I fused Hecate with Nigi Mitama and got another Hecate) Instead of Ranking up or down demons, Mitamas instead convey a statistical bonus to a demon, plus the opportunity to respec the demons skills. Each Mitama has a preferred stat, and when they are fused onto a demon, the recipient demon gets +3 to that preferred stat. Saki Mitama gives +3 VI, Kusi Mitama gives +3 AG, Ara Mitama gives +3 ST, and Nigi Mitama gives +3 MA. These stat boosts are considered bonus stats, so if a demon is over their Bonus stat cap but can still boost the targeted stat, points will be deducted from their less preferred stats and funneled into the stat that is being boosted. In the event a stat to be boosted is capped, the Mitama has no impact on stats but still offers the chance to shuffle around the demons skills. When a Mitama is fused onto a demon, the skills that the Mitama has are put into the selectable skill pool alongside the skills of the recipient demon. With this, you can remove skills you don't want from the target demon and use the Mitama to place any skill you could ever want onto the target demon. There is a limitation to this, any skill that is a part of the demons default skill set (That is, anything that would always be there if you were to just run a basic fusion of the demon) cannot be removed. While this doesn't matter too much for Command skills since they can be overwritten by Magnetite Overloads (interestingly default skills that were overwritten become locked to the demon and function the same way in Mitama fusion), it is an important thing to consider with Passive skills, which there are no ways to remove. This is why I've drawn attention to demons with open passive lists, because they can freely swap out their passives for whatever works best for them. Demons who have one or two pre-filled passive slots will always have less options than demons who have completely open passive lists, and frankly most demons with two filled passive slots tend to have sub-optimal passives that really hamper their long term effectiveness. Mitamas are key for creating the strongest demons in the game, and you will be using them heavily to prep for the ultimate bonus boss should you elect to take him on. In the main game, the catalyst fee does cut into how much you can spam these out, and they have very high compendium costs, but they are just cheap enough via fusion that it's not too much of a hassle to create them for augmenting demons with less than ideal passives by the time Day 7 rolls around.

User avatar
Cullen wrote:
Tue Nov 07, 2023 1:47 pm
A fairly breezy edition, the only thing we do is dismantle the borders between the human world and demon world and invite Armageddon should we fall in the war for Bel. It gives us great leverage for strong arming the military into giving us time to see this through.
That moment when the protagonists decide to open the boundaries to Hell itself to fight a demon. Some fine logic going on there LOL.

User avatar
The real beautiful part is that you do this in all routes except Yuzu's, even when you're allied with God.

User avatar


Part 36 is out! We square off against Belzaboul, who looks awfully familiar and seems to have nebulous reasons for being involved in the conflict of Bel. Strange. Afterwards, the angels take one last stand against us before we claim Belberith's head, and they drop some vague hints about what Naoya is really up to.

Demons Available

Deity Shiva (Lv. 61): Shiva is a special demon possessing the iconic fusion method, combining Barong and Rangda. Rather amusingly, Barong is actually a higher level than Shiva, making this the one special fusion in the game where the result is a lower level than one of the pieces used. Regardless, Shiva is quite good with high stats in everything, nearly full skill flexibility, and is resistant to everything with the ability to inherit Phys Repel from Rangda. He's definitely a worthwhile pick up if you like pumping out high damage with Awakening, and he can flex onto basically any role.

Fallen Mithras (Lv. 62): Absolutely do not fuse this guy without Anti Most or your end up with a demon weak to half the magic in the game. That aside, Mithras is another Fallen focused on mixed attacking, but he can't fuse in with skills to take advantage of this because two of his command slots filled out with a support skill and a conditional offensive skill. Mithras does have full passive flexibility, giving him a lot of options for how to be built though as aforementioned Anti-Most is essential. His stats are pretty close to Shiva's, but I can't really say he has as much going for him as Shiva does.

Avatar Barong (Lv.63): A remarkably boring demon for this stage of the game, he doesn't really have any notable traits to him and once again has really balanced stats. Despite the higher level, he doesn't compare too well to Shive with pretty standard resistances for this stage of the game and no interesting skills. He's an easy way to get Mana Aid into the skill pool, but again this guy isn't anything too special. Use him if you want to, but I'd say Mithras is better over all since Sacrifice can still stand to help out at least a little at this stage of the game.

Skills Available

Prayer (Command): For only an additional 10 MP, Prayer is Mediarahan with Amrita bundled in. Obviously this is good and if ailments are in the picture you'll definitely want someone capable of using this. That said, in comparison to Mediarahan, the extra MP cost is just enough that I would recommend this as a filler skill for physical demons since there is a very real chance they'll lose a casting compared to Mediarahan.

Mabufudyne (Command): We have this spell called Megido now that makes it hard for me to care about other multi targeting spells.

Crisis Might (Passive): Here's an interesting passive, Crisis Might conveys a 50% bonus to physical damage when close to death. I'm not sure what the trigger range for this is, but I'm guessing when your HP number changes color, this gets activated. This is quite bad in this game, you only get 3 passive slots and Phys Amp literally does the same thing with no strings attached. Obviously you're probably supposed to stack them, but since Pierce is essentially mandatory now, it's really hard to justify a passive slot for a skill that will likely not affect anything in 98% of the skirmishes you get into.

Makarakarn (Command): Tetrakarn but for Magic attacks. Definitely the lesser of the two, despite affecting a wider array of attacks. You never have to worry about a magic resistance being pierced, and like the other shielding skills, Almighty skills just ignore this anyway. Most demons in this game tend to be resistant to the elements they use as well, so there's not much damage potential to be reaped from this. Again, have Shield All for the situations where you want to no-sell damage.

Fire Drain (Passive): Not much to say about defensive passives at this point, use this one if it looks like it'll be helpful.

Death Call (Command): If an enemy is muted or paralyzed, this will auto-kill them when used. This is probably the reason why there are so many Mute skills in the game, and we get this piece of the combo at a point where nearly everything is resistant or Immune to Curse. Mercifully, the game seldom fields this against you so it's not much of a concern when picking passives. This comes way too late to be useful, and frankly it'd be pretty gimmicky even if we got it around Day 4 or so.

Grimoire (Passive): Boosts the chance of landing ailments by an unspecified amount. Like Death Call, we get this way too late in the game for it to matter at all. It's a good buff in a vacuum, but there's just not enough things vulnerable to ailments anymore to make this worth fielding. This skill is much better in the sequel where you get it early enough to actually build around it.

User avatar


Part 37 is out! The long awaited fight with Belberith has arrived, and we demonstrate just how much we deserve the crown from this conflict. The battle actually went pretty well in terms of pure combat, but this was easily my worst performance with skill cracking since the Gin & Azuma battle. I was so focused on making sure I had checks against what Belberith could do, I was zoned out hardcore on how to approach my skill cracks. I got the most important skills at least.

Demons Available

Dragon Fafnir (Lv. 64): We get access to a slew of Overclocked exclusive demons at this stage of the game, since naturally we're about to transition into the biggest new addition in Overclocked once we reach the Day 7 ending. Anyway, there's not much to say about Fafnir, like most Dragons he has unfocused stats and his resistances are kind of meh. Anti Most makes poor innate resistances much less of a problem, but that does create a situation where demons with physical resistances that are less than Null seem less impressive on defense, and on top of that it's nice to not have to dedicate a skill slot to Anti Most if it can be avoided. There won't be any new Viles to contend with at this point, so Fafnir enjoys an edge once Day 8 rolls around and Arioch gets pushed out of the level curve. I'd say have him for free battles if you feel Arioch is getting too weak.

Divine Sraosha (Lv. 65): Finally, another MA focused Divine. Sraosha is pretty solid all around, his base 28 MA can easily be capped on fusion, and like most high MA demons he can easily contribute by just hurling out Holy Dances. His defenses are nothing special, so he can find himself a little vulnerable, but he won't have a hard time contributing in both battle and with MP sustain. He's a solid generic demon for supporting casting teams.

Kishin Bishamon (Lv. 65): The last of the 4 Devas, and statistically he's what you'd expect. Bishamon does have one small downgrade though, he has a passive slot dedicated to a redundant Fire Repel passive, meaning he has less skill flexibility compared to the rest of the Devas. It's not a huge deal since he can still pick up Phys Amp and Pierce, but he does come across a little weaker than Koumoku in the bigger picture. He's still a fine addition though, and probably one of the best Deathbound users in the game with a titanic VI stat.

Jaki Macabre (Lv. 65): The last Jaki demon in the game and he is bad. Macabre has a decent ST stat that is easy to cap on fusion, but his resistances are abysmal for this stage of the game and he has a passive slot locked down with a redundant Fire Drain. He'll be too weak and inconsistent without a Pierce and Phys Amp combo, but too much of a glass cannon without Anti Most, so he really doesn't compare well to any other bruiser we can make at this stage. Give this guy a pass.

Megami Black Maria (Lv. 66): Like Norn, Black Maria is pretty low key for a Megami demon. Good but not fantastic MA and a rather unimpressive skill set by default is what Black Maria brings to the table. Obviously she'll do well when fused with Holy Dance and some support like Samarecarm, but she doesn't bring anything new to the table that makes her a must have demon. She isn't Unique like Norn at least, so she can be spread around to multiple teams.

Femme Jahi (Lv. 67): An actually pretty solid demon for the Femme race to end on! Jahi doesn't come in with anything too amazing, though she is the first demon to have Recarmloss. She has completely free passive slots, however, and solid resistances so she has a lot of potential if you want to kit her out properly. The biggest problem she has is that Devotion is a horrible skill at this point, so she fundamentally cannot contribute as much as a Megami on the field. If combat prowess is what you care about more, then that's not too big a deal, but you should always be mindful of every situation where a demon could help you. If you got a solid Jahi lined up in the fusion pool, then knock yourself out and take her for a spin.

Skills Available

Grace (Auto): Automatically casts Prayer at the start of the battle if either your team is hurt or there are ailments. Obviously this functions as a more expensive and upgraded Healing but it does have one caveat: it doesn't go off the moment even a single hit point is gone from your team. I'm actually not sure what the threshold to trigger Grace is, but you do need to be significantly more banged up for this to go off. It seems like around 40% of your team's HP needs to be missing for this skill to go off, or there needs to be an ailment. This can make it a little unreliable, so for general use I'd just say use Healing instead if you wanted an effect like this. It can be helpful in bonus boss battles though.

Health Save (Auto): Reduces the HP cost of physical skills for all participants in a skirmish by 75%. Pretty useless honestly, just having healing can invalidate the need for something like this, and it's just more sensible to build towards guaranteed first strikes if you want to reduce the chance of not having enough HP to use a physical skill. No loss if you miss out on this skill.

Debilitate (Auto): Lowers the accuracy, evasion, and defense of the opposing team by 25%. In effect, it's Blitzkrieg and Hustle rolled into one, just accomplishing that by lowering the enemy's stats instead of boosting yours. Pretty solid, though not also lowering the enemy's offense is unfortunate. At this stage, it's flatly superior to Blitzkrieg, so swap it out when you have the chance if you're still using it.

Multi-Strike (Command): I've made reference to a physical skill that is very powerful and benefits from AG, that is this skill. Multi-strike is a multi hit physical skill that hits all enemies 2-7 times, depending on how much higher your AG is compared to theirs. If you have more than 5 AG over the enemy you're attacking, they get utterly obliterated by a flurry of swift strikes. Combined with Pierce and Phys Amp, a demon with high ST and AG will be able to completely eviscerate 98% of the enemies you fight in the game single handedly. Multi-Strike also enjoys good move priority, so it often goes first. This skill is unreal levels of broken, and there's one specific demon who can use this combo to devastating effect and is an absolute lock for both Day 8 and new game + if you want to clear them quickly and easily. We will get to see the overwhelming power of this skill, just wait. As one final thing to mention, this is the physical skill I mentioned way back when that benefits from Tailwind. The bonus AG from Tailwind contributes to the hits of Multi-Strike, making it a good way to cheese out extra hits on characters and demons with good but not great AG. This matters more in Devil Survivor 2, but in this game you can have Atsuro make use of it should you desire.

User avatar


It's all led up to this, the war for Bel is over and it's time to claim dominion over Babel. What awaits after the ascension of the Overlord?

Skills Available

Anti-All (Passive): Exactly what it says on the tin: this makes you resistant to every attack type. (Save for Almighty of course) This gives us an even stronger option to cover all our defensive needs, covering the physical defense spot Anti-Most does not. Now generally, most characters have low enough VI that they probably like running a nullification type passive for physical attacks, but for high VI or high HP characters like Mari or Kaido, this is the ideal defense to stick on them. Another fringe perk of this skill is we now have a way to give every body some measure of protection against Curse attacks, which is greatly appreciated.

User avatar


Part 39 is out! We start off the 8th day with a whole load of exposition. Towards the end, we're faced with a critical choice that determines the outcome of this whole Overlord deal. Aside from that, we have a handful of skills to pick up before we begin our clash with the forces of Heaven.

Skills Available

Extra Savings (Passive): This reduces the MP and HP costs of skills to 0 on Extra Turns. I don't think this is too good of an ability in most contexts, but it does have a slight amount of merit in Magic Yin builds. Even with Tyranny, the high cost of Almighty skills under Magic Yin can easily run you dry and force usage of Drain or Mana Aid, so you could use skills like Shield All to turtle on the main turn and pop off with Awakening boosted Megidos for free on the Extra Turn. Not my style, but maybe you'd like it.

Avenge (Passive): The final counter skill, this one has the highest damage and the highest odds of going off. We are swimming in methods to destroy enemies before they can do anything and no bosses we square off against going forward rely on physical attacks, so this is an easy pass.

Force Drain/Ice Drain (Passive): Elemental drain defenses are pretty nice since they can't be bypassed and are a decently reliable way to protect and heal against certain attacks. Personally though, I mostly prefer them as a way to easily nullify Extra Turns. Ice Drain isn't too helpful, but Force Drain has extreme value for later in the day and is a good pick up for whoever you're using as your main fighter.

Dual Shadow+ (Auto): Now here's a skill that has some serious pop off potential. Dual Shadow + gives everyone on a team the Dual Shadow ability independent of their passives, giving a 25% chance that any attack launched will be repeated. In and of itself, this is potentially strong but not reliable. The catch, however, is that this stacks with the Dual Shadow passive as well, giving a 50% chance that any action will be repeated. This is really good, and reasonably consistent. If Dual Shadow procs, you effectively get double damage on a skill, and for a magic skill you're getting more value for the same cost as a Magic Yin boosted attack. I'd say that's enough value with decent enough odds to work a build around, and there's one more damage boosting passive that can really put a Dual Shadow + build over the top if you get a little luck on Extra Turns. I wouldn't recommend this as much for physical builds since the need for Phys Amp/Pierce for optimal physical builds clutters up the passive list too much, and doubling your HP costs creates a lot of personal risk, but this is a killer Auto Skill for powering up Almighty focused magic builds. I'm eager to put this one to work in the coming battles.

User avatar


Part 40 is out! We lash out against the humans and angels who have marked us for death, and begin our bloody conquest of Tokyo. Outside of that, we spending some time trash talking the military and then fuse my favorite demon in the game.

Demons Available

Beast Cabracan (Lv. 68): The ultimate Beast demon, Cabracan is just kind of okay overall. He comes with innate Multi-Strike but only has a modest AG of 19, so he's not the best user of it. It's certainly not a terrible idea to make and register a good one for new game + as Animal Leg helps a lot in quickly clearing missions, but as far as combat prowess goes, you can definitely find better things than Cabracan on Day 8.

Genma Ganesha (Lv. 68): The ultimate Genma demon, and a bit of a lowkey finisher. Ganesha is slow as molasses with his gutter tier AG, but the rest of his stats are high enough that he can pretty much be set up for anything. His MP is pretty low though, so I'd say Deathbound spam is ideal if you want to use this guy. His innate access to Force Drain does give him one use for my purposes at least.

Fairy Troll (Lv. 69): The ultimate Fairy demon, and what an oddball finisher he is. Troll is a slow physical bruiser in an almost purely magical race, which naturally means he doesn't make the greatest transition from Spriggan unless you have really good inheritance. Fortunately, we do have good inheritance, and he does have a decently solid base MA of 23, so we can continue the Holy Dance train and get a much more viable participant in Dual Shadow comps. I would definitely recommend hooking Troll up with Anti-Most though, those two weaknesses to fire and elec are dire for this stage of the game.

Wilder Behemoth (Lv. 70): The ultimate Wilder and the single most min-maxed demon in the game. This guy is all ST and VI, with MA and AG so low they may as well be negative. His MP is basically non-existent as well. Not exactly a good fit for demons who bring up a teams speed and mobility, but at least he can lay out solid Deathbounds I guess. I'm not a huge fan of this guy, but at least his base stats are so over the top for his preferred stats that he can easily be made with them capped and pick up some MA for bonus defense. He'll always be a glacier on AG no matter what you do.

Snake Ananta (Lv. 71): Our next option for a Snake, and he's about the same as what we've seen so far. Like a lot of the previous demons we've seen, he is extremely slow, though Constrict can help offset that. If you have Orochi already made, it's not a bad idea to upgrade to this guy, just be mindful of his Curse weakness. Ananta is also Unique, so we can't have pass him around to all our teams.

Avian Garuda (Lv. 71): Hell yeah, this is the guy I've been waiting the whole game for! Garuda is lightning fast with modest ST. Now for most of the game, this would put him on the lower end of the power curve, but at this stage of the game we have Multi-Strike. With Pierce, Phys Amp, and at least a modest amount of inheritances, Garuda becomes an overcharged meat grinder that absolutely shreds everything he comes across. We'll be seeing a lot of this guy going forward. I would highly recommend patching out that Force weakness, since it'll be important for later in Day 8. Fortunately, Ganesha gives an easy way to do that.

Skills Available

Extra Charge (Passive): Here's a spicy damage boost, double damage on Extra turns. This is a skill that makes high AG a desirable thing to have, as it allows you to consistently gain extra turns when initiating skirmishes as well as allowing you to pick them up more easily if you have Anti-All set and are defending. This is the skill that can really let Dual Shadow builds pop off, since you have a 50% chance of dealing a staggering 4X damage on the Extra Turn. Obviously it's not a guarantee, but I think the odds are good enough for that kind of payoff, so I'd say this is one of the ultimate builds you can run for pure offense.

Final Strike (Command): Convert your HP into an Almighty attack and hurl it at the enemy, reducing you to 1 HP. This is a skill that has basically no value on its own as its very easy to match or beat the damage it does without killing yourself. It does, however, have value in Recarm loop strategies as it is an easy way to set yourself up for death and exploit the turn order via revivals. I'd ignore it otherwise.

Elec Drain (Passive): You get healed if the enemy throws an Elec attack at you. Run it if it seems like there's good odds of that happening.

Barrier (Auto) Automatically cast Makarakarn at the start of the fight. Highly situational, especially at this stage of the game where we are seeing way more Almighty skills thrown our way. This is the first skill we get that sets an automatic attack barrier, and it is by far the least of them. I wouldn't recommend using this.

User avatar


Part 41 is out! We engage in another small conflict before opening up a much larger one. I also give my absolute worst performance in the let's play in a completely non-descript filler battle, thus proving that I am not that bright. Afterwards, we catch up with a couple familiar faces and spread the word of the Overlord.

Skills Available

Recarmloss (Command): This is another skill that drops you to 1 HP like Final Strike, but this one fully revives/heals all members of the team. Since this doesn't kill you when you use it unlike other MegaTen games, this does actually have potential for serious use. It's the only way to revive two demons in a single action, and so long as the demons have decent AG and a healing skill, they can bring you back to full at the start of a battle. It's also fairly cheap for what it does, so I'd actually say this is worth your consideration unlike Final Strike. Like Final Strike, though, the main reason people would use this is to exploit the recarm loop trick by deliberately setting your character up for death so they and a team member set up with Final Strike can chain revive each other. Not my style, but maybe you'd like it for the ultimate bonus boss.

Wall (Auto): The physical counterpart to Barrier and the much more useful skill. Physical Repel is an impenetrable defense against physical attacks in 99.9% of the fights in this game, and it often can do decent damage to bounce physical attacks back at the enemy. Mostly though I'd just use this for defensive coverage as something of a pseudo-phys repel passive, for when it's really important to block incoming physical damage. Keep it in mind for when it could be helpful.

Life Lift (Passive): The upgraded Life Aid, this restores 20% of your HP at the end of a battle. Hard pass, it's only negligibly better than Life Aid, and we are swimming in options for better healing if you can think to set up for it.

Megidolaon (Command): The upgraded Megido, costing 25 more MP normally and 50 more MP under Magic Yin. Despite that huge up charge, it actually is not that much stronger than Megido, not to the degree that you'd hope anyway. More damage is more damage though, so give yourself a way to foot the bill and then unleash completely unblockable damage onto the enemy.

Dream Feast (Command): A sideways upgrade to Drain, as this spell only hits MP but at a greater power than Drain. All truth told, Drain already tends to completely sap an enemy of MP, so the main reason to run this is to get that kind of MP sustain onto multiple characters. Given the problems I've been having since I've decided to run a Dual Shadow + and a Magic Yin build, this is probably a worthwhile pick up.

User avatar


Part 42 is out! We face off with the Shomonkai, who launch an ill-conceived assault on the Overlord. Afterwards, we have some quick pep talks with our team, Kaido transitions from dumb muscle to meta guy, and we have to break a heart. The final battle of this bloody path awaits us in the next part.

Demons Available

Megami Amaterasu (Lv. 73): The ultimate of the Megami demons, and a unique demon to boot. Amaterasu has pretty solid stats all around, and will likely cap MA with a good fusion. She also lacks any weaknesses and open passives, so she can be a solid tank with the right fusion. She doesn't come with any attacks, but it's no issue to get Holy Dance onto her at this point. Highly advisable to fuse her, she's a great caster with loads of MP to burn. Luckily, I can easily fuse her off of the Troll I made, giving her great power and the ideal skills in passives.

Fallen Murmur (Lv. 73): The ultimate of the Fallen demons, and he is pretty whatever. Balanced stats and no notable resistances, and 3 weaknesses. Not that it matters with Anti-Most, but you definitely can't make use of this guy off of an auction purchase. I really can't recommend this guy, even his access to Holy Strike makes him of no importance, I'd really just grind out a Mag overload if I want to get that skill into the fusion pool. Hard pass on this guy.

Divine Remiel (Lv. 75): We technically didn't have access to this guy at the end of this video, but I am making him for the final fight so I might as well cover him now. Remiel has balanced ST and MA, so there's two ways you can make him. Either you can focus his ST and AG on a fusion and build him as a multi-striker, or you can go with the standard Holy Dance build. I can fuse him off of Troll with a Murmur, so we'll be using a magic one. Remiel comes with Phys Drain and has pretty HP in spite of his mid VI, so he's remarkably durable on both fronts. Likewise, he has no weaknesses, so even without Anti-Most he can be really tanky. Blood Wine is also a good MP sustain skill at this point, so he's extra helpful to Naoya with a magic build. This is the last demon we'll be making for this playthrough (for serious use anyway), and he's a pretty high note to end on!

Skills Available

Shield All + (Auto): The final auto barrier skill, and it's actually a pretty good one! This casts Shield All at the start of the battle, nulling one magic or physical attack for a team member, including Pierce physical attacks. Since this covers everything short of Almighty attacks, I'd say this is the best auto barrier skill. The damage from repels is so minimal in this game, I'd rather have the coverage for everything if I were to run an auto barrier skill. Too bad it comes so late, there's a lot of spots earlier in the game this would have been really good.

Holy Strike (Command): A very unique skill, this is an Almighty attack that runs off ST and is fueled by HP. Don't I mean an Almighty physical attack? Not quite, this attack does not benefit from Phys Amp or Phys Boost, and while it has decent base power, it doesn't reach the same heights as Brutal Hit or especially Deathbound and Multi-Strike. The obvious perk is that it functions as physical coverage that can actually get around Phys Repel, which is very helpful when dealing with that. I wouldn't use it as a go to attack though, it's just not potent enough to delete enemies on its own. Freikugel, this isn't. Heck, it's not even Ragnarok. One thing to keep in mind is that it can crit, so Ares Aid is a potential damage boost you can get to it independent of Auto Skills.

Victory Cry (Passive): An iconic passive for the series, though heavily toned down in this game. Victory Cry regens a percentage of both HP and MP at a skirmishes conclusion, specifically 20% of both. So it's Life Lift and the upgrade to Mana Aid that doesn't exist rolled into one. Sadly it's not a 100% regen like it is in other games, but it's fantastic for Magic Yin builds. It's a very good idea to pick this up from the rare free battle Shiva, as otherwise you can only get it from the final boss of Yuzu's Day 8 final boss.

User avatar


Part 43 is out, and with that Day 8 is a wrap! Or is it? We did have another path we could have taken at the offset of this Day 8, and the game is generous enough to allow us to loop back to the start of this day and check it out! Let's hopefully get a cheerier outcome than what ultimately happened here.

User avatar


Part 44 is out! We roll the clock back one more time to see how things would go on Day 8 if we opted to protect our fellow man instead of slaughtering them. I won't have too much extra information to tack onto these posts going forward, so I was just going to say a few things here about the videos going forward and random things I noticed.
1.) The flow of the videos will be a little bit different going forward. Since we've seen most everything save for bonus bosses and the alternative route cutscenes, videos at this point are going to be jumping from cutscene to cutscene with heavily abridged battles when they. Additionally the videos will likely run longer since I want to get most everything in a given alternative Day done so we can quickly get to the next one. There won't be much vocalization or color commentary during the cutscenes from me going forward.
2.) One weird thing I noticed during the 8th Day is that some dialogues have portrait changes as the line is being said, which doesn't happen anywhere else in the game. I guess since the 8th days were made with voice acting in mind, they decided to get creative.
3.) For a Chaos route, I am kind of tickled by how optimistic and feel good the Good Naoya/Kaido route is. Not gonna lie, the big scene where everyone comes together to support you in your battle against the angels did tug on a string in my withered, chronically depressed heart.

Skills Available

Rage Soul (Auto): Rage Soul disables every single thing you can do in battle except for the Normal attack. The bonus for this is that your damage is doubled. This is better than it sounds, as much like Nocturne the basic physical attack scales pretty well throughout the game and can deal some solid damage. By stacking modifiers like Phys Amp and Extra charge, and securing a crit, you can layout staggering amounts of damage with this skill. If you mix in Attack All, you can even get AoE for this. That being said, I'm not a huge fan of this skill, at least in this game. The drawback tied to it is even harsher than the ones Magic Yin has to deal with, making it of dubious strategic use in battle. The sequel introduced a number of physical altering passives that synergize very well with Rage Soul, to the point where it's arguably one of the best physical builds to run, but in this game it's too gimmicky, too limited, and available way too late for serious consideration.

User avatar


Part 45 is out, and the Naoya/Kaido route is done for real this time! Overall, a pretty feel good ending considering you become a demon lord and galivant off into Hell while your best friend larps as the boyfriend of your love interest. With that, we can finally transition into New Game + to check out what we can do in that, fight the bonus bosses that unlock on successive playthroughs, and check out what other endings await us in this game! Going forward, the style of the videos will change a bit. Next video we'll be jumping from bonus boss to bonus boss and showing off all of those, save for the very special ultimate boss fight. Afterwards, we'll be checking out the different ending routes, dedicating a video to each Day 7 and Day 8 that remains. These videos will largely be cutscene compilations with heavily abridged fights that will run for as long as it takes to clear each day. Likely there will be less active commentary and interjections from me, but I will be sure to go over the more unique fights contained in each route in greater detail, in the interest of someone who might be taking that specific route on their first playthrough.

Now one thing I have to say now is that there will be a hiatus in video output before we get to these things. (Exactly what you want to hear from a Devil Survivor LP, I'm sure) I'll be taking a trip out of state to visit family tomorrow, and likely won't be able to record anything again until the 4th of December. Rest assured, I will return from the store with my cigarettes and we will be properly completing this game 100%. I recorded the final video for this series way in advance to keep myself on the hook for filling out the content in between, and I'm committed to showing off as much in this game as I can since I feel it deserves it.

Skills Available

Pierce+ (Auto): Another Auto skill that applies a passive to your entire team, and the third to last skill we need to get in the game. Now Pierce+ is sometimes bluntly described as a way to have Pierce by dedicating your Auto skill to it instead of one of your passive slots. The biggest thing people take away from this is that it's a way to have Pierce on two team leaders, allowing you to have two physical specialists that can ignore non-repel resistances. While this is absolutely true about Pierce+, one thing you need to keep in mind about it is that it does so much more than that. It gives Pierce to everyone on the team using it, meaning that any physical demon on a Pierce + team does not need to have Pierce themselves. This gives a huge degree of extra flexibility to any physical based demons, especially ones who have to contend with locked passive slots. Pierce+ is the best way to work Ares Aid into Multi-Strike builds, giving a tremendous boost in damage to an already overwhelming build archetype. In addition, it can also free up a slot in the passive list for physical demons with sub-standard innate resistances who would really like to have a passive like Anti-All/Most or Phys Repel. While it is true that Pierce+ denies you a direct damage bonus from an Auto Skill, all truth told that really doesn't matter anywhere except boss enemies at this stage of the game. Now honestly, since you can only get this on Day 8 in Overclocked, I can't really say this means too much in the grand scheme of things since there's only one fight you could use this in a way that actually helps. It's something more to keep in mind for the sequel, where you get this skill a bit earlier and can actually use it in situations where it matters. Don't sleep on Pierce+ if you decide to play DS2, you can make some over the top teams if you use it right.

User avatar
I have returned and am ready to resume working on this LP! The next video will be a bit of a long one, as I plan to tackle the Day 2, Day 4, Day 5 and Day 6 bonus bosses in a single video. I can't make any promises on when exactly it'll be ready, but videos should resume this week.

User avatar


Part 46 is out! Took awhile to get this one together, since it required yet another playthrough of the game (I've done 3 New game + playthroughs on hardware and 6 on emulator for the LP at this point, so I wasn't super eager to throw this together) but this one goes over New Game + and the various bonus bosses that unlock simply by replaying the game. Starting next video, we'll be checking out all the other ending routes of the game we missed out on, starting with Atsuro's.

User avatar


Part 47 is out! In this extra length edition that will be the norm for awhile, we get Atsuro's ending, which has very weird vibes and I'm not sure if the writing staff felt this was a completely positive resolution or not. Given how critical the game has been towards the government up to this point, I can't help but feel like Naoya had a point at the start. Whatever, it's the ending we got and we can get another if we don't like it. One thing I neglected to mention in the recording is that we actually got the final skill of the game. Let's take a look at that, shall we!

Skills Available

Full Might (Auto): The final skill we can crack in the game as well as the final auto skill. It is terrible, and I'm not sure why it's locked to Atsuro and Amane's route, because the other exclusive skill (Magic Yin on Naoya's route) is amazingly good. This gives your team one guaranteed critical hit at the start of the fight. It's literally just the Touki Race skill Aggravate but as an auto skill instead. Aggravate is already a pretty bad skill with loads of competition, Auto skills have even better effects available and are even more competitive for a slot. I don't know why you'd ever use this, even the way you get it makes no sense, being the signature Auto skill of Naoya who is a magic focused character. What a lame note to end on for skill cracks.

Post Reply