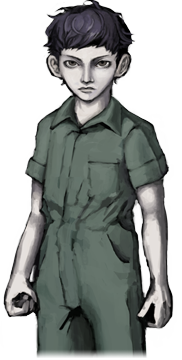
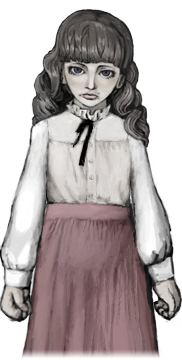
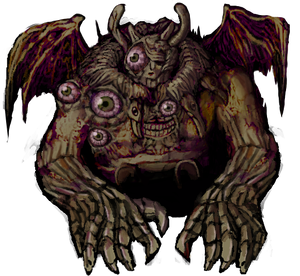
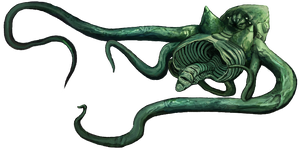
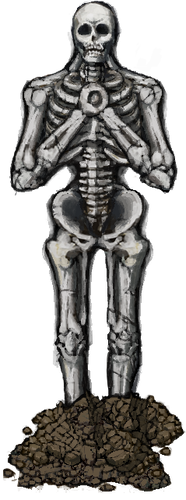
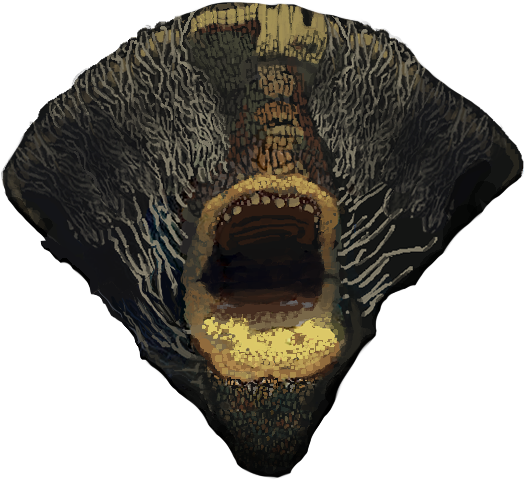
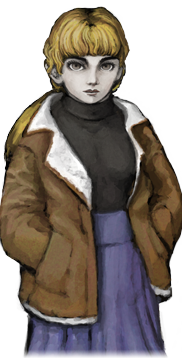
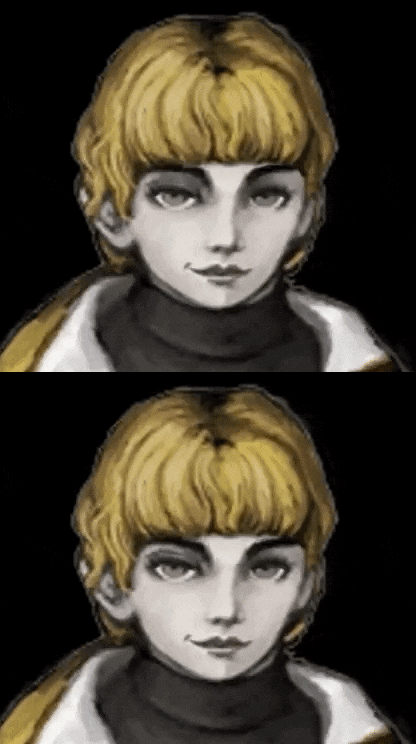
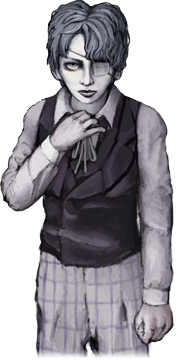
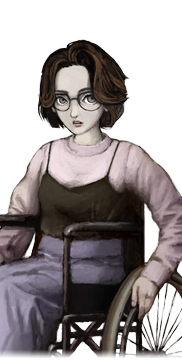
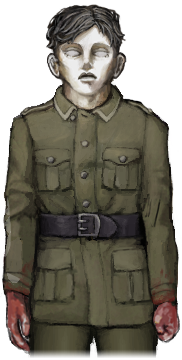
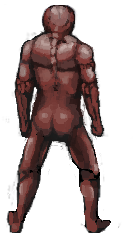
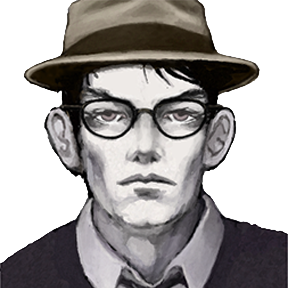
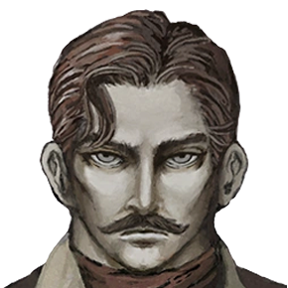
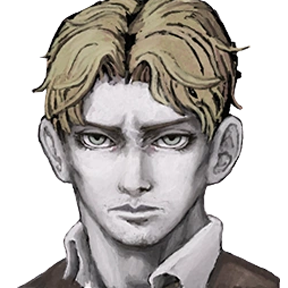
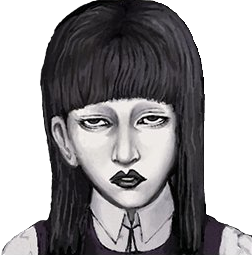
Death of Innocence. Birth of A God. Let's Play Fear & Hunger 2: Termina!

Put your Let's Plays in here.
User avatar
Image

*Content Warning* This game features graphic depictions of violence and mutilation, drug use and the pains of addiction, suicide, body horror, and sexual violence. If any of this is distressing to you, I'd strongly advise giving these a videos a pass.

The Game

Fear and Hunger 2: Termina is an independent grimdark RPG release at the tail end of 2022. Naturally, it is the sequel to 2018's Fear and Hunger, following a trend of me playing sequels in series without playing their first installments. (I have a good reason this time though, the first game is WAY too nsfw to really do a comprehensive playthrough of without excessive censoring) Shifting gears from the original which had a traditional dungeon environment in a medieval time, F&H Termina jumps ahead to an alternative 1940's setting, taking place just on the heels of its own version of World War 2. Like the first game, it is a Survival horror/JRPG Hybrid with random elements to diversify playthroughs, though this one leans far harder into the Survival Horror aspect, with Silent Hill influences being very apparent. I happened across this game by pure chance and began to fall in love with it, scratching an itch I had been getting for something relentingly bleak and oppressive, but also very rewarding to master. Fear and Hunger is all about knowledge and learning from failure, and once you've figured out the winning strategies, it's fun to see just how much you can accomplish in a game that hates you by default.

The Let's Play

Now a true comprehensive playthrough of this game is kind of a fool's errand, as there are many obscure events that require you to play in specific ways that are often counter intuitive. I can't say we'll see every event, but I plan to run to playthroughs on the normal difficulty that cover the bases for every way to complete the game. Once that's wrapped up, we'll take a look at the game's Hard mode, which lives up to it's punny title and is pretty much a completely different game that is even more sadistic. Note that this game has VERY restrictive saving mechanics, so these videos will run quite long as I have already mapped out what I consider to be ideal times to save. I have put timestamps in the video descriptions of each video marking off notable parts to indicate either good break points or just interesting places to jump around if you're not interested in the plot. Without anymore dalliance,

The Videos

Part 1, One More Moon Dance
Part 1B, O'ssa's Awesome Adventure
Part 2, Strength in Numbers
Part 3, Sinner's Reward
Part 3B, Abella's Alternatives
Part 4, Fellatio and Hunger
Part 5, Bunker Battles
Part 6, Death of Innocence
Part 6B, Abella's Apocalypse
Part 7, Birth of A God
Part 8, Tunic (Song For Karen) [Maso Mode]
Part 9, Karen Koltrane [Maso Mode]
Part 10, Karen Revisited [Maso Mode]
Part 11, Backstories and Bonuses

Supplemental Information

Mechanics
Status Ailments
The Hexen and Souls
Dismemberment
Phobias
Magic
Endings
Masox-S/M Mode
Characters
Marcoh
Abella
O'ssa
Levi
Marina
Karin
Daan
Olivia
Non-Contestants and NPC's
Lore
The World of Fear and Hunger
The Gods Pt. 1
The Gods Pt. 2
The Gods Pt. 3
Last edited by Cullen on Sun Dec 24, 2023 9:47 pm, edited 36 times in total.

User avatar
Mechanics: Status Ailments

Due to the length of the videos, I'll be limited to the times in my schedule where I can record for this game. Since there's a lot of stuff that would be hard to organically cover in the videos anyway, I see this as a good opportunity to write up supplemental posts explaining the more obtuse or obscure aspects of the game. We'll start with something that only came up for a hot minute in Part 1, and that is status ailments. While we did obtain a book that identified each and every status ailment by name, what these actually do is on the player to intuit out. Some of these aren't quite obvious, while others it's just handy to know exactly how these impact you. Starting from the top,

Image Concussion: A stunning effect that causes you to skip a random number of turns, ranging from 1-3. There are actually remarkably few things that nail you with this, the pipe villagers we came across are among the handful of enemies that do. There is one enemy that uses it to devastating effect though, which we'll likely encounter in the next video. Note that many of the ailments in this game work differently when applied to the enemy, but in contrast to what you'd expect, this is usually in your favor. Against enemies, Concussion will only stun the limb that was hit by the stunning attack, and it will always last for 2 turns.

Image Fracture: This a rare ailment but a damned annoying one. This reduces your maximum body by 20% and reduces your physical attack power by 50%. There are not many things in the game that nail you with it, but it pays to lock down the enemies that can at all costs as this is an ailment that is very difficult to cure. The more widely available option is drawing a Sylvian Sigil on an Asymmetrical Circle, something that came up in passing in Part 1. You can only do this 4 times at most, though to my knowledge there are only two enemies that can inflict this ailment so that's not too big a deal. The other option is a skill that Daan has which we'll cover when discuss him. Again, it's just prudent to avoid getting hit with this at all costs if you know it's a factor.

Image Bleeding: One of the more commonly seen ailments. In battle, this reduces your Body by 2% per turn. Out of battle, it causes you to lose 1 body every few seconds until you heal it. Cloth Fragments can be hard to come by in the early game, so it can be a little dangerous there, but it's mostly a nuisance by end game. Expect this to be inflicted by any bladed weapon, obviously. Note that this ailment is way stronger when used against the enemy, being one of the strongest Damage over Time effects against them in the game, balanced by the fact you have limited ways to inflict it.

ImageImageImage Poison: Coming in 3 flavors, though you'll mostly only see the first two. They deal 2%, 5% and 15% Body damage in battle respectively, and will deal damage every few seconds on the field until cured. Not many things poison you as it turns out, and you'll be swimming in White Vials by the end of the game so this ailment isn't much of a threat. It is much stronger in the player's hand, with the weapons/skills that can inflict cause some of the biggest DoT in the game.

ImageImage Infection: One of the more unique ailments to this game, Infection is often bundled with anything that causes bleed, and can also be self inflicted by using dirty toilet paper to treat bleeding. Infection is literally a deadly ailment, once infected the infection will progress as you travel across screens. If it is not cured after a certain number of transitions, your character dies. There are two ways to treat it, Green Herbs and Bonesaws. Green Herbs will just purge any infection, no questions asked, but you're obviously limited in that by how many you can collect. Should you burn through them all (Easy to do on a first playthrough because like I said, Bleed and Infection tend to be a package deal.), you may have no choice but to hack off the infected limb with a bonesaw. We'll ignore the logistical implications of that treatment method, and just note that Sylvian can restore limbs, so this isn't necessarily a completely bad idea if the situation calls for it. This ailment is common run killer for new players who don't get demolished upon entering the city.

Image Blindness: In battle, this reduces your physical attack accuracy by 75%, making hitting anything a crapshoot. This does not affect magic. For the Protagonist character only, being hit with blindness darkens the entire screen and makes it so you can't see anything on the field. Sylvian can cure this, but obviously it's a bit difficult to get to a circle when you can't see what the hell you are doing. Daan can also treat this, just like Fracture. We were lucky in this run and got a helmet that gives us immunity to Blindness early on, so this ailment should be a non-issue. There are 3 enemies that can blind you in this game, but realistically you'll only encounter one.

Image Traumatic Injury: This one is nasty. Traumatic Injury blocks healing on the character inflicted with it, and will cause the next attack to connect on them be an HP to 1 attack. This is not a good situation to be in, naturally. Thankfully, the ailment clears after that, and it's one of a handful of temporary ailments in the game that clears after the fight is over. I only know of one enemy that can do this to you, but there's an easy way to work around them.

Image Nausea: Another temporary ailment, this one lowers your defense slightly, and gives a -20% modifier to your accuracy and evasion as well as reducing the effect of your guard by 80%. There are two enemies that can do this to you, and it will be in play for the duration of battle against them, though one your unlikely to encounter and the other is easy to work around.

Image Confused: Reduces your attack power by 75% and causes the afflicted character to attack themselves or the party. Note that because of health/damage asymmetry, that 75% reduction can still result in an extremely dangerous attack against your party, so be wary whenever this ailment is factor. One enemy in the game uses it on you, and amusingly should you fight Abella, her Wrench Toss does this instead of Concussion.

ImageImage Withdrawal: Drugs are bad, kids. Heroin is a consumable in this game, and using it will put your character in a state of euphoria that fully restores their mind and increases all stats save for Body and Mind by 30%. However, using Heroin once will result in the character becoming addicted, and they will immediately go into withdrawal when it wears out. Stage 1 withdrawal lowers all stats by 10%. After about a minute of real time, it'll turn into Stage 2 Withdrawal that lowers your stats by 30%. Addiction and Withdrawal are the only truly permanent ailments in this game. Not even Sylvian or Daan can cure them. There is a programming oversight regarding a certain skill that does technically allow you to cure it, but otherwise you're stuck with this. Don't use Heroin without either serious consideration, or if it's the final boss fights of the game.

Image Irritation: Defense lowered by 10%, physical accuracy down by 30%. It's a temporary ailment and I only know one thing that hits you with it.

ImageImage Burning: Small burning inflicts 2% damage per turn, Large Burning is 5%. Compared to other DoT's, this one is temporary and goes away after fights end. It's also the easiest DoT for the player to inflict, with the most options available for it, and is correspondingly the weakest at your disposal. Note that small burning is actually a special status tied to a specific skill that only one enemy uses on you, and will otherwise be seen in effect when the player uses it.

Image Paralyzed: This is the special ailment Needles hits you with. The character is unable to act for the rest of the fight. Should it be a solo character, then this is essentially an insta kill attack.

Image Light Sensitive: Accuracy down by 20%. Rarest ailment in the game. One enemy uses this on you, and it's by far the least threatening aspect of it. I think it's temporary, but I've also read you need a purifying talisman to get rid of it. It's not much of a big deal either way.

This covers all ailments you'll have to worry about in this game. Technically phobias are also an ailment, but not one you really have any control over and I plan to cover them in more detail in the videos anyway.

User avatar
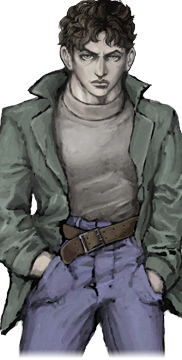
Character: Marcoh

For some extra fun, I'll be writing up posts for each of the playable characters in this game, discussing who they are, how they function should they be your protagonist, and what they can do for you as recruitable characters. We'll start with our beginning protagonist.

Image

"..."

As a Character: Marcoh is boxer and mob enforcer from the Vatican City, a fictional equivalent of.... The Vatican. Marcoh's rough career is not really by choice, he and his sister were left to fend for themselves at a young age and Marcoh was forced to take on any work he could. His build lent well to a career as a fighter, something he often had to do anyway to protect his sister from those who'd exploit her. His talent resulted in him being noticed by a prolific mobster, and what started as a legitimate boxing career after years of working street circuits, quickly turned into jobs working as a hitter for the Mob. Marcoh is not a bad man by any means and absolutely hated doing this, but his sister was at the mercy of the mob. Whether he chose to retaliate against his vile boss or simply fled with his sister, Marcoh took the first train out of the Vatican in order to escape the Mob life... and ended up heading straight into Prehevil. You don't get much insight into any character when playing as them as they are heroic mutes unable to talk outside of dialogue prompts, but they are fully fleshed out as NPC's when playing as a different character. Marcoh is consistently shown to be a standoffish and taciturn man, though unlike other characters described like that, Marcoh genuinely just seems to be kind of shy. He's shown to be a good natured individual, sticking with those who have trouble defending themselves such as Olivia and Tanaka. He will also restrain any your player character should they murder another contestant in front of him and imprison them. While his background likely means he is uneducated, he's far from a stupid man. One of the conversations you can have with him can float the idea of simply following the train tracks back to escape Prehevil, and Marcoh will admit that was the first idea he had once he realized what the situation in Prehevil was. Naturally, the tracks just looped back into the Prehevil area despite just being a straight line. It's kind of hard to dislike Marcoh, he's an all around good person despite his aloof nature, and he certainly has an inherent cool factor as a boxing badass who punches any monstrosity that gets in his way.

As your Protagonist:

Marcoh has the Tainted Soul, which offers him the following skills,

Bare-Fisted Proficiency: Passive. Increased Accuracy with unarmed attacks
Bob and Weave: Use in battle. Evasion boosted by 50% for 5 turns.
Adrenaline Rush: Passive. Attack power boosts as fight goes on. Caps out after 3 turns. I'm not sure if this scales with higher attack power, but I do know that with 65 attack power, your Attack will boost to 85 after 3 turns.
Counter Stance: Use in battle. Character with this status will counter every attack they receive for the remainder of the fight. Quick Jabs does not trigger off of counter attacks, it's just a standard unarmed strike.
Perfect Guard: Upgrades Guard command to Guard +. Increase effectiveness and makes character immune to limb loss when guarding.
Fast Stance: Use in battle. Increases agility so that you will get EX turns. Does nothing if you already get EX turns naturally.

Marcoh has is capable of wielding Two-Handed weapons, and can use guns.

Marcoh's backstory choices offer him the following,
1.) Steal OR Lockpicking OR 10 Shillings
2.) +2 Attack OR +2 Defense OR +2 Agility OR +25 Max body
3.) Bare-Fisted Proficiency OR Bob and Weave OR Perfect Guard OR Adrenaline Rush
4.) Killing Intent OR Escape Plan
5.) 2X Blue Vials and a Cloth Fragment OR 2X Dried Meat and a Moldy Bread OR Heroin and Pep Pills.

Alternatively, you can skip his backstory and get,
Gain x2 (x5 on Easy) Blue vials and Moldy bread.
Gain Bob and weave and Bare-fisted proficiency skills.
Gain +1 Attack and +1 Defense

Marcoh also has the innate perk of a unique Unarmed Attack; he will utilize Quick Jabs for his unarmed strikes. Quick Jabs hits twice, and the individual hits do about 50% more damage than a standard unarmed strike. Quick Jabs does untyped damage which is not resisted by anything, though nothing is weak to it either. Despite what you might expect, Marcoh can use Quick Jabs even if he has no arms.

It's pretty hard to overstate just how good Maroch is as a protagonist. While he has a few dummy options in his backstory that can result in a weaker character, it's hard to get through it without getting something good, and he'll always have the amazing Quick Jabs ability. Lockpicking gives him great early game utility, allowing him to access areas characters either need to rely on RNG to get into or taking specific routes that have a certain degree of opportunity cost. He can also pick up Steal and stockpile on tons of valuable items by pickpocketing enemies, ammo especially. Getting +2 Agility can allow him to very easily reach the 16 agility needed to get EX turns in battle, and sometimes you can get very lucky and get an accessory that will enable this before even entering the city. Perfect Guard is an amazing ability, one of the few sources of limb protection in the game, and the only guaranteed one you can get before reaching the Museum, an end game area. Additionally it reduces damage taken even further than guarding normally does, so once Marcoh gets 16 agility, he can very easily turtle against enemies and counter on his EX turn. Past these aspects, he can access Heroin and Pep Pills guaranteed, very useful items that you may potentially not get otherwise depending on how the RNG treats you, and Killing Intent at least has some early game use. Marcoh also has an extensive section of the Hexen with 6 skills. Aside from the 4 you can choose from in his back story, he can get Fast Stance which allows him to buff his agility and get EX turns before he can get reach natural 16 agility. Another ability is Counter Stance, which can combine with a couple of accessories to make a character that is almost immortal. Marcoh is an absolute beast, undeniably one the best characters in the game and certainly one of the most beginner friendly. Quick Jabs alone means he doesn't have to worry about securing a weapon and can do great in battle right out of the gate.

As a recruitable party member: Marcoh becomes available to recruit on Day 2 morning if Tanaka is not alive and Day 2 night if he is. Note that if the character Pav is alive, an event will occur that you need to intervene in, or Marcoh and/or Tanaka will both die. As a party member, he has Bob and Weave, Bare-Fisted Proficiency and Adrenaline Rush, alongside Quick Jabs. It's a decent spread of abilities, making him a very capable fighter, though slightly less so than as a protagonist as he will have base line stats. The main question of whether or not you should use him does kind of come down to if Tanaka is alive or not. You have to burn a lot of time to recruit him in that event and that can close off a lot of opportunities, at a time when many other characters become available. If Tanaka is dead though, then absolutely pick him up when you can. He's an excellent fighter and great back up for some of the tougher fights present in the back half of the game.
Last edited by Cullen on Sat Apr 29, 2023 3:09 am, edited 1 time in total.

User avatar
I've been hit by the cursed thought that Marcoh is a Jojo transplanted into another series, and I can't see anything else now.

He's perfect.

User avatar
If you feel that way, it is because it is the intended reaction.


Pour one out for Marcoh's purple shirt that never was.

User avatar
oh my god this game is wonderful :allears:

User avatar
Mechanics: The Hexen and Souls

So at the end of the first video, we saw this:

Image

And we saw this:

Image

What exactly does this all mean though? The Hexen is the skill tree system of Fear and Hunger (Looking a lot like a combination of the two versions of the Mantra Grid from Digital Devil Saga now that I think about it) and is the primary way to either power up your character or give them more options on the field and in battle. The Hexen may be accessed by Sleeping, thereby advancing the time of day. Is there a way to use it without resting? Yes, but it's not available until very late in the game, so it's not something you should worry about too much in Fear and Hunger mode. Souls are one half what makes up the Hexen.

Let's start by breaking down what the Hexen is. The Hexen table is divided into two halves, the top half being the domain of magic skills and passives derived from your affinity with Old and Ascended Gods, while the bottom half is the domain of the power you can gain from the souls in your possession. We'll delve into deeper detail about what magic you can learn and how to get affinity with Gods when it becomes more relevant in the videos, but know that Gods are the way into becoming a spell caster, and knowing the best ways to get affinity with them is critical towards developing a magic focused character. There are 6 Gods to gain affinity with, 4 of which have 3 levels of affinity while the remaining 2 have only 2 levels. Gro-Goroth, Rher, Vinushka and The God of Fear and Hunger gain affinity up to 3 levels, while Sylvian, and Alll-mer only require two levels to get all they can teach you. Between Gro-goroth, Sylvian and Vinushka that occupy the upper right side of the Hexen, there are a handful of skills that required shared affinity between them to learn. Once again, we'll break this all down when Magic becomes relevant.

Now the bottom half on the other hand relates to Souls and segues into the other half of this post. Each playable character and non-playable contestant has an associated Soul, with a set of skills that it conveys. Marcoh for instance, has the Tainted Soul and can learn everything that was contained in the character post about him. You'll notice though that there's a branch going off into the right side of the Hexen. This is connected to the Decrepit Soul we obtained from slaying Caligura. By butchering your fellow contestants in the Termina Festival, you obtain their Soul, and in true Mega Man fashion, can learn all of their abilities provided you have the soul stones to do so. It's important to note that there is no other way to gain access to character skills other than by obtaining the soul that has them, so if you want to diversify your abilities on your main character, some level of murder is necessary. This is also another thing that makes Marcoh unique, not many characters have backstory options that let them obtain skills outside of their own soul, and the ones that do often have a level of opportunity cost to do so. We'll detail the souls and what they give as we get through the character bios, so let's just cover how to make use of the Hexen and Souls in gameplay to wrap this up.

(Just as an aside, you may have noticed in the video that there were some light blue nodes on the outer edges of the Hexen. These are spells that are available after completing the game, often dubbed the "New Game +" skills. Most of these are terrible, but one is really good and I'll mention them in greater detail when we discuss magic)

Gaining Soul Stones to learn skills from the Hexen can be done in 3 major ways,
1.) As we saw in the video, using a Bonesaw to collect the heads of your defeated enemies. These heads can be sacrificed at Imperfection Circles (which I often call ritual pits) to summon the Tainted One. This New God gives you 1 soul stone SHARD per head exchanged. 3 Shards can be crafted into a single Stone, which can then be used to learn a skill.
2.) Some enemies, like the Decrepit Priest we saw, have them as loot when you search their corpses. Decrepit Priests always have Soul Stones, but this is not always the case for other enemies that can have them. Semi-related is that some enemies have Soul Stones as a item you can Steal, but that's largely irrelevant since most characters have a hard time getting access to that skill.
3.) Soul Stones can be found in some searchable objects, and very rarely as random loot from Chests or the environment.

There is a shop later that sells Soul Stones for half the money you can carry, but it's not very practical so I wouldn't consider it most of the time. Now as you can see from this, you do not exactly get Soul Stones in great quantities, but you do get enough to get every skill you'd really want. Fear and Hunger has a lot of trial and error in figuring out what's worth your time, but lucky for you I know all the skills to beeline for. Skills can be taught to anyone in your active party, but for the most part I wouldn't recommend this save for 1 or 2 skills. It's important to prioritize your main character since their death heralds an instant game over, and some party members are just flatly inferior both to them and other recruits so it's kind of a waste to teach them anything.


As one final point, you may find yourself wondering: If you can gain full access to the abilities of another character by killing them, are there any characters in this game who aren't worth much to play as and can provide the same benefit or better as a bloodstain on your fist? You bet your sweet bippy there are! Every character in this game has the exact same base statline, so abilities and what they can start with are the main things that diversify them. Tragically, this means certain characters are worth more as a means of level grinding than they are as either protagonists OR recruits, and we'll get to them in the character breakdowns.
Last edited by Cullen on Sun Apr 30, 2023 10:08 pm, edited 1 time in total.

User avatar
So if we can murder someone and get away with it, it's technically optimal to do so. :thinking:

User avatar
TeeQueue wrote:
Wed Apr 26, 2023 3:00 am
So if we can murder someone and get away with it, it's technically optimal to do so. :thinking:
Absolutely. Karin and Tanaka are very popular choices to gank because they quickly remove themselves from the train and isolate themselves, giving lots of good items when you loot their corpses, and in Karin's case some decently useful early game skills. Somewhat more infamously, if you're trying to make the strongest character/party, you have to kill Abella if not playing as her at some point as she has the ability to create the strongest weapons in the game.

User avatar
Cullen is explaining all of the game's mechanics in side posts largely because the game itself doesn't tell you about them. You're meant to figure everything out the hard way.
TeeQueue wrote:
Tue Apr 25, 2023 11:17 am
I've been hit by the cursed thought that Marcoh is a Jojo transplanted into another series, and I can't see anything else now.

He's perfect.
That's not the only on-the-nose reference to something else in the game. See how many you can spot as we continue.

User avatar
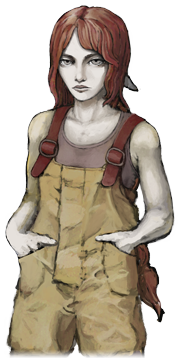
Character: Abella

Let's do our next character breakdown on our first recruited character.

Image

"If you keep that up, I'll come up with a better use for this wrench!"

As a character: I won't get too deep into Abella's backstory since I plan to use her as a secondary character for separate videos and we'll be seeing it there anyway. Suffice to say though, she has an actual reason for being in Prehevil over poor Marcoh who just ended up here through bad luck. Background-wise, she's a mechanic who hails from Oldegard, a fictional equivalent to the Scandinavian countries in Europe, and she can have some unique dialogue with August who hails from the same area. There's not too much to say about Abella really, she's an extremely spirited woman and does not let the situation in Prehevil shake her too much. By and large in party chats she does her best to keep everyone's spirits high, and she is actually quite chatty in comparison to other characters. In particular she has a large amount of unique combo interactions with other characters when using the Talk function in various locales, particularly with other outgoing characters like Marina. Her friendly personality is quite fitting considering she's the first person you can recruit and can provide excellent support throughout the entire game, in and out of battle. Just as some fun trivia, prior to releasing a playable demo of the game, Orange has taken polls to gauge player interest on characters in order to decide on who he should first make playable. Abella won the initial polls in a landslide, and has continued to maintain that level of popularity post-launch of the full game, being a common feature in fan art and memes surrounding the games.

As your Protagonist:

Abella has the Caressing Soul, which offers her the following skills to learn,

Short Circuit: Passive Field Skill. Allows a character to short out electrical panels locking doors, forcing them to open.
Wrench Toss: Use in Battle. Requires that a pipe wrench, or similar one hand blunt weapon, be equipped. Toss your Wrench at the enemy, dealing about 50% more damage than a standard attack. Has a chance to inflict Concussion on the area of the body it hits. This "chance" is 100% on anything not immune to Concussion. Naturally, disarms your character after use.
Trap Craft: Crafting recipe. Allows you to craft Booby Traps and Bear Traps.
Weapon Craft: Crafting recipe. Allows you to craft four unique weapons, including what is hands down the strongest weapon in the game.

I'm going to elaborate more on most character's skills since they tend to not be as self-evident as Marcoh's, plus we're less likely to see a lot of them in action. Short Circuit goes largely unused most of the game, typically only being a factor in the various Tunnels scatters around Prehevil. It does allow for gathering some extra loot, and can be used in tandem with either Lockpicking or Small Keys to get alternative access into the City of Prehevil proper. Wrench Toss is a fantastic ability when Abella is either a party member or has back up, but the draw back of losing your weapon makes it inefficient on her own. What about getting Abella's Agility up to 16 and re-equipping on the EX turn? Unfortunately that is bugged at the moment, and equipping on an EX turn will cause your character to skip their next proper turn. Trap Craft is very useful in Maso mode, but less so in the standard game. Bear Traps are by far the better thing you can make with it, but it is dependent on getting a lot of scrap metal. Bear Traps require 3 scrap metals to craft, making it uncertain if you'll be able to actually make use of them consistently. Finally, Weapon Craft is crazy good. This allows you to create the Sandman's Kiss, Reaper's Rake, Lantern Flail and last but most certainly not least the all powerful Meat Grinder. Now the Reaper's Rake is largely useless as it requires getting 4 Sickles which is unlikely to happen and it's a pretty mid weapon regardless. Sandman's Kiss and Lantern Flail are great though, the former being a rare Pierce type weapon that inflicts poison on hit, while the lantern flail does Blunt damage with a chance to inflict Burning. Whacking an enemy's torso with both of these will more than likely cause them to keel over from the DoT if they survive the turn. All of these weapons can go screw when compared against the Meat Grinder though. It only has a humble +35 attack power, but it hits 3 times, with a 100% chance to inflict Bleed on anything not immune. This weapon is obscene, and any character who isn't focusing magic by the end of the game wants to pick this up.

Abella can equip two handed weapons and Guns. She is notably the only Female character in the game capable of wielding two handed weapons.

Abella's backstory choices offer the following,
1.) Short Circuit OR Wrench Toss
2.) 9 Shillings and a Lucky Coin OR an Officer Sword
3.) Weapon Craft OR Trap Craft
4.) 2X Blue Vials and a Cloth Fragment OR 4X Bolts, 2X Duct Tape, 3X Scrap Metal and 2X Pressure Plates OR 2X Dried Meat and a Moldy Bread

Alternatively, skipping her back story would get you,
Gain x2 Duct tape, x4 Bolts, x2 (x5 on Easy) Blue vials and Moldy bread.
Gain Wrench Toss and Trapcraft skills.

Lots of people hype up Abella as a main character, but I've never had a terribly high opinion of her myself. True, she can make some decent weapons in the early game, but it's just not that hard for others to kill her and steal the ability for themselves. I'm ignoring the real reason I feel this way though, playing as Abella is the single biggest opportunity cost in the game: you cannot recruit her. This is a huge drawback in the early game, since not only can Abella be added to your party right off the train, alternative characters available on the first day are MUCH weaker than her. And since Abella can't recruit herself she has to fend for herself much longer than other characters without some serious good luck on getting something like the Gro-Goroth skin bible. As aforementioned, Wrench Toss is also not favored in the action economy if you're on your own, and the other people we could get at this point can't get as much off of it as Marcoh. That said, she fares much better in Maso mode where you can't recruit anyone anyway, and her unique skills to give her more consistent options for dealing with specific problems and she can potentially bypass an EXTREMELY difficult section of the game if you get a Small Key.

As a recruitable party member: Probably the best in the game. We've already seen her in action, and she's great. Especially when teamed up with a powerhouse like Marcoh. Abella is also your best bet for surviving some very tough boss encounters, including a notorious one that can spring on you randomly. There is a drawback to recruiting her, mind. Her fate is tied to the fate of another character you can rescue on Day 1. Encountering Abella removes the option of saving this character, and likewise saving the other character causes Abella to disappear from the game to be replaced with... something much less friendly. (And yes, merely just encountering either of these two causes the other to disappear) However, the other character is not a recruitable party member and his function is much less helpful than what Abella can do for you, so I wouldn't really fret this much. (And yes, if you're playing as Abella, you can save this character with no penalty to yourself) Overall, Abella's sheer existence makes the game easier when playing as any character but her. I'd strongly advise you pick her up on a first playthrough, she makes the early going much less of a headache.

Image
Last edited by Cullen on Sat Apr 29, 2023 3:10 am, edited 1 time in total.

User avatar
Mechanics: Dismemberment

One last mechanics post before the next real video, but it's an important one and one of the central mechanics of combat: Dismemberment. Fear and Hunger uses a limb targeting system in battle where you can target different parts of the enemy and attack them in an effort to disable whatever these parts may do. Most enemies can also have their heads targeted, which often have very low hp values and results in an instant kill should you land a successful strike. (Qualifying terms there because by default the head is quite evasive.) By this same token, however, this system can be used against you and many enemies have attacks that carry low-guaranteed chances of removing specific limbs from your own characters. In this post, we'll go over what to focus on when facing down enemies and also how losing limbs affects you and what you can do about it.

Let's start with enemies,

Image

The humble Sickle villager is perfect illustration of how the limb system works in this game. When facing down a sickle villager, there are 6 targetable areas, those being:
-The Left and Right Leg
-The Left and Right Arm
-The Torso
-The head

Most humanoid enemies follow this pattern, with some exceptions. Beyond this, there are small enemies with only two targetable sections and non-humanoids who can range from having as little as three areas to target to as many as 7. Now what's there to keep in mind with the sickle villager and enemies just like him? Let's start from the top of the list.

Legs are by far the least important parts of almost any enemy in this game. They often have extremely low HP values, often as little as 60 and break in a single hit. However, they don't contribute to any skills in most cases. What does happen is that if you disable an enemies legs, the following turn will disable the evasion of their head, allowing a guaranteed hit to land and often killing the enemy instantly. This tends to be inefficient in most cases though. Like I said, the evasion disable doesn't kick in until the following turn, and often with enemies as weak as the villager, you can kill him by just focus firing the Torso, doing so in less hits that it would take to land the headshot. Outside of that, I THINK disabling enemy legs guarantees that you can run from them, but I've never really messed around with that so don't quote me on that. By and large, you can just ignore legs, I'll point out the situations where you want to worry about them

Next on the agenda is the arms, and let's take a look at another screen shot here,

Image

This is hard to catch in motion but when a move comes from a specific limb, that limb will flash. In this case the sickle arm flashed, indicating that if I remove the sickle arm, that move can no longer be used. It's important to know this because say we were, Karin on her lonesome, she would most likely be unable to kill the villager in a single torso strike. Thusly, she'd get hit by this sickle when his turn came around, taking light damage and guaranteed bleed with a high chance of infection. However, the arm is very weak and can be destroyed in a single shot, so if she targeted that instead, she would avoid a huge resource drain. The same applies to the bear trap dropping left arm, destroy that and having to deal with bear traps is no longer a concern. Destroying arms is very important when dealing with enemies you can't kill before they get a turn. Arms are often weak, and when destroyed rob enemies of their deadliest attacking options. This does not shut enemies down completely, most enemies resort to tackling you or some other non-arm based action when disarmed, but those often only ever deal damage, which is usually a lot more manageable. Always go with sure things in this game, if you lack the resources to treat the ailments an enemy can hit you with, then it's better to just make sure that can't happen at all.

Next up is the Torso, a section of the body that kills the enemy altogether when destroyed, but isn't tied to their most dangerous actions. The torso is more complicated than you think. That villager up there? His Torso HP is 1200 altogether. You may be confused here, because I definitely killed him with just a little over 300 damage, far from what should be required if that's the case. This is because the torso has 2 HP values. The first is the True HP value, which is often a large number, much larger than the damage you need to deal to destroy it. The reason for this number is Damage Over Time effects. DoT's are scaled to the True HP value, and that's why DoT damage on the torso is often immensely higher than what it is on the other limbs. The value that you care about for killing enemies is what I like to call the "Break Value." The Break Value is often 25% of the True HP value (With some exceptions, usually bosses), and both normal attacks and DoT's will kill enemies when the damage dealt to the torso exceeds the Break Value. The reason for this odd system is likely to keep DoT's relevant in all situations where they can be used... which let's just say Orange might have succeeded too well with that.

Last but most certainly not least, The Head. Like I said, the Head for most enemies often has low HP, usually only special enemies and bosses have an appreciable amount. A single strike will kill the majority of the things you fight, so obviously there's a catch. The head for most enemies, by default, has a whopping 80% chance to evade physical attacks and a decent 40% chance to dodge magical ones. I've also read that the Head will always have a 25% chance to evade at the very least if you have accuracy bonuses, though I don't know how true that is. By and large, striking the head without breaking the legs first is an unreliable prospect, but there are some ways you can cheese it. Multi-target magic attacks, and one in particular, are a great way to fish for an insta kill. Some items also tend to skip evasion checks and do just enough damage to break the head, though these are in rare supply. Finally, there's a new game + spell that has perfect accuracy and can nail the head straight out. It's about as broken as it sounds.


What's this all come together to? Generally you should just blast the torso unless you can't kill the enemy. At which point, you should minimize the threat they are to you by eliminating the arms, either by destroying them or stunning them if that fails. This is far from universal though, as there are many non-standard enemies who require more specialized handling, but it's good advice to follow for the first third of the game. Late game, DoT's are extremely potent when applied to the torso because the True HP of the torso balloon's up heavily in relation to the Break Value for most enemies. Let's move onto the player and dismemberment.

Playable character's do not have Heads and Torsos to worry about, dismemberment for the player is purely a matter of arms and legs. For losing arms, we actually get unique graphics for our character portraits,

Image

Losing a single arm is more and less of a drawback than you'd think. It's less in that it does not actually apply any penalty to your stats. It does prevent you from using two handed weapons, but there are plenty of strong one handers in the game, including some you'd not expect that to be the case. It's more of a drawback because it also prevents you from using guns, which absolutely sucks. Guns are a great way to cripple or completely eliminate dangerous enemies, so not being able to use them leaves you hurting in some key situations. What about losing both arms?

Image

Naturally, weapons are completely off the table now. Funnily enough though, you STILL suffer no direct stat penalties.

Image

Marcoh can still quick jab like a champ without arms though. Kickboxing?

Now being completely disarmed is not the end of the world, but it does force a character that isn't Marcoh to become a magic caster. If you have no available spells or have already taught them all to other characters, then at that point an armless character is an item caddy and a meat shield. Is this an unsolvable situation? Well in the first game it mostly was, especially on Hard mode, but this game is a little more merciful. With an Asymmetrical Circle and the Sylvian skin bible, you CAN restore lost limbs. This is the only way though, and you have at most 4 uses. It's best to internalize what can destroy your arms and avoid letting that happen at all costs.

Now what about legs? Kind of undercooked for the player, much like how it is for the enemies. There are decidedly fewer ways to lose legs in this game, the most common way being bear traps, either in or out of battle. Only a handful of enemies, mostly bosses, have the ability to destroy your legs. Losing legs does not change your portrait or your battle graphics, and it only changes your field graphics when you lost both. Initially, sprinting was not in the game, so for a couple months losing a single leg didn't do anything. After sprinting got introduced.... it took two patches for a bug that caused losing a leg to not remove your ability to sprint to get fixed. What happens if you lose both though?

Image

You are reduced to crawling around. This greatly hampers your speed, making avoiding enemies and obstacles even precarious if not outright impossible. Note that if you have lost an arm, you crawl around even slower, which is practically a game over state in Maso mode for reasons we'll get to later.

Losing all limbs results in a dead character, though the game likes to give you false hope this isn't the case. As the protagonist, you can choose to hold on with all limbs gone, but that does nothing and eventually you just have to hold your breath and let nature take its course. For party members, you can interact with them, but they cannot be saved and will quietly pass away once you leave the screen. Like many things in Fear and Hunger, this is all about trial and error, learning which things and which attacks can destroy your limbs and finding the best way to work around these situations.

User avatar


Had enough time to record a secondary video last night, in this one we're just looking at the unique extended backstory that O'ssa has and the best of the rewards you can get from doing it.

User avatar
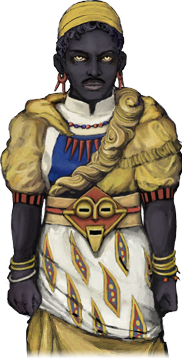
Character: O'ssa

I've got the next proper part rendering as I type this up, so why don't we take a look at the character featured in the previously posted bonus part?

Image

"Sarcasm is the lowest form of wit."

As a character: From the outside looking in, O'ssa is by far the most enigmatic of the playable characters. While certain contestants definitely have less presence due to limited opportunities to meet them, you can easily get what they're all about from those scant encounters. O'ssa keeps the player at arms reach, only offering mild insight to his mind. Of the taciturn characters in this game, O'ssa is the one who is like that by express intent of keeping secrets rather than it just being a personality quirk. Playing as him though can confirm at least some of what you may come to expect about him. O'ssa hails from Abyssonia, a fictional parallel to northern Africa. The land is torn apart by much internal struggle and political discourse, and sensing even further trouble heading the nation's way from Europa, O'ssa decided to pack up and leave. O'ssa found himself enamored by the way of the Yellow Mages, those who bended the power of the Gods to their own purposes rather than merely benefitting from subservience to them. O'ssa has a clear lust for power though, and his highly individualistic ethos made him something of an outcast even among the anarchic Yellow Mages. He did find like minded individuals however, which led him on an expedition to the dungeons of Fear and Hunger. Being the sole person with the will to actually brave the horrors of the foul prison, O'ssa made out with the severed head of an ancient wizard long thought to be lost to time. This wizard in turn led O'ssa to Prehevil with the express intent of partaking in Rher's festivities, making O'ssa by extension the only character who is here specifically for Termina. O'ssa holds no trust for the wizard Nas'hrah, but he does view both him and Termina as a step forward in his personal quest for power and control.

O'ssa is a tough character to crack in terms of his morality, with self-centered probably being the best way to describe him. He's not evil, but he certainly isn't good. He's not above getting his hands dirty, but he is not unhinged and actively seeks conflict either. He's the only playable character who can potentially become hostile without being attacked first, but he will warn an approaching player of such should this situation arrive. On the opposite end as well, he will gladly team with the player's party should he see it as an arrangement that is beneficial to his own goals. In any case, O'ssa is all about himself and will only do what benefits him. He makes an interesting foil to Le'garde from the previous game. Le'garde was a similarly self-absorbed person seeking power, outright Godhood in fact, but arguably had noble intentions that did not pan out. O'ssa is similarly self focused individual, but his aspirations go no further than being the strongest in his domain and controlling the Gods rather than being among them. Aiming for these lower heights, he seemingly succeeds to a greater degree in his own personal ending than Le'garde did, but we're getting ahead of ourselves here.

As your Protagonist:

O'ssa has the Enlightened Soul, which offers him the following skills to learn, (I am going to get this out of the way right now, O'ssa has what is by far the buggiest and least balanced Soul in the game)

La Danse Macabre: Passive skill. Magical counterpoint to Adrenaline Rush, it is WAY stronger, 64 extra points of magic power when maxed out on its own and over 300(!!!) M. Attack when combined with magic boosting equipment
Meditation: Passive skill. Is supposed to give 1 extra rev point at the end of a turn if you guard. It is bugged out the ass. Will explain below.
Greater Meditation: Passive skill. Upgrade to Meditation, giving 2 extra rev points when you guard... in theory. Is bugged and does not do anything.
Spice Forge: Passive... kind of. Very complicated but broken skill that also has a lot of bugs tied to it. It'll get its own paragraph.

La Danse Macabre is broken, one of if not the most overpowered passives in the game. The scaling is all kinds of screwed up on it, and if you have a Chac Chac and a Death Mask equipped you will have close to 300 magic power when it maxes out. While it's only supposed to give 64 extra Magic Attack when maxed out (which is still a lot), for whatever reason it also boosts the effect of magic boosting equipment, making them go from boosting magic by 20 to boosting it by 100 when its maxed out. It turns Black Orb from a merely strong skill to some of the most obscene damage in the game, and it is extra goofy with another skill combo you can get from Vinushka. To put this in perspective, the absolute highest your physical attack damage can go is around 600-700 without landing crits, with an attack stat value of 87-125 depending on what weapon you're using; La Danse Macabre can push the best magic attacks in the game to well over 3000 damage. Moving on from that, Meditation is bugged in several ways, some good and some bad. The good way it is bugged is that it seems to have a reference error and has Greater Mediation's effect instead, giving two rev points when you guard instead of 1. It can also proc off of using items for some reason. The bad ways it is bugged is that one, it can disable Just Guard on coin flip attacks. I don't know if it always does this, but it has happened to me once. Two, it does not stack with Perfect Guard and is in fact overwritten by it if you have both skills. Meditation and Perfect Guard upgrade your guard command to Guard + and the Perfect Guard version seems to take precedence, thus rendering Meditation useless. Due to the aforementioned reference error, Greater Meditation seems to point to the wrong data and does absolutely nothing. Sad.

Spice Forge is the most complicated ability in the game, and also has its own share of bugs. While it's technically a passive, you do have to use it in the skill menu to enjoy its effects in battle. It will bring up a menu option with every spell in the game, ones you don't know darkened while ones you do know are lit up. The first bug comes in here, you can apply spices to spells the character with Spice Forge does not know but other characters have learned, which will do nothing. You have 3 spices you can apply to your spells. Blue Spice upgrades your spells to Greater spells, which slashes the Mind cost of the spell by a ton, about 60% off. Greater spells have a weird bug where they appear in everyone's skill list in battle, not just the Spice Forge user. Red Spice allows you to use Double spells, which is exactly what it says on the tin. Spells will be cast twice, AND for the same cost as the normal variant of the spell, which is pretty great. The catch is that single target spells target randomly (With the exception of Combustion for some reason) but this drawback does not affect spells that multi target. The final spice is Green Spice, which gives you access to First spells. First spells go off as a free action at the start of battle, with spells that normally cost Rev points being cast without that restriction. It does still cost you Mind though. There is one spell it is very strong with that only costs Rev points and not Mind, which we'll definitely see at some point. First spells have a major scripting bug tied to them though. The way it works is that it creates a dummy turn at the start of the battle that queues up the spell as the only action to happen and then the normal battle begins. The beneficial side of this is that you will get Rev points for this dummy turn and La Danse Macabre and Adrenaline Rush will tick up from this. The ABSOLUTELY AWFUL aspect of this is that some enemies have attacks and skills that are expressly programmed to go off at the end of turns and they do proc off of this dummy turn. This can be a disaster in some cases. That said, you freely rearrange Spices with absolutely no cost and mitigate the worst aspects of the bugs tied to Green Spice, making this combined with LDM an insanely broken combo, and it makes O'ssa a must kill character for any magic focused builds.

O'ssa's skills are an absolute mess of bugs and terrible balancing decisions (Although at least this part is in the player's favor). I suspect nerfs and fixes in the future.

O'ssa can equip Two Handed weapons but he CANNOT equip guns. He has the dubious distinction of being the only character in the current version of the game to be unable to use them, and this sucks in many situations. It makes him the de facto worst character in Maso mode which is impressive considering who he's up against for that dishonor.

Regardless of anything, O'ssa will start with the unique Beheaded Wizard accessory. This accessory has a 30% chance to reflect magic attacks. Pretty useless but it is there.

O'ssa's Backstory offers the following,
1.) Chac Chac OR Soul Stone
2.) +1 Affinity with any God of his choosing OR Pyromancy Trick OR Meditation.
3.) La Danse Macabre OR Hurting
4.) *Abridged Text Adventure* Gro-Goroth Bible OR Rher Bible OR Sylvian Bible
5.) *Abridged Text Adventure* Officer Sword OR Iron Spear
6.) 2X Blue vials and a Cloth Fragment OR 2X Tobacco and Condensed Lavender OR 2X Dried Meat and a Moldy Bread
In addition to the aforementioned abridged choices, doing the full text adventure can allow O'ssa to get: Small Key (can be used to get Bear Traps in adventure), a White Key, Lucky Coin OR Tobacco and Blue Vial, 2X Bear Traps (uses up Small key to get) Pipe and Tobacco 3 Matches, Ornament Lantern and a Small Things Amulet, and last but most certainly not least if you complete it without O'ssa getting hurt at any point, O'ssa will start with 125 Body.

Should you choose to skip his back story (Extremely ill-advised) you get,
Gain x2 Tobacco, Condensed lavender, Skin bible - Rher and (x3 on Easy) Blue vials.
Gain La Danse Macabre and Hurting skills.
Start the game with 100 maximum Body Points instead of 125.

You might be surprised to hear this, but O'ssa is a character who is much better on paper than he is in practice. Despite the enormous amount of bonuses he starts with, especially the fact he starts with 125 Body without there being any opportunity cost, the sad truth is that O'ssa has a remarkably weak start skill-wise. He is also lacking in affinity with God's which means he has to do a lot of extra work to get spell access compared to the other magic focused character, Marina. Marina killing O'ssa for his Soul gets a far better yield than the other way around, as Marina starts with many skills and traits that are conducive to making a magic focused character. O'ssa meanwhile, can start with a bad spell (Hurting) and a mediocre spell (Pyromancy Trick) and that comes at the expense of Passives or Affinity he desperately needs. He can use two handed weapons, but that just does not matter until mid-game really, which is when magic also really starts to pop off. The thing that really drags him down is not being able to use guns. This means that O'ssa has to rely on Bear Traps to deal with troublesome fights (which, at least he can start with a couple) if he does not have the means to win them through direct engagement. On Maso mode where you have no party members, and numerous other factors working against you, this makes him far and away the worst character in the game. Disregarding that, even on F&H mode he just does not have that great a kit to work with and doesn't really have any moment where he shines compared to other early game powerhouses. It's a shame because I think he's a really cool character but all the stuff he has manages to be less than the sum of its parts.

As a Party Member: O'ssa actually does a lot better here, being one of the more powerful recruits in the game. Recruits have lower standards and O'ssa actually comes with a decent load out at a time where you can make use of it. He doesn't have the 125 body sadly, but he does come with La Danse Macabre and Hurting. The former makes him the only party member that is actually worth teaching attack magic to assuming you don't plan to kill him. Additionally, only your protagonist character can make use of guns on the field, so his inability to use them is no problem as a companion. As a character who can wield two handed weapons, he also has good end game physical attack potential. The catch is that he is recruited in an area that is typically reached by end game, though he can be recruited as early as day 1 morning should you make it here. Even if you go for him earlier, the benefit of having him may be underwhelming considering you have to really know what you're doing to accomplish that. Still, in a vacuum he's one of the best party members and you'll likely swap him out with the losers who can't used two handed weapons regardless.
Last edited by Cullen on Sun Apr 30, 2023 2:25 pm, edited 1 time in total.

User avatar


Part 2 has been uploaded! I'm actually quite happy with this video, in two places I got the absolute worst luck possible and made a seriously bone headed mistake at another moment, and I still managed to come out ahead despite that. We're finally getting to the point where we have magic at our disposal, though we'll need one more Skin Bible to really break into the power of being a caster.

User avatar
Mechanics: Phobias

Time for a relatively short mechanics post. These have come up in passing, but we're at the point in the game where it's really handy to know about Phobias and how they affect you. When creating your protagonist, and when recruiting a character, that character is assigned a random phobia from a list of 6 (Though there are 7 phobias in the game altogether) that puts them at a disadvantage against certain enemies. The penalty is a 50% increase in the damage received from an enemy, and a 50% reduction in the character's evasion against that enemy. (This does not seem to detract from accuracy penalties the enemy may suffer such as blindness) Now outside of Maso mode, you can mostly ignore phobias since they aren't super huge penalties given the low numbers this game has, but if you DO want to take on Maso then it's handy to know which of these to avoid having. Like a lot of aspects of this game, Phobias are not terribly well balanced and some are basically never an issue while others are a massive head ache. Note that there are some enemies that trigger multiple phobias, but these are uncommon. I'll list them in order of what I feel is most threatening to least.

Panophobia: Fear of Everything. The only phobia that cannot be randomly assigned. You actually become afflicted with this should your mind ever hit 0 while on the field. (If you're in battle, you won't get it so long as you restore your mind before it is over) Naturally this gives you phobia penalties against everything in the game. It's not quite a game ender on its own, but it sure does not help if you get it early. You'd have to be pretty careless to get this on F&H mode, but it's a very real threat in Maso mode where your mind is always draining at double the rate it does in F&H. Panophobia is permanent and cannot be removed if you get it.

Teratophobia: Fear of monsters and malformations. Examples of things that trigger Teratophobia are... christ, nearly everything after you enter the city triggers this. It is the most common phobia in the game by a mile, the number of enemies past old town that don't trigger it can probably be counted with just your fingers. Nearly every boss in the game triggers this, making it a constant pain to deal with. It's also a common secondary phobia for the handful of enemies that trip two. Easily the worst phobia to have, and the only one I'd earnestly recommend just re-doing your history in Maso mode if your character rolls this. Dreadful phobia to have.

Nosophobia: Fear of Disease and Contamination. Examples of things that trigger Nosophobia are the moonscorched villagers of all types and almost anything that can cause infection. Very common phobia to contend with in the early game, but it becomes less of an issue past Old Town. Undesirable to have in Maso mode, but not unworkable.

Rhabdophobia: Fear of Magic and Otherworldly powers. Examples of things that trigger Rhabdophobia are enemies like the Decrepit Priest. Basically anything that uses otherworldly magic will trigger this. It's not the most commonly threatening phobia in the game, but the enemies that do trip it are pretty threatening. Be cautious when you have this one.

Erotophobia: Fear of sex and genitals. Examples of things that trigger Erotophobia are anything that has its willy hanging out or has obvious sexual imagery. This might actually be more dangerous that Rhabdophobia in the context of the whole game, but it's not common enough that I find myself overly concerned if I have it. There are some enemies who hit really hard that trigger this, but they're usually easily avoided and there's only one notable thing you need to fight that triggers it. Not much of a concern.

Zoophobia: Fear of Animals and Beasts. Examples of things that trigger Zoophobia would be Headless Hounds and any animal themed enemy like The Vile. This one is very rarely triggered and the things that do activate it are pretty weak honestly. You'll hardly ever notice this one past one or two boss fights that are still pretty easy. Would be the least threatening phobia if note for the one I'm about to mention next.

Phasmophobia: Fear of Ghosts and Ghastly figures. We've not actually run into anything that triggers it yet and that leads right into my main point about this phobia: It is essentially no drawback at all. As of the current version of this game, there are only two ghost type enemies in the game, and they DO NOT deal Body damage at all. This phobia will never impede you and it is essentially the same as having no phobia at all. If you're looking to make the most optimal character possible, this is the phobia you want to reload for.

User avatar
Character: Levi

Image

"I'm not feeling all that well... would it be okay... if I came with you for awhile?"

As a character: Much like how I feel you'd have to work pretty hard to dislike Marcoh and Abella, I feel like you'd have to be a little cold to not feel bad for Levi. Levi's childhood was just one traumatic event after another. His father was an abusive drunk who took his frustrations out on Levi and his mother. Levi's mother eventually died at his father's hands and this resulted him being put under the guardianship of an almost as abusive orphanage. Levi longed for freedom and a chance to escape from the life he led... and he got it, being conscripted at the age of 13 to fight in the second Great War, leading squadrons of child soldiers even younger than him. It is no wonder that in almost any version of his backstory, Levi ends up with a severe dependency on heroin to numb the pain he feels. It's perhaps equally unsurprising he's a very quiet and somewhat skittish individual, often keeping to himself. With the conclusion of the war, Levi finds himself returning to Prehevil simply because he has no idea where else he can go, unfortunately finding himself in yet another bad situation. In spite of all this, Levi does still persevere and I find that be a very interesting aspect of his character. Taking him around town and doing party talks does show that he cares for the allies he has made in Prehevil, and more shockingly than that he does actually have some fond memories associated with the city itself, even at some points being rendered speechless by the horrid state the city has found itself in. I really admire Levi's determination to continue living despite all the crap he's been through, and I hope he gets his happy ending at some point in the update cycle.

As your protagonist:

Levi has the Solitary Soul, offering him the following skills to learn,

Gun Mastery: Passive. Increases accuracy with fire arms in battle. By how much, I have no clue.
Gunslinger: Passive. Allows the Lugr pistol to dismember enemies the same way the rifle can. Though description implies there is RNG to it, it actually as a 100% chance of removing an arm with each shot.
Executioner: Passive. Allows you to kill enemies with a follow up shot when stunning them with the Trench Gun. You may notice that describes how the Trench Gun normally works. This ability is in fact redundant and does nothing.
Marksmanship: Passive. Gives the rifle a small chance to kill the enemy with each shot. Note that a rifle will always kill a normal enemy after 4 shots, Marksmanship or no.

The Solitary Soul is easily Levi's biggest problem. It is arguably the worst Soul in the game, and easily the worst of the playable characters. As aforementioned, Executioner literally does nothing. The odds on Marksmanship are too low to count on so I'm not terribly fond of it, though I suppose it is at least an upgrade, which is more than you can say for Executioner. Gun Mastery is pretty pointless, it doesn't boost your odds to hit an enemy's head by much, accuracy is not much of a problem in most fights to begin with, and more importantly ammo is just better spent on the field. Gunslinger is the only unambiguously good skill Levi has naturally, allowing you more mileage out of 9mm bullets, and even then it's only decent. I have never bothered learning these skills as other characters, and in my Levi Maso run I did not get a single skill from his Soul.

Levi can equip 2 Handed weapons and guns, obviously. Levi is the third and final character who can start with a Body cap of 125.

Levi's backstory choices offer the following,
1.) One level of affinity with a God of your choosing OR +25 Max Body.
2.) A Lugr with 10 Bullets OR a Rifle with 4 shells OR a Trenchgun with 3 shells.
3.) The associated skill with the gun you choose previously plus a syringe of Heroin and the Withdrawal status OR no perk but you avoid the addiction penalty. (For the love of god do not take the former if you specialized in Trenchguns)
4.) 2X Blue Vials and a Cloth Fragment OR 4 9mm Bullets/3 Rifle shells/2 Trenchgun shells OR 2X Dried Meat and a Moldy Bread

Alternatively, you can skip Levi's history and get,
Gain Lugr Pistol, x10 9mm Bullets, x1 (x4 on Easy) Blue vial and Moldy bread.
Gain Gunslinger skill.

Note that skipping Levi's backstory is the only way you can get one of his gun skills without suffering heroin addiction right out the gate for doing so.

Love Levi as a character but boy is he dicey to play as. Funnily enough, I find him to be the opposite of O'ssa. Horrible skills at his disposal, but he has just the right combination of traits to do well in the early game, and he has pretty good end game potential, arguably just as good as O'ssa. Levi was written off early as the worst character in the game, but recent appraisals have been kinder to him. Being able to start with any gun you want and good supply of ammo is a pretty sweet trait, and 125 Body is an uncommon trait. The main problem Levi has is that he's just outclassed by the mid game. Marcoh is a stronger fighter, Daan has better support options as protagonist, Marina curb stomps everyone as a mage, and Abella can make the best equipment in the game. I'd rate him second worst character in F&H mode and third worst in Maso, but he's by no means unusable and I find him to be a fair deal better than the character who I actually think is the worst. I do want to take a moment to mention skipping Levi's history. While he's not the only character to have a skipped history that gives him unique combos or abilities, he is the only one that I'd actually say that might be worth something. Gunslinger is his only good skill and he gets quite a generous amount of ammo to cripple enemies with. I wouldn't recommend it for Maso mode, but in F&H it's a perfectly solid option to take if it sounds fun to you.

As a party member: Unfortunately Levi does even worse here. His only saving grace is that he can be recruited on the first day. As we've gone over in the videos, Levi is addicted and can never overcome his withdrawal without using bugs. This does make him the only character who can use heroin without gimping himself, giving you some use for the syringes you pick up in a few key fights, but heroin is scarce and he can't be high all the time. Any time he's not high on the drug, he is the second worst companion in the game and should be replaced as soon as you have someone who isn't a junkie to take his slot. If you don't like feeding bad habits but do want to recruit Levi, it is possible to save him in an event on Day 2 and get him to join you that way, but it's not very practical. And it requires that Caligura be alive, which is off the table for us.

Image

User avatar


Part 3 has been posted to Youtube! We're kicking off the main collection quest for the mid game, and we've also gotten enough characters recruited to run full parties. This gives us pretty strong control over any encounter we could get into going forward, and we're only going to get even more options as several more characters are recruitable by day 2. Next video will be switching gears, however. I want to take a look at some alternative options for getting into the city, as well as some extra things you can accomplish if you make it into the city earlier than I did with Marcoh.

User avatar
Mechanics: Magic

This will probably be the last mechanics post for awhile since we've gotten through most of the more complicated aspects of the game. If there is any aspect of the game that is unclear to anyone, just let me know and I can do my best to explain it.

With that out of the way, Magic. We're at the point in the game where you'll almost certainly be able to use a bit of it, so it's a good time to break down what spells we can learn and how we can learn them. All magic is tied to the various God's in the game, and you need affinity with said God's in order to learn and subsequently use the spells. How do you gain affinity? For all God's, the primary way to gain affinity is to draw their sigil at the proper ritual circle. Gro-Goroth, Sylvian, Rher and Vinushka must be drawn at Asymmetrical circles, while Alll-mer and the God of Fear and Hunger must be drawn at Perfection Circles. There are 4 usable Asymmetrical circles in the game, and 6 Perfection circles, at least as of the most current version of the game. While there are more than enough Perfection Circles to max out both F&H and Alll-mer, there are far fewer Asymmetrical Circles, meaning for most characters it is not possible to get max affinity with more than a single Old God. Fortunately, there are some alternative ways to gain affinity for specific Gods:
-You can gain Gro-Goroth affinity by using his circles to perform sacrifice. You can attempt to sacrifice any character in the game at a GG circle, but no contestant will allow you to do so without a fight. There are, however, a handful of non-contestant party members who can freely be sacrificed. Black Kalev is among these. Beyond this, the Blood Sacrifice skill which can be learned from the Radiating Soul can be used to gain affinity with no limit. Typically a Sacrifice will exhaust the circle's power and render it unusable, but Blood Sacrifice does not. The skill does reduce your HP to 1, so you will need healing items to use it repeatedly, but it can easily be used to max out your GG affinity should you have it. There is, in fact, a pre-made GG circle in the game and if you're willing to wait until you can reach it, you can max out GG's affinity without drawing a single circle for him.
-Sylvian has the Masturbation skill, also learned from the Radiating Soul. This skill is one time use. There is a pre-made Sylvian circle, but this skill is a one shot, you do still need to draw at least one Sylvian circle to max out Sylvian's affinity. Given Sylvian only goes up the level 2, the pre-made circle is largely pointless unless Pheromones is the only thing you want.
-Alll-mer has the confessional, as we saw in the last video. This is completely worthless because Alll-mer's skills are trash anyway, and you'd need to draw two Alll-mer symbols to get any use out of him anyway (Alll-mer is another 2 level God), but it is there.

Now that we've established that, let's break down what every God gives you. I'll be copying the skill tables from the Fear and Hunger wiki, and I'll be sure to clear up any part that might be obtuse or inaccurate.

God of Fear and Hunger:

Rot: Target takes increased damage for rest of battle if the spell succeeds. Rot the victim from inside out to make them vulnerable to attacks. Requires 1 Rev Point. 20 Mind
Mastery over vermin: Magic attack, hits all targets, very low damage but high chance to inflict confusion. Also lets you understand what the frogs in Maiden forest are saying. Gain the ability to talk to those who are often left unseen. Passive
Flesh puppetry: Summons hands that deal 4 physical attacks at end of turn to a random target, based off of your attack stat. Puppeteer severed limbs at your disposal to attack the enemy. You need sawed off limbs to do this. 10 Mind
Mischief of Rats: Stuns and deals low damage to all enemies. Summon a mischief of rats to disrupt the enemy. Rats spread confusion and disease where ever they go. 35 Mind
Agility +1

The Fear and Hunger skill tree is a mixed bag of skills and passives that are really good and some that are situational and gimmicky. Rot is pretty pointless because it can often fail on the things you'd want to use it on, and I find Flesh Puppetry to not be worth the mind it takes to have it active given the damage it does. The wiki neglects to mention that the main thing Mastery over Vermin does is allow you to talk to rats, who will give you supplies should you seek them out. Mischief of Rats is a very good skill, with a very high probability of completely shutting an enemy down, but it does have a high mind cost so it's not spammable under normal circumstances. Agility +1 is of course very good, any boost to agility is appreciated. F&H is a God you're going to max out regardless just because it lets you save more, but the good skills it has are very good, so definitely pick those up pronto.

Alll-mer:

Blood Sword: Equips Blood Sword weapon to user for fight. The blood of Alll-mer boils and rages even ages after his death. Just a drop send swords to the heart of his enemies. Summon a blood sword to wield in battle. 10 Mind
Inverse crown of thorns: Suicide A glimpse of the pain and suffering Alll-mer the ascended one endured on the cross. Can you feel closer to the god this way? Death
Defense +1

Alll-mer is essentially a joke God. Blood Sword would be situationally useful if there were more ghost enemies in the game, but there aren't so it's mostly a waste to cast it since it's only negligibly stronger than a one handed weapon. Defense +1 lowers incoming damage by a whopping 1%, so it will often not do anything at all. Inverse Crown of Thorns is a literal joke skill to kill yourself with. Terrible, and his circle effect sucks too, so just ignore Alll-mer.

Rher:

Reveal Aura: Find the mutated forms of other contestants Reveal position of the other contestants through examining a map. To sense these position, a spike of energy is required. You can't sense a person without this. Passive
Mind Read: Automatically used in conversation on the overworld A moon magic that reveals the inner thoughts of fellow humans. Passive
Golden Gates: Travel through the Golden Gates in the Rher dimension A gift from the Moon God himself. Gain access to golden gates that lead you out from madness and world of deceit. A passive ability. Passive
Mind Capacity +25

Rher is the odd man out among Gods, not actually teaching any spells but a selection of gimmicky passives. Reveal Aura can be useful in Maso mode on your first time, but it's largely useless because it does not work on Contestants that are not mutated (we'll go over that in the videos soon enough.) Mind Read just gives flavor text. Golden Gates is the skill that you need to open up those gold doors we've been seeing in the Rher dimension. This has the interesting effect of allowing you to travel through any Rher dimension in the game that has Golden Gates, including one that your normally need to draw your own Rher circle to get into. It's a level 3 affinity skill however, and Rher is absolutely not worth that many circles. Typically this only picked up by people playing Marina who chose Rher as her God to have maxed affinity with. This can allow for some dungeon bypass shenanigans, but it's not super practical and it's more of a for fun skill. Mind Capacity +25 is the one mechanically useful passive Rher gives you, but since it's a level 2 skill, I really can't advise picking it up. Rher just isn't worth that much dedication.

Sylvian:

Pheromones: Targeted ally will be focused by enemies N/A Release of pheromones that makes the opponent divert all attention to the target. 10 Mind
Loving whispers: Single target heal for 60-100 Body N/A Concentrated whispers carried out by the older god Sylvian. Heals a considerable amount of health. Precariously the whisper's effects are solely based on Sylvian's whims. 30 Mind
Healing whispers: Party heal 30-70 Body N/A Concentrated whispers carried by the older god Sylvian. Heals a considerable amount of health of all the party members. 30 Mind
Brain flower: Plant a seed on a corpse to make a brain flower, Heals mind. N/A Plant your personal seeds of brain flower to a fertile ground. Freshly deceased corpses being the most fertile of grounds. A brain flower replenishes sanity and mind. None, overworld
Heart flower: Plant a seed on a corpse to make a heart flower, Heals body. N/A Plant your personal seeds of heart flower to a fertile ground. Freshly deceased corpses being the most fertile of grounds. A heart flower replenishes body and wounds. None, overworld
Magic defense +1

Note that Heart Flower and Brain Flower require maxed out affinity with Vinushka as well to learn. Sylvian is the God to beeline for to pick up support magic, being the only one that teaches the very useful Whisper healing spells. While the mind cost of these spells can be hefty, they are fantastic to have in emergencies, and their both level 2 skills so you can get both at the same time. Pheromones is excellent, allowing you to designate a tank for your party. There are very few multi targeting skills from enemies in the game, so this can easily render the enemy useless. (It can miss however, so be wary) Brain Flower and Heart Flower are too impractical for me to recommend on anything other than a gimmick build, but they are interesting if you are able to pick them up. Magic Defense +1 is even more useless than Defense +1. Very good God with a very good circle effect, and you should do the best you can to max it out.

Vinushka:

Roots that reap Magic attack, All enemies and their body parts. Breaks bones. a.mat * 4 - b.mdf * 2 A talented wizard can generate a shockwave that travels underground and forces sharp roots to push through the ground. Attacks all enemies. Requires 2 Rev Points. 25 Mind
Pyromancy trick: Fire magic, Single target. Can cause burn status a.mat * 4 - b.mdf * 2 A simple pyromancy trick to burn your opponents 10 Mind
Combustion: Fire magic. Single target. Can cause burn status 80 + a.mat * 5 - b.mdf * 2 A talented wizard can control the heart in the atmosphere and create a large combustion of fire and flames to devour their opponents. Requires 1 Rev Point. 35 Mind
Photosynthesis: Restores 1 body every 10 seconds in overworld outdoors during the day and evening. N/A The process in which you use sunlight to create oxygen and energy to replenish your health gradually over time. Passive
Brain flower: Plant a seed on a corpse to make a brain flower, Heals mind. N/A Plant your personal seeds of brain flower to a fertile ground. Freshly deceased corpses being the most fertile of grounds. A brain flower replenishes sanity and mind. None, overworld
Scorched earth: Sets ablaze the ground, dealing small amount of damage along with improving fire spells. N/A Scorch your surroundings completely to create an environment that greatly enhances fire attacks. Requires 1 Rev Point. 50 Mind
Spontaneous Combustion: Die immediately. N/A The (sic) highest form of pyromancy. Become the flames itself. Death
Greater Photosynthesis: Restores 1 body every 5 seconds in overworld outdoors during the day and evening. N/A The process in which you use sunlight to create oxygen and energy to replenish your health gradually over time. Requires sunlight obviously. A passive skill. Passive
Heart flower: Plant a seed on a corpse to make a heart flower, Heals body. N/A Plant your personal seeds of heart flower to a fertile ground. Freshly deceased corpses being the most fertile of grounds. A heart flower replenishes body and wounds. None, overworld
Magic Attack +1
Magic Attack +1

The first of the Gods that gives us a real offensive presence with Magic, and he is by far the lesser of the two. It kind of shocks me how expansive his skill list is considering how crappy he is without extreme power gaming. It does not help that Vinushka requires dedicating most of your circles to maxing him out. The gimmick with Vinushka is that his spells have no or low base power, but scale extremely well with your magic attack stat. Disregard the defense aspect of the damage formulas there, in as far as I can tell the enemy's Fire and Otherworldly resistances are the only thing that detract from Magic damage. Starting from the top, Roots That Reap is one of the few multi-targeting attacks in the game, and with a Chac Chac and a Death Mask it can actually be quite good. Enemy head evasion is also much lower for magical attacks so it can often kill things outright with a head shot. However, compared to the other option it's not much more effective in most cases and the two rev points and high mind cost make it a tough sell for anyone but Marina. Pyromancy trick is very weak without a lot of modifier stacking, but it is a reliable source of Burning. It has reduced accuracy though, so it can miss annoyingly frequently. Combustion has the potential to be the strongest attack in the game, but you quite literally have to stack every modifier possible to get it there. I really can't recommend building around this one unless you want to do something really goofy like killing the Irrational Obelisk. Photosynthesis and Greater Photosynthesis might just be the worst passives in the game that actually work properly, regenerating your Body at a comedically slow rate during the day and only if you're outside. These skills literally do nothing in Maso mode since it's always night there. Scorched Earth requires maxed out GG affinity to use, and is a pretty unique skill. When in effect, it increases all Fire damage by 50%. Additionally, it inflicts the small burning status on friend and foe alike. Combined with Combustion and La Danse Macabre, you can hit some pretty silly damage figures, but the high mind cost between the two skills makes it way too impractical most of the time. We've gone over the flower skills already, the magic attack bonuses are negligible, and Spontaneous Combustion is another joke suicide skill. Fun.

Gro-Goroth:

Necromancy: Can revive dead soldiers and sickle-wielding villagers as party members. N/A Bring back life to where it once lingered. The bond between the body and the soul must still be relatively fresh for the necromancy to work. None, overworld
Hurting: Magic attack, Single target 200 + a.mat * 2 - b.mdf * 2 Create a devastating vortex out of your concentrated feelings of hurting and hatred. Requires 1 Rev Point. 20 Mind
Blood golem: Summon a party member in battle, cannot be controlled N/A Sacrifice blood to summon a golem that fights by your side temporarily. The golem only takes orders from the one that gave birth to it. Requires 1 Rev Point. None
Scorched earth: Dramatically increases the strength of fire attacks to all battle participants N/A Scorch your surroundings completely to create an environment that greatly enhances fire attacks. Requires 1 Rev Point. 50 Mind
Black smog: Magic attack, all parts/enemies. Can inflict blindness 50 + a.mat * 2 - b.mdf * 2 Crystallize manmade darkness born from the industrial age to blind and suffocate your opponents. Requires 1 Rev Point. 10 Mind
Black orb: Magic attack, single target, attacks four times. 100 + a.mat * 2 - b.mdf * 2 A concentrated negative energy that can be hurled at your opponent multiple times. The orb maintains its form only temporarily before the ill will disperses. 30 Mind
Attack +1
Attack +1

Now here's the guy you want to dedicate to for attacking magic. GG's skills have higher base powers but don't scale as well with your magic attack stat. Because La Danse Macabre scales in a really funky way when you mix in magic boosting equipment though, these skills can hit extremely hard on a dedicated magic build, and they're still a lot better than Vinushka's skills outside of that due to those skills lacking almost any base power. We start off with non-attacking skills though, Necromancy allows you to create ghouls. Ghouls can be made out of Sickle Villagers and Dead Soldiers. Any other type of deceased enemy will not work. Ghouls are basically just meat shields. They attack randomly for very low damage, though every once in awhile they'll land a head shot and end a fight immediately. Unlike Black Kalev, they can be given armor and some accessories, so they have a bit more survivability. The best function of them, though, is that they can be sacrificed to GG for free affinity boosts. Since they're completely subservient to you, they will not fight back. Blood Golem is one of the best support spells in the game, creating a 200 Body punching bag that actually hits decently hard as well. This spell is by far the best First spell in the game with Spice Forge, completely bypassing the rev point cost and allowing you to get a tank on the field before the enemy can do anything. Note that Blood Golem in Fear and Hunger 1 did require some Body to cast, for some reason it doesn't require that in this game. We've covered Scorched Earth already. Hurting is the one bad skill GG has, doing pretty mediocre damage for the fact that it costs Mind AND Rev to cast (and quite a bit of Mind at that.) The main reason you learn it is to get the next skill, Black Smog. Black Smog deals low multi-targeting damage, but it does enough to kill most enemies should it land a head shot. Even better, it causes Blindness with extremely high probability, meaning that anything that can survive it will be almost completely unable to hit anything after. With La Danse Macabre and magic boosting equipment, its damage actually can become pretty substantial too. Finally, there's Black Orb, the de facto best attacking spell in the game. While its base power is lower than Hurting, Black Orb his 4 times, doing way more damage in the process. While it costs more mind, it DOES NOT cost Rev points to cast, so it is very spammable with the right set up. Great choice for the Blue Spice from Spice Forge, and it scales very well with magic boosting equipment and La Danse Macabre, being able to hit for about 2800 damage on most things when you have a Chac Chac and Death Mask equipped. Once again, the attack boost are fairly negligible, though Marcoh can like them since they count for double with Quick Jabs.

New Game + Skills:

These are skills that do not require any affinity with any specific God to learn, and are instead usable on any subsequent playthrough once clearing a specific ending. There is one odd man out here that I'll mention when it becomes relevant.

Red Arc: Magic attack, Single target 250 + a.mat * 2 - b.mdf * 2 Strike your enemy with a concentrated bolt of electricity that will stun weaker foes 20 Mind Ending A
Moth Swarm: Magic attack, Single target a.mat / 2 Summon a swarm of moths to aid you in combat. The moths are the very same that leaked from the paradise, the artificial green, when the door between the worlds was opened. 30 Mind Ending A on Masochism Mode
Lunar Meteorite: Magic attack, Single target 200 + a.mat * 2 - b.mdf * 2 Summon a small piece of the moon. Requires 1 Rev Point. 40 Mind Ending B
Lunar Storm: Magic attack, all parts/enemies a.atk * 4 - b.def * 2 Requires 2 Rev Points. 50 Mind Ending B on Masochism Mode
Longinus: Equips Longinus weapon to user for fight. The blood of Alll-mer boils and rages even ages after his death. Just a drop thrusts spears to the torso of his enemies. Summon a blood spear to wield in battle. 20 Mind Ending C
Chains of Torment: Magic attack, single target 600 + a.mat * 2 - b.mdf * 2 Summon the chains that tormented Chambara the Tormented One for hundreds of years. Requires 2 Rev Points. 80 Mind
Defeat the Tormented One, only unlocked for the playthrough

Chains of Torment DOES NOT require the game to be beaten, and instead is just a temporary unlock for completing a specific sidequest in a given playthrough. Moth Swarm is currently bugged, but in a good way, unlocking for completing Ending A in general and not just on Maso mode. All New Game+ Spells are incompatible with Spice Forge, which is a huge drawback for almost all of them. Starting from the top, we get the only good spell in this crop. Red Arc hits harder than Hurting, has no rev cost, has 100% chance of stunning the targeted limb, and completely ignores accuracy checks, hitting its target 100% of the time. Red Arc is not just good, it's kind of broken since you don't have to do anything special to get it once its unlocked, and for the half the game it can end any fight just by aiming for the Head. You do need to be able to foot the hefty 20 mind cost, but it is very good for Maso mode and highly advisable you unlock it for that. The rest of these are crap. Moth's Swarm sounds amazingly terrible from the way the Wiki describes it, but it is better than it sounds. Moth Swarm hits 6 times, and each hit restores your HP by the exact amount of damage it dealt. Still pretty bad, but it is at least interesting. Lunar Meteorite is literally just Hurting but costs double the mind. Lunar Storm is just Roots that Reap but costs double the mind. Literally the only thing these spells have over those is that you can learn them without any affinity. Big whoop. Longinus is actually not that terrible, the spear itself is +70 attack power, just 2 points below the weapon in the game that has the highest power, but I'm not really sure if it's worth the turn to cast it most of the time. Chains of Torment is technically the strongest spell in the game, but that mind cost is just not worth it. It's incompatible with Blue Spice, and the accessory that lowers mind cost on spells is dependent on RNG to get and only mildly reduces the cost. It's mostly a for fun spell then anything I'd seriously recommend picking up.
User avatar
Character: Marina

Image

"Yeahhhhhhh... feels bad man."

As a character: Marina is the only other character besides Levi that originally hails from Prehevil, though her reason for returning a fair deal different. Marina was born to a high ranking member of the clergy of Alll-mer in Prehevil, a sect of the church that still follows the brutal and archaic rights of the dark priesthood. Marina was born male, and were she to be assigned as such for her life, she would have been locked into the brutal restrictive life style of a dark priest, as is expected of the first born son of a member of the clergy. Marina's mother did not want this lifestyle for her, and since Marina was born in private out of the gaze of her father, she was reported as being his daughter and was raised as such. In a bit of serendipity, Marina did not mind this at all and felt it natural as she grew older, continuing to identify as female independent of her mother's influence as an autonomous individual. Marina does suspect her father knows about the circumstances of her birth, which she feels has driven a wedge between them, not helped by her father's already cold demeanor and seeming jealousy of the talent Marina would develop for the occult. Being family with a dark priest while not being forced into the life of one allowed Marina to immerse herself in occultic teachings while not committing to any specific sect or religion. In time, her knack for the occult would get her noticed by the Ministry of Darkness in the Vatican, which would extend an opportunity to teach her and further her skills as an occultist. Marina always disliked Prehevil and especially the animosity she felt from her father, so she leapt at the chance to skip town and pursue her interests. Much time would pass and Marina would continue to strengthen her connection with the old Gods, when one day she received a letter from her father, callously reporting the death of her mother with no seeming grief on her father's part. As many ancient blood magic rites required the sacrifice of a loved one, and Marina always got the feeling her father wanted to one up her, Marina quickly hopped on the first train heading back to Prehevil so she could learn the whole truth of her mother's death. Despite all this, it's rather unfortunate to say that Marina ends up being rather disconnected from the overall plot of the game. Despite her background and connection to a major religious figure in the city, Marina's own personal arc goes unresolved and any plot point related to her is dropped after the church. Maybe some day Orange will expand on her, it would be interesting to see the full background of Prehevil's Dark Priesthood be explored.

Just as a fun side thing to note, there are a few moments where characters speak rather anachronistically or reference things that don't make sense for a 1940's period piece, but Marina is by far the most prone to this. Not sure if it's coincidence or if Marina is supposed to be some kind of meta character,

As your Protagoinst:

Marina has the Changeling Soul (heh), which offers her the following skills to learn,

Engrave: Field Use only. Engraves the face of a character, selecting from a list of sigils tied to whatever skin bibles you have in your possession. The effects of each are as follows:

Alll-mer (+3 physical defense) [+15% physical resist]
Gro-goroth (+4 physical attack)
Rher (+25 Max Mind)
God of Fear & Hunger (+5 Agility)
Sylvian (+3 magic defense) [30% Otherworldy resist]
Vinushka (+4 magic attack)

Warding Sigil: Field use only. Creates a sigil on the ground the character stands upon which prevents enemies from walking over it. Costs 10 mind to use.
Advanced Occultism: Passive. Start battle with an extra rev point.
Greater Occultism: Passive. Same again. Stacks with Advanced Occultism, allowing you to start battle with 2 rev points.

The Changeling Soul is remarkably ho-hum, but it is undeniably useful in very straight forward ways. I've never really used Warding Sigil but I can see some situations it might come in handy. Engrave is a one and done deal, but it's hard to argue with giving yourself +5 agility. Sadly as of the current version of the game, the other Engravings are just far too weak to really be worth using, though Rher and Alll-mer have pronounced enough effects to be situationally useful at least. The Occultism skills are great for opening battle with spells that require Rev points, particularly it can often let you end a fight immediately with Black Smog. Very solid Soul all around, and pretty much anyone benefits from learning the skills from it.

Marina is the first character we're covering the can only equip one handed melee weapons, denying her the ability to use the strongest melee weapons in the game. She can use guns though, with the exception of the Bayonet. Uniquely, Marina starts with chalk in her inventory, and can draw sigils from the moment you start the game.

Marina's backstory offers her the following choices,
1.) Engrave OR Alchemilla Vol. 1 and 2 OR Necromancy
2.) Maxed affinity with a God of your choosing.
3.) 2X Blue Vials and a Cloth Fragment OR a random skin bible OR 2X Dried Meat and a Moldy Bread.

Alternatively, you can skip her backstory and get,
Gain x1 (x4 on Easy) Blue vial and Moldy bread.
Gain Engrave and Necromancy skills.

If you want to build a character who solves the entire game with magic, you want to be Marina. Despite her small selection of backstory choices, the actual things she gets are amazing. Maxed affinity with Gro-gorth and Advanced Occultism lets you get right to work with annihilating things with Black Smog, or you could max out Sylvian and take Necromancy and a GG bible to quickly build up affinity through ghoul sacrifices. Being able to start with Alchemilla 1 and 2 is also crazy good, giving her great survivability in the early game. The ability to get any bible in the game right at the start also pretty much makes her the de facto best character in Maso mode, being the only character who can potentially save her game at the start. You do have to re-do the history until you get it, but it's well worth it to do so. Marina is an excellent example of how you don't need much to be great, you just need the right things. She is fantastic early and mid game if you know what you're doing, and while characters like Marcoh can surpass her late game, they rocket past her by any means and she can still hold her own in fights very well. Excellent character, competing with Marcoh for best in F&H mode.

As a party member: Remarkably solid here as well. The only one handed locked character worth keeping in your party really. She's worth grabbing purely for engrave, giving those sweet bonuses to your entire party, and Pyromancy trick gives her a nice niche as an enemy burner and its damage can be pumped up pretty far if you get a Chac Chac. Definitely pick her up for Engrave if nothing else. It's worth noting there is a second recruitment method that wasn't shown in the previous video. In the event Prehevil gets its new mayor, and according to the wiki, you don't kill the Decrepit Priest in the manor, Marina will be kidnapped and found in the manor bedroom. Prior to version 1.8, Marina would always be taken here if the Prehevil got its new mayor, regardless of if the priest or even the mayor himself was alive by the time night fell. It made very little sense. It actually really sucks if Marina ends up here, because while she will join you without a fuss, she will run away from the party when you enter the old town square and disappear from the game more or less save for one very specific event. That said, she won't do it if Levi is your main character, and more amusingly due to a bug, she won't do it if you recruit her and then immediately sleep on the manor's bed to advance time.

User avatar


The last part I was able to record for this weekend is up on Youtube! Rolling things back a little bit here, we're exploring alternative options for entering the city of Prehevil, of which there are more than most people realize. We also take a look at some additional events that were unavailable in the route we're taking for Marcoh's playthrough.

This will be the last video until next weekend when I have more time again to record this game. I've addressed all the mechanics and characters I feel were pertinent to at this point in the game, but as an open question would anyone be interested in posts regarding the background concepts of the game? The names of the various Gods and nations of the world have come up several times but in the actual text of the game itself you don't learn too much about them beyond the scattered documents you get addressing them.

User avatar
Hi yes hello I will consume all of the data that you have available. This game (and its prequel) are both fascinating. :allears:

User avatar
Lore: The World of Fear and Hunger

Since we're between things to talk about regarding game mechanics and the characters of the story, I thought it'd be fun to talk about various aspects of the setting of Fear and Hunger. To this point, I've operated under the assumption that people are either passingly familiar with the setting elements at play, or that what they mean is at least self-evident enough that people aren't lost with all the names being thrown out. Since there is a wealth of background detail in this game, and it can be easy to lose track of it or get certain elements mixed up, let's dive into the world on display here!

Speaking of which, we'll start with the actual world of Fear and Hunger. In the grand tradition of fantasy writing, Fear and Hunger occupies an alternative Earth, the most prominent feature of which being that ancient Gods and magical rites are known knowns with legions of followers and practitioners into its modern day. The first game occupied a fantasy RPG inspired medieval setting in the year 1590 (though with a thick grimdark coat of paint ala Berserk) while Termina as we have seen jumps forward a few centuries, taking place in an alternate 1942 at the conclusion of its own second Great War. The continent that the games take place on is known as Europa, which is comprised of several nations: The Kingdom of Rondon, the northern lands of Oldegard, the rural country of Bohemia, the Bremen Empire, and the republic of Voroniya. These are just the locations that have been named within the continent and have been explored in some depth, there may yet be more lands to be revealed. Beyond the borders of Europa, there are the Eastern Sanctuaries (which by the time of Termina has formed a coalition with the Voroniyan Republic to become the Eastern Union), the large but divided land of Abyssonia, the Kingdom of Edo, and the dark continent of Vinland. Let's go more in depth on some of these places!

The Kingdom of Rondon: Most notable for being the setting of the first game, though you only saw the kingdom proper in flashback sequences. You probably don't need to be literary analyst to notice the name is just a one letter swap of London and that the land is probably based on England. While this is true, Rondon also incorporates elements a French history and culture, being something of composite nation. This is most notable with the characters D'arce and Le'garde from the first game, Rondon natives with pseudo-French names. Once a land occupied by 100's of small warring nations and tribes, the people of Rondon eventually banded together under a single flag and through their combined efforts established themselves as the center of western civilization. The country is also well known for, of course, housing the infamous Dungeons of Fear and Hunger. Once a location for the imprisonment of the most vile of criminals as well as political prisoners, the dungeons were tainted by the darkness the came about from being built over the God of the Depths and became an eldritch location that few dared venture towards and none returned from. In the modern era, Rondon is beginning to wane in global influence and it's hinted many times they are wary of the growing power of the Eastern Union, which may have been a factor in them quickly agreeing to the Bremen Empire's treaty to end the second Great War. Daan and Henryk hail from this Kingdom.

The Land of Oldegard: Another significant area from the first game that you see briefly in a flashback, Oldegard is a colder area occupying the northern end of Europa. It is analogous to the Nordic states in the real world, although unlike Norway, Denmark, and Sweden, it seems to exist as a singular entity into the modern day. Oldegard in the first game was known for its survivalist culture, with the warriors of Oldegard drawing heavy inspiration from Vikings. While this gives the impression that the area was underdeveloped and behind the times, the reality is that it is simply a very traditionalist country. Oldegard was known for having been on the cutting edge of ship building and unparalleled in skill as sailors. The sailors of Oldegard are the very first recorded to have managed to reach the land of Vinland in the West, as well as the first to chart a trade route to the continent. (Although as we'll get into later, this route was more likely just for the purpose of resource gathering than formal trade) In the modern era, Oldegard is know for its scenic beauty and seems to have transitioned to advancement in electronics and engineering if Abella is any indication. Oldegard did participate in both Great Wars, though they suffered great losses in the first and had little choice but the join in the war efforts with Rondon and the Eastern union for the second, lest they be overrun by Bremen. Ragnvaldr, one of the protagonists of the first game, hails from this area. The aforementioned Abella is also Oldegardian, while the NPC August has Oldegardian heritage.

The Bremen Empire: A major nation introduced in Termina. Bremen is analogous to Germany (even being named after a prominent German city) and as you can expect from the time period the game is set in, they crimp more than a little bit from the Third Reich. Bremen experienced major political overhaul prior to events of the game, with its nobility being ousted in a populist movement, and control of the country being given to the chancellorship of the charismatic enigma of a man known only as The Kaiser. Once in control, Kaiser wasted no time uniting the country and beginning an aggressive expansionist campaign, kicking off the second Great War and leading into the events of Termina. Despite the scope of the war and the whispers of numerous atrocities Bremen is said to have committed, the Kaiser abruptly motioned for an end to the conflict upon seizing the country of Bohemia, with a particular interest in the country's capital, a mid-sized city known as Prehevil...
As far as characters representing the country go, Olivia is from here, while Karin was born here but was kidnapped and extracted from the country in her youth. In a potentially ironic twist, Karin is one of the country's harshest critics in the modern day, writing highly critical articles on the Kaiser and resolving to expose all the atrocities committed under the Bremen banner while finding out what their true end game is.

Bohemia: Another new nation to Termina, Bohemia is situated in the eastern parts of Europa. It is sparsely populated rural nation, and unlike Oldegard it does actually seem to be quite behind the times. Despite lacking in resources, it has valuable strategic positioning, being sandwiched between some of the most powerful nations in the world. The Eastern Union had recently begun conducting experiments within the country's borders, and are responsible for the expansive bunker system found around Prehevil. Speaking of Prehevil, it seems to be indicative of the country as a whole, with the religious rites practiced within the town harkening back to some of the more cruel practices found during Europa's dark ages. How much of this was happening prior to the Termina festival and how much came about due to the insanity cause by it is unclear, but documents from soldiers stationed in the town definitely give the vibe the place was always offputting to outsiders and definitely had a hostile and unwelcoming vibe. Bohemia in general is based on Czechia, with Prehevil itself being heavily based on the city of Prague. Levi and Marina are both from Prehevil. While the former seems to at least have some fond memories, Marina calls the place a dump and absolutely resents it.

The Republic of Voroniya: Once again, another nation introduced in Termina, and one that has very little known about it. Based on the name, we can probably infer it's based on the Soviet Union. There are no characters representing this nation in either game, and it's only come up in passing with documents regarding the Eastern Union. Apparently it has enough power and influence to seem like a good idea for the Eastern Sanctuaries to form up into a singular entity with it, and it is also responsible for the system of bunkers in Prehevil but that's about all that can be told about it as of the most current version of Termina.

These are all the nations that are known to exist with in the borders of Europa as of Termina, but there are several other major countries and continents in the world.

The Eastern Sanctuaries: Situated to the east of Europa, The Eastern Sanctuaries functions as the Middle East of the Fear and Hunger world, though it seems to hew far closer to the land as it's described in the Bible even into the modern era. The holy city of Jettiah is a clear analog to Jerusalem, even being the birth place of the world's equivalent of Jesus Christ, Alll-mer. The Eastern Sanctuaries have strong ties to the occult and magic of Fear and Hunger, its sultan once being the mad wizard Nas'hrah, being the origin point of the chaotic yellow mages as well as inventing the spice forge to augment the power of magic. It also has a history of conflict with the neighboring kingdom of Edo, leading to an interesting effort copy their style of war and creating the Yansa Aryuaban and the Jizamurai warrior class. Its unique culture and exports results in Jettiah being a hotspot for trade even into the time of Termina. As of Termina, the Eastern Sanctuaries partnered with Voroniya to form the Eastern Union. Despite the combined powers of the countries, they were unable to put much of a dent in the Bremen Empire's army while suffering devastating losses in turn. This would lead to desperate measures on their part, with Voroniya taking child conscripts from Bohemia in an attempt to hang onto their infrastructure in Prehevil. (This in turn leads into Levi's unfortunate tenure as a soldier) Beyond this, The Eastern Sanctuaries is the homeland of Cahara from the first game, specifically he was from Jettiah. Though Karin is Bremen by birth, she spent most of her childhood living here as a tool for ransom. O'ssa trained here as an acolyte yellow mage, though he was not impressed with the organization in modern times.

Abyssonia: A land that is analogous to northern Africa. The name is likely inspired by Abyssinia, an old name for Ethiopia. Rather than being several countries, Abyssonia does seem to be a singular nation from what we hear of it, but political dissent between multiple factions is a common occurrence in its history. Abyssonia is notable for having far more reverence for ancestors than among its populace than it does the Old Gods; the worship of Alll-mer in the region is a relatively recent phenomena. That said, it does also have its own pockets of interest in the occult, namely the city of Amon which has a temple dedicated to the study of the Old Gods, magic from the Eastern Sanctuaries, as well as Abyssonia's own spiritual practices such as meditation. The country is no stranger to pressure from foreign powers due its access to resources such as oil making it highly desirable during war time. Its borders were outright closed during the first Great War. Abyssonia is also notable for having the second recorded voyage in the world to Vinland, although what may have happened on this voyage is not disclosed. Abyssonia is the homeland of O'ssa, and the Anathoma book of ailments was written by Homer of Abyssonia.

The Kingdom of Edo: It's.... alternate reality Japan. Not really too much to say about Edo beyond that it exists. Besides that it has been in conflict with the Eastern Sanctuaries in the past, Edo has little history that has been revealed for it at the moment. Currently, it is still at war with the Eastern Union, which likely contributed to some of the Union's problems on the Bremen front. A specter that could be found in the first game likely hailed from this area, a weapon you get in this game is likely of Edo make, and Kida Tanaka is of course from here. Beyond that there's not much else I can say about it.

Vinland: The dark continent. Geographically, it occupies the same landmass as North America, but it is not the land it is in our own world. Vinland is eldritch hell hole wasteland with deep ties to the Old Gods, to the point that even thinking of traveling here can give you nightmares that will only get more vivid and worse as you approach the land. The soil of Vinland is stony and with the texture of pitch, and any plant life that can actually grow here shares similar traits. It's mostly overcast all the time as well, and since the land has the consistency of obsidian, it can be hard to tell where land ends and the sky begins on a bad day. More distressingly, things actually do live here, adding to the mental duress of just being on the land. Most recorded voyages to the continent result in death for a large chunk of the sailors and madness for a good chunk of the rest. The name itself is Oldegardian, a macabre joke by the sailors who made it here that literally translates to "Wine Land"; referencing the amount of wine one would need to consume to forget the time they spent here. Ragnvaldr found the Cube of Depths in this land, a major artifact in the first game tied to the God of The Depths. What the hell it was doing here when The God of The Depths is buried in Rondon is another one of those mysteries that adds to the unsettling nature of the location. Despite all this, there seems to have been some progress in the way of colonization of the land by the time of Termina, as evidenced by advertisements for Old Vinland Whiskey. I'm guess they haven't made it much further than the coast line. Vinland gets a few passing references in Termina, and we do actually meet a Vinland native later in the game. Naturally, being from a place like this, he is off in more ways than one. Orange has expressed interest in exploring Vinland in its own game, though since he's a one man band for actual development I suspect it'd be awhile before we see anything come of this.

User avatar
Lore: The Gods Pt. 1

An important aspect the has come up frequently in this game is the various gods worshipped in and out of Europa. We haven't really gotten a chance to get into what the deal is with each God and what they represent, so let's do so! In this first post, we'll be going over the 3 different varieties of Gods in this verse, and then covering the most important old Gods featured in the first game. Note that technically Rher was a factor in the first game, but he was very much in the background and didn't get fleshed out in greater detail until Termina, so we'll be saving him for a future post. With all that established, let's get down to business. Starting with the different types of Gods,

The Old Gods: The most prominent and influential of the Gods to be certain. Old Gods are exactly what their name implies: They have been around since time immemorial. They pre-date humanity by an amount of time that can be only speculated and had a hand in their creation. The Old Gods are immensely powerful, far beyond what any mortal being could hope to match. As you'd expect, they are also ageless, and while they can technically be killed, it requires their power to be almost completely diminished through lack of faith and they cannot be beaten in straight fights. In the event they even do die, their powers do not leave the world and simply transfer into the next being to take their place. The Old Gods have also, in reality, long since abandoned the Earth, growing disillusioned with the nature of humanity. Despite this, their powers were so grand that their influence still persists in the living world and can still be utilized so long as there is faith in their existence. As a good example of this power, anytime a physical incarnation of an Old God is encountered in this game, it is merely their traces or their remnants in physical forms. They are far and away among the most dangerous things you encounter, and the fights with them do not end in their deaths should you succeed, but they merely get bored with the encounter and decide to let you go. Or worse.

The New Gods: The New Gods are distinct from The Old by not being Gods since their inception. They are instead humans who managed to transform into a God like state through use of the power of the Old Gods or artifacts imbued with their magic. New Gods are far weaker than Old Gods. While they can ascend to great heights if they can amass a following, their influence tends to be far more mercurial and short lived during their reigns. Likewise, at birth and once their time in the sun has passed, they are barely greater than exceptional humans, and are mortal in the conventional sense. New Gods can be killed, and are doomed to occupy a grand hall with other New Gods who have fallen should this come to pass. In the grand scheme, New Gods often come off as pretenders to the title, and tend to be forgotten once their reigns have passed. The Fellowship from the first game has somewhat avoided this, but much like the others their abilities were too limited to leave a lasting influence on the world, at least on their own merits. New Gods do not have any associated powers that could be learned from them nor do they have devoted cults.

Ascended Gods: Often confused with New Gods, as they are similar on paper, but Ascended Gods are humans who have reached Godhood by the design and machinations of Old Gods or New Gods. They do not reach their status by their own merit or even intent. Alll-mer is the most prominent of the Ascended Gods, and the God of Fear and Hunger who ascended at the end of the first game ushered in a brand new era for the world with her might and influence. Unlike New Gods, Ascended Gods actually do rub elbows with the Old Gods and can be as strong as them or stronger. Likewise, they can take the power of Old Gods who have fallen to the wayside, such as how the God of Fear and Hunger has supplanted the God of The Depths and has extremely similar powers to him. The end of Termina sees the ascension of another God who is likely supplanting the late Vinushka.

Now that we've laid out what kind of Gods there are, let's cover the major Gods from the first game. To keep this post from running too long, we'll save the Fellowship for another post.

Gro-Goroth
Image
Image

The most traditionally Lovecraftian of the Old Gods (right down to the Shub-Niggurath inspired name), Gro-Goroth is the God of Destruction and Sacrifice. Creation cannot exist without a clean slate, and sometimes said slate needs to be wiped clean in order for creation to happen again. Gro-Goroth in that capacity represents change, and the tumult and chaos that can spring from it. Gro-Goroth considers death not to just be a part of life but something to strive for. He considers Sacrifice in his name to be a high honor, something to be coveted, and his traces react with genuine confusion when the protagonist of the first game rejects death by his hand and fights against him. Rapport with Gro-Goroth grants access to his destructive power in the form of blood magick. Nothing can compare to the destructive might of Gro-Goroth's magic, and he's the preferred God of the Yellow Mages because of this. Beyond them, Gro-Goroth has a dedicated cult in the form of the Wolf Masks. Wolf Masks are truly unhinged individuals who take the idea of honorable sacrifice to heart and engage in group ritual cannibalism and auto-cannibalism near constantly in an effort to please Gro-Goroth. They are seemingly successful, as they survive these rituals well past the point anyone would even have any blood or even viscera left to shed for Gro-Goroth.

Sylvian
Image
Image

If Sylvian isn't at least partially inspired by Mara from the Shin Megami Tensei series, I'll be surprised. Anyway, Sylvian is Gro-Goroth's counterpart, representing Creation, by means of love and lust. Sylvian takes the concept of being a God predicated on sex to its most disturbing extreme. To Sylvian, sex isn't just a means of procreation or physical expression of feelings but love in it's absolute purest form. Sex is Sylvian's preferred mean of receiving devotion, and she actually seems to take great offense should you attempt to show fealty in any means beyond sex. Naturally she is loaded with phallic imagery and even the most mundane aspects of her have sexual overtones. Rapport with Sylvian has great benefits though, as she can bestow potent healing gifts upon her devotees that can heal people beyond the means of conventional medicines and treatments. Beyond that, she provides the ability to create life from anything, with Demon Seed skill creating Demon Children from dead enemies in the first game and the flower skills allowing you to create restorative plants from corpses in Termina. Like Gro-Goroth, Sylvian has a dedicated cult in the Bunny Masks. I'll give you three guesses what these guys are about. Much like the Wolf Masks, they go about their business in a trance like state. They do not seem to derive any pleasure from their massive orgies, having strictly work-like focus on them, and these carry on well past the point they could be pleasurable for anyone.

Alll-mer
Image
Image

Born as a human to a virgin mother in the holy city of Jettaiah, Alll-mer would begin to amass a following in his adulthood by way of his teachings that challenged the order of the world at the time. He set out with his 12 apostles in an effort to change the world for the better. The kings and sultans of the time felt threatened by Alll-mer, and sentenced him to crucifixion. This ritual execution was not the end of Alll-mer, however, and he became an Ascended God, resurrecting in his Holy Tomb in the City of Ma'habre. Gee, this story is sounding awfully familiar so far. It diverges quite a bit here though, once returning to his apostles, Alll-mer proceeded to slaughter the corrupt leaders of the Eastern Sanctuaries and ushered in a New World Order via blood shed. So much for turning the other cheek. Alll-mer has an alternative origin that paints quite a different picture of him though. The alternative story is that he was an experiment by the Old God Vitruvia, the architect of humanity, who sought to perfect her design. The end result of this was Alll-mer, humanity perfected and on par with the Old Gods. It's very possible that this is the reality of Alll-mer's resurrection, although it is unclear if there is any truth to the story prior to his death. Regardless, in contrast to our world, the AD era of Fear and Hunger coincides with Alll-mer's resurrection, rather than in our world where AD begins with the birth of the historical Jesus Christ.

Due to his origins, Alll-mer is commonly mistaken for being a New God since he's a human who rose to Godhood, but he is not. He is an Ascended God, and as such his power and influence are comparable to the Old Gods. He's even begun to overtake them in following in the modern era. Rapport with Alll-mer would grant numerous Jesus style miracles that one can perform, such as creating bread from nothing, water into wine, the ability to walk on water and less related to Jesus is Alll-mer's signature Blood Portals that can warp people between multiple set locations. Sadly he lost most of these abilities in the transition to Termina and is kind of a joke really, but he's probably supposed to be similar in principle. Alll-mer has a strong following from the Dark Priests, but as mentioned before he's one of the most commonly worshipped deities in the modern era, paralleling the prominence of Christianity in the western world. Alll-mer's current status is actually somewhat unclear. As you can see from the picture, he has a corpse to be found in the first game but the nature of death and the Ascended Gods hasn't really been established. He's definitely left the world like the Old Gods, though whether or not this involves leaving his physical body behind isn't really clear.

God of the Depths
Image
The wiki doesn't have a picture of his symbol, but it's just a backwards letter R

A very important God in the first game, but largely unmentioned in the second due to his death and assumption by the God of Fear and Hunger. The God of the Depths is seemingly the only that has not left the world, and is in fact fused with the Dungeons of Fear and Hunger and is a large part of why the locale is so screwed up to begin with. He's also a relatively obscure deity, worshipped only by "those who are forsaken and forgotten". He is strongly tied to insects, and indeed rapport with this God grants many abilities tied to the control of insects. Because of his small follower base and a God's power being directly tied to the belief in them, he is in fact vulnerable, though not to conventional attack. Several of his vital organs were spread throughout the dungeons, and destroying them resulted in his death. Old Gods cannot truly die the way a mortal could though, and his body served as a birthing ground for the God of Fear and Hunger, who inherited most of his abilities and allows him to persist after a fashion. There's not too much to say about this guy beyond that, save for some fun trivia that his design is based off the breached hull of the sunken USS Saratoga.
Image


That's where we'll leave this lore dump. Next time I write one of these, we'll cover the Fellowship of the New Gods from the first game, as well as Rher and The God of Fear and Hunger.

User avatar


Part 4 is out! Ended get quite a lot more done than I expected to in this video, collecting to remainder of the effigies and seeing most of the city we've yet to. Technically we can progress to the next major area now and start working towards an ending, but there's a couple more areas for us to check out that are required for setting up Ending A. We'll be getting to at least one of these places in the next video, possibly both depending on how long it takes.

User avatar
Character: Karin

Image

"I've covered wars, you know!"

As a character: Karin is a fiery and highly temperamental woman. She has extensive opinions she is not afraid to share, and she has probably some of the longest party talks and secondary conversations in the game. Her verbosity and often combative attitude (Especially Daan is involved) as got her the affectionate nickname "Karen" from the fanbase. All that said though, given the fact the Bremen Empire is analogous to the Third Reich and are strongly indicated to have conducted many similar atrocities and experiments, she does have a good reason to get worked up when they're mentioned. In a moment of irony, Karin is in fact a Bremen citizen by birth. She belonged to a lower end noble family, but was absconded out of the country by the family maid when political unrest started to put major pressure on the nobility of Bremen. Karin long suspected she had been kidnapped in reality, and that the money sent to support her in her new home of Jettaiah were in fact ransom payments. This ultimately turned out to be correct. The state of the Eastern Sanctuaries gave Karin interesting perspective on the divide between those with wealth and those in poverty, and the sheer dissonance of those groups existing side by side in Jettaiah led her to get involved with activism. She ended up making a televised appearance in a protest that was broken up by the military, and in a stroke of fortune was noticed by the Bremen Embassy and returned to her home. Sadly her father had been killed in the riots that overtook Bremen, and Karin found the rapid ascension of the Kaiser to be more than a little suspicious. Karin begun working as a journalist for the Midnight Gazette, and through her investigations she began to narrow down the activities of the Kaiser and found he has a strange pre-occupation with securing the city of Prehevil in Bohemia. Naturally, when the Kaiser secured the city and abruptly withdrew from the war, Karin decided she needed to check this place out for herself.

Aside from all this, Karin has some pretty fun interactions with Daan and it's amusing to see them butt heads over everything. Karin also has a unique sub plot on day 3, which I'll be sure to show off. Going into the rest of this post, I'm likely mostly going to dunk on Karin because she some serious problems-

As your Protagonist:

Karin has the Endless Soul, offering her the following skills to learn,

Persuade: Passive. Opens up new dialogue options when using the Talk option in battle.
Lockpicking: Passive. Allows you to open any lock that normally requires a small key, as well as certain reinforced locks.
Escape Plan: Passive. Improves odds of escaping from battle by an unknown amount. Only takes effect if you use the Run skill in your skills menu.
Diplomacy: Passive. Automatically uses the talk skill at the beginning of battle, and does not use up your first turn in the process.

Endless Soul is actually not too bad, and quite good in the early game. Persuade is interesting and offers some chances to stun or weaken enemies with the conversation topics it unlocks. However, in the second half of the game, you often come across enemies where talking is completely fruitless, or can even have negative effects. On top of that, Persuade doesn't always do well in the action economy, and can be dangerous to use if you don't have party members to capitalize on it. It's much more practical with the Diplomacy skill, which gives you a free Talk action at the start of a fight. Like I said though, these diminish in use HEAVILY in the second half of the game and are kind of annoying at that point. Lockpicking is useful as we have seen, granting tons of extra items and alternative routes should you have it. I don't have a high opinion of Escape Plan, but I only just recently learned I've been using it wrong. It may be better than I give it credit for, but it's not something I'd rely on either.

Karin can only use one handed weapons, but is still capable of using guns.

Karin's backstory choices offer her the following,
1.) Persuade OR Escape Plan
2.) 4X Cloth Fragments and 2X Blue Vials OR Lugr Pistol and 6X Bullets OR Escape Plan
3.) 2X Blue Vials and Cloth Fragment OR Lugr pistol if not earlier obtained, 7X bullets and a Fencing Gambeson armor OR Moldy Bread and 2X Dried Meat.

Alternatively, you can skip her backstory and get,
Gain Lugr Pistol, x6 9mm Bullets, x2 (x5 on Easy) Blue vials and Moldy bread.
Gain Escape plan and Persuade skills.

Karin's backstory is by far her biggest problem. These choices SUCK. It's entirely possible to make a redundant choice if you're not paying attention and get Escape Plan twice which does nothing, a unique problem for her. Likewise, Persuade isn't that useful against early enemies, and while it does open up the option to freeze the heads of Bobbies and open them up for an instant kill, it DOES NOT stun Bobbies and stop them from acting. Persuade needs Diplomacy to be effective, and it falls off hard once you're done fighting Bobbies. Karin can start with a ton of pistol ammo and a slightly better armor, but it just doesn't really compare well to Levi getting guns and ammo of his choosing and an increased Body cap. Karin comes pretty close to starting the game perkless, and as a one handed character with no innate affinity with the Gods or a crafting advantage, her mid game is abysmal and her end game potential is also bad. Karin is pretty much inarguably the worst character in the game and she's only potentially better than O'ssa in Maso mode since she can at least use guns. And even then, I could be convinced to double back on that because O'ssa rockets past her once he can learn skills and has far more tools at his disposal that can potentially let him work around the situations you'd want guns. Considering that you get a pistol and a decent amount of ammo from killing her and her optimal backstory (at least for me) starts her with only one perk, Karin is the only character I'd legitimately say you can get everything you want from her if you kill her over actually playing as her. Since she needs to use the Hexen to complete her early game advantage, (not able to start with lockpicking or diplomacy) a character willing to spend the extra soul stones is just as capable of taking advantage of Karin's skills as Karin herself is. This also hurts her really badly in Maso mode where she CAN'T use the Hexen in the early game, having almost nothing to work with at the start in that mode.

As a party member: Sucks pretty bad here too. Recruitable on Day 2 when a ton of better characters become available, located in the western city with only Lockpicking as a skill. You will be well past the point where you'd care to have lockpicking anymore, already passing most pickable doors and easily capable of smashing them down with a full party now. Karin is also a one hander, so her end game damage potential is flatly lower than characters who can use two handed weapons. For some reason she also comes with only a kitchen knife when recruited instead of her pistol (which she magically produces should you attack her). Bad companion, tied with another character for worst one in the game, and is debatably worse.

Image

User avatar


Part 5 is out! We complete the required fetch quest to unlock ending A. Also I get to bury that dream of getting through this let's play with no game overs :(

User avatar
Character: Daan

Image

"Well, fuck."

As a character: Probably the most enigmatic character to his companions who isn't taciturn and reserved, Daan has had an odd and varied life to say the least. His parents, whether from his birth or later into his childhood, were a part of Sylvian's Bunny Mask cult. and as Daan grew older they became more and more obsessed with the cult activities. Disturbingly, they wanted to rope Daan into the cult as well when he turned 13, which was a bit too much for him and he quickly fled home. Being raised in a family dedicated to Sylvian, Daan was at least familiar with Sylvian's healing gift and could use it himself, and whether through honest work or becoming a street healer, Daan found himself being brought under the tutelage of Baron Eihner Von Dutch in Rondon. The Baron taught Daan all of his formal medical training as well as teaching him an appreciation of the finer things in life and good manners. Despite this, Daan will fully admit he's not an accredited doctor, merely being an apprentice to the Baron who is, but his knowledge is about as good as a practicing physician could hope to be so most of the party save for Karin don't split hairs on this. Daan would also find himself in a romance with Von Dutch's daughter Elise, eventually becoming engaged to her in his adulthood. Tragically, Daan was conscripted for the second Great War. Letters from Elise helped him work through the atrocities he saw, but as the war drew to a close, the letters had ceased to come. Returning to the Von Dutch Manor, Daan found everyone in it, including Elise and Von Dutch, dead; seemingly in sacrifice to an old God who bore a symbol he did not recognize. In desperation, Daan attempted to use the ultimate technique of Vitruvia, the Magna-Medicinal, to sacrifice his eye in an attempt to revive Elise but she was too far gone for it to have any chance of working. Daan frantically searched for any information he could that could let him at least know why this tragedy happened, and the only thing he was able to unearth were the mentions of a city: Prehevil.

Daan's a very fun character, with a disaffected attitude and a dry wit the results in him having some of the more entertaining interactions with tightly wound characters like Karin and O'ssa. Despite this, there's also a certain level of despair he harbors that overwhelms him in private, and his personal ending is arguably one of the worst outcomes in the game. Daan is a man who is struggling to find any reason to continue with life, which adds a lot of depth to what seems like a straightforward snarker of a character. Beyond this, Daan is a surprisingly versatile individual, being an excellent bartender and a good conversationalist. He's also far more physically capable than his somewhat wry frame implies, and he's one of the more outwardly moral characters albeit a bit more pragmatic than others in this regard.

As your Protagonist:

Daan has the Blank Soul, allowing him to learn the following skills,

Diagnosis: Passive. Unlocks a new interaction with corpses, letting you learn there weaknesses and getting some flavor text about their physical condition. Has some unique text for two specific corpses when Daan specifically uses it.
Organ Harvest/Medicinal: Passive AND use in field. Very complicated skill that's essentially 7-in-one. Organ Harvest gives a new interaction with corpses allowing you to harvest one of 6 organs from them, while Medicinal creates a unique skill for each organ that allows you to cure specific ailments.
Precision Stance: Use in battle. Increases accuracy at the cost of 5 mind.
Analyze: Use in battle. Finds the enemy's weak point (usually the head) and disables its evasion. Does not work on most bosses. Costs 20 mind to use.
Magna-Medicinal: Use in Battle. Bring a fallen party member back to life. Costs 50 mind AND a limb to be sacrificed in order to use. Has a couple notable bugs associated with it.

The Blank Soul is unique though I wouldn't necessarily say its good. Since Diagnosis requires you to have already killed the enemy to use it, its effect can straightforwardly be gotten through trial and error. You mostly just use it for the flavor text. Organ Harvest and Medicinal are interesting. You can harvest Livers, Kidneys, Eyes, Hearts, Parathyroid Glands, and Thymus'. Each one heals a specific ailment when used with the Medicinal skill. Notably, eyes can cure blindness and parathyroid glands can cure Fracture, the only non-Sylvian circle method in the game to cure those ailments. Other than that, the Thymus can cure infection while Hearts cure bleeding. Livers and Kidneys treat different levels of poison and are pretty useless since white vials are very common. This skill allows you to stock up on infection and bleed cures, as well as have an emergency counter to Blindness and Fracture, the worst ailments in the game. That said, it's pretty easy to avoid most of these, so I can't really say it's useful either. Note that Organ Harvest pulverizes the corpse when used. You can saw off a corpses head and organ harvest it (amusingly still being able to get an eye from it), but not the other way around. Keep this in mind. Precision Stance is pretty useless since few things in the game even have evasion to worry about, though I can think of one time it may help. Analyze on the other hand, makes enemies vulnerable to head shots the same turn it's used and can win fights turn one when you have a party. Sadly it's pretty useless in Maso mode due to the action economy and high mind cost. Finally, Magna-Medicinal is the only way in the game to revive dead party members, albeit only within the battle they get killed. It has two major oversights with it: 1.) Since death purges all negative statuses, including the otherwise permanent Withdrawal status, you can amusingly use this skill to indirectly cure Heroin addiction. 2.) For some reason the limb sacrifice checks against your limb protection, so Arm Guards and the Salmonsnake Soul allow you to use this skill without losing limbs. Good to know if you get into a situation where you have to use it.

Daan can use two handed weapons and guns. Depending on your backstory choices, he can also start with either a Scalpel (a unique melee weapon that only he can get) or a pistol.

Daan's backstory offers him the following,

1.) Loving Whispers and +2 Sylvian affinity OR Organ Harvest/Medicinal OR Analyze. (Note the latter two have a separate choice tree that opens up off the initial choice you can make)
2.) A Light Blue Vial and Pep Pills OR a Pistol and 5 bullets (Lose your scalpel)
3.) 2X Blue Vials and a Cloth Fragment OR 2X Dried Meat and a Moldy Bread OR Beer and Vodka.

Alternatively, you can skip his backstory and get,
Gain Pep pills, Green herb, x2 (x5 on Easy) Blue vials and Moldy bread.
Gain Medicinal and Organ harvest skills.

Daan is highly underrated in my opinion. Most people look at the Blank Soul and see its situational or gimmicky skills and just write Daan off as a joke. What really puts Daan over the top is his first backstory choice. Starting with Loving Whispers AND max Sylvian affinity is CRAZY good. Not only does it give Daan great safety in the early game, it gives him excellent circle economy, allowing him to only use Sylvian circles on an as needed basis that you can avoid altogether. Additionally he can pick up all of Sylvian's skills the first time he uses the hexen with no additional effort on his part. Starting with a good amount of supplies and a decent weapon also gives Daan a great early game, and he has decent late game potential as a two handed character. Playing as him does rob the player of his bartender function, but that's not a huge deal since standing in the bar restores your mind anyway. Daan does very well in F&H mode, teaming up with Abella allows him to pass Healing Whispers onto her and suddenly you have two healers at your disposal. Likewise, picking up Analyze gives you a great way to eliminate nasty enemies like Neighbors on the first turn. He does less well in Maso mode because Mind is a much bigger problem there, but he does get a nice buffer with being able to start with some alcohol. Great character and a very beginner friendly one, I'd rate him up there with Marcoh and Marina.

As a party member: Daan has a brief period where you can pick him up as a companion on Day 1, but he quickly leaves when you travel in any direction. (Though there are bugs that let you recruit him permanently on Day 1) You can get him permanently on Day 2 with no special effort, just have to find him in the white mold apartments.. He comes with Analyze, Magna-Medicinal and Diagnosis. Not the best combo, but it has its uses. (Especially Analyze) He doesn't really compare well to Marcoh or O'ssa as companions who have skills that make them a lot better in fights, but he's easy to get and can use two handed weapons so it puts him over companions like Levi, Karin, and Olivia. Good addition if you are unable to get Marcoh and O'ssa in a timely manor. He also has his function as the Bop's bartender, which is a nice a quick way to top off your mind if you're on the cusp of Panophobia and running low on food supplies.


..........

Okay no discussion of Daan is complete without mentioning his infamous unique game over should you sleep past the night of the third day. Posted as just a link for those who'd like to check out Daan's unique story beats for themselves.

https://youtu.be/AkO6oBhy5IY
Last edited by Cullen on Mon May 08, 2023 3:54 pm, edited 1 time in total.

User avatar


Part 6 is up on Youtube! Rounding out our Prehevil tourism with the final district, we're actually poised to end the game now. I also check out a few more events that involve rolling the clock forward that we won't see otherwise. Next part we'll be joining back up Protag Abella in her file and be committing mass slaughter.

User avatar
Character: Olivia

Image

"I think the forest bed here is very fascinating. There seems to be all kinds of medical herbs growing around."

As a Character: Olivia is kind of interesting, having a pretty huge divide from how she appears to her fellow contestants and how she comes across as your protagonist. While there's always some level of this due to the divide between gameplay and story, when Olivia is a companion she comes across as an unthreatening, demure, and very friendly person. She never seems to have a negative thing to say and is always keeping the silver linings in mind for the situation at hand. Going through her backstory though shows that she struggles deeply with jealousy and resentment in regards to her sister Reila. Reila is not just perfect in all the ways Olivia isn't, she's perfect in all the ways she is too. On top of that, Olivia suffers from a degenerative condition that has rendered her wheelchair bound, creating a distinct difference between her and others that she has always hated. At many points in her life, Olivia found herself being motivated by jealousy to either attempt to one-up or get back at Reila, though whether or not she does is dependent on the player. Despite all this, she does love her sister and they do have a reasonably strong bond. Olivia's whole reason for coming to Prehevil in fact, is finding out the Reila was wrapped up with the NLU and was planning to do something in the Bohemian city. Other curious points about Olivia's inner thoughts, while other characters react to having to use guns with either resignation or outright disgust (even a career rifleman like Levi), Olivia is the only one who gets outright excited to use them, feeling completely natural holding a rifle and briefly reveling in the power they give her to take life. Like Daan, there is far more going on with Olivia beneath her surface, and I could easily see some more of her darker aspects being addressed in future content updates.

As your Protagonist:

Olivia has the Shadowed Soul, offering her the following skills to learn,

Advanced Botanism: Crafting skill. Unlocks the recipes for Condensed Blue (restores 125 Body), Condensed Green (cures infection, bleed and poison and protects against them for a few turns) and Condensed Lavender (Restores 100 Mind).
Poison Tip: Use in Field or Battle. Gives your weapons the ability to inflict poison when striking. Costs 5 mind to use.
Undergrowth Awareness: Passive. Allows the picking of Deep Blue Roots (found after picking a Blue Herb), Nettle, Poison Hemlock and Wild Dagga.
Toxicology: Crafting Skill. Unlocks the recipes for Condensed Nettles and Condensed Hemlocks.

The Shadowed Soul is extremely potent, especially when just stepping off the train. Advanced Botanism allows you to make some of the best restoratives in the game, in particular giving a good use for the otherwise unhelpful lavender petals you'll collect. Poison Tip is interesting, but kind of overshadowed by the next two skills that completely invalidate it. Undergrowth Awareness allows for the collection of tons of useful supplies; Deep Blue Roots can be combined with Red Herbs or Blue Herbs to create a mix that gives HP regen in battle, hemlocks can inflict poison, nettle inflict irritation (lowers accuracy) and Wild Daggas restore 100 mind when smoked and can also be used to inflict concussion. Finally, there's Toxicology. You can make condensed nettles, which stun and cause irritation, but the real item of the hour is Condensed Hemlock. This item is the only way to inflict the Severe Poisoning status in the game, and it deals ridonkulous amounts of damage to the torso. Some enemies will outright die from a single tick of damage from it, and I can only think of one enemy offhand that isn't immune to it that won't die in 2-3 turns just from the damage inflicts alone. It is hands down one of the best boss killers in the game, and having a ton of these early is one of the big perks of Olivia in Maso mode.

Olivia is capable of wielding One-Handed weapons and guns. Olivia also starts with a One-Winged Necklace, a unique accessory that gives an increasing amount of defense the lower your Body gets (at less than 10 Body it can potentially nullify all incoming damage). Beyond that, Olivia is bound to a wheelchair which has several unique mechanics tied to it. Olivia cannot go up stairs while in the chair, or else she'll slide back down. She must collapse it with the C key, crawl up the stairs, and then get back in the chair to move at full speed. She can also roll down stairs at higher speeds, and if she hits an enemy in this situation, she'll get a unique First Strike. Olivia is unaffected by losing her legs, but will lose movement speed if losing an arm and is completely disabled and functionally dead if she loses both arms. Olivia has a unique vulnerability to Tackle and other similar attacks: They can knock her out of her wheelchair. In this state, she will be unable to use physical attacks but she will still be able to use magic and items. To use regular attacks again, she must re-equip the chair. This status also applies if she is attacked while crawling around. As a companion, Olivia does not have to deal with the stair mechanics, but she does have to worry about being thrown out of her chair still.

Olivia's backstory offers her the following choices,
1.) Short Circuit OR Undergrowth Awareness
2.) Recipes of the 15th Century Vol. 1 OR Advanced Botanism OR nothing (Obviously don't pick this)
3.) Skin Bible of Vinushka OR Toxicology.
4.) Alchemilla Vol. 1 OR 2X Green Herb, 2X Blue Herb, 2X Lavender and a Red Herb OR 2X Dried Meat and a Moldy Bread.

Alternatively, you can skip Olivia's backstory and get,
Gain Blue herb, Green herb, Mixed herbs (blue), Moldy bread and (x3 on Easy) Blue vials.
Gain Undergrowth awareness and Advanced Botanism skills.

Olivia is a real mixed bag of a character, with an interesting dilemma. Right off the train she can collect tons of incredibly useful supplies and go into Prehevil with a massive safety net. Her boss killing potential is also through the roof, and her One-Winged Necklace gives her a unique low HP advantage play style in fights. Her unique wheelchair mechanics, however, flatly work against her in all cases. This often forces her to slow down in Maso mode which can be a death sentence in many cases. Additionally, Olivia is far more adversely impacted by losing her arms, and outright gets a game over if she loses both. She's hard to recommend for new players given all these unique problems she has to contend with, but once you learn the game she is extremely strong. She's alongside Marina in what I consider to be the "Expert" characters of the game. I'm not sure if she is as good as Marina, who's just more straightforwardly useful, but you cannot deny that Olivia has some incredibly potent positives in both F&H mode and Maso Mode.

As a party member: Garbage. Has literally none of the things that make her good as protagonist, and can't be recruited until the second day. Despite what some people claim, if Marcoh and/or Tanaka are unavailable as NPC's, she can't be recruited at all. Aside from being a one-handed character, the only skill she has is Photosynthesis, an extremely slow regen skill that restore body at a rate of 1 per 10 seconds... only when you're outside... only when it's morning or afternoon. It's hard to say if she's better or worse than Karin since I suppose Photosynthesis actually does something by the time you recruit her, but Olivia has the Tackle weakness to deal with. Pretty much the only reason you'd take her is that if Marcoh AND Tanaka are alive, they'll engage in a training session that lasts until nightfall. She's more or less just there to replace anyone who might have died on you, though I guess she does have better stats than Levi at least.

User avatar
Characters: Non-Contestants and Non-Playable Characters

For this part we'll be taking a look at the scattered party additions that are not strictly related to the Termina festival at hand. These additions are notable for being the only party members you can have in Maso mode. On top of that, we'll be looking at the Contestants who cannot be played as or recruited into your party, but do have a Soul that you can reap skills from. Note that Orange has already confirmed future content updates will make at least some of the current NPC characters playable, so I may have to write up actual breakdowns for them sometime in the future. When that will happen is unknown though, so it's best to cover them in the capacity of how they do affect the game now. Let's get down to business!

Non-Contestant: Ghoul

Image

Ghouls are a very straight forward non-contestant addition. With the Necromancy skill, you can turn either a Soldier corpse or a sickle villager that has not been decapitated into a party member. There 3 sickle villagers in the game and 3 soldier corpses, allowing you to create up to a maximum of 6 ghouls. Ghouls cannot equip weapons and are controlled by the AI, randomly throwing out weak swipes that deal around 60 damage. Ghouls can equip armor, and some accessories (Pretty much anything that isn't a shield), so while they aren't great damage dealers aside from the times where they might land a headshot, they can be functional meat shields. Since ghouls do not use weapons, they are unaffected by losing limbs unless they lose all 4, which of course renders them functionally dead. Ghouls are immune to death by infection. Ghouls do need to be fed, or they will suffer from starvation, so do be mindful of that if you get a full undead posse. The situation you'd most likely get these guys is by playing as Marina, since she can start with Necromancy. Aside from their party function, Ghouls can be sacrificed to Gro-Goroth with no push back allowing a quick way to build at least 2 affinity with GG. I honestly wouldn't really recommend using ghouls as serious party members due to their limitations and being a resource drain, but they can have some decent short term functions.

Non-Contestant: Black Kalev

Image

Worst companion in the game by a mile, ducking under the already low bars set by Levi, Karin and Olivia. At least they can actually equip crap. Black Kalev, like a Ghoul, is AI controlled and attacks randomly. His unique Rampage attack is slightly stronger than a Ghoul's swipe, dealing around 90 damage. Being a Goat however, Black Kalev cannot equip ANYTHING. Nada. No accessories. His stats are horrible, being a flat 16 across the board and he cannot do anything beyond his random attacks. He takes about 40-50 damage from everything, and can easily die in two hits. Despite being a satanic goat, he somehow has phobias and can take even MORE damage. It is very hard to keep him alive and it does not really pay off at all to do so since he's another resource drain who provides far less than even a ghoul. On top of that, recruiting him requires wasting one of the precious 4 asymmetrical circles in the game on a Rher symbol. About the only thing he has going for him is getting some additional plot details... itself requiring that you waste another circle on a Rher symbol. As if that all wasn't enough, when walking through areas with grass, he can stop to graze and leaves your party in the process. You need to either feed him a carrot or leave and come back to get him to rejoin. Black Kalev is a joke character, and you should never seriously try to use him. Even being one of the few party options you have in Maso mode does little for him, since he will likely die as soon as something sneezes on him.

Non-Contestant: Blood Golem

Image

Yeah the Blood Golem can only be summoned in battle and does not have a portrait. Once again, the Blood Golem is AI controlled, but its random strikes hit for a solid 300-350 damage. On top of that, the Blood Golem has 200 Body to work with, allowing it to take quite a bit of punishment even though it only has baseline defenses. The Blood Golem is not something you recruit; rather Blood Golem is a Gro-Goroth spell that can be used in battle. It costs 2 rev points to use (Though weirdly not any of your Body like it did in the first game), and starts attacking the turn it is summoned. Using Pheromones on it can allow it to soak up all incoming hits for you. Additionally, since First spells bypass rev point costs, using Green Spice on him can summon him first turn for free and allow him to get right to work tanking for you. Should the Blood Golem run out of Body, it will collapse into a pile of meat and will be dead for the fight, unable to be summoned again. He'll be just fine the next time you get into a fight though, essentially making the Blood Golem an immortal ally. Definitely the best AI controlled character you can have. Most solo and Maso runs make heavy use of picking up spice forge and bringing in First Blood Golems for support, as he makes the high damage flying around much more bearable.

NPC: Tanaka

Image

"I'm already late, so late..."

A slightly highstrung salaryman hailing from Edo, Tanaka is nevertheless a pleasant and amicable man. He strikes up a curious friendship with Marcoh, respecting the latter's physical prowess, and should both live to see Day 2 Marcoh will give Tanaka some boxing training. Qualifiers there, since Tanaka is notorious for having a high number of story event related deaths, with two possible ways he can die when you get off the train. He can die on day 2 alongside Marcoh if you fail to intervene in a certain event, and he can die or be rendered lost in multiple ways on day 3, before the inevitable Moonscorch sets in. Perhaps because of this, Tanaka has a bit of a beloved under dog status in the fanbase, and he's one of the most desired characters to be added as playable in the game. I myself also pull for him, and it's nice to see the interactions he has with others when he can actually live past the first day. Demonstrating his good nature, he'll make sure to secure a wheelchair for Olivia regardless of whether or not Marcoh is there to back him up.

Should you want to kill Tanaka for his Soul, just head towards the ruined shack and jump him when he sees the corpses. It's actually somewhat helpful to kill Tanaka early as he carries a good amount of Shillings with him.

Tanaka has the Latent Soul, a very strange Soul to say the least. This Soul DOES NOT confer any skills, instead it allows you to pick up +1 for every stat except Body and Mind. Naturally this is too negligible for most of the stats to make any kind of difference, but thankfully the most useful +1 Agility is the first node on this branch of the Hexen. Should Tanaka be made playable, I suspect either this Soul will get a rework, or Tanaka's backstory will revolve heavily around resources or picking up skills from other characters.

NPC: August

Image

"Nice day, isn't it?"

A somewhat strange man, August doesn't seem to have any relation to the occult, but he is similarly disaffected by the situation in Prehevil much like the occultist characters on the train. Further questions are raised when he demonstrates his impressive physical prowess, leaping over the gate into the city and hopping along the rooftops. He seems to be an archer, strange weapon choice in the modern era, and there are very limited opportunities to interact with him beyond the initial gathering at the train. Abella can pump a little more information from him here, revealing that he has Oldegardian heritage and has a deep reverence for the land of Oldegard. Beyond that, he was seemingly keeping tabs on the other contestants prior to everyone reaching Prehvil, as claimed by Karin who stated she had a journal with this very information that came from August. August seemingly confirmed the existence of this journal, but regardless of whether he lives or dies in this encounter, someone will have absconded with the journal.

August is strongly implied to have ties with Ragnvaldr, a protagonist of the first game, though what this connection is has been debated. For awhile it was thought that he may very well be Ragnvaldr, having become a New God in his S ending.
After all, he has all of Ragnvaldr's skills on his Soul and is a master marksman like Ragnvaldr was, in addition to his bond with Moonless who was a party member in the first game. This interpretation has faded though, due to a lack of hard evidence supporting it, and August lacking certain physical traits of Ragnvaldr like his distinctive facial scars. The current theory is that he is the direct reincarnation of Ragnvaldr, due to a unique interaction he has with the Kaiser, or that Ragnvaldr simply built strong familial traditions that carried on into the modern day. A clear answer likely will not be found until August actually becomes playable.


Should you want to kill August for the purposes of getting the C ending, you have exactly one opportunity to do this. When in west Prehevil, trigger the scene where he attacks the half-cocooned with his Bow. You can interact with him as he walks away, and this is the only chance you have to safely kill him before day 3 rolls around.

August does not have a moonscorched form, and will always be dead from the get-go on Maso mode.

August has the Tormented Soul, offering the following skills to learn,

Bloodlust: Use in battle. Increases attack power by 50%, but renders the character AI controlled and attacking randomly until the effect ends. Costs 10 mind to use.
Devour: Passive. Allows you to eat corpses to restore hunger. Some are inedible and some have negative effects for attempting this.
Warcry: Use in Battle. A self targeting version of Pheromones, forcing enemies to attack the character that uses this. Costs no mind to cast.
Sisu: Use in Battle. Gives the user a buff that allows them to survive fatal damage with 1 Body. Need to have at least more than 1 Body for this to work, and the buff dispels when used. Costs 10 Mind to cast.

Nothing too amazing here. Bloodlust will likely just result in wasted turns, a deny you a person who could use items. Food is not an issue, so Devour is of limited use at best. Warcry is actually pretty solid, considering Pheromones can miss, but it's hard to actually get access to it for the times you'd want it. Sisu is just a worse Hardened Heart, requiring set up and dispelling when it comes into effect, while the Hardened Heart will always work as long as you have it equipped. I wouldn't go out of my way to get any of these.

NPC: Henryk

Image

"The name's Henryk. 32. A chef. Single. My zodiac sign - Suffocated Soul. What else..."

A somewhat flighty and ditzy man, on top of being rather flirtatious, Henryk nevertheless seems like a decent enough fellow. In the event you save him from losing his mind in the mayor's manor, he will secure a large foodstock for all the Termina festival contestants and will prepare meals for anyone whenever they desire. Not many people end up seeing Henryk, since his fate is tied to Abella's. Should one be encountered, the other disappears from the game and suffers moonscorch. Due to the extreme value of Abella as a party member, it's hard to recommend saving Henryk since his cooking ability just isn't that helpful due to the abundance of food in the game. Abella can rescue him with no drawback though, and should you do so he actually has a rather extensive personal sidequest, allowing you to guide him to the various restaurants in Prehevil before settling him at PRHVL Bop. Should you follow this quest through, be wary because if Henryk is present at the Bop on the night of the second day, he will suffer a break and poison everyone in the bar if you sleep and advance time to the third day. So much for gratitude...

Henryk can pretty easily be killed at any time in most playthroughs. Either kill the Mayor if you recruited Abella, or just wait until you get the Sewer Keys from him and gank him before he can return to the train.

As the man himself has stated, Henryk has the Suffocated Soul which offers the following skills,

Slow Metabolism: Passive. Heavily reduces the rate at which your hunger meter decays. It falls to about 25%-30% the rate it normally goes down.
Melee Mastery: Passive. Increases your accuracy with melee weapons by an unknown amount, though presumably enough to get past any enemies that have natural evasion.
Master Chef: Crafting skill. Unlocks recipes for Goulash+ (DEF UP), Meatpie+ (STR UP), Vegetable Pie+ (EVA UP) and Mushroom Stew+ (EVA UP). It's supposed to unlock these regardless of whether or not you have the recipes for the standard versions, though I've heard reports of it also not doing so.

A simple but effective Soul and one that's easy to pick up. Slow Metabolism is great for reducing your supply usage, and Melee Mastery can't hurt to have. Master Chef is very good, giving you a way to go into fights with an immense power advantage, and it's a great use for all those ingredients you'll be picking up. If you have a way to easily kill the mayor (which as I demonstrated is very easy to do with Abella as a companion) then definitely pick these up when you have the spare soul stones.

NPC: Samarie

Image

"M-Marina! It's me! It's not a coincidence we both ended up in Prehevil!"

A very off kilter and unstable woman, Samarie is a dark priestess and belongs to a sect operating under the Vatican City. Her innate gift with the magics of Older Gods caused her to be used heavily in the rites of this order as a means to receive messages from the Old Gods. These rites have taken a severe toll on Samarie's physical health, rendering her deathly pale and with a gaunt and emaciated figure. Her lifespan has been cut down heavily due to this, something she is aware of. Not that most people learn this since it requires getting to the church on Day 1 Morning to save her. What most people know about Samarie is her psychotic obsession with Marina, where it is all but stated Samarie had been stalking her constantly prior to the Termina festival. She seemingly kept a low profile doing so, as Marina has absolutely no idea who Samarie is. Besides being way too devoted to Marina in a way that often breaches Marina's boundaries, it led her to a murder of impulse against Marina's father, and can potentially lead her to an early moonscorch if not talked down soon after the murder. Her obsessive stalker behavior makes her not terribly sympathetic, but she does have a somewhat pitiable existence if nothing else.

Aside from confronting her in the church basement to kill her, Marina has a unique way to deal with Samarie. Sleeping in certain beds around Prehevil will trigger a scene where Samarie is creepily watching Marina sleep, and you can use the opportunity to jump her as early as day 1 morning should you want her Soul.

Sepakin' of, Samarie has the Radiating Soul which offers the following skills,

Blood Sacrifice: Use on Field. Can be used on GG circles to lower your HP to 1 and gain a level of affinity. You need at least 50 Body to survive this skill. Unlike normal sacrifices, this does not exhaust the circles power and can be reused up to the maximum affinity level, though I have heard reports it can overflow your affinity and reduce you back to level 1. Don't use it anymore than you have to.
Masturbation: Use on Field. Can be used on Sylvian circles for one level of affinity. Is not reusable, but does not have any drawbacks for using it either.

A real two hit wonder here. As demonstrated in the videos, Blood Sacrifice can let you max out your GG affinity without drawing a single circle, while Masturbation let's you max out off of just drawing one circle. The big problem with these is that you can't actually fight Samarie with most characters until you've already passed all the Asymmetrical circles in the game, so it's hard to use them to break into magic casting in a way that's actually useful. Marina does have the ability to learn these earlier than usual due to her unique scene with Samarie, but they're still of limited use there as well since Marina will likely already have maxed out GG or Sylvian affinity. Still, they're a great back up if you've had bad luck with getting bibles or just want to transition your character into magic casting.

NPC: Caligura

Image

"I recognized your ugly ass mutt face the moment you came walking from the train cabin!"

A truly repugnant man to say the least. Unlike Marcoh, Caligura is a career mob enforcer by choice, and he's about as nasty as you'd expect someone who kills people for a living to be. He's foul mouthed, highly aggressive, deeply paranoid, prone to violence for no reason, prejudiced, and is not above attempting rape should an opportunity present itself to him. He is designed to be the evil contestant, someone not a single player would feel bad about failing to save or even killing. It's also surprisingly easy to get through the game without seeing him once. His initial encounter requires returning to the train cabin and having NOT picked up the map and combat manual already, and the few encounters you can have with him in the game require either sleeping in specific locations as specific characters or having certain characters be available to get into an altercation with him on Day 2. Just as well, seeing less of this guy is probably for the better.

It's surprisingly hard to give this guy his just desserts. Abella and Marcoh have encounters with him tied to sleeping in areas in Prehevil, but otherwise you either need to leave Levi unrecruited or save Henryk, since Caligura has events involving them on Day 2. Thankfully, he moonscorches on the night of Day 2, so he's just under the wire to be killed for ending C if those other options aren't on the table for you.

Caligura has the Decrepit Soul, which offers the following skills,

Steal: Use in Battle. Allows you to grab items from enemy's in battle. Every enemy has set items to Steal.
Intimidate: Use in battle via talk skill. Offers additional talk options, almost all of which are useless
Killing Intent: Passive. Weak enemies will avoid you. Affects few things in the game, and not always consistently either.
Explosives: Crafting recipe. Allows you to make Pipe Bombs.

Steal is amazing, the rest of this is crap. Steal allows you to get tons of good items, including huge amounts of ammo if you know what to pilfer from. Intimidate and Killing Intent don't really do much so I wouldn't recommend grabbing them. Explosives would be cool if Pipe Bombs didn't take a ridiculous amount of Gun Powder to craft, which is unfortunately a really rare crafting item. A real one hit wonder Soul, and thankfully it's the first one on the branch.

NPC: Pav

Image

"So - Be killing you later-- I mean seeing you later~!"

Another guy who's easy to miss for most of the game, though you're liable to see him at least once on your first playthrough. Pav is a Bremen Lieutenant, which already engenders a lot of distrust towards him from most of the cast given Bremen is public enemy number 1. His seeming psychopathy does not do much to dissuade this distrust. That said, there's more to him than meets the eye. He's actually from the Voroniyan Republic by birth, and his hometown was razed in an early Bremen campaign. Enraged, Pav sought to get close to The Kaiser and exact vengeance personally. This single minded vendetta likely contributes to his murderous mindset, and tragically it's for naught because in the event he gets to be face to face with the Kaiser, it results in him being fatally wounded in about 5 seconds. Little is known about him beyond this, and while he is kind of another evil contestant like Caligura, he does have a little more depth that will likely be expounded upon in future updates.

Pav has pretty limited encounters in the game if you want to kill him. At anytime on Day 1, if you manage to make it to the tower (so basically the end of the game), you'll see a confrontation between him and the Kaiser. You can elect to save Pav, or finish him off and collect his Soul. Alternatively, on Day 2 morning he will have a confrontation with Marcoh and/or Tanaka at the gate of the old city in front of the restaurant. Should you intervene, you can kill Pav for his Soul. Don't, and Marcoh and/or Tanaka will be shot to death.

Pav does not have a Moonscorched form, and will always be dead from the get-go on Maso mode.

Pav has the Chaotic Soul, offering the following skills to learn,

Bury The Trauma: Passive. Reduces passive mind loss when in dark areas, somewhere between 30-50% of the normal rate.
En Garde: Use on Field. Press the shift key to launch a physical strike that will give you a First Strike should it connect with the enemy. I haven't personally used it, but I've heard it's been kind of screwed up since Sprinting got added.
Order, Charge!: Use in Battle. Orders all your party members to launch physical attacks, while still allowing them to take their own turns. Costs 40 mind to use.

As much as I have played this game, I'm actually not able to give much insight on these skills. Pav is so rarely encountered, and often so late in the game, I just never have the opportunity to put them to work. The fact he is unavailable to kill in Maso mode also kind of hurts him here. Bury the Trauma is okay at least, while the others are just kind gimmicky and there. As I've said, I've heard En Garde is mostly broken since Sprinting got added, but I have not been able to test it myself to confirm this.

User avatar
Mechanics: Endings

Hopefully this should be a short mechanics post for once. We're closing in on the endings of the game, so I'd say it's a good time to explain what endings there are and how you can obtain them. There are 3 distinct endings in the game, one tied to a sidequest you can do while the other involve the resolution of the Termina festival. It's worth noting that the second of these, Ending B, has two distinct variations on how it can play out with 8 unique epilogues for each playable character. Let's break them down.

Ending A: The Machine God. This ending actually has little to do with the ongoing Termina festival, funnily enough, beyond some light trappings relevant to the conduction of the festival. It's more accurate to say it's happening concurrently than congruently. This ending can by gotten by connecting the 3 telectroscopes found in Prehevil, and then accessing the hidden dungeon under the museum: The White Bunker. Simply get through the White Bunker and defeat the 3 final bosses that await you there, and you have your ending. This is notably the only ending that allows you to rescue people from Prehevil, with any contestant still alive making it out of the town okay (Although probably with some mental scars). This does NOT include anyone who was present for the final boss encounters.

Ending B: Day 4. Despite the name, this can be gotten at any time, though you're unlikely to get it before Day 2. For this one, simply all contestants need to dead, either by your hand or from events in the town itself. Afterwards, the Tower will open up and you can ascend to its heights for your final boss encounter. This ending has two variations: If you qualify for Ending C, there will only be one boss encounter and the game will end at its conclusion. We'll cover the criteria for that when we get to Ending C. If you do not qualify for Ending C, there will be a second boss encounter after the first. Regardless, you get a unique epilogue for your chosen character after. This ending provides the photos for your New Game + photo album book.

Ending C: The Sulfur God. To qualify for Ending C, there are two things you need to do. Firstly, you must be in possession of all Souls. This means personally killing every contestant in the game. Whether they are human or Moonscorched does not matter, though more than a couple will need to be killed before their transformation. The second criteria is that it must be before the third day of the festival that you ascend to the top of The Tower. Should these two criteria be met, you will have a dialogue prompt that allows for this ending. You may still take Ending B if you so desire in this situation. Important note, due to the nature of the mode locking you into the Night of the 3rd day, this ending cannot be obtained in Maso mode. Aside from passing the time cut off, Pav and August will already be dead and you will not be able to get their souls.

Naturally we'll be showing off all endings, though the variant of ending B that has two final bosses will be reserved for the eventual Maso mode playthrough.

User avatar
Lore: The Gods Pt. 2

In this post we'll be looking at the major New Gods from the first game, known as the Fellowship, as well as Rher and the God of Fear and Hunger. The Fellowship were major characters in the first game, with nearly every ending in the game requiring their subjugation (with the exception of Nilvan), but since death holds a more definite end for New Gods their influence has almost completely disappeared and you only see scant few references to them in Termina. They've mostly been relegated to the history books now, at least being credited with ushering in a new age in the year 809 after their ascension. By the time they are encountered in the first game, their heyday has long passed them and they are perfectly killable though by no means does that mean they aren't a threat.

Francois, The Dominating One

Image

The climax boss of the first game in many of the various ending routes, Francois is the "muscle" of the Fellowship so to speak. His reign was defined by power and the pursuit thereof, with even his goal of uniting the warring lands seemingly being motivated by self interest rather than a desire for peace. Francois was extremely protective of his New God status, establishing his stronghold in the Golden Temple of Ma'habre, which housed the throne of power that the Fellowship used to ascend. He trained hunting hounds by instilling feral behaviors in them and released them around the temple, while sitting himself upon the throne and assuring no one else can use it anymore. He seems to be deeply paranoid, perhaps always knowing on some level that he just did not stack up to the Old Gods. The intended way to complete his boss fight even involves jumping on his paranoia and getting him lost in the thought that he is not in control of anything. In a twist of irony, despite his ambitions, Francois probably has had the least long term impact of the Fellowship, even less than the aptly named Forgotten One. He has left no personal writings behind nor is he really tied to any major figures that factor into the plot and background of the second game.

The Tormented One

Image

Also known as Ronn Chambara, the Tormented one is a bit hard to get a read on considering he can't speak at all. What is known is that he was a poet in life (we even found one of his books in Termina!) who believed great art could only sprout from pain and suffering. Whether his Godly form was by his own design or the powers that be simply have a twisted sense of humor, his ascension reflects this mentality, turning him into a skinless man who is further tortured by chains within his body. He resided in Ma'habre's Temple of Torment, a location dedicated to horrific torture such as flaying. His inability to speak leaves little to say about him, but he does seem to have a curious footprint that allows him to exert at least some influence past his reign. Aside from his writings as a human still persisting to the modern day, he can be summoned by sacrificing a Dead Crow at an imperfection circle and can even convey his tormenting chains to those who defeat him. (admittedly it's not clear if this encounter is supposed to be canon or if it's just an Easter egg.)

Valteil, the Enlightened One

Image

A God basing himself around the pursuit of knowledge, Valteil occupied the Grand Library of Ma'habre and spent of his reign dedicated to his research. He became obsessed with the idea of creating artificial life, believing it to be the path to true Godhood. Perhaps he was familiar with the alternative origin of Alll-mer involving Vitruvia. This endeavor hit some roadblocks though, Valteil seemed to be paranoid about his liminal nature like Francois was and was uncomfortable with the idea of creating beings who could outlive and surpass them. Ultimately he settled for making life from flesh to keep them within human limits, humorously defeating his own endeavor before he even started. Like the Tormented One, he does not get too much development, so there is little to say about him besides there being hints about him having disturbing sexual proclivities. Like Francois, his modern impact seems to be almost non-existent.

Nilvan, The Endless One

Image

Nilvan is never fought, so she doesn't have any higher scale art. Nilvan is notable for being the one among the Fellowship who did not limit themselves to purely selfish endeavors post-ascension. She believed in the endless potential of humanity and espoused the idea they can accomplish anything through dedicated effort. Coinciding with her unique mindset, Nilvan was notable for having unique powers allowing her to affect things beyond the physical realm and interact with the world of dreams. Nilvan was keenly aware that, despite her title, she would not last forever and actually took steps to ensure her existence persisting past the end of her reign. This led her to the man named Le'garde, who was prophesized to unite the warring states without resorting to force. She bore a child with him, hoping that this child would be the next step for humanity and a beacon of hope. Said child would become an Ascended God, the God of Fear and Hunger. Although Nilvan failed to extend her own personal influence past the conclusion of her life as a New God, she did succeed in having the largest lasting impact of the Fellowship, just behind the very ironic next individual we're going to talk about.

Norasmus, The Forgotten One

Image

As that title implies, Norasmus is an enigmatic man who's exact exploits were largely lost to the history books. That is because Norasmus is actually NOT a New God, though he has discovered means to prolong his life far beyond the natural expectancy of a human. As his story did not continue past the ascension of the Fellowship, his motives are somewhat inconsistently recorded. In some recountings, he is depicted as being deceived by the Old Gods and being denied Godhood, while other stories portrayed him as a traitor to the Fellowship. These stories can't even seem to decided if he was a man or a woman. The truth is more mundane though, at the moment he could have ascended Norasmus simply choose not to. He was able to see the futility of an existence as a New God and not incorrectly figured he could achieve far greater personal ambitions by seeking the path of Enlightenment and using the resources of Ma'habre to swell up his own knowledge. Although it's not clear if he still is alive to the time of Termina, it is known that he passed his philosophy onto the dark priest Enki, a protagonist from the first game, who utilized a Spirit Anchor provided by Norasmus to also deny Godhood and seek the path of Enlightenment. This gives Norasmus a by-proxy impact on the modern world, as the skin bibles utilized by the modern religious institutions of Termina were penned by none other than Enki.

I'll fully admit you don't really need to know about these guys to understand the plot of Termina, and even in the context of the first game some of them simply serve as obstacles to you reaching the end of the game. Still, at least some of them had far reaching implications that are still affecting the world by the time of Termina, so I thought it'd be nice to share their context in the grand scheme of things. Let's transition back to the beings of far greater power.

Rher

ImageImage

The Moon God. The Trickster God. The Delinquent One and the Ever-Watching God. Rher is known as many things and yet also seems to exist beyond people's full understanding. Rher had almost no impact in the first game, largely due to the game taking place indoors and underground where the Moon's light could not reach. He had two thralls, Pocketcat and the Lady of The Moon, who were carrying out his will in seemingly esoteric ways, but beyond that there was no involvement from him in the grander schemes. His very name was seldom referenced, and he had no symbol or associated skills. What was known about him is that he is seemingly still observing the world, and that he is the jealous and resentful type. He does not believe humanity is worthy of Godhood, detesting the New Gods, and he employs his thralls as a means to subvert the potential of humanity and rid the world of children with potential to reach Godly heights. That said, he also seems to be fickle and changes his mind at a moments notice. He keeps Pocketcat and the Lady of The Moon from directly interfering with the protagonists of the first game, only letting them do what the protagonists allow them to do. An odd move to be certain since this ultimately births the God of Fear and Hunger into the world. It's difficult to comprehend what Rher's exact motives are, and this is possibly deliberate given his status as a God of trickery and insanity.

While Rher represents trickery and deceit, he also represents the truth in a twisted way. After all, in order to effectively lie you also have to know the reality of a situation. In this way, Rher represents dark truths, things lying below the surface and the knowledge to horrible stay sane if you learn it. It's perhaps for this reason that building rapport with him offers increases to your mental capacity, allowing you to peek at these dark truths without losing all of your mind in the process.
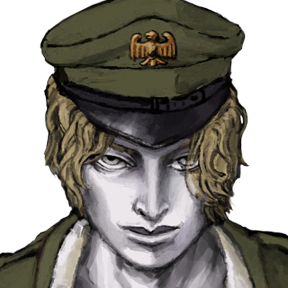
With Termina taking place over ground and often outdoors, naturally Rher can exert much more direct influence and is the one responsible for the titular festival. What exactly the purpose of this festival is unknown, but apparently it will allow those involved to reach illustrious heights should they reach its conclusion. With Rher's ability to directly affect those below him, we get to see the terrifying extent of his powers with the moonscorch affliction. Rher has rendered all within Prehevil as deformed and insane monsters, with few managing to retain any semblance of coherent thought or conscience. The same fate (and arguably worse) awaits the festival participants should they dally too long. What exactly Rher's intent is with all of this remains to be seen, but with Pocketcat also making an appearance and directly interacting with some of the contestants, clearly some grander scheme is developing.

The God of Fear and Hunger

Image Image

The second of the Ascended Gods in the world, a variety of God not seen since the resurrection of Alll-mer. Like Alll-mer, the God of Fear and Hunger is on par with the Old Gods and capable of exerting influence on the world at large in much the same way that the Old Gods can. Like Alll-mer she also came from seemingly humble origins, being born from a young girl who was a tortured prisoner held within the Dungeons of Fear and Hunger. This girl was, in fact, the child of Le'garde and Nilvan. Her greater destiny unfortunately thrust her into a life of much suffering, with many within the dungeons who sought to snuff out her life and prevent her from fulfilling her purpose. With the aid of one of the main characters from the first game, though, she was able to reach the core of the deceased God of the Depths and subsume his power, ascending to her current form.

Her epithet is not exactly a welcoming one, and indeed she represented these concepts in their purest form. Her ascension and impact in the world resulted in what was known as the Cruel Age, but despite what that might imply it actually represented a development point for humanity as a whole. Fear had motivated people while hunger kept them moving forward. In the wake of the God of Fear and Hungers influence, people begun to cherish hardship and draw inspiration from it, resulting in rapid growth development and societal advancement not seen since the forgotten ages. It is currently not know where the physical form of her resides, but she has established a following that is just below the other old Gods in presence and continues to grow. Time will tell if she reaches the same heights that Alll-mer has.

User avatar
The god of fear and hunger eternally T-poses to assert her dominance.

Anyways reading all of this reminded me of a really interesting theory I saw once about what's going on and I'm writing this mostly to remind myself of it should we hit the endgame and it never come up. There's so much shit going on that only ever gets hinted at, I love that bout this series. :allears:

User avatar
An extension of the God of Fear and Hunger asserting dominance is probably also her engravement being the only one worth much in the long run lol.

This series in general is a pretty good breeding ground for fan theories since it has enough concrete elements to tell an unbroken and easy to understand narrative, but at the same time there's enough background dressing and enough stuff left unexplored that it gets your imagination going a bit. I seldom do much theory crafting myself, and even I have ended up thinking about potential ways things are gonna go or just humoring off the wall ideas that are just barely plausible enough they could be true.

User avatar

*CONTENT WARNING* There is a scene of attempted rape in this video. While obviously certain parts have been censored, if these kinds of scenarios are upsetting to you in any circumstance, I have included a time stamp that specifically mentions when it happens in the video description as well as a stamp leading to when the event is concluded.

Part 6B is out! This is Abella going on a war campaign, annihilating anyone involved in this festival. This video also contains several minor events that just couldn't have happened in Marcoh's playthrough due to how I approached it. The main purpose of this video is to set up for Endings B and C, as well as give a rough outline of what kind of build you want to work towards as a solo character.

User avatar
mmm... now that's some good, optimal murder.

User avatar
I assure you it's the power of editing that made it seem that smooth lol. I had a serious "oh crap!" moment because I forgot August could only be killed on Day 2 and was worried the Moonless event locked me out of it. Almost scrapped the recording and started over, but my cooler head prevailed and I doubled checked a full ending guide that had fighting Moonless and killing August after in the route to make sure I didn't screw myself.

User avatar


Part 7 is up on Youtube and Marcoh's Bizarre Adventure is over. All 3 main endings are covered in this video, though this is far from the end of this Let's Play. Next weekend we'll be starting a file in Maso mode and being going through that, as it is a very different experience from playing the game normally. I'll be sure to draft up a Mechanics post at some point in the coming week detailing what the changes are, as its handy to know what you're in for and there's also some misinformation floating around about certain aspects of the mode, including on the wiki. That aside, the game will be updating at an unspecified point in the future and will see hosts of new content and balancing changes, so this let's play will technically be going for as long as new stuff is being added to it. Orange has posted a new preview of an addition we'll get to see in the next update, so I'll link that here too!
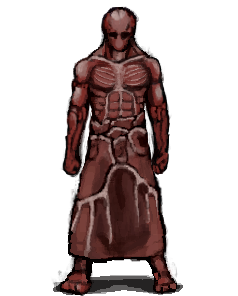

User avatar
Mechanics: Masox-S/M Mode

I've made many references to this mode throughout the Let's Play, and now we're finally at the point where we can check it out and I can explain just what the heck this mode is. Masox-S/M mode (often just shortened to Maso by people talking about it) is the "Hard Mode" of Fear and Hunger Termina, but the effects it has on the game go well beyond what that descriptor implies. In the first Fear and Hunger, the Hard Mode impacted the game in a very simple but prominent way: all non-necromancy recruitable characters were removed from the game and you couldn't save. Thankfully, in Termina we can save our progress in this mode, but the game makes up for that by adding loads of mechanical changes that completely upend how you might approach the game in Fear and Hunger mode. We'll be going down these changes in list format, more or less in order of prominence, if not necessarily in order of threat to your health.

1.)The game starts on Day 3 Night: This is a simple change that causes a cascade of problems. The most obvious one right away is that you cannot sleep without ending the game, denying you both the ability to save and the ability to use the Hexen to upgrade your character by resting. While both things can still be done, it's wholly dependent on getting the proper books for saving and getting to the designated areas for the Hexen. Additionally, all Contestants have been Moonscorched making them hostile and unable to be recruited. The only party members you can have are Ghouls, Black Kalev and the Blood Golem. As a final issue to deal with, since it is always night and you are perpetually in darkness, your mind will constantly be draining anytime you're not in the train/PRHVL Bop or the presence of a lit candle. On a more mundane note, since all the characters are already gone from the train and are largely unable to speak, this means the game has most of its story and interactions removed from this mode.

2.)Moonscorch: This is quite possibly the single most hated mechanic in the game, which is fairly impressive considering the coin of judgement and the saving systems exist. Once you reach specific screens, either the ruined shack screen north of the train or the riverbank to the east, the Moon God will notice you and a 30 second timer begins to tick. Should this timer run out, you will be moonscorched and it will be game over. The only thing that halts and resets this timer is going inside. For awhile it was reported that getting into fights or killing enemies also reset the timer, but sadly this is false. You need to get inside to reset it, and at least hang out for a few moments to fully reset the timer. There are a few things that pause the timer, but not as many as you'd hope. Obviously, it's not ticking while you are in battle, and certain actions such as using the bonesaw also seem to pause it. Text boxes though, including scenes where characters talk to you, DO NOT PAUSE THE TIMER. Infamously, you can die while Pocketcat is rambling at you, and it is absolutely essential to know that the W key fastforwards text before playing this mode. Before sprinting got added, this mechanic was an absolute nightmare with several areas requiring near perfect execution to get through without dying. It's still a threat with sprinting, but you have more margin for error in various places than you did originally. Certain areas do end up becoming inaccessible, as they go on for far too long without any indoor areas you can dive into, making them suicidal to travel to.

3.) The damage you deal to enemies is halved: This is a very straightforward change, all damage you dish out to enemies is flatly halved. This naturally causes fights to drag on longer, though thankfully against earlier enemies it doesn't impede your ability to one shot their limbs in most cases. DOT effects are unimpacted by this change, making them much stronger than they already are in F&H mode. One indirect nerf that this causes to the player is that it weakens the Leechmonger ring considerably, brining it down from healing about 8-9 Body per hit to only 3-4. It is sometimes stated that enemies have more health in Maso mode, but this is not true.

4.) The damage you receive is increased: Separating this one out into its own point since it's often incorrectly reported how this works. It is often stated that damage you take is doubled, and this is wildly incorrect. The game would be borderline unbeatable if this was true. What actually happens is your character's natural resistances are modified in this mode. Instead of having base 100% damage resistances, all of your resistances are changed to 150%, increasing the damage you take from everything by 50%. Now because this is direct modification of you resistances, this means that you can overcome a lot of this increased damage by having good armor. Armor resistances stack multiplicatively rather than additively, so in the main game this means that each piece you equip has diminishing returns and shaves off less and less damage. In Maso mode, this works in your favor because the relative effect of equipping gear is much greater and yields much higher reduction in damage.

Let's use a practical example. All attacks in this game deal a range of damage, with the number rolled multiplied by your damage resistances to determine the final damage you take. Let's say we're getting whacked over the head by a Bobby, which on average does 30 damage before factoring in resistances. It is a blunt type attack, and we are equipped with a Bremen Chest Plate, a Bremen Elite Helmet and a Ballistic Shield, having 70%, 85% and 80% DR values for blunt type attacks. The calculation for the final damage would be as follows: 30*.7*.85*.8=14.28
I'm not sure if the games rounds up or down, so we'll just say it hates us and the final damage value is 15. Let's take a look at the same situation in Maso mode, this time determining our final resistance and then multiplying that by the number the Bobby rolls,
(1.5*.7*.85*.8)30=21.42, giving us a final damage received of 22.

So under these circumstances, we're only taking 7 more damage over what we'd expect to see in F&H mode, far less than what the commonly cited double damage figure would give us. Additionally, our armor shaved off a greater amount of damage relative to what we would have taken without good armor(~45 on average), blocking a whopping 23 points of damage and ensuring we'd actually be able to survive with a bit left in the tank if the Bobby got all 3 of its attacks through. The end takeaway here is that while the damage you receive in the early game is very high, and stuff like Bobbies can easily kill you, by the end of the game you're only taking negligibly more damage than you would in F&H mode. This is very much just an early game hassle, and if you can get Bremen Gear and any kind of shield, it should no longer be much of a concern. That said, phobias can still push certain attacks into dangerous territory, so be mindful of what your character is afraid of at all times.

5.) Your Mind drains at an accelerated rate: Tying in with it always being night, your Mind plummets MUCH faster in the dark in this mode, somewhere between 2-3 times the rate it depletes in F&H mode. Panophobia is a very real concern for many characters, as the only guaranteed alcohol you get is Levi's stash by the train. Getting struck with Panophobia early on is a disaster, so you want to be moving as quick as possible and be looting EVERYTHING for a chance at beer and vodka. To my knowledge, your Hunger decays at the same rate, but even if it doesn't, it's a negligible increase and food is so common you'll never have a problem with it.

6.) All Death Mask Coffins are active: Every Death Mask coffin in the game will spawn a Death Mask should you walk past it more than once. This is one of several anti-backtracking mechanics in Maso mode, only a handful of characters will start with guaranteed ways to dispatch Death Masks, and sometimes you will not be given the breathing room to employ them. One thing you can use to pseudo-kill Death Masks is bear traps. When a Death Mask is caught in a bear trap, they are stuck in it permanently assuming you don't engage them in a fight. If you're walking by a coffin for the second time, you can just plop a bear trap in front of it and the Death Mask will be snagged and incapacitated as soon as it pops out.

7.) Bellends are stationed on rooftops all throughout Prehevil: The other major anti-backtracking mechanic, once you enter the city you will find that Bellends are on rooftops in nearly every part of the city now, and they will drop down as you walk past. Bellends are almost unkillable without magic in this mode, and are highly dangerous past that due to the high damage they can deal. It almost impossible to maneuver around them in many places, essentially keeping you from backtracking until either you have a means to kill them, or you can open up the sewers and bypass them by going underground.

8.) The Hexen in the Orphanage is usable!: ....Once, with a notable drawback if you use it. I won't go too deep on this one.

9.) The Poe is active by default: The Poe we release from Dr. Kefer's is active from the word go in Maso mode. This isn't much of an issue honestly, since he's ridiculously easy to beat in fights if you have extra turns, and is dispatched by simply leaving the area in the event he does block a way you need to go. This also means there's no drawback from taking the soul stone from his lamp.

10.) A new boss awaits you in West Prehevil: And it's a very dangerous one if you don't have the right skills! Luckily in can be completely avoided, but I'll likely show it off just for demonstration purposes.

11.) Boards with rusty nails will be found in certain areas: If you walk over them, you take 1 damage plus bleed and infection. Listing this one last because it's not really something that makes the game hard, it's just unbelievably annoying. Do be mindful of this in the early game, because these stupid things can burn through your green herbs and bandages in a hurry.

There are a couple miscellaneous things that don't really fit neatly into the list. Since it's Day 3, the general store in old town is open, giving you a way to get some supplies if you have spare money. Everyone being moonscorched means there are some additional encounters you have to avoid or take on, though the only one that is 100% mandatory to fight is Moonscorched Marina. Beyond this, Marina and Marcoh are even better in this mode as Marina can start with the ability to save guaranteed as well as with good crafting abilities and a maxed affinity, while Marcoh can start with Lockpicking and get into the city by way of the sewers, which is highly desirable. We're not going to be playing as either of them though...

Image
*Art by MarinazAnon000 on Twitter. I'd link their profile, but most of their stuff is very nsfw lol

Post Reply