Memento Mori. Let's Play Persona 3!

Part 34 is out! Summer begins proper, with a festival event to herald in the sudden free time we have, naturally completely eating up the entire day for no reason! That said, you get to spend some quality time with any female classmate you've initiated a social link with, or you can opt to help Aigis acclimate to her surroundings. Following that, the Port Island Station Film Festival begins, with a new movie marathon every day. This is purely opt in, with a different person calling you up/texting you to go the movies most every day until it ends. We won't be seeing it until the next video in Reload, but we end up going on quite few movie dates in FES and Portable as it is beneficial for some of our school social links. Past that, Koromaru gets a ton of focus in this video, as he should.
Extra Notes
In FES
-We get our introduction to going on walks with Koromaru in this video! This was a new night event added in FES and retained for all future versions of the game (though some of the walk scenes have been replaced or shuffled around for the FemC) that mostly serves to add some additional interactions with your team once you've completed all things you could possibly do at night. Occasionally, you can also walk Koromaru by yourself to get an item, and on certain nights you'll run into Social Link characters on your walk, getting a +10 (with the potential for matching Persona bonus) points to their Social Link progress. This can occasionally be used as a means to push characters towards a rank up, though it's basically impossible to plan around without a guide. You only occasionally meet people on walks, and it'll always be a specific character on a specific night. Nothing in game tells you indirectly that Koromaru can be walked on a given night, you just need to interact with him and see if he wants to go outside.
-I'm not actually sure if any of the festival dates award social link points, though it hardly matters because the only girl who'd benefit from it right now is Fuuka, and we have a movie date we can do with her later in the month anyway.
-Speaking of, attending a film festival date awards the same amount of social link points as a non-ranked hang out, affected by having a matching Persona (+ maxed out Charm in Portable) like any other social link boost. Movie dates also give a +4 boost to specific social stats, though obviously the only ones we'd care about are Academics at this point, and even that's very low priority. Of the available film dates we can go on, I need to do the ones with Kenji, Kaz and Fuuka to ensure they get a rank up next time we hang out with them. Of those 3, Kaz also needs the matching Persona bonus. Another date I need to attend is Yuko's, not because she needs it for the rank up but because the next time we hang out with her will be in October in-game. The last time we did anything with her was July, so that will be well past the 60 day limit for female social links reversing. Any other movie date can be skipped, and will be skipped after I show off anything interesting regarding it. Note that I attended Keisuke's movie date in the video because I wasn't 100% sure if it was necessary or not, but I did go back and reviewed my raw footage from the last time we hung out with Keisuke, and it is indeed skippable. I may go back and do so in the interest of getting Mamoru to Rank 3 since that actually has some pretty huge benefits in the near future, though it isn't super critical I get that squared away asap.
-I do some weapon fusion to shore up my combat options. I create a Strength arcana weapon, which conveys the Auto-Tarukaja ability. This is a decent thing to have for the protag since this allows me to have boosted attack and accuracy at all times if I pair it with a Speed Enhancer. I do have a specific weapon in mind to create before this Moon cycle is out that the protag will be using for boss fights, but for general exploration Strength weapons help out quite a bit until we make the ultimate elemental specialists who simply don't need the boost. I also can now fuse an Empress Persona, which can create a weapon that conveys the Resist Wind ability. A natural fit for Junpei, anytime you're going up against anything that uses Wind magic, you'll want him to have that.
-On a related note, we can create a Sun Persona at this point, which would allow us to make a weapon to cover Mitsuru's fire weakness. Akihiko has to wait a little, because the first Star Persona we can fuse, Nandi, is level 39. This is one edge Akihiko has in Portable, where much lower leveled Star Personae are available. Not that it matters, since I won't be using him there at all. As for any other notable weapons to create, keep an eye out for the strongest Moon Personae you can fuse, as Crit Up weapons are a very solid option for when they don't have to cover their weakness.
In Portable
-Koromaru has a social link now, occupying the Strength arcana for the FemC. Koromaru's social link is one of 3 new night time social links introduced in the FemC's storyline, and it develops by far the slowest. Don't be in a hurry to get this one maxed out though, as we have plenty of time for it.
-The Summer Festival now has you heading out with the guys of the game, though it otherwise proceeds the same way as other versions of the game.
-I made a goof trading my opals for a Growth 2! If I had sat on them, I would have gotten enough from the special Monday Commodities sale to get a Growth 3. Here's to the could-have-been's!
-As far as movie dates go, we need to go on the ones for Yukari, Akihiko and Rio. Any other can be skipped, though the FemC has so little to do during the day at this point that there really isn't anything I could get super ahead on if I did skip them. Since the FemC has less daytime school links than the MC, she also picks up some exclusive film dates with non-social link characters, such as Theodore/Elizabeth and Ikutski.
-I'm not in a super big hurry to do any weapon fusion right now in Portable, though I will probably fuse off Eligor to create a Tower weapon to cover either Aigis' or Yukari's weakness. Probably Yukari since she's the more vulnerable of the two. I do need to put Growth 2 on him before I fuse him off though, and I'm waiting on a free day where I can grab that from the shrine since I'm currently having it duped. The film festival pretty heavily delays that, annoyingly enough.
In Reload
-In addition to walkies, Koromaru has the unique Brushing hang out that awards us with an item as well as a dapper dog whenever we participate in it. After 3 brushings, he'll gain his characteristic. We can also watch DVDs with him on certain nights, which sounds pretty funny just saying it out loud. We're probably not going to see too many walk events in Reload, as the nights are much busier here and the situational social link bonuses they give are less relevant for a variety of reasons. This is the benefit of playing this alongside FES, where I can easily show off all the walk events since there's hardly anything to do at night by now!
-It's worth noting that the walk events with Koromaru do also carry item rewards and are fully voiced now. For team walk events like with Aigis, we can get a random gem or even better a random Incense I. That's a nice bonus, but not necessarily at the expense of developing our social links or team abilities.
-The Summer Festival dates are now fully voiced, though still follow largely the same script. Note that if you choose to go by yourself, you still get an event with Aigis and Mitsuru.
-We get back-to-back Characteristic unlocks for Yukari, gaining Healing Mastery and Healing Apex in short order! Now Yukari can sling healing spells in and out of battle for a quarter of the cost, which is pretty close to free if healing is all you have Yukari do. If Yukari is in the party, you can pretty much just hit auto-heal after every battle now and keep on trucking for the longest of hauls. Junpei is also getting close to unlocking his upgraded characteristic, which I'm hoping will happen soon.
-In addition to night time hang outs, Koromaru also has a Linked Episode subbing in for a Social Link. I actually like this Linked Episode quite a bit more than his real social link, as they found considerably more interesting plotlines to write for him in Reload.
Social Progress
In FES
Star Social Link: Rank 2
Devil Social Link: Rank 8
Hermit Social Link: MAX
In Portable
Strength Social Link: Rank 3
Hanged Man Social Link: Rank 8
Devil Social Link: Rank 9
In Reload
Hanged Man Social Link: Rank 9
Moon Social Link: Rank 4
Star Social Link: Rank 4
Devil Social Link: Rank 4
Koromaru's Linked Episode: Episode 1 Completed
Junpei's Hang Outs: Gardening 3/3 Reading 2/3
Yukari's Hang Outs: DVD's 3/3 Cooking 3/3
We're officially done with the Hermit link in FES, saving me from losing anymore days to it. Other than that, we've cleaned up Yukari's hang outs and are close to doing the same with Junpei. I'd definitely like to get cracking on Aigis' reading events and Akihiko's events in general, but we're at the mercy of the game for when we can pursue those. We'll also be having a number of our nights locked down by a certain other character in the near future, which will slow things down for the other members of SEES for a time.
The next supplemental video is up! Took me awhile to get this one made as I had to drum up the motivation to sit through the Summer Festival scene 8 times in a row. And since there were multiple dialogue choices I couldn't check out completely while doing so! Regardless, I decided to include all the Reload versions of the MC dates as they are fully voiced and largely follow the same script. One notable distinction between Reload's version of the Summer Festival and every other version is that if you reject everyone in the older versions, Mitsuru forces you to go with her and Aigis. Reload instead allows you to go by yourself, which is somewhat pointless as it just plays a stripped down version of the Aigis/Mitsuru date anyway, but it does have the fairly hilarious consequence of making your MC seem really pathetic. The FemC picks up a couple unique dates, though none with any of the non-SEES social links in her story. We've already seen Akihiko, so here we have the Junpei version of the date, plus a FemC exclusive group outing with Yukari and Fuuka. I also include the FemC's version of the Aigis/Mitsuru date and the dialogue you get should you attempt to refuse Mitsuru. The FemC also gets the option to wear a Yukata, which mildly alters the dialogue of the succeeding scene at the start. Rather disappointingly, we don't get to see what the FemC's Yukata actually looks like right now, and Yuko and Chihiro just don't get one altogether. I'd say Fuuka has the best looking one, btw.
Moving on from that, we've got the handful of social links we were able to fit in between film festival dates. The only notable thing to mention here is that I did ultimately decide to go back and pass on Keisuke's movie invite in order to spend time with Mamoru. It's actually going to be a bit before we see him again since there's a Koromaru walk we can get a free bonus for his link from, and he currently needs additional points for the next rank up. Other than that, we finally finish up Hermit in FES, and the Devil and Tower links are quickly winding down to their conclusion everywhere except Reload. Tanaka and Mutatsu just cannot compete with those Characteristic bonuses in Reload!
Part 35 is out! You know, I was kind of expecting the Summer portion of the game to breeze on through with fairly quick videos but this proved to be surprisingly in depth and complicated to put together. There's a lot of different events for the month of August! Regardless, we get to have delightful film outings with every member of SEES, pick up a new team member with even more dubious ethics behind fielding them, Junpei manages to rizz a weird girl, and school resumes with a robot school girl now on the class roster. We also have delightful evening walks with Koromaru and our friends on occasion. We're now poised to return to Tartarus, and we actually have a ton of new things to work with! It should be pretty exciting.
Extra Notes
In FES
-I want to show off some more weird mechanics that I haven't had a chance to cover now that the schedule going forward is going to be much less frantic. By checking Social Link ranks with your social links, you can also get a preview of what Personae they benefit, based on what your current level is. This is obviously less helpful than just looking up a compendium online, but if you're committed to using no guides it can be occasionally helpful to see what's out there.
-FES' less demanding evening schedule gives me ample time to show off all the team Koromaru walks! One of the more interesting aspects of the walks featured in this video is that you need to attend the film festival outing with the corresponding team member in order to access them. Weird case of an optional event requiring another optional pre-req considering both of these things serve no practical purpose in most cases.
-Ken joins SEES a little undercooked in the skills department, but he's definitely worth the time to train up as his skill list fills out with some pretty choice abilities in due time.
-I accomplish my main Tartarus goals for the moon cycle, reaching level 40 and grabbing 3 specific Personae: Nata-Taishi, Nandi and Cu Chulainn. Nata-Taishi comes with Masukukaja and Herculean Strike, two skills that will be very useful going forward. (For the former, we need the accuracy buff coming up and the latter is just more than twice as strong as Gale Slash). Nandi, with a Rank 3 Star Social Link, learns the Cool Breeze skill on fusion. This skill restores 8% of your HP AND SP upon battle's conclusion should you have a Persona with it equipped. This is the ultimate SP engine of Persona 3 for all practical purposes, and getting it fused around guarantees the Protag will never run dry. Cu Chulainn doesn't have any particular skills I care about, but he is a decent physical attacking Persona that resists elec, which will become important soon. The real reason I want him though is for weapon fusion, which I'll go in more detail on in a little bit.
-One notable skill that Cu Chulainn does have is Power Charge. Now in future Persona titles, this ability applies a 2.3-2.5 multiplier to the next physical attack you perform. In all versions of Persona 3 prior to Reload though, this skill flatly doubles the damage of the next physical attack you perform. This of course means there's no benefit to using it over just simply performing a physical attack two times in a row. In fact, it's often worse than that due to variance in damage rolls potentially resulting in less damage than two attacks in a row. Now one thing that can be done with it (much more easily in Portable) is setting up your buffs and debuffs so that on the second turn you can launch a Power Charged attack that effectively piggybacks the support spells and gives you the functional effect of launching two attacks with all buffs and debuffs in play. I find this too impractical to set up most of the time, but it is technically more effective than just launching two attacks in a row. The other main thing that can be done with this skill (moreso for its sister skill Mind Charge which affects magic attacks) is that in situations where you aren't able to attack a boss on a given turn, you can use a Charge skill to rev up an attack for when the boss is vulnerable again, which does significantly improve your damage over time. There are exactly two fights in the game where this kind of situation crops up with any degree of regularity, and they are the final boss and bonus boss of the game. Never bother with these skills under normal circumstances.
-Onto Cu Chulainn himself, he is the first Persona we get that creates a Unique Weapon when used in weapon fusion. Cu Chulainn will always create the Spear Gae Bolg when fused into any kind of material weapon. Note that Unique Weapons cannot be used for weapon fusion again, so this isn't a way to cheat material weapons you don't have into your inventory. Gae Bolg is pretty obscene for this stage of the game, being a 260 attack power weapon. We're not going to see any weapons on that level until around December! The other significant thing to note about it is that it deals Wind damage instead of Pierce damage. This has implications, as this means its damage is augmented by passives that boost Wind damage. Serendipitously, Gae Bolg has the Wind Boost passive as its ability! By giving a Spear user (so Ken and the Protag) the Vayu Bracers, this boosts the damage they deal with Gae Bolg by 87.5%, which is even better given its really high attack power for this stage of the game! Even better, Gae Bolg is also boosted by the Spear Mastery passive (1.25X damage dealt by Spear weapons), bringing the overall damage boost for the Spear to 2.34X. Guess what passive Ken learns later on? The only two weaknesses it has is that it only has 85% base accuracy, and since it deals Elemental damage it cannot score critical hits. The former is easy to work around, and the latter hardly matters when its damage is so much higher than anything else you can do normally anyway. Gae Bolg will fall off eventually, but it won't be until the literal last month of the game for that to be a concern.
-I use the ample cash I picked up from Tartarus to pick up more Amp bracers. Since we now have multiple characters who benefit from having these, it only makes sense to pick up copies of all Bracers I'd like to use on multiple characters.
In Portable
-For some reason, all film dates with SEES except for Koromaru's and Junpei's boost Academics in this version of the game. I won't complain, that's the one stat we need to boost up anyway and this is an easy way to speed us along.
-SEES movie dates also serve a slightly more practical purpose for the FemC. Now that all SEES members have social links, almost all of them enjoy point bonuses to their social links from these dates. This becomes immediately relevant for Koromaru in this video.
-I have no real reason to get up to level 39 in Portable, so I likely won't have access to Nandi by the time I'm done with Tartarus. I elect to card Growth 2 onto Eligor to get me to Cool Breeze instead, which should hopefully happen by the conclusion of the coming expedition.
-Continuing on from FES with covering things I've yet to show off because they aren't that important, I check out Be Blue V in Portable. The main notable thing you can do here is work Part Time for a now completely irrelevant amount of cash. The other thing is that since Kurosawa now sells accessories, the store itself has been retooled into a sort of health spa. If you are not already in the Great status, you can use Be Blue V to boost the protagonist up to it. You can also use it as a more reliable way of curing the Tired status, but since Yawn-Be-Gones are so cheap and easy to come by, this is a wildly impractical use of a daytime time slot.
-Speaking of impractical uses of Daytime time slots, I hit up Iwatodai Strip Mall to use Wakatsu since I didn't really have anything else going on. The same restaurants that boost your stats in Reload give the same bonus in all previous versions of the game, but you can only ever get a +3 bonus to a social stat and they can only be used during the day. Never bother with the Iwatodai Strip Mall restaurants, they are a complete waste of time for any stat, but especially for anything that isn't Academics. Since the day would have otherwise been wasted on a movie with Junpei though, I decide to hit it up for fun in this video.
-Ken joins SEES with a much better showing in Portable. Ken is the one character who had his skill list completely reworked in the transition to Portable, so not only does he start with Diarama in this version, he learns Medirama after one level up in Portable, even sooner than Yukari! Were I not committed to using Yukari in this version, I'd be kicking her to the curb right now.
-Note that Gae Bolg is still in the game and obtainable in the same way, but I don't really care to get it. I'm not using Ken, who is now the sole person who can use it, and it's also been nerfed slightly. Gae Bolg in this version now has the fairly useless Dodge Wind bonus tied to it instead of Wind Boost, lowering its maximum damage potential considerably. It's still very good, but given the general buffs Ken got here and the relative unimpressive nature of it compared to the FES version, I don't consider it worth going out of your way to pick it up ASAP.
-Semi-related, this is one notable way the MC/FemC are weaker in Portable. They can no longer use the extremely powerful elemental weapons, which is pretty obnoxious considering they were originally the only character who could learn all the relevant weapon boosting passives to maximize the potential of these weapons.
In Reload
-We pick up Junpei's Critical Amp characteristic, which is where Junpei really starts to come into his own in the art of violence. This skill is a flat 10% boost to his crit rate, which a 1.4X damage modifier applied in addition to the usual critical damage bonus. Junpei doesn't have any crit boosting accessories or high crit skills outside of Hack 'n Blast right now, but those pieces will come flying in soon and Junpei will be swinging for the fences all the time once they do.
-We also get Mitsuru pretty close to unlocking her characteristic. Her's is not all that great, but it is interesting and has a unique synergy with Junpei for exploration once we get it.
-I use up the Security Site Note from the suspicious vendor in Club Escapade, which gives us an upgrade to our pre-emptive strike on the field. We'll get to see it in action soon, but the main thing to note is that it will allows us to secure First Strikes regardless of our position relative to the enemy, which is very useful!
-Ken has been revamped a third time, coming into his own more a Light based attacked with more unique support options such as Dekaja and the repel barrier skills Tetrakarn and Makarakarn. Funnily enough, this takes him back a bit to how he is in FES, where it takes a bit of time for him to really pop off. Once he does though, I'd dare say he's just outright broken in this game.
-Upon entering Tartarus, we now have access to two very potent Major Arcana cards: Chariot and Justice. Chariot permanently increases the Protag's HP by 10. I don't think I need to explain why that's good. Justice is also excellent, allowing us to draw two cards per shuffle time instead of one for the remainder of the expedition once we draw it! Absolutely secure the Justice card as soon as possible once you have access to it.
-Related, we can now pretty quickly get to Arcana Burst and enjoy better shuffle times for the entirety of our Tartarus expedition. By returning to blocks you've already cleared and completing the now trivially difficult Monad doors in them, you can rapidly secure Major Arcana cards and reach Arcana Burst within a matter of 10 minutes. I'll do so offscreen going forward so I can maximize the efficiency of my Tartarus trips before I even begin to break new ground.
Social Progress
In FES
Hanged Man Social Link: Rank 8
Star Social Link: Rank 3 (Technically taken care of last video, but I had to redo a portion of the game to get it so I'll reiterate it here)
Devil Social Link: Rank 10
Tower Social Link: Rank 9
Sun Social Link: Rank 2
In Portable
Strength Social Link: Rank 5
Devil Social Link: Rank 10
Tower Social Link: Rank 10
Once we reach the next weekend in FES, the protag will officially no major commitments to worry about at night and can do whatever. I'll likely start playing a bunch of Arcade games to boost up any Personae I care about assuming I don't have to give Koromaru his walkie that night or go to Tartarus. The FemC has 3 additional social links during the evening, resulting in scheduling being slightly more important for her. Two of them are fairly time consuming due to having high point thresholds against low point yields during the rank up events, while the third is an auto progression link that has a time limit and must be hyperfocused in order to complete it. As a result, we'll still have some pretty meticulous planning for the FemC in how she spends her nights going forward, though there will still occasionally be time to do whatever.
In Reload
Devil Social Link: Rank 5
Tower Social Link: Rank 6
Justice Social Link: Rank 8
Mitsuru's Hang Outs: Reading 2/3 Cooking 2/3
Junpei's Hang Outs: Gardening 3/3 Reading 3/3
Akihiko's Hang Outs: DVDs 2/3 Cooking 0/3
Fuuka's Hang Outs: Gardening 1/3 Reading 1/3
Since we mostly attended movies in this version, the social linking has been light in Reload. We've got Junpei in a good place now, and Mitsuru is in the same situation Yukari was in where we can quickly skip having to use her base characteristic to having her enhanced one immediately depending on how the schedule falls. I hope we get more opportunities for Akihiko soon, he's really dependent on his characteristic to really shine. Tanaka and Mutatsu are progressing slowly in this version, but the last two months of the game will be flush with time to hang out with them should it come to that, so you should never really sweat it. Also a full month later, and people STILL think Chihiro stole that money. Poor girl can't catch a break.
Supplemental: Ken Amada FES/Portable

"This is what my power was meant to be used for!
Level 99 Stats
ST: 55
MA: 66
EN: 58
AG: 70
LU: 55
Ken resists Light and is weak to Dark skills. I have to constantly remind myself Ken has no resistance to Elec attacks.
Skills
Hama, Zionga, and Cruel Attack: Starts With
Diarama: Level 37
Hamaon: Level 41
Recarm: Level 42
Mediarama: Level 51*
Hama Boost: Level 54*
Ziodyne: Level 55*
Vile Assault: Level 59*
Diarahan: Level 62*
Spear Master: Level 65*
Samarecarm: Level 73*
Mediarahan: Level 78*
*Skills marked with an asterisk are ones only obtainable after an in-story upgrade. In Ken's case, rather fortunately this comes within a month and some change of him joining.
Ken is a character that generally gets shit on by the playerbase as being the worst party member in the game, but he's always been one of my favorites to use. I was wondering if in my practice runs I'd find that my appraisal of him might be a result of faulty memory, but I've actually walked away thinking he's even better than I previously thought. Ken doesn't have any one thing that he's amazing at (he is at least the only Light user of the team but that's a debatably useful trait on PS2 and a fairly useless one on Portable). As an all rounder, Akihiko has better attacking stats while Koromaru picks up natural boosts for his Fire magic. As a healer, Yukari learns Mediarama a bit sooner than him but they're otherwise fairly even on that front for most of the game. In terms of raw strength, Junpei and Aigis do trump him there though his Spear Master passive allows him to stay over Aigis once he gets it at least. This all leads to a critical thing though: while there are plenty characters who trump Ken in specific areas, Ken has by far the most versatility of any character in the game. Since healing isn't influenced by MA in this game, he's perfectly capable at keeping the party up and running once he gets Mediarama. Since he has more HP than Yukari as well as slightly more EN, this makes him a more dependable healer than her and also grants him a more useful support niche than something like Koromaru's Sukukaja access. Spear Master flatly boosts his weapon damage by 1.25X, giving him much more impressive single target physicals than Aigis unless she commits to Orgia mode, and with a good weapon he honestly is not that far behind Junpei most of the time. Cruel Attack/Vile Assault are mostly useless in FES, but are situationally helpful in Portable. He's an easy check for Light weaknesses, and while his Elec damage is less impressive than Akihiko's, it's not too difficult to get him close enough to matching Akihiko's numbers.
Ken is just a very solid damage dealer with a wide array of attacking options meaning he's almost never walled out, and even if he doesn't have any good options to swing, his healing skills mean he'll never hurt for something to do for the party. Yukari doesn't enjoy any legitimate advantage in healing over him once he gets Mediarama, and while she technically gets Mediarahan sooner, they both practically learn it in time for the same thing: The final boss. Of course depending on what version you are playing, Ken has very specific things that help to put him over the top for me, so let's cover those things now.
In FES
The big thing here is that Light skills more often than not actually hit their mark when cast against a weakness, meaning Hamaon is a genuinely helpful tool Ken has that he learns very quickly. He does have a very sparse starting skill list in this version, but luckily for him he also joins at a point where he can take advantage of the best thing in his bag of tricks: Gae Bolg. Gae Bolg is a Unique Spear created by fusing Cu Chulainn into any weapon material. This Spear comes with the Wind Boost ability and also deals Wind damage instead of Pierce damage. It also affected by the Vayu Bracers and Spear Master, and when you add all those multipliers together with its respectable 260 power, you get a kid that's swinging around a sonic boom in the form of a stick that makes Yukari's wind magic look like a broken desk fan. Not only does Gae Bolg give Ken an extra attacking type to cover, it's just a fantastically powerful attacking option in general. The only thing that slightly undermines it is that the protagonist can also use it in this version, and he can get quite a bit more out of it with a ST focused Persona that has Wind Amp to free his accessory slot. That hardly matters though, it is incredibly effective to just have them both use Gae Bolg. A lot of people trap themselves in the mentality of having diverse attacking options for the sake of it, but if we're not dealing with wind resistant enemies there's simply no reason not to use double Gae Bolg. Additionally, while the protag will eventually find bigger and better things than Gae Bolg, it's always a relevant choice for Ken who can't simply swap his Persona, and it legitimately makes him stronger than any other non-protag character by a pretty considerable margin. It won't be until the last two months of the game that other characters can outpace Gae Bolg, more than likely using their own version of Gae Bolg. Once Gae Bolg does fall off, it's worth it to keep around for the coverage it offers, and in other cases Ken can rock Gungnir which carries the Elec boost ability to pair wonderfully with Indra Bracers. His Spear Master skill also means powerful weapons like Aeon weapons or his ultimate Spear Pinaka do excellent damage in his hands. Ken is going to be locked in for FES, and he's going to be putting in a lot of work going forward.
In Portable
Surprise! Perhaps in response to Ken's chilly reception on PS2, he's be given a revamped skill list in Portable. Ken's redone skill list is as follows,
Hama, Cruel Attack, Zionga and Diarama: Starts With
Mediarama: Level 37 (note that Ken joins at level 36)
Hamaon: Level 41
Recarm: Level 42
Spear Master: Level 54*
Ziodyne: Level 55*
Vile Assault: Level 59*
Diarahan: Level 62*
Primal Force: Level 65*
Samarecarm: Level 73*
Mediarahan: Level 78*
Some interesting changes here to say the least. Ken picks up Medirama almost immediately, and 6 levels sooner than Yukari to boot, meaning he's a flatly superior healer to her in this version by any practical metric. Spear Master is learned much sooner, although Hama Boost is lost for Primal Force, an addition to Ken's arsenal that makes about as much sense as a return address on an envelope of anthrax. Otherwise the rest of his arsenal is obtained as normal. Some other notable things about the transition to Portable, Light skills just flatly suck in this version and almost never hit anything, especially without the corresponding boost. Hamaon by extension is something of a brick in Ken's skill list now. Gae Bolg has been nerfed slightly, now having the Dodge Wind ability instead of Wind Boost, which is useless on multiple levels for Ken. That said, that merely lowers its maximum potential to "very good" instead of "busted", so it's not an option to be slept on. Since he picks up Mediarama so early in this version, Ken leans more heavily on his support capabilities, and he's darn good with them. He's both sturdier and more evasive than Yukari, and he can pack a mean punch once he grabs Spear Master. Since we don't have to worry about it lifting an enemy up to act again anymore, Cruel Attack/Vile Assault is also a decently useful beatstick option in this game. There are some enemies that we can knock down that don't just get deleted by an All-Out Attack, and the 50% damage bonus these skills get against downed enemies can layout some hefty punishment when we're dealing with them. Like Aigis and Junpei, Ken also benefits from the highly buffed Giga Power Bands, for those situations where his best option is poke the enemy with his Spear Master augmented stick. Were I not committed to the Teen Girl Squad, Ken would also be locked in for Portable because he's just incredibly useful here. While damage potential doesn't reach quite the same highs as it does in FES, he still does quite well. Gae Bolg is now also an exclusive option for him, so the boost it gives him is relatively more pronounced here.
All-in-all, Ken's just an incredible damage dealer for a large portion of the game from this point on, and when others begin to overtake him he has a useful secondary specialization in healing to fall back on. His versatility means there's never really a bad situation to have him in the party for, and his redundancies with characters like Akihiko hardly matter when most random battles from this point aren't going to make it past the Protagonist's turn. Don't sleep on Ken, he is fantastic in these games and I hope to demonstrate why that is as we go.
Supplemental: Ken Amada Reload
"I have to do... what must be done... I have to!"
Skills
Zionga, Kougaon, Mediarama, Makarakarn, Dekaja: Starts With
Makouga: Level 38
Tetrakarn: Level 42
Samarecarm: Level 47
Vile Assault: Level 51
Ziodyne: Level 55
Mahamaon: Level 60
Mediarahan: Level 64
Makougaon: Level 68
Light Amp: Level 72
Heat Riser: Level 76
That's certainly a lot more tricks Ken has up his sleeve in this version! In Reload, Ken leans much harder into being a dedicated support. In addition to his healing, which retains the Portable buff he got of getting the good stuff sooner than Yukari, Ken also picks up Tetrakarn to bounce physical attacks, Makarakarn for a one hit nullification of a character's weakness, Dekaja for enemy buff canceling, and end game he can grab Heat Riser which has some situational application. Most of his Light skills have been subbed out for the new Kouha line, with Mahamaon being added as a late game pick up (That I couldn't particularly recommend). Yukari does actually have a slight edge as a dedicated healer here as MA does affect healing power in this game, but it's a minor advantage for most of the game and is easily rendered moot with an accessory that can replicate Divine Grace (or you know, the fixed power Mediarahan). On the offensive front, the Kouha line is flatly stronger than other elements and the end game Light Amp can make the damage of Kougaon pretty sizable. Vile Assault is also a fairly good option somewhat stymied by Ken's mediocre natural ST, while Ken's Elec magic largely retains its purpose of being just for weakness exploitation.
Of course this leads into an obvious problem: you can only have 8 skills so some cuts must be made. Much like future characters such as Teddie and Haru, Ken has many good skills to choose from, but he simply cannot have them all. This means at some point you'll have to pick a lane for him and drop some of the chaff from his skill list. For my money, it's best to have Ken focus on his support and drop most of his attacking options. Taking the two Karn skills, the Dia and Recarm skills and Dekaja leaves us with 3 skill slots. I tend to prefer single target damage for magic if I have to absolutely make a choice, so I usually leave Kougaon and grab Light Amp later to maximize the potency of that if Ken genuinely has nothing left to do. Your final skill just comes down to preference really, and every potential non-light skill choice has its perks. Vile Assault is a decent damaging skill, but Ken's not the best user of it. Zio gives Ken a non-redundant coverage option considering his Spears already do Pierce damage, but it is easily Ken's weakest attacking option and serves no purpose outside of hitting weaknesses. Finally, Heat Riser is a single target buff skill that applies all 3 buff types. Personally, I think having two other characters just up Matarukaja and Marakukaja is all the buffing you ever need (to say nothing of how auto team buffs render this skill pointless for the first 3 turns of a battle) but Heat Riser can be a nice way to quickly re-establish buffs on a character about to use a Theurgy if they happened to be purged or countered by the enemy. I'll probably end up rocking Ziodyne or Vile Assault by the end game for him, but I could easily end up changing my mind once that point rolls around since I largely prefer Ken for his support skills anyway.
So how does Ken stack up to his prior iterations? He's very good! He's almost inarguably the best supporter (Yukari is a good healer but the only support option she has outside of that is the Sukunda line) and he has a wide array of exclusive options that make him stand out heavily from the rest of the cast compared to his generalist archetype in FES/Portable. He still has his slight durability edge on Yukari, and his wide coverage combined with fast speed means he often goes first and has ample options to initiate Shifts, which has its own strategic applications. Does Ken have any flaws? Well compared to FES/Portable where he had an above average SP pool, his SP pool in Reload is the lowest in the game. Ken can run dry during exploration very fast, though this surprisingly turns out to be a mixed blessing for reasons will cover in a bit. How do I feel about Ken? You might be shocked to hear given my fairly positive appraisal of him in FES/Portable but I actually don't like using Ken that much in Reload. Not because he's bad, mind, but because he's very good in a very boring way. He has excellent healing from the jump, can revive people too, he can spam out Reflects to counter any potential weakness in your line up and his damage is just kind of bad in this version so I rarely have him do anything but support in boss fights. In FES and Portable, he has very versatile damage dealing options and it's a fun experiment to maximize those and see just what the fledgling SEES member is capable of. In Reload, he just hangs back and heal-bots most of the time. A valuable thing, to be certain, but not super exciting to me on a personal level. Still, I plan to use everyone fairly equally, so we'll be seeing plenty of Ken going forward. Let's not get too ahead of ourselves though, we still have some things to go over for Ken. You might not be sold on him just yet, but there's one addition to Ken's loadout that is near universally agreed to put him over the top.
Characteristic and Theurgy
On certain evenings, you can spend time with Ken either cooking (okay, brewing coffee but functionally it's the same) or watching DVDs. Upon completing 3 of either of these activities, Ken will gain the Spirt Refresh characteristic. Once Ken has this, he will regen 5 SP at the start of his turn though not when he gets a One More. This is important and unfortunate. Once all 6 hang outs have been completed, Ken's characteristic upgrades to Spirit Restore which doubles the effect, restoring 10 SP when his turn comes around. Starting with Koromaru, the characteristics you start seeing are a lot less flashy and definitely less useful, but Ken has one of the better ones gained at that point. Since his max SP is so low, on a single turn this is essentially a 10 SP reduction to any spell he casts. This is nowhere close to the economical boon of Healing Apex, but it's also perfectly fine. You can also stack it with accessories that replicate the Invigorate ability line or the Shift SP restorative skills to gain even more of a per turn refund. Because it doesn't proc on One More, it doesn't help too much if your using Ken to exploit weaknesses left and right, but Shifting off of him immediately when he does score a weakness hit can give him a lot more mileage. There is one other perk of this passive just being a roundabout universal 10 SP reduction to all of Ken's spells.
Ken's Theurgy has a fairly unique charge condition that turns a weakness into a strength. When Ken's current SP is 50% or less of his maximum, Ken gains additional Theurgy charge. Since Ken casts fairly expensive spells with a low SP pool backing them, he rapidly reaches this condition and charges his Theurgy super quick. In boss fights, it's quite easy to keep him there as well without actually running out, since in most boss battles he'll seldom be scoring One Mores. Do his Theurgies make this a huge boon for him? Almost exactly like Koromaru, Ken brings a whatever-tier offensive Theurgy to the table and an absolutely cracked support Theurgy alongside it.
Divine Retribution: A single target Light skill that has good base power, but like with Koromaru it's really hard for me to recommend this considering the alternative. Don't get me wrong, I did see the comments about how stacking up passives for Koromaru and adding in Concentrate by any way you can get it does make the relatively pedestrian Theurgy really shine, and much the same is true for Ken I'm sure. The thing is though, stacking passives and buffs to jack up Theurgy damage is not something only Ken or Koromaru can do, and there is definitely an opportunity cost into boosting up these skills over what you can do with the alternative. I could Concentrate an optimized Koromaru, or I could have him Charge up Junpei and Orgia Mode Aigis and have both of them unload for what is likely better damage than what Koromaru can do, and that's how I feel about this skill too. A fun novelty if you build around it, but I definitely think the alternative is more practical. I really do think this one should have been multi-targeting at least, I feel like that would have benefitted it greatly.
Divine Intervention: I pretty regularly see this called the most broken Theurgy in the game, and I'm inclined to agree with that. Divine Intervention is another support Theurgy, and it has one hell of an effect. When cast, it fires off Mediarahan, Samarecarm, Tetrakarn and Makarakarn all at once on the entire party. To simplify that, it fully heals the entire party and makes them functionally immortal in 98% of the battles in the game for 1 or possibly even 2 turns. And because Ken can get his Theurgy back up very quickly with his charge condition, he can often have this ready to go again within a few turns if the fight starts going poorly for you somehow. This is the apex of unique Ken skills in Reload. Since Tetrakarn and Makarakarn have been nerfed into single target skills in recent Persona games, this is the only way to get Repel barriers on the entire party in one action, and it ups both varieties. The only other way you can revive multiple characters at once is with Fuuka's Theurgy, and that doesn't come online nearly as quickly as Ken's does. Admittedly, since the Protagonist dying is a game over and Ken obviously needs to be alive to cast his Theurgy, you'll never be able to revive more than two people with it, but it's not impossible for that situation to crop up. This is another thing that make me feel Ken is pretty boring to use in Reload. Since he's constantly healing the party anyway, you have little reason to not just fire this off as soon as you get it. It's a free party heal that guarantees at least one turn of no incoming damage, and once it's gone Ken can get right into charging the next one up should it come down to that. Even beyond the obvious benefits, it has really potent non-obvious benefits. The only almighty ailment skill in the game is Virus Breath (which you almost never see), so Tetrakarn and Makarakarn can deflect any ailment thrown your way, making this skill also have the function of warding off ailments and ensuring your other characters can use their Theurgies when their turn comes around. Divine Intervention is the ultimate support skill in the game. I can't even tell you to accept no substitutes because nothing else even comes close to the utility of this skill. Just to take it one step further, Ken is also one of the first characters to get his storyline upgrade, which is just a little over a month after he joins. You get a lot more time to enjoy just how obscene this Theurgy is.
I can tell they really wanted people to give Ken a fair shake in Reload, and I think they might have overcorrected because he is ridiculously overtuned in this game. He outright starts with better healing than Yukari in this version (as opposed to Portable where he at least had to get one level up to secure that) and while Yukari does catch up on that front, she never quite hits the same highs Ken does on team support. His ability to spam heals and repels while also having more niche traits like buff purging and wide coverage means you can basically never go wrong with brining him along. At the same time, while he has picked up some new damage dealing options, Reload places greater emphasis on having good stats and good attack skill access to deal high damage, and Ken definitely falters a bit here. Not to say he can't deal good damage, but he will never come close to the offensive specialists in that regard (even less so than Koromaru!), so I can't say it's super practical to try and build him that way for anything other than deliberately trying to shake things up. Like I said before, I find Ken to be really boring in this game. Previously I found him to be a diamond in the rough that had loads of interesting options in fights, while in Reload he's just kind of too perfect with the correct moves for him to make almost always being obvious. Of course if I'm just trying to recommend a team for people struggling with the game and are looking for an easy win, Ken is one of the first people I'd recommend they add when they get access to him. He covers all your healing and defensive needs, and his own deficiencies are easily accounted for. Feed him some Guard Incenses and slap on a Dark nullifying accessory, and you find yourself with a nigh unkillable anchor for your team who can keep them going the distance.
The next supplemental video is out! I forwent all movie dates with SEES except for Fuuka's, who we have to go with to keep progress on her Social Link going on schedule. Correspondingly, we makes tons of progress on Maiko's link, initiate Akinari's and complete Bunkichi & Mitsuko's link. We also finish off Tanaka in FES and are poised to finish with Mutatsu soon as well. With those two done, we will have complete freedom to do whatever during the nights in FES unless I want to walk Koromaru with somebody. Over in Portable, most of the links covered in the last video were exclusive and have already been seen, so we just had the capstone for Tanaka and Mutatsu to show here. Portable is probably going to feature much more infrequently in the social link videos going forward, as we have multiple FemC exclusive links unlocking in the near future and we're also going to be pursuing the established unique links we already have such as Saori and Rio.
I've got all the footage for the next Tartarus video recorded, so hopefully I should be able to edit the first portion of it together and get it uploaded this weekend. I do have an upcoming vacation, so it'll likely be a few weeks until we get to the next Full Moon since I try to avoid spamming out hour long videos.
Part 36 is out! It's another cycle end Tartarus blitz... in Portable and Reload anyway! I've had Tartarus done for awhile in FES, which is honestly something I really appreciate about the more flexible night scheduling that game has. The second half of Yabbashah mostly serves as a good proving ground for our new additions to SEES, there are many enemies weak to Ken and Koromaru here. Their performance in boss fights is a bit more dubious currently, though Koromaru comes in with the raw stats and skills to do fairly well in spite of that. Beyond that, it's a fairly droll expedition with no interesting shake ups like the last trip had. Look forward to the next part though, I play like complete ass in Reload due to forgetting a couple of key things that would have made The Journey much easier.
Extra Notes
In FES
-Much like Aigis, Koromaru joins ready to use and quite good for this stage of the game really. He's a dubious late game member, but joining with Tier 2 magic just after we got the Amp Bracers allows him to notch pretty high damage against anything not Fire resistant. He's also very sturdy and has an uncommon (though dangerous) weakness, meaning he'll usually chip in every turn he gets. He probably won't see much use after this moon cycle in FES because Junpei picks up the insanely useful Marakukaja once he breaks into the 40's, but may as well put him to work for now.
-By contrast, Aigis is already flagging in the damage department, even when in Orgia mode. Luckily I'll be trying to make her work in Portable instead, so she'll likely be toasting the bench for the foreseeable future in FES.
-Ken is largely absent from this first video for FES simply because I did the first expedition shortly after Koromaru joined but before Ken did. I made sure to include a brief rundown for him that I recorded in the second expedition video.
-This holds true for Portable as well, you'll absolutely want to get an item-bearing Narcissus and level it to the point that it produces its item. It'll be very important to have at least one Narcissus Flower for the second Tartarus boss for this cycle, and it'll also come in handy for a Full Moon boss down the line.
-Another shared Portable mechanic, this is something I've been nebulously aware of but not until this LP did I really think of actually utilizing this to streamline things. Take note of any floors where you get money or equipment! While loot gained in Tartarus is random on a per chest basis, it's important to note that there is a method to how the game decides what you get. Each floor in Tartarus has a specific item list it pulls from to determine the loot you get e.g. on Floor 91 I get money and a piece of equipment from the chests meaning you'll always get that type of treasure on floor 91, and while these obviously update with better stuff as you ascend higher and higher, these lists are what you can always expect to find when returning to certain floors! The item lists come in 3 distinct flavors,
1.) "Garbage floors". If you ever get near-literal trash like Rotten Gravy, Odd Morsels, or a Muscle Drink, you're on a garbage floor. These floors seldom ever provide anything but these items should you search them, though I THINK there's occasional "prizes" like money and potent healing items such as Revival Beads. Mostly you just get trash from these though. Note down any floors where you get the three previously mentioned items as something to speed through and not even bother with chests when training/farming in Tartarus.
2.) "Cheap Pharma floors". If you get any of the Dis-Whatever cures from a chest, you're almost certainly on a Cheap Pharma floor. You'll get Dis items, Me Patra Gems, Medicines and Medical Powders, stuff like that. Proving to be something akin to those drug stores that also have antiquities on the side, you also occasionally get the attack items gems that replicate spells from these floors. As you ascend higher and higher, these floors also have not terrible odds of spitting out items like Revival Beads and Beads, so they can be worth scouring if you're in need of the latter. Otherwise I usually just pass on by these.
3.) "Payday floors." Large monetary payouts and equipment awaits you on these floors! These are the floors to take note of, and are absolutely the ones you want to scour. These will aware you with better and better amounts of money/types of equipment as you ascend Tartarus. These allow you to outfit your party for free and build up your liquid assets for any potential purchases you'd like to make! For what we explore within this video, floors 91, 93, 95 and 96 are Payday floors, and should be the ones to beeline to when going back through this portion of Yabbashah.
There doesn't seem to be any consistent pattern to how the game decides what floor is a Payday floor, although odd numbered floors, perhaps by coincidence, are more often Payday floors. You can also have multiple Payday floors in a row, as seen in the above examples, so be sure to check and take notes on every floor!
-Money chests are kind of interesting, as while the maximum payout for them gradually goes up like you'd expect, the lower limit for what you can get from them never really changes. Even by the endgame, it is not impossible for a chest at floor 236 to give you 4 figure or even 3 figure cash payouts depending on what the RNG spits out. For this section of Yabbashah, the most we can expect is around 49-50k Yen, but you'll only occasionally get that. Set your expectations for around 10-20k Yen. As per usual, since equipment sell prices are doubled in Portable, you can expect slightly more stable income from equipment chests though it is not something you get on-demand, which is important to keep in mind if you have any compendium purchases you need to make immediately.
-So how do Rare chests factor into all this? In general, any floor can have Rare Chests with about a 10% chance or so that a chest is Rare instead of the usual silver briefcase. Rare chest also have floor-dependent item lists they pull from, though it works a little different. On Garbage and Cheap Pharma floors, Rare chests pull from a "common" pull of valuable consumables. Attack Mirrors, Magic Mirrors, the ever valuable Homunculus, and Balms of Life are what you can expect from Rare chests on these floors, and these are the only reason you'd ever want to scour these floors. When a Rare chest spawns on a Payday floor, it instead has an equipment pool it pulls from that is floor dependent. A good example of how this works is the Rare Katanas. Juzumaru, one we haven't thought about in awhile, was the sole equipment you could get from Rare Chests on Floor 11, for instance. This isn't super critical to note, but it is handy to know if you find something extremely valuable from a particular floor like a Berserker's Seal or Sorcerer's Mark.
-This system is broadly the same in Reload, but the item lists and cash yields are a bit more smoothed out and consistent compared to the roller coaster of prizes you'd get in FES and Portable. It's also obviously much less exploitable, since treasure no longer refreshes every time you return to the Tartarus lobby.
-Nothing much to say about the boss for this video really. It's pretty tee'd up for you and Koromaru to annihilate it with All-Out Attacks. I had to think a little harder about how I wanted to approach it in Portable, but I was able to come up with something just as good if a little poorly executed.
-I mistakenly think I want to reach just level 39 this moon cycle, I actually want to hit 40. The payoff for doing so is well worth the effort.
In Portable
-Ken gets Mediarama within a level of joining in this version, making him much easier to use from the jump and it gives him a distinct advantage over Yukari for a decent length of time. I won't be using him in Portable, but I'd highly recommend fielding him in this version if you aren't going for a gimmick team like I am.
-I don't have any particular level goal in mind for Portable at this point. Level 39 carries the same benefit it does in FES, but I can card Growth skills onto Eligor so it's not as critical for the access of Cool Breeze. I ultimately ended up reaching Level 38, which tempted me to continue to 39 but I decided to keep my levels a bit lower than FES to keep things interesting.
-Using a consistent party is a good strategy for FES and Portable, as level plays a perhaps too large role in damage dealt/received. Keeping a consistent lineup means everyone maintains a consistent performance in battle as you progress through the game.
-Take note of Mitsuru's HP and remember she's not wearing any HP boosting equipment. She's remarkably sturdy for a caster!
-Event floors are a mechanic that have come up sporadically but I haven't really dedicated much focus to them. I'll be going over these now for Portable since this version made some additions to the mechanic to make it a bit more interesting. When revisiting a floor you've already explored in Tartarus, there is a slight chance that it will be an Event floor, which can result in numerous things happening. In Portable, a new mechanic referred to as Accident-Prone Nights has been added. Specific nights in Portable will be Accident-Prone, resulting in a higher chance that event floors will occur. These are the same nights on the calendar every single playthrough, if you ever want to make use of them in a run. Event floors aren't too different from standard ones in layout, but they will have a specific effect in play that you have to work around. These effects have the secondary consequence of greatly reducing the amount of time it takes for the Reaper to show up, with him coming in about 1 minutes as opposed to the 5-10 you normally get (with two exceptions in Portable). The floor events you can get are as follows,
1.)No enemies present. This one is notable for actually creating non-standard floors. As opposed to the 2 chests floors in Tartarus usually have, enemy-free floors can have up to 8 or possibly more chests on them (though sometimes it'll be the standard amount). If it's a Payday floor, this is great! Of course, the Reaper shows up within a minute of you arriving on such a floor, so better be quick. These floors also always have an Access point, so you have two avenues to escape should it come to it. Skeedaddle from these if you get them on Garbage or Cheap Pharma floors, those items are certainly not worth the risk.
2.) Many enemies present. The exact opposite kind of floor! Like the name implies, the floor will be absolutely packed with enemies. These enemies have a unique trait: Double EXP! These floors can be fantastic for level grinding, but be wary: the Reaper shows up fast. These floors are likely to have Access Points, though I'm not sure if they are guaranteed. Certainly comes in handy if you absolutely need to jet from them though.
3.) Many Enemies, All Rare Forms. Like the name implies, this a variant of the Many Enemies floor where everything is a Rare Form Shadow. In FES, these are great ways for securing Nihil Weapons and getting the occasional Coin to sell. These work a bit differently in Portable. The Rare Forms on these floors in Portable will ALWAYS drop their Coin item instead of fusion materials. Additionally, they are the only types of Rare Forms that can trigger Shuffle Time. Shuffle Time off of these will have only Coin and Sword cards that are always cursed, docking even more time from the already reduced Repear timer. These cards tend to be a level or 2 higher than the average Shuffle Time you'd get for whatever section of Tartarus you are in though, so it might be worth the risk depending. I believe this is the last kind of event floor you can get in FES, though possibly the next one also can happen and I just have had bad luck with seeing it/don't remember it.
4.)Many Enemies, All Strong Shadows. Exactly what it says on the tin, nothing but flashing pink Shadows and absolute boatloads of them. These are THE floors to grind on in Portable if that's what you want to do. It's high risk, but the amount of Experience you can get with a Wand card from these floors is just outright stupid. Remember that the Wand cards have been buffed to 2.2X from level 1, so you get 4.4X the amount of EXP just from drawing that, on enemies that already give out extremely high EXP! I believe this is a Portable exclusive event floor, but I'm not 100% sure.
5.)Get more EXP from fighting. All events going forward are definitely Portable exclusive. I'm not sure if there is a mechanical equivalent to this in FES, and there's a reason I'm saying that. Regardless, these floors aren't quite as helpful as they might sound. Whatever the multiplier it applies is, it certainly isn't double like it is for the Many Enemy floors. I want to say maybe it's 50%, but it's possibly less than that. It's a nice boon when it happens, but it's not something I'd actively seek out. It does have one nice trait over Many Enemy floors that I'll cover in a bit though. Another note about this floor type and the rest going forward, to my knowledge they do not have a reduced Reaper Timer, or if they do it is much less pronounced than the other event floors we've covered so far.
6.)Get more items from enemies. Item drop rates for Shadows are doubled, making it much easier to get gems when fighting them. This exists in FES in a wildly different capacity: It's a buff you can get from the Inari Sushi and Naganaki Shrine that applies for your entire Tartarus exploration for the day you get it (it costs time to do this so don't get too excited). In Portable, it's now a Floor Event, creating a weird situation where it's less powerful but you're more likely to get use out of it. Anyways, if you're in a section of Tartarus where Shadows drop gems you care about, it's a good idea to get the most out of this when it happens. Onyx, Opals, Sapphires and Diamonds are high value gems to keep in mind when this pops up.
7.)Full View of The Floor. You enter the floor with your map already filled in! Nothing flashy, just a nice perk every now and again.
8.)Black Out Floor. FUCK these floors man. The area surrounding you is darkened, making it hard to see what lies ahead, and your map is disabled. These floors are super obnoxious, not helped by the fact they usually pull large layouts. It can be hell to find the Stairs on these floors, and the reduced vision only affects you. Shadows see you just fine. It really sucks to get these, and they are the biggest pain in the ass on accident prone nights.
Now for the first 4 on these list, there's one thing to keep in mind with them: Specific floor events regarding enemies are particular to specific regions of Tartarus. For instance, in Thebel, you will ONLY ever get No Enemy floors when an event happens. In the second half of Arqa, you will ONLY get Rare Form enemy floors when an event happens. This can be quite handy to know for the purposes of Farming and Grinding, so try to keep these things in mind. The latter 4 floor events in Portable can happen anyway, making this mechanic quite a bit more dynamic than it was in the PS2 versions.
-Reload sort of has a system like this, but it's not quite as fleshed out as it was originally, funnily enough. We've yet to see these replacement events yet, though I believe you can get floors with Only Strong Shadows at this point.
-I opt to hammer on the boss with my juiced up Ares physicals in this version. This leads into another point, I want to be mindful of which Personae produce skill cards with better physical skills as they come along. Since I have such a juiced up Physical attacker already, I may as well kit him out for attacking. Nata Taishi is the first one that I'd like to pick up for this purpose, he carries the card for Herculean Strike which is more than twice the base power of Gale Slash.
In Reload
-I clear out the Monad Doors of the previous section of Yabbashah offscreen to quickly get myself to Arcana Burst before beginning exploration proper. This is a nice and easy way to quickly secure Major Arcana like Justice and Chariot, so if you're cool with burning 10 minutes to hunt those down and utterly trouncing the Monad Bosses behind them, I'd recommend. It's also a good source of Gems and Fusion material!
-Ken and Koromaru have much better attacking options from the start in Reload, and many of the enemies here are weak to them. It's a good idea to bring them along.
-Ken outright starts with Mediarama here, making him a great healer right off the bat. Still, his SP runs dry quickly, and Yukari has Healing Apex now so be mindful of that if you leave her behind.
-We get Black Frost in this video, who is an AMAZING Persona. Maeiga and Dark Boost is awesome, and he's our first access to Tier 3 magic with Bufudyne and Agidyne. Get the correct boosts on him, and he deals some choice damage. It's honestly not hard to end up using him the entire game, a marked step up from his status in FES and Portable where he becomes available far too late to really be all that much help.
-With King Frost and Black Frost, we get access to the King and I Theurgy for the Protagonist! This Theurgy is fantastic, a highly damaging multi-target Ice skill. With Ice Boosts and Multi-Target Boost, this is one of the best damage dealing options the Protagonist will have for a long time. It is a tremendous step up from Jack Brothers, and allows the Protag to keep pace with our dominant physical fighters when it comes to damage, to say nothing of Black Frost's single target dominance at this stage.
-With Eligor, I have access to Life Aid AKA Cool Breeze now. This is the premier SP engine of Persona 3, but Eligor himself is not a great user of it. I'd recommend fusing him into something stronger, and then carding a full set of elemental magic onto it in order to have something that covers all weaknesses and refunds the SP used to hit them. Because I'm a dumbass, I don't think to do this until after the exploration is finished, which leads to numerous disasters in the next video.
-We get a good example of how Koromaru's Power Howling can completely bypass the conventional means for dealing with a boss. The extreme ramping it does to Junpei and Aigis' damage means that even having my buffs and debuffs contested didn't set me back too much.
I'll be working on the next Tartarus video later tonight, but until then I had another pseudo-update that's a sneak preview for a video that won't manifest for another 6-7 months. Once again, this is a clear of FES' bonus boss using a more conventional strategy with all the tools in place to make it relatively manageable. If you don't know who the boss is, and would like to keep it that way until the time comes, ignore this post. This time around the fight is commentated, and this will be the segment I open the video that covers all versions of the bonus boss+the Portable exclusive bonus boss with.
https://youtu.be/_ZcpAZTe6Ss
Despite this being a much more refined version of my previous clear of the fight with only one notable execution error, as you'd expect my luck goes out the window once I hit the record button and I get two false starts on the fight that get discarded due to random crits from the boss that I can't really account for. Sometimes I could avert disaster by playing a little more conservatively, but other times the boss will just wing you with multiple crits on the second turn they get. As long as that doesn't happen though, the set up I have more or less makes this fight just a matter of time. This is actually the first time ever I've had to use the Plume of Dusk, I didn't have it for the previous version of the fight and didn't even know how it worked when starting this recording. Having it did make me feel comfortable playing a bit more risky at points, I will admit.
In other exciting news, I have officially completed Persona 3 FES 100% on my personal file!
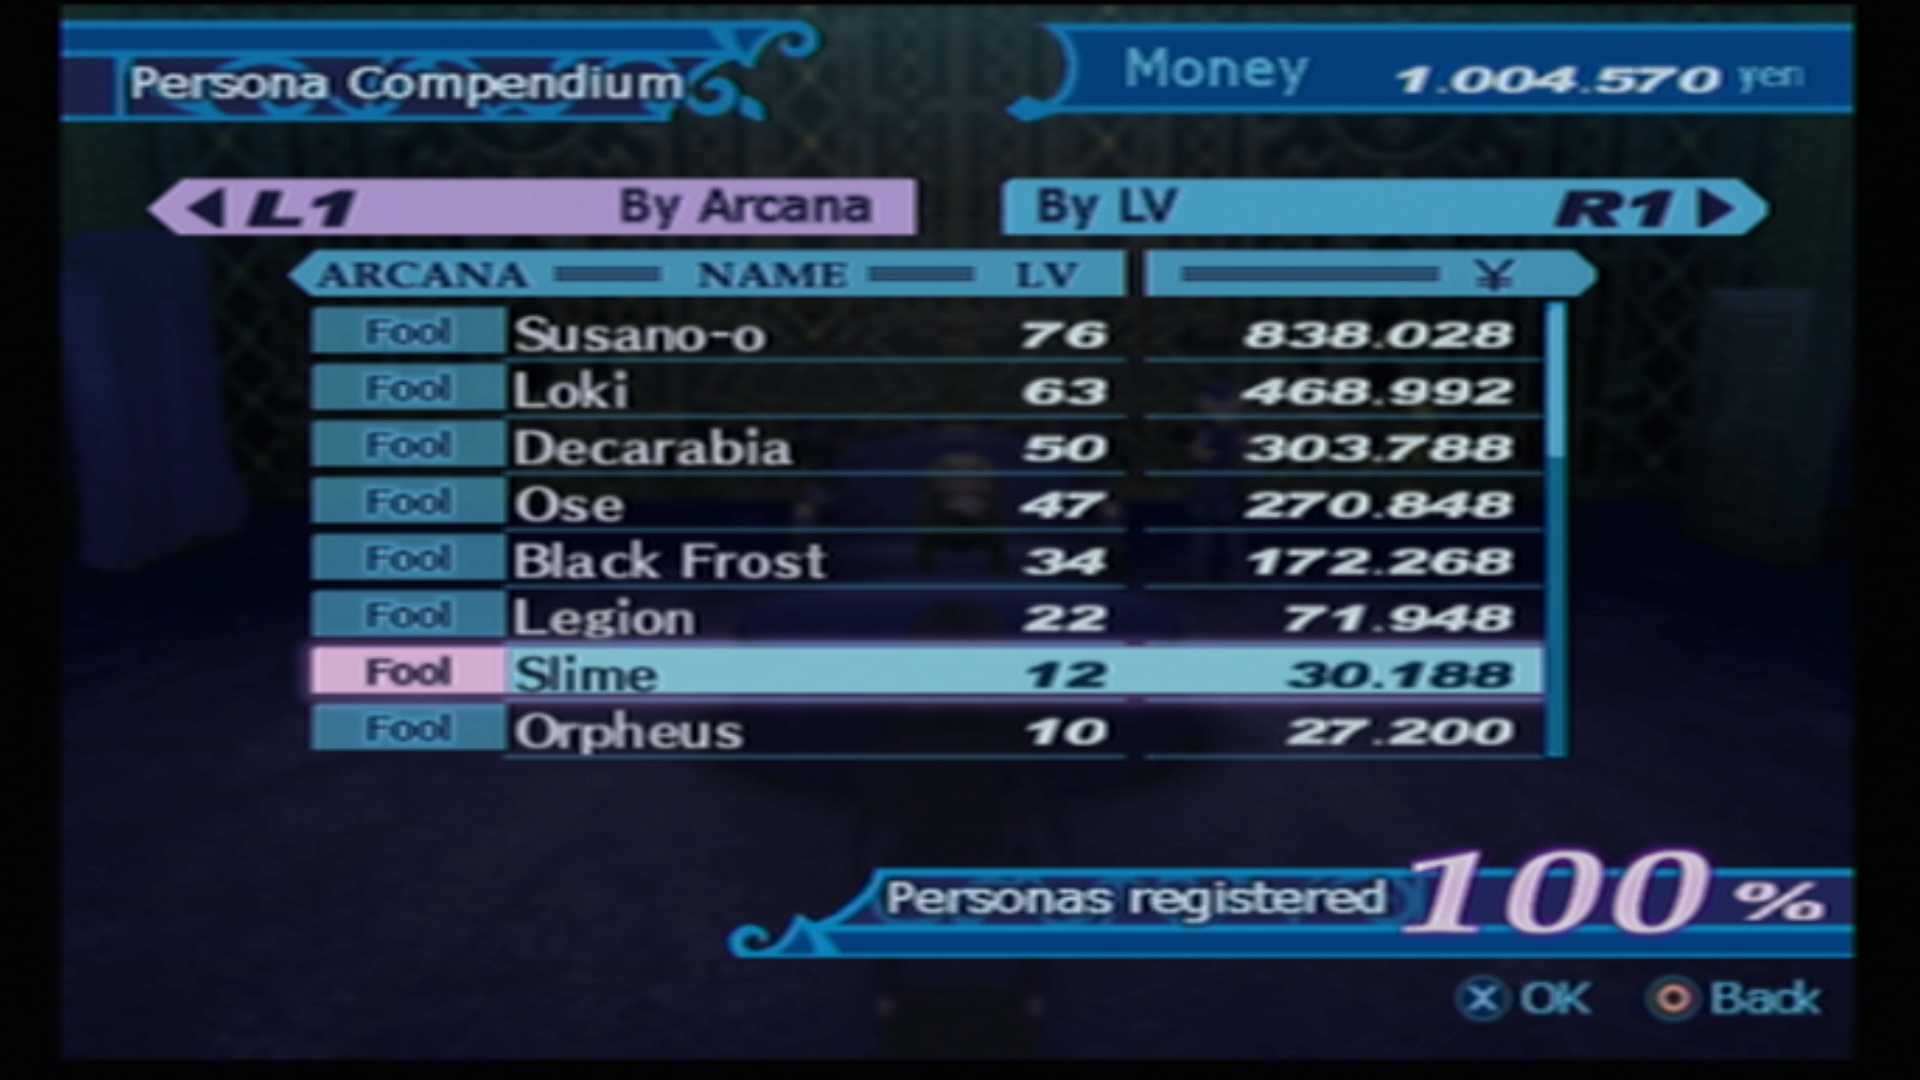
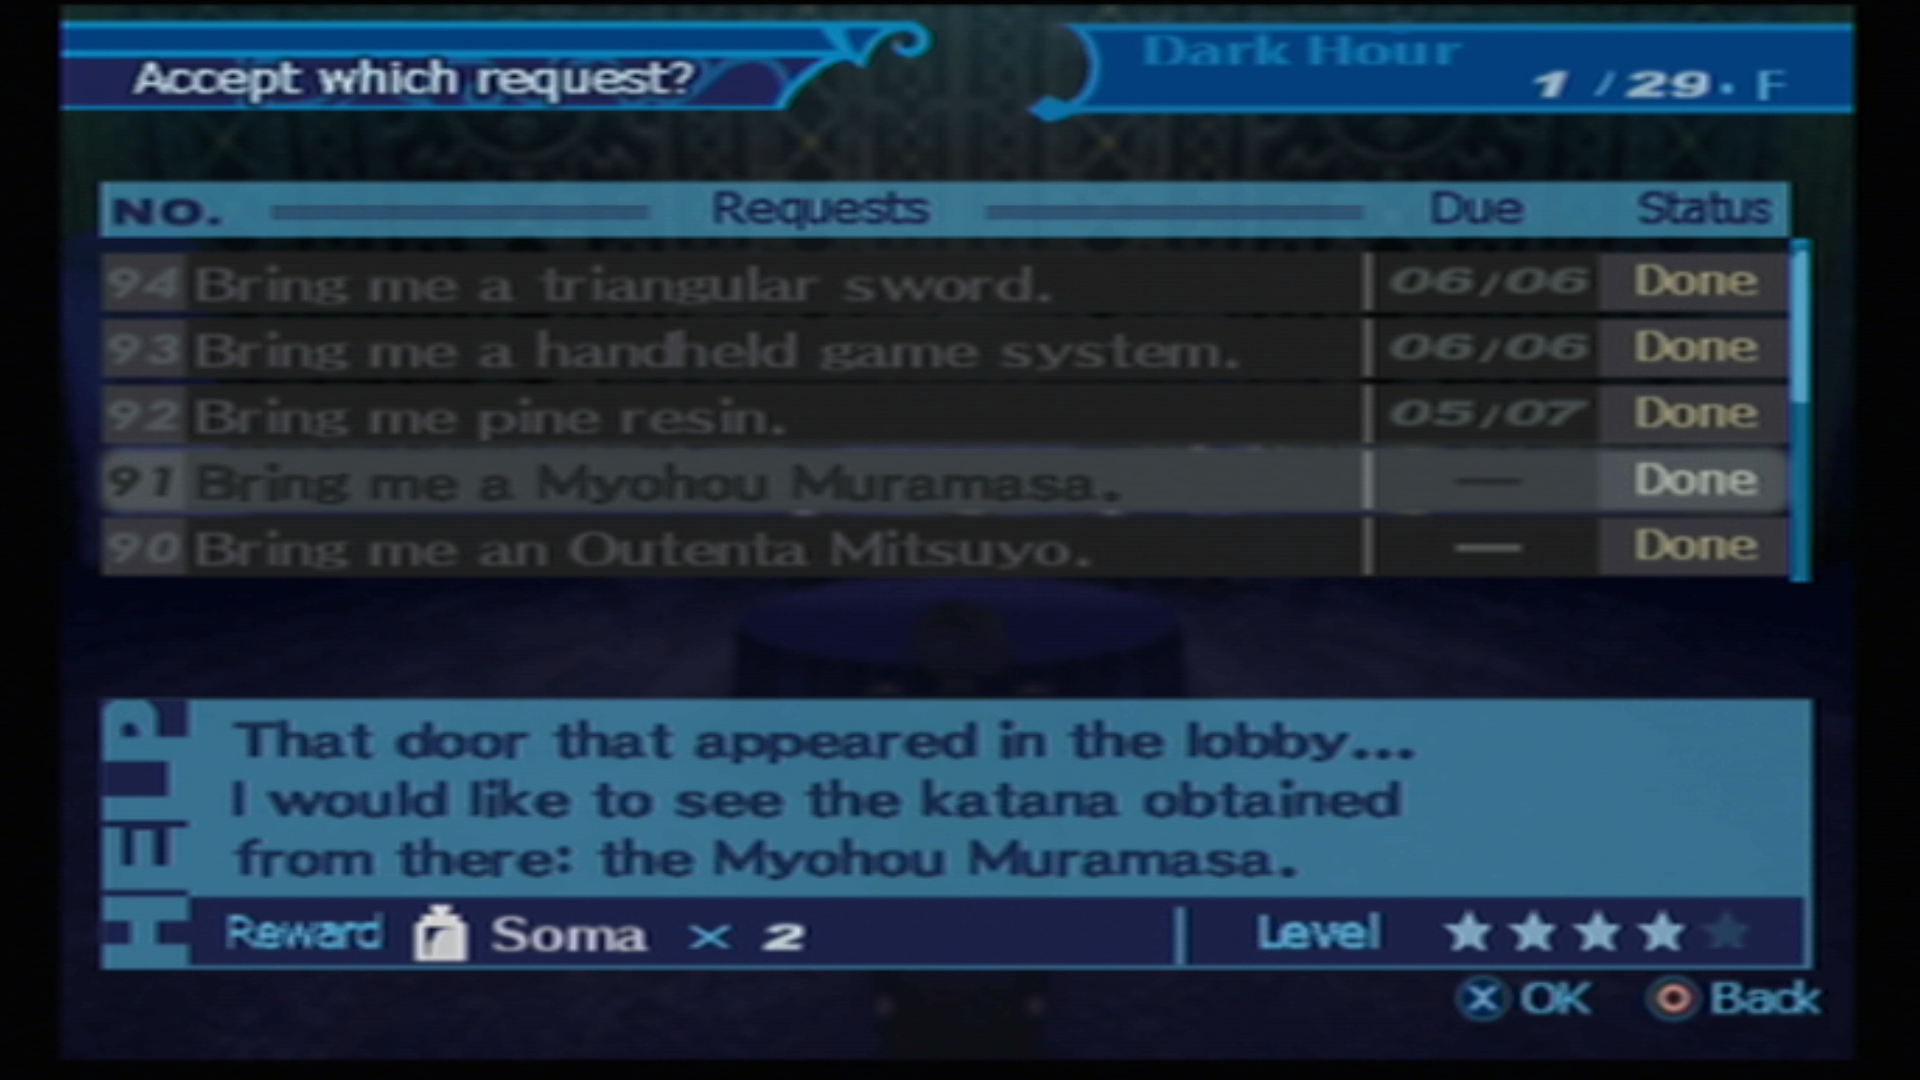
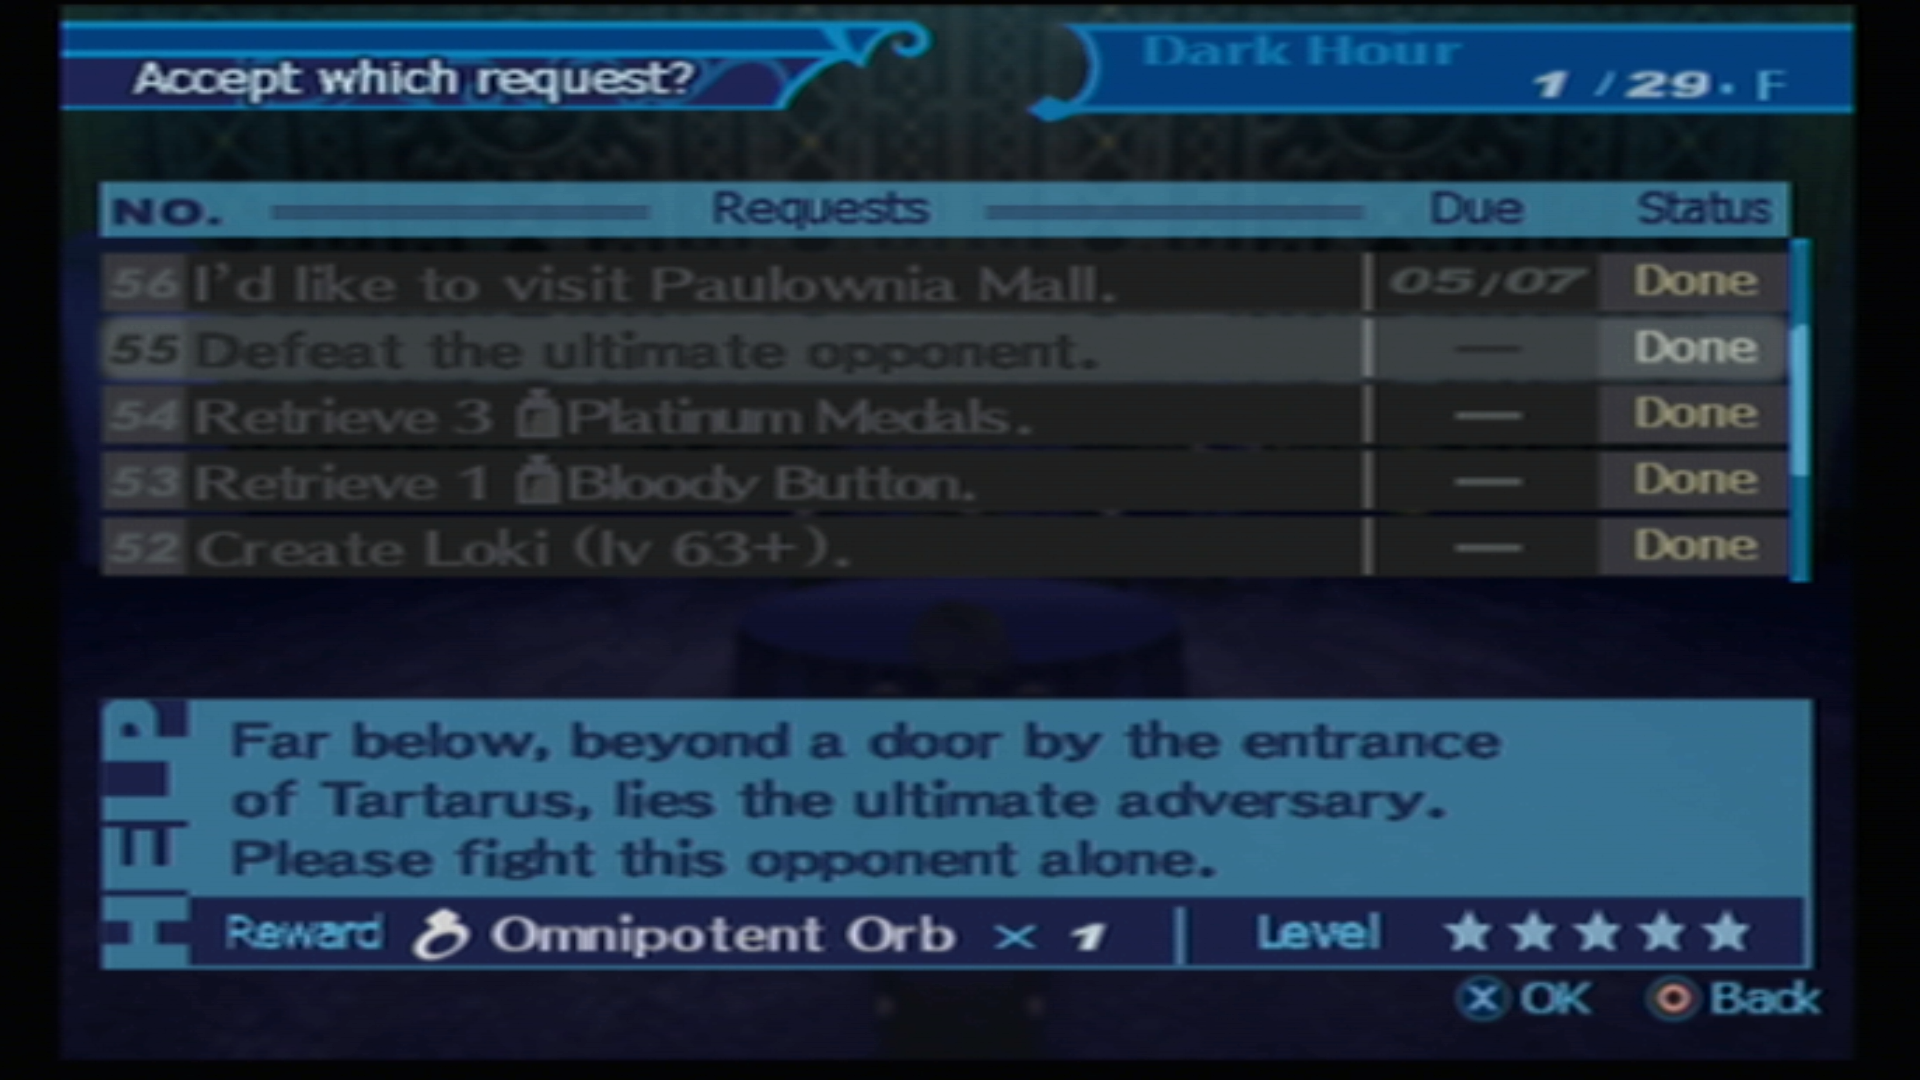
Now that I don't have that to chip away at anymore while I ride my exercise bike, I may just go ahead and create a separate file for what we currently have with Portable and Reload and achieve the same there for the LP!
If I do go that route, it won't take nearly as long, a lot of the playtime from FES comes from how agonizingly slow the pace is in the game and the fact you can't fight the bonus boss unless you start a New Game + file.
Part 37 is out! We switch POVs to Reload predominantly and resume exploration of the final section of Yabbashah. I play this portion of Tartarus quite sloppy and have numerous boondoggles along the way. I've been casually playing The Answer in my free time which has both a wildly different upgraded pre-emptive strike that I also have the charge time upgrade for at the stage of the DLC I'm in, so the slow timing for The Journey's fairly different pre-emptive strike really throws me. This is also a good example of how playing wildly different versions of the same game can cause you to lose sight of effective strategies specific to one version. I really should have fused off Eligor into something new and customized it with cards to have all elements covered (which I did do after recording this), but I was so locked into exploration mode that I just didn't consider this as I went and was running a fairly sub-optimal team that struggled with SP management. Fortunately, once I can get some new gear from the Antique Store, I can start kitting everyone out with better things to enhance our general combat performance! One thing I'd like to say before I get to my general musings, it will be a little bit before I get the next update out. I'll be taking a vacation to visit family starting this Friday, and will be absent my PS2 and PC until March 2nd, so I can't get any recording done during that timeframe. It'll be my top priority to resume once I come back fully recharged! I will have my laptop with me and there have been a couple things I've been meaning to write up, so I might still push out a supplemental post or two.
Extra Notes
In FES and Portable
-We don't see too much of these here, so I'll roll them into one because for once they're pretty similar in what I do. Natural Dancer is a nightmare if you don't know what's coming, and practically unloseable if you do. With a Wind Immune Persona and a Narcissus Flower, it literally can't do anything to the Protag so you could just whittle it down solo if you so choose. Seiryuu Is a good pick for this fight for this very reason, but Nata Taishi is also serviceable.
-One FES specific thing, the AI really hates Tetrakarn and this is the first time that might really be an issue. They will not ever trigger a repel, and will outright refuse to act if that's the only thing they possibly could do. The Rush command is valuable for circumventing this, as it always forces them to launch a physical attack. Almost adds an element of Real Time Strategy to the game, albeit a very silly kind. It's also handy to know if you send Aigis into Orgia Mode in Portable, since she reverts to the standard AI control in that situation.
-To reiterate, my big goals for Persona pick ups are Nandi, Nata Taishi and Cu Chulainn who are all valuable for different reasons. I get all of these in FES, but I settle for Nata Taishi in Portable since it allows me to avoid extra grinding. I would really like to get Nata Taishi to the point where he pops out that Herculean Strike card because it would push Ares over the top. An easy way to do that would be to just fuse him again when I max out the Chariot social link, but it may be more practical to card the Growth 3 skill onto him. In a bit of fortune, I did get enough Opals from the expedition to afford that card, though there isn't enough time before the Full Moon to dupe it, so I'd have to be sure Nata Taishi is my set Persona for the boss kill if I want to take advantage of the big EXP yield I can get there.
-Since Portable otherwise had nothing to show but the boss, I show off some miscellaneous things I haven't had a chance to mention yet/forgot. FES added some music tracks you can swap out the Tartarus BGM for, and Portable actually tells you the name of these tracks if you'd like to look up their original versions later. Portable allows you to cancel Shuffle Times, which can actually be handy for speeding up Gem farming as well as avoiding having your inventory cluttered with early game crap. Frustratingly, Reload doesn't retain this and it can actually force you into picking undesirable cards if you have the Justice Major Arcana in effect (such as being forced to take the completely useless Temperance card). Finally, I wanted to acknowledge the Compendiums biographies for the various Personae you fuse. Many different MegaTen games feature something like this, and it's fun to read the origins of the featured demons/Personae and how that informs their appearance in game.
In Reload
-With Healing Apex in tow, Yukari is phenomenal for exploration now. She effectively keeps the party topped off for free, allowing you to just hit Auto-Heal after every battle to cure off injuries or incidental HP lose due to using Physical Skills. She's great to have around if your general battle strategy is having Junpei and Aigis spam multi-target moves.
-Once you get Life Aid on something, I highly recommend fusing the skill around and creating ways to keep it in effect while maintaining good coverage. I neglect to do this, and my general battle flow suffers for it.
-We've finally hit the point where even with a AG boosting accessory, pretty much everyone on the team is becoming faster than the Protag and he's usually dead last in the turn order. This can make SP engines quite frustrating to use, as its preferable to have the MC go first in order to check every possible weakness first thing. If he's last and your All Out Attack doesn't kill the opposition, that means you have no choice but to eat some incoming damage. Sadly there's not really a great way to address this short of shoring up on as much AG boosting equipment as possible, which is easier said than done.
-We've hit the point where most Tartarus bosses are a simple matter of entering with Theurgies at the ready, upping your buffs, and then letting loose. Power Howling allows me to skirt the intended flow of most battles, which is why I made a pointed decision to not use Koromaru for the Monad Passage.
-Speaking of, if you're risk averse it's much smarter in the Monad Passage fights to just turtle up and guard constantly while you slowly take note of what kind of attack each dice result sends your way. I was confident I could win without doing this (we'll pretend like that was the reason, and not that I just didn't think of it at the time), so I instead just bulldozed through with the Teen Girl Squad.
-If you hadn't when entering Tartarus, I'd recommend going back to the first half of Yabbashah at this point and clearing out all the Monad Doors there. They are a nice and easy source of extra Black Quartz and Onyx, which are super important gems for equipment trading.
Supplemental: Social Links, or Friends With Statistical Benefits
This is a post I've been meaning to write for awhile but we've only just recently seen the full extent of ways we can game this system, so I held off a bit. I'll be updating the post in pieces and as we unlock new links, since obviously I'd rather not spoil anything before it has a chance to come up (and in the former case this means I'm not writing a whole bunch at once.)
Social Links are the backbone of Persona 3's streamlined social simulator gameplay. A number of interpersonal connections as well as some story segments cause the formation of Social Links, gamifying the concept of friendship and assigning a numerical rank to how close you are to people. Beyond providing a wealth of extra detail to the secondary cast of Persona and maybe helping your protagonist learn some things about life, Social Links also provide power in the form of fusion bonuses. Each link represents an Arcana, and each Persona underneath that Arcana will gain additional experience when fused. Naturally, Personae that are fused and have high level social links backing them have much more power out of the starting gate than anything you could hope to find from Shuffle Time. The bonus EXP is as follows,
Rank 1: 1 Level Up
Rank 3: 2 Level Ups
Rank 5: 3 Level Ups
Rank 8: 4 Level Ups
Rank 10 (Or Rank MAX): 5 Level Ups
Aside from the gap from level 5 to 8, every 2 social link ranks from Rank 1 yields another Level Up for a fused Persona of a given Arcana. In P3 Vanilla and FES, fused Personae actually gain the full amount of Experience displayed for the fusion performed and can end off much closer to a level up for it, making the in-between ranks have mechanical benefit. For some reason starting with Persona 4 and back ported in Portable and Reload, any EXP gained in excess of the last level up a Persona gets from their fusion bonus is just lost, though Reload introduces the Lovers major Arcana card (grants extra EXP from Social Link bonuses when performing fusions) that can actually get some value out of this normally lost EXP at least. Perhaps it goes without saying but just so it's clear, Personae fused without a Social Link established for their Arcana gain no bonus EXP from fusion, though they still inherit skills at least. Naturally, this makes Personae of certain Arcana undesirable to use as not every Social Link is established within the timeframe you can expect to be able to actually these Personae. One final benefit of Social Links is that when a Link is maxed out, it unlocks a new Persona for fusion. These Max Rank Personae are among the best in the game, and are well worth a look if you qualify for creating them.
So we know the benefits of Social Links now, but what actually are they? Like I said, they are a gamified reflection of your bonds with others, and are established through a variety of means. Social Links will form the bulk of your daytime activity in Persona 3 (and some nighttime activity), with almost any day where you are given the choice on what to do being dedicated to them. Every Arcana in the game save for 2 has a specific representative for it, and you can dedicate your limited time slots to hanging out with said representative and hopefully obtain a rank up for their Social Link. Social Links come in 4 flavors.
Automatic: Automatic Social Links are ones that are established purely through plot progression. No conscious effort is required on the player's part to advance these, merely getting through the game will cause Automatic links to go up. Naturally, this is the rarest type of link, with only 3 of this type existing in Persona 3. The Fool Social Link is an example of an Automatic Link. Another notable thing about Automatic links is that they occasionally skip levels, such as the Death Social Link going from Rank 1 to Rank 3 when it first levels up.
Semi-Automatic: Semi-Automatic links are ones that you do have to initiate on your own time (and often they have social stat checks you need to pass to initiate them), but do not require any particular special care taken to complete them beyond that. When you engage in a Semi-Automatic link, it will always Rank Up regardless of anything. The Devil Social Link is an example of a Semi-Automatic link.
Streamlined: Streamlined links are ones that do require specific actions from the player to advance as fast as possible, but if said actions are taken then the link will complete either within 10 social link events or very close to 10 social link events. Emperor in FES and Portable is a very good example of a streamlined link: If you have a Persona of the same Arcana in your stock for every Social Link event and always pick the correct dialogue choices, the Emperor social link will complete in 10 social link events like a Semi-Automatic link would. There are a handful of links that can manage this kind of progression in FES, though for the most part the archetypical Streamlined link will be something like Hierophant or Hanged Man, an out of school link that requires 2-4 additional time slots dedicated to it to complete. Portable and Reload, due to mechanical changes, have the vast majority of their links qualify as Streamlined ones, for different reasons.
Standard: Standard links are the ones you'll most likely want a guide for. Simply picking the right options and having a matching Persona is not enough for Standard links, you will hit roadblocks that can take multiple timeslots from your very limited calendar time if the only way you are choosing to progress these is by hanging out with their representative like normal. The Justice Social Link is a good example of a Standard link: towards the back half of it we will find low point yields from the correct dialogue choices against high point requirements for the next rank up, and we'll want to look for additional means of getting extra points into the link.
So now we know what kind of Links we can see, but what's the actual progression for a Social Link? As you progress through the game, you'll be notified of the existence of a potential Social Link through a variety of means. Some Links will be forced on you by the game, sometimes pre-existing bonds lead to the formation of new ones as people you are Social Linking with will give you leads on other potential people to hang out with, and sometimes you'll just talk to a major character after a story event and find them ready to Social Link with you now. Once a Link is formed, the representative of the Link will be available to hang out with, each rep having specific days they can be interacted with for Social Link purposes. If hang out with them when they have enough Social Link Points, the hang out will be a Rank Up event, advancing the Social Link to its next story beat and enhancing the effects it has on Persona Fusions.
I've mentioned Points a few times now, what's that about? Every Social Link has a "Score" tied to it that determines whether or note a hang out is a rank up event, and this score is always reset to zero when you trigger a rank up event. When participating in the rank up event, you'll be faced with dialogue choices. Certain choices yield Social Link Points, with "better" choices giving you more points. If the points gained from picking the right choices matches or exceeds the Score needed to get a rank up, then the next time you engage in a Social Link event with someone, it will be a rank up event again. If you didn't get enough points, and there will be times where you won't get enough points no matter what, additional actions will need to be taken to get the next rank up event. Usually, this is done by just hanging out with someone normally and getting a generic event that has no dialogue choices and instead awards a set amount of points depending on if you have a matching Arcana Persona or not (more on that below). There will be plenty of times in FES and Portable where you do this, but it has limitations: namely that it can only be done on a Social Link reps normal schedule and sometimes it still isn't enough to secure the points for a rank up event. Luckily, there are other means to get more points for our Social Links.
The first and biggest one, as I've mentioned repeatedly: Having a Persona that matches the Arcana of a Social Link rep in your stock grants a bonus to points gained from social link events. Specifically, it awards a 51% bonus to any point increase you get, with the result rounded down in the case of a decimal. Portable specifically also adds a new function to the Charm social stat: When Charm is maxed out in Portable it will also provide a 51% bonus to all point gains, which stacks with the matching Arcana bonus. Now for any Streamlined link, these bonuses on their own are enough to either guarantee rank ups, or at least ensure that you only need to devote one extra timeslot to a Social Link to get that next rank up. For Standard links though, it pays to know the full extent of ways you can get points outside of rank up events. Now when you participate in a Social Link event but it isn't a rank up event, you will get +10 points if you don't have matching Arcana Persona, +15 points if you do/have Max Charm in Portable, and in Portable specifically you can get +22 points with a matching Persona AND Max Charm. There are a litany of other events that yield this same point bonus, and they include:
Drawing a Relationship Fortune at Naganaki Shrine
Meeting a Social Link character when going on a Walk with Koromaru (Note that in FES and Portable, SEES members who are also Social Links never get this bonus)
Attending the Summer Film Festival with a Social Link rep
Accepting a date invitation from a nighttime/holiday phone call (This one does not exist in Reload)
The first one is probably the main way you'll be getting bonuses outside of a character's normal schedule in FES, the second and third are very situational but are also located at consistent points on the calendar so it's not too hard to route them in once you know about them, and the last is special. In addition to the points you get from accepting a phone invitation, the date itself is excellent for gaining points. When accepting a phone invitation, the next day you have off from school will automatically be a date with the person who invited you (usually this will be Sunday, but there are some holidays that you can get date invitations for). The date event will present you with a dialogue choice, much like a rank up event, and picking the right choice yields a +30/+45 point bonus! Additionally, dates with your female classmates will prompt you the option to give a gift (In Portable, this was changed so that you can give gifts to Men and Women when playing as the FemC). Giving a gift a girl likes is +10/+15, while giving a gift she loves is a staggering +50/+75! Now there were a couple times in Persona 3 Vanilla where the latter was necessary, but there is no link in FES and Portable where the points from just giving the right answer isn't enough. With some good scheduling, it is possible to get the points to rank up from accepting a phone invitation, get that rank up event, and the use the ensuing date when it comes up to get the next bunch of points you need to get the next rank up! This does come up a few times in FES, so don't neglect this avenue for Social Links! In Reload on the other hand, dates are essentially pointless as the general point requirements for every rank up event have been reduced heavily, resulting in most links qualifying as streamlined ones.
As for some final miscellaneous points before we get onto the links themselves. Any points gained in excess of the amount required for a rank up are useless since the score resets to zero when you finally trigger a rank up event. Say we have a link that has two rank up events in a row that require 30 Social Link points. Going into the first rank up event with 60 points in tow does not mean we will automatically get the succeeding rank up event. This behooves you to initiate rank up events as soon as you qualify for them. Thankfully, there are different ways you can gleam this information: in FES a character that is ready to rank up will approach you during lunch time at school on a day where they can engage in a social link event (this does not apply for out of school links, but those are baseline Streamlined links with oodles of free time to approach them, so it hardly matters). In Portable and Reload, the game will simply tell you if the character is ready for a rank up when you talk to them ("You feel your relationship will become stronger soon..."). Is it possible to lose Social Link points? No, but you can gain them slowly or damage your relationships. Picking the "wrong" dialogue choices in rank up events obviously yields less-to-no points, and occasionally you'll come across what I call "land mines" that will cause your Social Link to reverse if you pick them. A reversed Link provides no fusion bonus when creating a Persona of the affected Arcana, and you either need to draw a relationship fortune to fix it or participate in a Social Link event where you try to smooth things over with the person you upset. Most of these land mines are obvious, but there is one infamous one in Vanilla/FES that tons of people have tripped over. Speaking of Links reversing, FES exudes a bit of extra pressure here. Our in-school social links (e.g. Kenji, Kaz) have a 90-day limit to interact with them. This can be participating in normal Social Link events or even just drawing a relationship fortune, but if there is no activity on a social link within 90 days, the link will reverse. That's just for links with Male classmates though, for Female classmates this limit is 60 days. Additionally, the MC's social links with female class mates in Vanilla, FES and Portable automatically become romantic and introduce a Jealousy mechanic. Once a link becomes romantic, engaging in a Social Link event with another Female classmate reduces this count by 15 days, making it very precarious to juggle multiple Social Links with Female classmates at the same time. I'm not sure if Social Links that take place outside of school fall under this mechanic for Reversals, but you're given designated weeks where these are the only Links you can pursue every other month so it hardly matters if they do. For one final reversal related mechanic, double-booking for a date on a day off will result in an automatic reversal for whoever you decide to stand up. Naturally, if you've already planned a date, do not accept another one should you receive a call. It's worth noting at this point that maxed out social links are unbreakable, and cannot reverse once established. This can lead to a funny situation where you can accept multiple phone dates for the points it gives, max out one of the Social Links in the interim until the day of the date, and then stand up the person you maxed out with no fear of the link reversing.
Phew! Now to go over the specific Social Links, how we establish them, their schedules, and what Personae they affect. Some Arcana are easier to advance than others and some are tied to simply better Personae, so this information can be handy to know if you have a purely practical approach to this game!
The Fool
Fittingly for the card representing the journey's beginning, The Fool is our first Social Link. It's also a non-indicative one for the system as a whole, as it is an Automatic Link with no specific representative. Instead, The Fool represents the bond between SEES as a whole. A cute little detail is that as you gain new members for SEES, their names will populate the list for who this Link represents when you check it in the Social Link menu. Like said previously, The Fool is an Automatic Link the increases when you pass by certain days on the calendar. Once established, it usually increases in response to defeating a Full Moon Shadow, but there are some outliers to this. The dates this link increases are,
Establishes at Rank 1 on 4/20 (Blaze It)
4/21
5/9
7/7
7/22
11/2
11/4
11/28 (Skips Rank 8 and goes to 9)
12/31 (Only if you choose to fight on)
In addition to the usual fusion bonuses a Social Link provides, the early rank ups for this link vaguely coincide with mechanical upgrades, stopping at Rank 5 for additional goodies. In FES, Rank 3 coincides with learning the Knock Down Tactic, Rank 4 coincides with learning the Full Assault Tactic and Rank 5... doesn't coincide with anything but it's the last rank you get before learning the Same Target tactic from beating Chariot and Justice. The Conserve SP Tactic just goes unrepresented. In Portable, Rank 3 coincides with gaining the Co-Op attack mechanic, while Rank 5 unlocks the diving save mechanic. Contrary to what you might read in some places, the ability to endure fatal blows is NOT tied to this link, that's a separate upgrade. Reload, rather disappointingly, does not have any extra mechanical benefits associated with this link.
You probably noticed right away that this link gets to Rank 5 relatively quickly and the stagnates for a long ass time. For a fairly long stretch of the game, Personae under this Arcana will only gain 3 levels off of fusion, I suppose a fair trade for the automatic nature of the link. Are there any worthwhile Personae under this Arcana? Well for FES and Portable,
FES/Portable Fool Personae
Orpheus: Level 1
Slime: Level 12
Legion: Level 22
Black Frost: Level 34 (Special Fusion)
Ose: Level 44
Decarabia: Level 50
Loki: Level 58
Susano-o: Level 76 (Special Fusion, unlocked at Max Rank)
Note there is one more Fool Persona that was added in FES and retained for all future versions of the game, but he is special and will be covered at specific point down the line.
Fool Personae can only be created via Triangle Spread or Special Fusions in FES and Portable, so you won't actually end up seeing them all that often when fusing junk off. Are any of them worth it? Ehhh. Fool Personae have the unique trait of having the Universal inheritance type (with the notable exception of Orpheus, who is a Fire Inheritance type), meaning there is no limitation on what skills they can get from fusion and they do not favor any particular skill when it comes to probability of inheriting them. This makes Fool Personae fairly customizable, but that also entails grappling with Persona 3's awful fusion inheritance system, which I'd rather chew glass than spend a ton of time on. Fool Personae as of FES are more notable for their use as weapon fusion material, as they create 1 Attack Power 99 Accuracy weapons with unique effects. I go over the full extent of these in the Antique Shop post, but notable ones include Legion providing +100 HP and Black Frost providing +10 MA. Beyond that, none of them jump out and say "I'm Awesome!" and most of them are unremarkable generalists with no interesting skills picked up to potentially fuse into other things. Decarabia is required for the Best Friends fusion spell, but that spell is very situational and I only know of one fight where it is extremely good. Things are a bit different in Reload,
Reload Fool Personae
Orpheus: Level 1
Slime: Level 12
Legion: Level 26
Black Frost: Level 37 (Special Fusion)
Ose: Level 41
Decarabia: Level 54
Loki: Level 69
Susano-o: Level 77 (Special Fusion, Unlocked at Max Rank)
Triangle Spreads are gone, so you're much more likely to stumble upon these guys by happenstance, and there are some pretty notable picks here! The Arcana is pretty low-key (no pun intended) until you can create Black Frost who is now creatable as soon as you reach his level. In addition to enabling the ever useful King and I Theurgy, Black Frost is a phenomenal Persona that picks up our first Tier 3 magic in Bufudyne and Agidyne. He also picks up useful passives like Fast Heal and Dark Boost, on top of having excellent resistances and picking up Resist Light to patch out his only weakness.. Customization is also much easier in Reload since you can now pick what skills you get directly, so that Universal inheritance type means that Black Frost and most any Fool Persona are now very easy to kit through a mixture of smart fusions and skill cards. Ose also has had the extremely useful Life Aid passive added to his skill list, making him a great way to access that skill and pass it around if you haven't built up an Eligor. Ose also has the fringe perk of being an excellent Slash attacker, so there's extra incentive there to create him. The final notable Persona is Loki, who in addition to coming with the 4 -dyne spells, picks up the Spell Master passive that halves SP costs. Loki also has helpful passives like Single Target Boost and Soul Shift, making him pretty great for general exploration purposes! All in all, a pretty solid Arcana considering you don't need to take any special care with its Link.
The Magician
Our first "real" social link, and one that is also hoisted upon us automatically in all versions of the game, albeit at very slightly different times. (4/22 in all versions except for Portable where it starts on 4/23) As you'd expect from an early game link, the Magician lowballs it by being a Streamlined link that only requires one additional Social Link event to Max out, and said Event can be done in a way that doesn't lose any time. You will need a matching Persona and the correct answers most of the time, as you'd expect of any link, but you'd have to make a mistake to lose any calendar time to this link in FES and Reload. Before going forward, let me lay out how I'll represent the progression for each Link. For FES, the progression will look like this,
Initial | 1(22) | 15(28) | etc.
The first rank of every Social Link does not have any dialogue choices for you to select, nor are you expected to gain any points to get Rank 2. Starting from Rank 2, you will need to be selecting the correct choices to advance the link in the minimum amount of time required. The first number is the point requirement for the succeeding Rank Up event, while the parenthetical number is the maximum amount possible from the Rank Up event itself. I will always be using the numbers that assume you have the matching Persona, so be sure to keep that in mind! Note that all Rank 2 events either require 1 or no points to get to the next Rank Up event, so every Social Link is pretty casual for scheduling starting out.
For Portable, this format will largely be the same with one distinction,
Initial | 1(22/33) | 15(28/36) | etc.
The second parenthetical number represents the maximum points possible if you have a matching Persona AND maxed out Charm. The second number doesn't really matter until around July where you have your first realistic chance to have maxed the stat, but it's good to keep in mind from that point on. Pretty much any Streamlined link can also be completed in the minimum with just one of these bonuses, so it takes some of the stress off of needing to have specific Personae all the time for Social Linking.
Now for Reload, I don't have any resources that actually tell me the numbers involved for Social Link progression beyond the numerical Ranks of each Rank Up event. So instead, I'll be representing the progression like this,
Initial | O | O | X | O | etc.
An O means that all the points to get to the succeeding Rank Up event can be gotten from Rank Up dialogue choices you are currently on. X means that the dialogue choices alone won't get you to where you need to be, and more will need to be done in order to get a Rank Up the next time you participate in a Social Link event. A bit inelegant, but rarely will this require more than a matching Persona and a relationship fortune in Reload as all Links progress way faster in this version. With that out of the way,
Kenji Tomochika represents the Magician Social Link for the Male Character, and in FES & Reload he will invite you to hang out on 4/22, automatically initiating this link for you. Kenji is available to Social Link with on Tues., Thurs. and Fri. assuming school is in session and an exam isn't coming up within a week. His Rank Up progression is as follows,
Initial | 1(14) | 15(29) | 15(22) | 15(22) | 15(22) | 22(21) | 22(29) | 22(22)| Max
Initial | O | O | O | O | O | O | O | O | Max
Kenji proves to be a very basic fellow, and this is hammered in with his Link progression. Only in FES do you have to sacrifice one extra timeslot to max him out at Rank 7, and that is easily accomplished at no real time loss by simply going to Film Festival with him during the Summer. In Reload, that is unnecessary and Kenji is a true Streamlined link that just requires the right dialogue options with a matching Persona. Fittingly with how easy it is to max this Link out, the Magician Arcana governs a bunch of useful early game Personae, giving mechanical incentive to hang out with Kenji if you're just looking to be pragmatic. Things are a little different in Portable though, as the FemC wants nothing to do with Kenji. Instead,
Junpei Iori represents the Magician Social Link for the FemC in Persona 3 Portable. In an effort to give more characterization to the Male members of SEES, all of them have claimed a different Arcana to represent as a Social Link for the FemC, although amusingly not all of them have been given Arcana that matches the Arcana of their Persona. Junpei is not one of those outliers though, instead bucking convention by having a decidedly more complex Link than Kenji. Junpei will automatically spring his initiation event on you on 4/23, and is available to Social Link with on Tues. and Thurs., a slightly narrower timeframe than Kenji that proves to be more limited than you'd think due to Junpei's progression.
Initial | 0(37/56) | 0(66/101) | 30(14/22) | 30(22/34) | 35(22/34) | 35(66/101) | 40(66/101) | 40(37/56) | Max
As you can see, Junpei starts out fairly undemanding, but rapidly hits you with back to back Rank Ups that necessitate additional time slots dedicated to him in order to keep things going. It's important to note that only on New Game + do we have the possibility of getting that Max Charm bonus for Rank 4, so that one actually requires either two social link events or two relationship fortunes to clear the points required for Rank 5 to happen! Fortunately things smooth out a bit after that, and by Rank 9 you should have the maximum Charm required to get the necessary points for Maxing out. Because Junpei is only available two days of the week to hang out with, he'll be common early recipient for Relationship Fortunes. Serendipitously, due to the Hermit link now being a School Link, the FemC has very little to do on Sundays and Holidays starting out, so these are easy time slots to spend on Junpei. This is an early indicator of the general trend for SEES Social Links in Portable: Since several links have been swapped out entirely or moved to a Night time slot, the remaining daytime links generally demand more of you to advance them. All that being said though, Junpei isn't too difficult to Max out relative to Kenji, and because of the more limited options the FemC has to spend her daytime, he'll probably Max out even faster than Kenji like he has already in the LP proper.
As stated previously, Magician is the archetypical Early Game Arcana. Many of the Personae feature within find themselves within pre-defined niches and make great fusion fodder for creating future specialists down the line, should you be willing to farm the assets needed to pull them from the compendium. In FES and Portable, our prospects for the Arcana are,
Nekomata: Level 5
Jack Frost: Level 8
Pyro Jack: Level 14
Hua Po (Special Persona, must complete an Elizabeth Date to fuse): Level 20
Sati: Level 28
Orobas: Level 34
Rangda: Level 40
Surt: Level 52 (Unlocked at Max Rank)
Unlike Fool, and like many Arcana available in the Early Game, Magician has no Special Fusions. Magician Personae have very straightforward and obvious uses: several of them unlock the Elemental Boost Passives. Jack Frost carries Ice Boost, and at an incredibly early point for the stage of the game he is creatable. Hua Po carries Fire Boost, and Orobas, while a bit late in comparison, is also an easy way to access Wind Boost. Aside from Orobas and Jack Frost, most Magician Personae are Fire based, so they are the premier Fire Casters for a good chunk of the game, especially if you do Triangle Spread upgrades with them. In particular, Sati makes a good mid-game source of Fire damage due to her innate Agilao and Maragi. The real centerpiece of Magician, though, is Surt. Surt makes putting up with Kenji entirely worth it, and makes Junpei even more of a GOAT than he already is. Surt is absolutely cracked, coming in with innate Fire Boost, learning Fire Amp, Maragidyne, and he also is the only Persona that learns the Tier 4 Fire spell Ragnarok. Surt is a must-have for maximizing Fire damage, and due to the Arcade Games and Stat Cards that exist in FES/Portable, he is inarguably the best Fire Persona in the game. In both of these games, you have ample time to cap out his MA stat, and since he comes with everything a Fire caster could care about by default, there is no reason to fuse past him in The Journey. Now over in Reload,
Nekomata: Level 3
Jack Frost: Level 8
Jack 'o Lantern: Level 15
Hua Po (Special Persona, must complete an Elizabeth Date to fuse): Level 19
Sati: Level 29
Orobas: Level 39
Rangda: Level 50
Surt: Level 60
Futsunushi: Level 74 (Unlocked at Max Rank)
Reload made an effort to make the various Arcana less obviously tiered relative to each other, so most have either picked up a new Ultimate Persona or have had their general levels raised up a bit. Both in Magician's case. Despite this, due to the expedited Level curve of Reload, most of these Personae serve the same function they do in FES and Portable. Surt is no longer the end all-be all for Fire casters since he longer has innate Fire Boost, and the retooled Incense system paired with extra Night activities means it's less practical to just max him out and call it a day. He does still have exclusive Level up access to Inferno (formerly Ragnarok), so he's worth creating to fuse that around but it's safe to say his best days are behind him. Futsunushi goes against the grain of the Magician Arcana by instead being a Slash specialist. The most notable thing about him is that he picks up the Unshaken Will passive at Level 81, a passive that makes you immune to all ailments save for Poison, Freeze, Shock, Down and DIzzy, and was previously found only on Sun Asura. This is something to consider, though the only thing you want that passive for is a bonus boss that requires capped out levels anyway. For conventional purposes, there is an accessory that just makes you immune to all ailments and can simply be purchased.
The [High]Priestess
Everyone's favorite captain of the obvious, Fuuka Yamagishi, is the representative for the [High]Priestess Social Link in all 3 versions of the game. While Fuuka is not the first possible romantic partner for the MC you'll encounter, she's the first one we'll be covering so she's a good object example of the general progression for these links. Note that while she's not explicitly a romantic option for the FemC, all shared Social Links with female SEES members follow pretty similar scripts to the MC's and tend to be pretty thick in Sapphic vibes due to this. It's a shame they didn't commit to that.
For being the first female SEES member you can establish a Social Link with, Fuuka has a remarkably complicated set of unlock requirements. Obviously she needs to have entered the story and joined SEES. At that point, not long after you'll be prompted to join a Culture Club. Pick the one you want to tumble 4, and Fuuka will just happen to be a member of the same club. At that point, she will be available to converse with on the second floor hallway of school every Monday, Friday and Saturday. If you have maxed out your Courage stat, you will be able to initiate Fuuka's Social Link and progress it on the previously mentioned days. The earliest all of these can be fulfilled is 6/19, which is the deadline to max out Courage if you want to start Fuuka's Link right away. It's not too difficult to accomplish if you know what you're doing, but it can be easy to fail this if you don't know the best ways to maximize courage. For Portable, this is actually way simpler. Fuuka will want to form her own club on 6/15, and you only need Rank 2 Courage to agree to her proposal. Onto progression!
Initial | 1(22) | 15(22) | 22(22) | 30(29) | 30(22) | 0(35) | 40(29) | 0(55) | Max
As you can see, once Rank 5 is reached, there is not a single event where we can get the points we need for the next Rank Up just from the event dialogues alone. Rank 9 in particular affords you know points, putting Fuuka in the unique spot where even a successful date will not get us a rank up and we'll need to supply her with a gift she likes to get that little bit of extra. Pretty much all Romantic social links follow this progression, and if you are just pursing them via the regularly available Social Link events, they will burn way too much time. It would take 4 hang outs or 4 Relationship Fortunes to get from Rank 9 to Max, even with a matching Persona! Now for Portable,
Initial | 0(15/22) | 15(37/56) | 22(30/44) | 22(37/56) | 30(22/34) | 30(22/33) | 35(0/0) | 40(22/34) | Max
Much easier to progress, particularly because by the time we'll reach her we will also be adding in the max Charm Bonus to our point gains. In fact, that combo nearly makes the Social Link a streamlined one right up until the end where we get some major point gates with a lack of dialogue choices to blow past them. Past that, Fuuka's cooking club also supplies us with gifts in the form of the treats we bake with her. These can be handy for bypassing other point gates in other links should you go on dates with them, or even help you bypass Fuuka's own point requirements if you route it right. For Reload,
Initial | O | O | O | O | O | O | O | X(?) | X | X | Max
For Rank 8, I'm not actually sure if there's a point gate or not, but there will be a huge lull in activity for Fuuka's Social Link as a new mechanic introduced in Reload makes it ideal to save the back half of Social Links with female SEES members for the end of the game. Due to more generous point yields (or maybe just lower requirements) for Social Links in Reload, Streamlined is the new standard and any means of ekeing out extra Social Link points is usually enough to clear any point gates you may come across if you're picking all the right answers.
The [High]Priestess Arcana is another archetypical early game Arcana, though not one I think is quite as good as Magician. Priestess Personae mostly focus on Ice and Healing Magic, with some outliers such as Unicorn and the FES/Portable version of Kikuri-Hime. Speaking of the FES/Portable Priestess list,
Apsaras: Level 3
Unicorn: Level 11
High Pixie: Level 21
Sarasvati: Level 27
Ganga: Level 35
Parvati: Level 47
Kikuri-Hime: Level 53
Scathach (Unlocked at Max Rank): Level 64
Early game, Apsaras is half the extremely useful Cadenza spell, so if you're like me you'll often have her in the back pocket for casting that spell in FES. Unicorn is one of your earlier means of using Hama skills, but early Hama skills are too inconsistent to care about. Past that, the next most notable Persona is Sarasvati, who learns both Bufula and Ice Boost. With a Max rank for the Priestess link, you can do a triangle spread with High Pixie and Ganga to create a Parvati who will also gain Bufudyne off the level ups. Parvati is a solid ice caster for most of the rest of the game, and does form one half an interesting fusion spell, though she doesn't pick up Ice Amp so you may need to fuse her up if you don't want to commit to Varuna Bracers. Kikuri-Hime is another means to access Cool Breeze, though she's far from the best due to how relatively late she is picked up, and she's uncharacteristically a Fire casting Priestess at a point where you already have access to the broken Surt. Scathach is very whatever, no special skills I care about and an unfocused skill set that picks up Myriad Arrows, Mabufudyne and Magarudyne. Overall, not an Arcana that has anything I think is amazing, though Parvati has potential. For Reload,
Apsaras: Level 2
Unicorn: Level 11
High Pixie: Level 20
Sarasvati: Level 32
Ganga: Level 41
Parvati: Level 48 (Special Fusion)
Kikuri-Hime: Level 61
Scathach: Level 75
Reload shifts the focus of the Priestess Arcana much harder towards healing, with many of its reps now picking up multi-targeting healing skills when they previously didn't. Sarasvati is among your earliest options for accessing the extremely useful Mediarama spell, and it is well worth your time to make her. Kikuri-Hime is now an Ice caster and also picks up Mediarahan, making her also a pretty good pick up once you reach the necessary level. Other than that, the Arcana is actually pretty similar to how it was originally. Scathach is once again a weird generalist with no particularly interesting skills. It is worth noting that customizing any Persona you want to be an unbeatable tank of death is much easier in Reload due to the retooled skill card system and the much easier to use inheritance system, but I do place some value on Personae who don't take much work to be made awesome. It's hard to justify advocating something like, I dunno Ganga, when Black Frost is right there.
I'll be updating this post incrementally. There's quite a lot to say as we get into the weeds of more complicated Social Links, so this may very well end up being a two part mechanics post by the LP's end!
Last edited by Cullen on Wed Jun 25, 2025 2:38 am, edited 3 times in total.
After some delays, Part 38 is out! It's a longer Full Moon video than usual due to how the in-game scheduling fell for this month, but that just makes it all the richer in things that happen! Aigis begins her school infiltration and blends in immaculately, Akihiko seems to tap into some personal baggage to finally get Shinji back in SEES, and I absolutely stomp this moon cycles Shadow in a devastating show of force. Things are looking up for SEES!
Extra Notes
In FES
-The dual Gungnir setup is pretty overkill, but it's very fun. I'd like to have it sooner rather than later anyway, so I figured I'd just pick it up at the first available opportunity. Ken's going to be locked into the party in FES going forward provided there's no night where he has to focus on his homework or something.
-Star Personae can be fused into weapons to nullify Akihiko's Ice weakness, and Akihiko will be another party lock later so I fuse off a Nandi to secure that for him. It's not immediately useful, but it'll come in handy down the line.
-We hit Genius level Academics! This has multiple benefits to us. For one, with all my social stats maxed and both night links completed, I'm now completely free to just use Arcade games to boost up my Personae. This isn't super useful right now, but by next Moon cycle we will be reaching the levels necessary to fuse Ultimate Personae like Surt. Using Lucky Fortune to max out Surt's MA is hilariously overpowered, so I'm eager to show that off. Another fringe perk is that since we no longer need to study, our late night timeslot can always be used for sleeping early. This means any Tartarus expedition going forward will see the Protag in the Great status, which is a nice little bonus to all his attributes. Knowledge is power!
-Because the PS2 versions of Persona 3 lack any means to guard attacks, you kind of have no choice but to face tank The Hermit's charge attacks. If you're not confident that you can survive them, you can pop a Magic Mirror as a to nullify it. I don't think he drains Elec skills, but I ultimately decided it wasn't worth breaking my offense for.
-The shock status is hilariously useless to The Hermit in non-Reload versions of the game. Since it cures the moment a character's turn comes around and they can still act after that, he literally has no way to follow up on it.
In Portable
-I have something embarrassing to point out... some mistakes! Somehow I forgot to turn in the Old Document request for this Moon Cycle to Theo, so I had to go back and replay to do that. I would have had to do it anyway though, because I also screwed up on Fuuka's social link. I misinterpreted the answer key for her Rank 6 event and picked the option that didn't give enough points to secure the next rank up! After I finished recording, I went back and replayed the segment since it doesn't take too long when you're just fast forwarding the text. It wouldn't be the end of the world if I stuck with the mistake, as early as November in Portable the FemC has free days to course correct the Priestess link, but I didn't want to have to stray too far from my schedule so I just decided to go with the replay.
-With Ken as a part of SEES, we have new link to spend our nights on! Ken develops a bit faster than Koromaru, but isn't available to hang with as often, only on Tuesdays and Thursdays. It's nice the FemC now has a rep for the Justice link!
-I didn't check him out in this version since I'm never going to use him anyway, but Shinji is mostly identical to how he is in FES. One key difference is that he already has a built in Endure passive like Koromaru does in this version of the game. Handy!
-I was surprised to see The Hermit go down even faster in this version, I practically didn't need the Tower weapons I secured for Yukari and Aigis. Were I lacking those, I would have needed to play a little more cautious, but even if I had needed a turn to Guard I would have absolutely rinsed him still. Very easy fight in the old versions of the game.
-One amusing thing I saw on my replay is that if you fail to do enough damage to him to prompt his charging phase (I had back-to-back misses with Yukari and Aigis), he can Poison Mist you as an opener. This doesn't accomplish much for him.
In Reload
-Shinji is an absolute Beast in this version. Endure is now a formal skill for him, and he has the extremely powerful Bloody Charge skill in addition to a strong physical skill in Heatwave. His Theurgy is also one of the strongest single target attacks in the game, so with Bloody Charge and the Strike Bracers in effect, it really lays the hurt on anything you hit with it.
-Speaking of Strike Bracers, I picked up those and Pierce Bracers with my Black Quartz since they're good investments for our physical fighters. Nobody but the Protagonist can naturally access the Physical Boost passives, so these are extremely useful to keep around until you get the Amp versions of them.
-Going forward, most of my equipment will be coming from the Antique Store. The stuff that isn't will either be found, or purchased from Club Escapade. The things Kurosawa sells are straight junk in comparison.
-We'll want to focus on Shinji for nightly hangouts going forward. There's a big benefit to knocking his out as soon as possible.
-Speaking of Shinji, his Linked Episode is available to pursue now, but it's similar to Koromaru's. Rather than having a highly specific window of time to access it, instead it's just another daily activity with each stage of the Episode being unlocked more or less right after the last and you can pursue them at your leisure. Like Shinji's hangouts though, it's beneficial to knock this out early.
-The Hermit is way more of a real fight in this version. Not only does he attack independent of his charging phase, the charges speed up as the battle goes on and the attacks he launches become quite nasty. Shock is also more of a threat in this version as you DO lose a turn from being hit with it, and The Hermit has physical attacks to follow up on it with. More than that though, he is WAY more durable in this version, like 4 times the HP. If you don't know how to maximize your damage, this fight can be a slog. Fortunately for all involved, I cooked up a pretty good strategy for accomplishing this. It didn't go as smoothly as it did for me in practice attempts, but it ultimately only took about double the time the fight took in FES, which is actually much better than it sounds.
Social Progress
In FES
Lovers Social Link: Rank 2
Priestess Social Link: Rank 6
Academics: Rank MAX
Unsurprisingly, FES is the first game to hit Max Academics! I could have gotten this done sooner, but we have literally the entire next month and a week and some change of October to accomplish it, so I'm already way ahead of schedule. We're pretty much out of things to do at night, so if I don't need to walk Koromaru or play an Arcade game to boost up a Persona's stats, there will probably be some nights where I just immediately head to bed.
In Portable
Hermit Social Link: Rank 5
Justice Social Link: Rank 2
Strength Social Link: Rank 6
Priestess Social Link: Rank 6
Star Social Link: Rank 7
We're finally getting a good volume of Portable exclusive links in a single video! Ken's also in the Social Link pool now, giving us more to do at night. As mentioned previously, I did mess up slightly with Fuuka's link. You'll want to pick option 2 when she gives you the Rice Ball.
In Reload
Lovers Social Link: Rank 2
Koromaru's Linked Episode: Episode 2 Completed
Aigis Hang Outs: Gardening 3/3 Reading 1/3
Shiji Hang Outs: Cooking 1/3 Gardening 0/3
Not too much going on in Reload, but we have started Shinji's night time hang outs. Shinji's characteristic isn't that helpful, all truth be told, but we do have some fringe perks that come up from completing them as soon as possible, so he'll be seeing a lot of floor time in the coming videos!
Supplemental: Shinjiro Aragaki FES/Portable

"Adios, asshole."
Level 99 Stats
ST: 84
MA: 52
EN: 69(nice)
AG: 54
LU: 45
Shinji has no weakness OR resistances. Remember that in non-Reload versions of Persona 3, the resistances of SEES members reduce damage by 90% instead of 50%, so this isn't necessarily a strict benefit.
Skills
Regenerate 1, Fatal End, Counter: Starts With
Evil Smile: Level 39
Counterstrike: Level 42
Power Charge: Level 50
Blade of Fury: Level 52
Heat Wave: Level 53
High Counter: Level 55
Deathbound: Level 60
Regenerate 2: Level 65
Akasha Arts: Level 72
God's Hand: Level 77
The aloof and literally too-cool-for-school bad boy has finally returned to SEES! As you'd expect from a guy you primarily know for his headbutting ability at this point in the story, Shinji is the premiere physical bruiser of SEES. Aside from Evil Smile, all his learned skills are in the interest of either doling out physical pain, or aiding him in doing so. That said, Power Charge is pretty bad in these versions, the Regenerate skills heal far too little to matter, and Shinji's LU is awful so he will almost never actually land Evil Smile should you let him use it, so you're really just focusing on the damage dealing skills he has. And he does quite well with them! While he only narrowly edges out Junpei for damage, he's a much better crowd clearer than Aigis once he picks up Heat Wave. End game, his God's Hand is one of the single strongest thing that can be thrown out by anyone in SEES, and High Counter essentially bakes in a 15% physical resistance to him as he'll randomly fling Shadows' own attacks right back at them. Shinji has a bit of a slow start when the only physical move he has is the already failing Fatal End, but it's not too difficult to make/find a mighty axe for him to work that high ST until he picks up his multi-target moves. Before we get onto version specific things to keep in mind for Shinji, there are a couple amusing peculiarities about him. Like Koromaru, he doesn't have an in-story upgrade and instead has the full breadth of his skill list to learn from the jump. Another funny thing is tied to how Persona 3 handled its party members learning skills prior to Reload: Since you don't get to choose what you party members forget and they almost always replace lower tier skills with their functional superior even if they have an empty slot, Shinji is the only character who ends the game with just 7 skills instead of 8 (God's Hand, Akasha Arts, Deathbound, High Counter, Regenerate 2, Power Charge and Evil Smile). Not sure why they couldn't think of anything else to add in there, but it tickles my funny bone if nothing else.
In FES
AI control strikes again with Power Charge being a pain in the ass to deal with. If left to his own devices, Shinji has a bad tendency to waste his turns upping it, even if he could outright kill the enemy without it. While he has a low SP pool, he has literally nothing else to do with it but Evil Smile, so he can waste quite a bit of time doing it. Luckily, Tactics like Conserve SP shut it off while still allowing him to use high powered skills like Deathbound, so it's pretty easy to work around. Past that, Shinji is fairly solid if a bit less versatile than Junpei due to lacking a useful buff skill like Junpei has. He blows Aigis out of the water for multiple reasons. In addition to having way higher ST and good enough EN+HP, Shinji picks up stronger attacks sooner and has one more critical thing Aigis lacks: an elemental weapon! By fusing the Persona Thor into a Nihil Axe, you can create the Elec element hammer Mjolnir, giving Shinji a means to deal non-physical damage backed by his mammoth ST. Mjolnir is even stronger than Gae Bolg with an attack value of 340 while similarly having the relevant elemental boost ability baked in. By kitting out Shinji with Indra Bracers and casting Sukukaja on him to offset Mjolnir's low accuracy, Akihiko can go screw as far as damage is concerned as Shinji becomes the ultimate Elec attacker of SEES. Literally the only thing that trumps him is the Protag using Thunder Reign with the same boosts... or Mjolnir also. And hey, why not double up if it's effective? I've already demonstrated how good that can be with The Hermit. This bit of versatility is what really puts Shinji over the edge, and makes him a good fit for a team that's trying to maximize its damage output.
In Portable
All things that were good about Shinji originally still apply here, with the added bonuses that you don't have to wrangle his AI and he can also be an item caddy should the need arise. Like Koromaru, lacking an in-story upgrade means Shinji also joins with the baked in Endure passive that all party members pick up in Portable. There's also a minor sidequest reward you can get for frequent use of Shinji, but we'll get into the weeds on that later. Just a very straight-forward and easy to use party member!
All in all, Shinji has a pretty modest start as a sturdy anchor that does reliable damage but has limited ability to support the team. All at once though, he explodes upwards into the best non-protagonist fighter on the team by a mile. He picks up Heat Wave at level 52, and Thor is a level 53 Persona, so picking both these up around the same time suddenly makes Shinji the real God of Thunder. He'll help you tear through mobs if your all-out attack doesn't cut it, and clap the enemies like thunder in boss fights. He's an excellent party member, and I'm looking forward to getting good use out of him in the future.
Supplemental: Shinjiro Aragaki Reload

"Now, this'll end it!"
Skills
Fatal End, Blade of Fury, Heat Wave, Bloody Charge, Endure: Starts With
Counterstrike: Level 41
Regenerate 3: Level 44
Deathbound: Level 46
High Counter: Level 51
Brave Blade: Level 55
Debilitate: Level 59
God's Hand: Level 63
Akasha Arts: Level 66
Firm Stance: Level 70
Holy smokes! Like a lot of characters thus far who were solid already in the older versions of Persona 3, Shinji has been tuned up a bit and has had everything cranked past 10 in the transition to Reload. Shinji is THE physical specialist of Reload, make no mistake. His ST is through the roof, and he's backed by the much better Regenerate 3 and Endure skills for longevity in addition to his solid HP+EN. Power Charge no longer sucks ass, and Shinji now gets the the more interesting Bloody Charge variant that costs HP to cast instead of SP as well as applying a Rebellion-esque crit buff to the Castor (apologies). The HP cost also synergizes nicely with another attribute of Shinji that we'll get into in a bit. He starts with the extremely powerful Heat Wave skill, trouncing Junpei and Aigis' AOE damage on join, and he very quickly picks up the amazingly good Deathbound. In general, Shinji's rate for learning new skills is just ridiculous. He picks up end game skills others see in the 70's as early as the 50's, with Brave Blade coming at Level 55 and DEBILITATE coming at level 59! Nearly 20 levels sooner than Koromaru can get it, and the first Non-DLC Persona the Protag can snag that from is Level 65. Evil Smile getting dropped from his skill list is obviously a more than worthwhile trade for one of the best support skills in the game. And then he goes onto learn God's Hand and Akasha Arts (two of the point-for-point strongest skills in the game) before anyone else learns their best attacks. The cherry on top of this triple scoop sundae is Firm Stance, which trades out Shinji's ability to dodge for a 50% reduction to ALL damage received, a more than worthwhile trade in almost any situation. (And this only applies to damage dealing moves, he can still resist ailments!) If I were not committed to rotating people around for varieties sake in Reload, he would be wrecking shit for me full time.
Does Shinji have any drawbacks? Well obviously, his options are a bit more constrained when he's faced with an enemy that walls out Slash and Strike attacks. Mjolnir is still a thing in this game, but it's thoroughly less impressive as an option on its own merits, and Shinji benefits much more greatly from having weapons with skills that strengthen the things he's already good at. Until he gets Debilitate, he can easily find himself reduced to turtling and being an item caddy until his Theurgy charges. Aigis in contrast, at least have her buffs and healing on top of that while she waits for her opening to strike. Also funnily enough, they went through on making Shinji's MA a gutter tier stat that gets almost no investment throughout the game. While this generally doesn't matter since obviously he has no magic attacks to use it with, it does bring his Theurgy down from Excellent to merely Really Great. Remember that Theurgies take both ST and MA in equal measure to determine their final damage, so being really weak in one stat does bring the attack overall down just a tad. That said, Shinji's Theurgy has one of the highest power values of any in the game, so it's not that big a deal. I wouldn't really recommend investing Magic Incenses into Shinji to bolster it as anything other than a Clown option, but it can be fun to push that damage number as high as possible. Speaking of Theurgy!
Characteristic and Theurgy
On certain evenings, you can spend time with Shinji Cooking or Gardening. Completing 3 of one of these events will unlock Shinji's Auto Bolster Characteristic. This causes Shinji to start every battle with Tarukaja and Rakukaja applied to him, giving him even greater survivability and damage for 3 turns right away, no need to buff him up. Completing 3 of the remaining event upgrades this to Auto Heat Riser, which adds Sukukaja on top of it. Now this is a pretty solid ability in a vacuum, but how is it in practice? Honestly, this probably one of the worst characteristics in the game. Obviously buffs are good... which is why by the time Shinji joins you'll have obtained stuff like Matarukaja and Marakukaja to buff up the entire party for tough fights. In these situations, Auto Heat Riser is just kind of redundant, since you'll be buffing and re-buffing the party anyway. Don't get me wrong, it's convenient for Shadow encounters when crawling through Tartarus... but around the time Shinji joins you're not that far out from picking up the Auto Ma- abilities, upgraded versions of the auto buffs that apply them to the entire team rather than just the Protag. With the ability to directly pick skills inherited through fusion, it's easier than ever to create an Auto Team Buff Persona, and then just shut off Persona Memory so you always default to it in every fight you get into. Once you have this set up, Auto Heat Riser essentially does nothing, which is a real shame.
Fortunately, things look up a bit when we get to Shinji's Theurgy. Shinji has a simple but elegant charge condition, being an HP counterpart to Ken's: When Shinji falls under 50% HP his Theurgy begins to charge faster. Incidentally, Bloody Charge takes 40% of your HP to cast, so between that an either soaking up a hit or just using a skill after, Shinji can have this condition fulfilled almost full time. And with Endure, Regenerate 3 and, by the end game, Firm Stance he can have this in effect with a remarkable amount of safety from death on top of it. Which is good considering what his Theurgies actually are!
Bleeding Fury: Essentially a juiced up version of Junpei's Hack 'n Blast with Strike as the element. This is a single target attack that has the third highest power value of any Theurgy in the game (only being weaker in terms of base power value than Mitsuru and Junpei's second Theurgies) and an utterly ludicrous 30%(!!!) crit rate on top of it! With something that gives him Apt Pupil and the crit buff from Bloody Charge, Shinji can notch around a 70% chance to crit with one of the most powerful attacks in the game. Mix in Strike Boost/Amp and it just gets silly. Anything hit by this skill will definitely be feeling it, and it's essentially a capstone to Shinji's already excellent offense: He'll be revving up to uncork uber-tier physical skills the whole fight just to slam out one last attack that takes the obscenity to new heights.
Nothing!: Perhaps they couldn't think of anything better for Shinji to do with his Theurgy Gauge, as he's uniquely the only character in the game with only one Theurgy. Admittedly, I can't imagine what else I'd give him either, though an AOE Theurgy for Tartarus boss fights might have been nice. Given how borderline broken Shinji is otherwise though, it makes sense they'd give him a more overt weakness like this.
Shinji is the GOAT of physical attacking in Reload. You'll never regret bringing this guy along, he's just insanely good in all the ways a dedicated attacker could be. Given that he also picks up one of the best support skills in the game, he's also great in ways they typically aren't! I was already plenty excited to have him along in FES, I'm over the moon this guy is finally here in Reload, things are going to be great going forward!
It's time for the next Persona 3 Vanilla stream, starting soon!
Interesting Things I Learned This Stream
-It is wild how quickly you can max out your social stats in this version. I have hit Rank 6 for everything at this point, and maxed out Mutatsu shortly after so now there is literally nothing to do during the evenings unless you need to visit the Velvet Room. Koromaru walks were added in FES, so that's not something to pass the time either.
-The point requirements for social links are ever so slightly different in this version of the game and it's kind of funny. It works out that links like Maiko progress slightly faster though because we have basically no spare days to advance links.
-The Summer Festival date is not a mandatory event in this version and it has a very funny interaction with the Hermit link. Hanging out with Maya on the day of the Summer Festival results in the one time in the game where the Hermit link does not eat an entire day. Why, I have no clue, but it lets you get some unique dialogue from Akihiko. It really threw me off when this happened.
-Tanaka's link has begun and must now be worked into the daytime schedule. As far as I know, he's available most if not all days of the week, though we'll generally only be pursuing his link when there's an absence of anyone else to advance. Thankfully, he's still a Semi-Automatic link.
-The film festival is a complete trap in this version of the game, pretty much any of the dates will ruin you chance to max out every link in the game. Thus, we spend 4 days in a row trapped in our room playing an MMO. Interestingly, the days you get invites sent to you are slightly different in this version.
-With no relationship fortunes to bolster our link progress, we're starting to see a lot more night time phone calls accepted in order to keep our links moving along as well as our friends placated. This makes the Sun social link a bit tougher to finish, though times like Summer are great for ekeing out more dates.
-Going into Tartarus, I'm see all sorts of Personae in Shuffle Time that you don't see until way later in FES or some I don't think you see at all. A lot were also beyond my level, which was quite frustrating.
-One good pick up at this point is Parvati, a level 35 Persona in this game. She's a good caster that learns Marakukaja within one level of being fused, which we get immediately with our Priestess Social Link. I was able to get her with Agilao and Fire Boost, which worked quite nicely for the Hermit.
-Seriously, there is nothing to do at night now lol. The sign-in sheet sees a lot of use in this version!
-We get a good look at how many people can flag you down at lunch time. There will be at least one time in FES where we will also get a line of 5 people keeping the protagonist from his cafeteria pizza.
-The Hermit was a slower and more methodical fight in this version due to lack of good damage dealing options, but it wasn't too bad. I actually got to see some of the stuff he'll throw out towards the end of the fight should you not blast him down within the first charge cycle. A Mind Charged Ziodyne is a little intimidating, but he was so weak by the time he set it up that it didn't amount to anything for him.
Part 39 is out! A very plot heavy installment as several of Persona 3's plot threads begin to converge and we get more insight into the participants involved in them. We also have quite a few Linked episodes lined up, with rewards of varying usefulness for viewing but they are all certainly rich in characterization. Outside of the world of Reload, things are going to become pretty relaxed in terms of scheduling. Social Stat raising is no longer a concern in FES and will shortly no longer be a concern in Portable, so we can largely just spend our days getting right to the social links we need to address. The FemC has also gained access to all of her Night time social link options, so the evenings will be fairly busy for awhile going forward!
Extra Notes
In FES and Portable
-Going forward I plan to just montage anything in FES in a single segment as we've basically exhausted all major differences between it and Reload at this point, with night times being quite light on things to do. I'll remark on the noteworthy things but otherwise the FES recording sessions are now just me beelining to the Social Link I need to do for the day and then immediately doing the Sign-In Sheet or Arcade to finish out the day.
-We have complete freedom with when we can go to Tartarus in FES now, so I'll probably make my first expedition between this video and the next.
-We unlock the final night time Social Link for the FemC, Shinji! He reps the Moon Arcana (rip nozomi) and is pretty unique in structure: He's a semi-automatic link where the choices you pick don't really matter (with one notable exception at the end) and uniquely you must choose to hang out with him when he is available to do so. Failing to make a date for Shinji results in the link becoming impossible to complete, so be sure to give him the attention he needs.
-Saori
In Reload
-We get our first instance of Walkies with Koromaru in Reload, in this instance meeting Chihiro to get some points we needed for her Link. Like FES and Portable, these walks where you run into other people you have Social Links with always happen on specific nights, so you can include them in a Max Social Link route with meticulous enough planning.
-We power through most of Koromaru's linked episodes in this video. There isn't really a hard deadline for these, unlike other Linked Episodes, and you can more or less address them at your leisure. The final Episode doesn't unlock until the very end of the game, so it's not critical to take care of them now but it's one less thing to worry about for our days going forward. Certain Social Links also benefit from being addressed later in the game, so that's another reason to take care of Koromaru's events now.
-Ken's Linked Episode also begins here, and his is more in line with Junpei's and Akihiko's: Be sure to address it ASAP! Ken's takes place at night, like Akihiko's, so it's not much of a hassle for scheduling.
-The Mahjong quest is essentially the same across all versions and is another instance of needing a Social Stat at a certain level to complete, in this case Courage.
-We notably don't get any social link points from Yukari's Rank 3 event, so we'll need to take some special care in the next part to keep her link going smoothly.
Social Progress
In FES
Sun Social Link: Rank 3
Emperor Social Link: Rank 5
Fortune Social Link: Rank 3
Magician Social Link: Rank 8
In Portable
Sun Social Link: Rank 2
Moon Social Link: Rank 2
Emperor Social Link: Rank 6
Temperance Social Link: Rank 5
Lovers Social Link: Rank 9
Hermit Social Link: Rank 6
In Reload
Sun Social Link: Rank 2
Lovers Social Link: Rank 2
Justice Social Link: Rank 9
Koromaru's Linked Episode: Episode 4 Complete
Ken's Linked Episode: Episode 1 Complete
Shinji's Hang Outs: Cooking 1/3 Gardening 1/3
Fuuka's Hang Outs: Gardening 2/3 Reading 1/3
Koromaru's Linked Episode resolves much later on, so he's not a scheduling consideration anymore. For all you Shinji fans out there, he's going to be getting a lot more focus in the coming videos as in addition to his hang outs we'll also have his Linked Episode to go through!
The next couple supplemental videos have been released! I'm going in reverse order here though and starting with #20 which has the social links. A big batch of links that we haven't seen in more than a minute due to Summer vacation, though mostly on the side of FES since we are now absolutely flush with FemC exclusive links in Portable. I gotta say, it's much easier to edit these now that I don't have to pay attention for when I interact with Tanaka and Mutatsu. Additionally!
I've compiled all the bosses for Yabbashah plus the Full Moon Shadows we've toppled! I've also elected to include the Monad Passages into these videos, as while there isn't anything analogous to them in FES/Portable, they're complex and generally tough enough that it feels wrong to leave them out. I'll be doing my relative difficulty ranking for the mandatory bosses, but I won't dwell on thoughts for the Monad Passages since they're not mandatory and tend to have more puzzle elements anyway.
Portable Furious Gigas=FES Furious Gigas< Reload Ochlocratic Sand and Arcanist Decapitator
The Yabbashah mob bosses are remarkably straightforward in both FES and Portable. You take things slow and incapacitate the Gigas with Down/Dizzy, and pop off an All-Out Attack at the right time to finish them off. In this case the specific element we need to bring is Wind. Like the Golden Beetles, they're quite resistant to it, but you can easily chip them down with it until you're sure you can secure the kill. Obviously they're tougher if you don't know that the Protag and Yukari can just endlessly stun lock them, but they are completely shut down and also destroyed by Attack Mirrors. The Portable fight was slightly more interesting since I leaned more on Aigis and had to be a bit more meticulous with Dizzy incapacitations, but the fight is short enough that it doesn't get a chance to become more complicated than FES. I rate the Reload fights higher purely because they have slightly more going on and I can't just completely prevent the enemies from acting. I also made some pretty poor line up choices which created additional challenges (such as Mitsuru in the Ochlocratic Sand fight) but even with pretty bad luck when it came to Ailments, overwhelming offense and Theurgy spam still won the day.
Deviant Convict and Controlling/Dependent Partner<Portable Fanatic Tower<FES Fanatic Tower
What's there really to say about the Reload bosses here? Once again, popping off with Theurgies allows you to easily circumvent any nasty stuff they can potentially do. The Partners are teed up to be easily dispatched with Aigis, so it ended up being a remarkably low key finish to the first half of Yabbashah in Reload, Monad Passage not withstanding. I was expecting to really struggle with the Portable version of the Fanatic Tower since I rolled in with just about the worst team you can bring to it, but having full control over my team and being able to avoid weakness hits with Guarding and Orgia Mode made this a fairly slow but easy fight. I had a pretty rough time with the first attempt in FES, I really should have tried to clear that poison instead of toughing it out. The damage eventually just overtook me. I was somewhat disappointed the boss didn't do Poison Mist in my second attempt. Not the toughest battle we've faced in the game thus far, but definitely one of the more arduous.
FES Chariot+Justice<Reload Chariot+Justice<Portable Chariot+Justice
The ordering of this might seem a little weird. I dumpstered the Portable version of the fight pretty hard after all. I rate it the hardest for one reason and one reason only: Myriad Arrows. Justice can throw out this end game level skill, and if it crits someone on Maniac mode, you lose no questions asked. If you don't have any Attack Mirrors, you have no choice but to just pray it does not use that attack, or if it does that it doesn't crit. Fortunately I had plenty of Attack Mirrors and it never used it anyway. To my knowledge, Myriad Arrows is a thing in FES but it's not an automatic game over if anyone gets critted since crits deal less damage and he doesn't get One More off of that unless it crits everyone in the party. As usual, the Reload battle is a lot more complex, but for once this doesn't really translate to a tougher fight. Aigis takes to this fight wonderfully and the bosses themselves don't generally hit hard enough to be too much of a concern.
FES Magical Magus=Portable Magus=Reload poor bastards who get nuked by Power Howling boosted attacks
Christ. Magical Magus are kind of the last mob boss of Tartarus that's a lay up if you have their weakness. They can be scary... if you let them do anything. Incapacitating them with fire makes the fight into just a magical version of the Furious Gigas fight. The most I can say for the Reload bosses is that they mildly slowed down their inevitable doom with debuffs to counter my set up and the poison from Venomous Magus. Power Howling and Physical attacks are just too good and they only get better from here.
Reload Imposing Skyscraper<Portable Natural Dancer=FES Natural Dancer
The Skyscraper fares no better in Reload, I chew him up and spit him out without a single care to what the hell he does. Natural Dancer is a fight that relies entirely on player ignorance. If you don't know what the Natural Dancer does, you are in for an absolutely miserable time. Fortunately, in both FES and Portable, I had wind resistant Personae and Charm Immunity on the Protag, making the fight largely free. If not for Tetrakarn, the Protag could easily solo this fight with the right set up, and even Tetrakarn would just randomly make it take longer. If you don't have a set up like I did, the Portable fight is probably slightly easier if only because everyone can be commanded to use Dis-Charms while the PS2 AI is famous for it's inability to handle ailments properly.
FES Hermit=Portable Hermit<Reload Hermit
The Hermit is essentially no issue in FES and Portable. He takes so damn long to charge up, you've likely just about killed him by the time he unleashes his first attack. He has no way to follow up on the Shock status either, making the fight an absolute cakewalk. He has some other things he can do when his HP gets low like Ziodyne and Mind Charge, but he's not liable to get any chance to flex those ability. Reload Hermit, by contrast, actually has a lot more going on for him. Not only can he take actions while charging, his charge speed increases as the fight goes on. Additionally, Shock now robs you of a turn and the Hermit has powerful physical attacks, so he can actually ruin your day quite effectively once he enters the Perma-Charge status. Reload Hermit also pretty infamously has way more HP than the FES/Portable version. If you haven't figured out how to effectively stack damage bonuses to maximize your output, this fight can take forever and a half. Fortunately, even with a vulnerability in Aigis, my team was well suited to blast this guy down. Shinji is basically tailor made for the fight in Reload, so he helps expedite the process immensely.
After some editing goofs necessitated an entire re-edit and re-render of the video, Part 40 is out! It is the Shinjiro Aragaki hour as we power through most of his Linked Episode and his night time hang outs this go around, AND make good headway on his social link in Portable. And there's still plenty to go, especially for the Portable social link! We also fit in some time for Ken and get another maxed out link. Been awhile since we've had one of those! On the FES side of things, I've also gotten my first Tartarus expedition for the Moon cycle done. This specific section of Tartarus is probably the last time the bosses thrown at us within Tartarus pose a serious challenge, and they saved some of the toughest ones for it!
Extra Notes
In FES and Portable
-I've hit the point of the game where I don't really have any specific level goals in mind for the protagonist and will likely hit any threshold I care about him naturally. On the other hand, multiple of my party members have notable levels I'd like them to hit. The immediately useful ones are Yukari and Junpei. Yukari picks up Mediarama at Level 43 while Junpei picks up the extremely useful Marakukaja at Level 44. The former isn't super important due to AI stupidity, but it is handy to have in the pocket. Marakukaja on Junpei though is extremely helpful, and I'd like to have it before the next Full moon Shadow. I wasn't able to get them there on the first trip, but it shouldn't take more than a half hour to accomplish on the next trip.
-I actually don't have much to say for Portable really, we're just hyperfocusing Shinji out of necessity. We're also pretty close to maxing out Rio, which is notable because it might make it worthwhile to re-fuse Nata Taishi just to immediately get a Herculean Strike card.
In Reload
-We want to complete Shinji's Linked Episode ASAP, which is fortunately easy because it's available to advance most every day of this moon cycle. Note that you can end the Episode prematurely in Mitsuru's scene on 9/15 if you don't insist on taking the Extension Form back to Shinji.
-We advance some of Ken's night events this time around too, and brewing Coffee with Ken is somewhat notable as being a source of SP restoratives if you like hoarding those. Assuming it's not at the expense of Aigis, I'll probably focus on Ken the nights he's available, since his Characteristic is decently useful for him.
-We finally max out Justice in this game and get access to Melchizedek down the line. He's a pretty solid Strike attacker, picking up the ever useful God's Hand and Akasha Arts. he also is easy access to Hamaon and Hama Boost if you like that, but I don't care much for insta-kills in this game.
Social Progress
In FES
Chariot Social Link: Rank 9
Priestess Social Link: Rank 8
Magician Social Link: Rank 9
We're on the cusp of a couple more max outs here! We attend a date with Fuuka in this part also, and another one will be coming up very shortly. It's notable for being the only date in FES where you actually need a gift since giving the correct answer itself isn't enough. Fortunately, Fuuka loves empty glass vases for some reason, so that's easy to manage.
In Portable
Justice Social Link: Rank 3
Moon Social Link: Rank 5
Chariot Social Link: Rank 8
Lovers Social Link: Max Rank
Hey another max out here too!
In Reload
Strength Social Link: Rank 8
Justice Social Link: Max Rank
Shinji's Linked Episode: Completed up to Episode 3.5 (Shinji's episode is kind of weird like that)
Shinji's Hang Outs: Gardening 3/3 Cooking 2/3
Ken's Hang Outs: DVDs 1/3 Cooking 1/3
Like I said, Ken's Hang Outs are pretty worth it to pursue due to his fairly helpful Characteristic. Shinji's is less so, but we're close to done with him anyway and finish right at the start of the next video. Haven't had much in the way of Social Links since we've had so many Linked Episodes to view, but we'll be getting back to normal routine soon enough.
Part 41 is out! After being absolutely inundated with Linked Episodes for the past few parts, we're finally done with those for awhile and have a slight return to normalcy. Takaya gets another Reload exclusive appearance to be an annoying prick again, and then the game decides to speed us through a few days of September with a convenient typhoon. Next time we'll have an absolute blitz of Social Links and evening hang outs, before we once again find ourselves poised to enter Tartarus!
Extra Notes
In FES and Portable
-I hit my level goals in FES with Yukari and Junpei learning the last skills for now that I care about. Junpei having Marakukaja in particular is a huge help for the coming future. Yukari kind of has her last hurrah here: after the next Full Moon boss Ken will get an in-story upgrade that allows him to learn more and better skills than Yukari, while Yukari stagnates for a frustratingly long time. That's just something I'm going to have to bear in Portable, but in FES I'll be shifting into my preferred team for the remainder of the game.
-Conveniently, I also hit Level 48 with the Protag, which allows me to fuse Dionysus. As a Moon Persona, he creates weapons that boost crit rate, and at level 48 they will have ~225 power making them just better than most physical skills at this stage of the game. Akihiko also has a story upgrade coming up that allows him to finally pick up Fist Mastery, allowing him to put his good ST to work alongside a pair of Moon gloves (provided I don't need Star gloves to patch out his weakness).
-We finally unlock Special Fusions in FES and Portable, and they are superficially more complicated than they are in Reload. We have new spreads in Cross, Pentagon and Hexagon Spreads, each one mandating specific Personae. In FES, you're not even allowed to see what you can make until you have the necessary materials in stock, which is something they relaxed for Portable. While Reload axing these and Triangles spreads for just Normal and Special Fusions is definitely a good case of streamlining, I will admit it's a lot less flavorful than this iteration of special fusion. Having these dedicated menus unlocked after the mid-game just makes each Special fusion feel... well, Special. It is a shame it unlocks so late though, poor Black Frost is already irrelevant.
-It's possible to get a similar scene in Reload for what happens in the Festival Clean Up in FES, but you do have to go out of your way to start multiple romantic links instead of having them forced on you. Truthfully, I've never tested to see if the situation can be bypassed in FES since even on New Game + it would take many hours to get to this point and not pursuing any of the female links by now goes a long way to making max social links an impossibility.
-Since it's not even possible to have multiple romantic links at this point in Portable, Portable instead gets a production call-back/narrative call-forward to the notorious "Miss" Yasogami High pageant from 4. I will admit, I do find Junpei's enthusiasm in this scene to be pretty funny.
-Since I'll never get a chance to mention this again and it's semi-related, FES is not actually an acronym for anything and is instead a shortening of Festival. Fun little bit of trivia there.
-Saori
In Reload
-Shinji's linked episode is not done just yet, but it'll be a bit before the final event for it pops up.
-Shinji now has Auto Heat Riser, and it's a pretty whatever ability. Decent for now, but falls off quick. Now that we've completed all his events though, we can move onto other hang outs! If you're looking for a decent resource for routing these in, GameFAQs contributor Lukaknight made a Calendar guide listing every available activity for every playable day in the game. In general, every character has about 13-15 nights within the game where a given activity can be done with them, with a distribution of about 2-3 events per month. Once the entirety of SEES has joined, these events have a noticeable uptick in frequency. For the most part, as long as you're pursuing at least one night time hang out whenever multiple are available, you'll max them all sooner or later. One notable convenient case of there being 3 events per month is Aigis' reading activity. She'll be available to read with on 9/25 and 9/30, allowing us to pick up Phys Amp for her before we head to Tartarus again. We're also finally going to get a chance to pick up Akihiko's characteristic, which is something he's been needing desperately.
-Shinji's movie date is one of the biggest beneficiaries of more voice acting being added to the game, I have to say.
-We actually go on a date for once in Reload, this time in the interest of boosting up Yukari. In theory, enough night time hang outs would also get her to the next rank, but that's obviously not a very practical use of our nights since she already has her characteristic maxed out.
Social Progress
In FES
Emperor Social Link: Rank 6
Fortune Social Link: Rank 4
Moon Social Link: Rank 1
Magician Social Link: Max Rank
In Portable
Temperance Social Link: Rank 6
Moon Social Link: Rank 6
Priestess Social Link: Rank 8
Justice Social Link: Rank 4
Strength Social Link: Rank 7
Hermit Social Link: Rank 7
In Reload
Fortune Social Link: Rank 3
Hermit Social Link: Max Rank
Moon Social Link: Rank 5
Shinji's Linked Episode: Episode 4 Complete
Ken's Linked Episode: Episode 2 Complete
Shinji's Hang Outs: Gardening 3/3 Cooking 3/3
Koromaru's Hang Outs: Brushing 2/3 DVDs 0/3
Mitsuru's Hang Outs: Cooking 3/3 Reading 2/3
Akihiko's Hang Outs: DVDs 2/3 Cooking 1/3
We're going to rapidly see the conclusion of multiple characters hang out events. Aigis will be done completely before this month is out, Akihiko will finish off DVDs, Koromaru will be done with brushing and we'll have Ken at 2/3 for both activities by Moon Cycle end. By November we should more less be done with all of them except Koromaru I think, meaning we might actually get to see more of Tanaka and Mutatsu soon! There's not really much hurry to finish their links because even with fairly sub-optimal scheduling, it's possible to have an entire two months worth of free time to finish their links.
The next supplemental video is out, compiling the repeated social links in FES and Portable for the previous two videos! Since we're officially done with non-unique night links in both games and there several days either skipped or without direct advancement activity, I figured it was better to just roll these into a single longer video than two short ones. On the more mundane level, we pick up at the mid point for several links such as Temperance and Emperor, and also initiate the Moon link in FES finally which will not be seeing major focus for a very long time. On more exciting news, we secure a couple max outs. I don't have to deal with Kenji in FES anymore and have unlocked the absolutely amazing Surt who we will see in full force next Moon cycle. We also wrap up Yukari's link for the FemC, which ends with Yukari deciding not to get a boyfriend right now because she enjoys spending time with the FemC more, which is about the least shocking resolution ever.
Part 42 is out! I'll admit, I was worried this video would end off being a 2 and a half-3 hour long marathon, but it ultimately just cleared the two hour mark and is only slightly longer than the previous one. Still quite a piece of content, but not as bad as I feared! Disregarding that, with all current Linked Episodes caught up and all story scenes exhausted, we get a nice breezy week of advancing social links and polishing off some night time hang outs with SEES. Currently, we have Junpei, Yukari, Mitsuru, Aigis and Shinji completely maxed out. Fuuka is one event off from maxing out, Akihiko needs two more cooking sessions, Ken it literally halfway done with 2 DVDs and 1 Cooking session, and Koromaru needs two more TV times. Once those are all done and dusted, we'll have ample time to return to Tanaka and Mutatsu and get them finished out in a matter of weeks! Things are looking good. We've got two Tartarus videos inbound, and afterwards we have one of the most memorable moments of the game lined up. Should be a fantastic time, I'm sure.
Extra Notes
In FES and Portable
-There were a few interesting miscellaneous points that came up in FES, but most of the recording was just Social Links for the Supplemental video. We had a date with Fuuka which if memory serves is the one and only time we need to give a gift in the schedule. We also maxed out Kaz which led me into a weird but kind of funny thing that happens with some social links: Schedule breaks. Every social link has a specific schedule for advancing it, and they'll hold to it. Some links break from this schedule though either at max rank or during certain Calendar times. Kaz, for instance, can be social linked with on any normal day for him when he's ready for his Max event, even when he normally wouldn't be available to such as exam lead up weeks. Mamoru has the interesting quirk that his Max out event must be done on day when school is in session, while Hidetoshi can be have his link attended every single day in the final week of the game. These are pretty weird and niche occurrences that don't affect scheduling too much, but their existence amuses me.
-Over on the Portable side, we max out Shinji's social link just about before the moon cycle rolls over. It is important to have done so, so make sure you spent every day he was available with him! Some interesting quirks come in for the Link at the end: to get the rank 10 event you must go to the police booth and Talk to Kurosawa (as in literally use the Talk command in the store screen, something you probably forgot even existed at this point) to get Shinji's watch back and qualify for the final event the next night. Uniquely, Shinji's romance is also not activated within his own link, and can instead be pursued via a follow up conversation on 10/2. I have to imagine these quirks caused most players to bungle this link on their first playthrough, if they were even able to intuit it was a time limited link because it was their first experience with Persona 3. *cough*.
-I've been regularly duping out Growth 3 cards at Naganaki Shrine, a slower but still fruitful process compared to Reload. I'll probably upgrade Eligor's Growth skill to 3 once we enter Tartarus again (Note that Growth skills do not stack, the highest leveled one overwrites anything lower).
-In the video, I play out the schedule up to 10/3, but I will be tackling Tartarus on 9/29 instead since it works out the best for scheduling.
In Reload
-Koromaru unlocks his Auto-Sukunda trait, an interesting but not terrible useful characteristic. It's a lot better for general use once you complete both of his hang outs and it upgrades to Auto-Masukunda, making your attacks much more reliable in hitting their mark in random battles.
-On more interesting notes, we get the stuff that make Aigis and Akihiko start to pop-off. Aigis' Phys Amp is a 1.2X multiplier to all her physical attacks, that pairs wonderfully with Strike/Pierce boosting bracers due to the multiplicative stacking. Mix in Orgia Mode and Power Howling, and Aigis can swing for the fences as well as a crit from Junpei currently. Akihiko gets his Buff Boost passive, a super unique effect that brings each buff from a 40% increase to about a 51% increase to relevant stats. It's not super impressive right now, but once he gets Buff Amp Akihiko essentially gets double the bonus from buffs applied to him, making him both stronger AND considerably more durable. Akihiko also starts to pick up some decently strong skills at this point, so I'm eager to get him some floor time in the next expedition.
-Fuuka meanwhile gets the rare defensive Characteristic, Weakness Buffer. This has the pretty whatever effect of reducing damage when a character's weakness is struck by 10%. It's a negligible effect, but it is at least active at all times. There are ways to completely eliminate weaknesses though, so much like Auto Heat Riser it has a pronounced shelf life (though it remains relevant for a bit longer).
Social Progress
In FES
Priestess Social Link: Max Rank
Chariot Social Link: Max Rank
Emperor Social Link: Rank 8
Fortune Social Link: Rank 5
Lovers Social Link: Rank 3
Strength Social Link: Rank 7
A couple max outs here, and we're poised to see a couple more funnel in! We have an exam lead up week after the next Full Moon, giving us an opportunity to finish up with Maiko and put some work towards Mamoru and Nozomi.
In Portable
Moon Social Link: Max Rank+Romance Initiated
Chariot Social Link: Rank 9
Hermit Social Link: Rank 9
Justice Social Link: Rank 6
Temperance Social Link: Rank 7
Priestess Social Link: Rank 9
Emperor Social Link: Rank 8
We also have a bunch of max outs queued up for Portable, with ones like Chariot being pretty convenient because we're just about at the point where we can make use of its reward!
In Reload
Temperance Social Link: Rank 5
Fortune Social Link: Rank 4
Priestess Social Link: Rank 7
Lovers Social Link: Rank 4
Sun Social Link: Rank 3
Mitsuru's Hang Outs: Cooking 3/3 Reading 3/3
Koromaru's Hang Outs: Brushing 3/3 TV 1/3
Akihiko's Hang Outs: Cooking 1/3 DVDs 3/3
Aigis' Hang Outs: Gardening 3/3 Reading 3/3
Fuuka's Hang Outs: Gardening 3/3 Reading 2/3
Ken's Hang Outs: Cooking 1/3 DVDs 2/3
The main thing we're maxing out in Reload currently is night time SEES events, and we're well on track to finishing most of these! Akihiko's the big one I'd like to see finished ASAP, but with so many completed the nights are becoming less cluttered and competitive so it's essentially a matter of course before they're done. Ken is also a pretty big priority since his Characteristic is quite helpful for him.
Another day, another supplemental video! These continue to be pretty light on Portable content and will continue to be so for awhile as we only really have a handful of shared links currently left available, with most of them on the cusp of maxing out. It won't be until November until a new shared link between the MC and FemC opens up, which I suppose is a good thing! Aside from that, we max out Chariot and Priestess for the MC, obtaining the useful ability to fuse Thor and the less-useful-but-still-decent Scathach. We also a get mildly amusing translation error (or at least I'm assuming that's what it is) where in the Rank 7 event for Hidetoshi's link, the correct response is the weirdly callous "He should suffer", which Hidetoshi mostly ignores and instead reacts like we said expulsion was too harsh as we did in the other versions of the game. It's the little things. Speaking of that, I do appreciate the mild differences in how the end portion of the Emperor link is portrayed for the FemC compared to the MC. Large portions of the link are copy pasted between the two, but it's nice to see when they do make those little adjustments to account for the presence of a Female protagonist.
Part 43 is out! It's another end of month Tartarus blitz, and ideally it's the last time we really NEED to do that. Across all versions of the game we're going to find ourselves with a new excess of free time in the evenings, giving us far more flexibility to take Tartarus trips at our leisure. In other news, we're set on SP management issues with a good Life Aid/Cool Breeze set up for every protag, and in Reload we will have more than enough items to keep our party topped off without need to invest fragments into the clock. I actually didn't use a single clock heal this trip in Reload, and only hit is up once as a precaution in Portable (which cost a piddly 25k Yen). We're just about making our way into having a set up for auto team buffs, and we're also poised to make specialists for every element!
Extra Notes
In FES and Portable
-At this stage, it's definitely not a terrible idea to stop and grind to catch up Junpei and Yukari. I've mentioned this a couple times, but it's ideal for them to be at level 44 and 43 specifically by the time you reach the second Tartarus boss this cycle. Junpei gets Marakukaja and Yukari gets Mediarama, both of which go a long way in making the fight a lot more manageable. I soldier without doing that, and it almost costs me dearly.
-On the FES side of things, Ken is an absolute beast right now. Vayu Bracers Gae Bolg is just the best damage anyone aside from the protag can do right now, even Portable where the weapon has the less useful Dodge Wind passive. This is convenient as the Protag has a definite edge in support right now with ready access to Mediarama and multi-target team buffs. Having Ken take that particular load off is amazingly helpful, and he does quite well against both bosses in this cycle. If you aren't interested in building up Junpei/Yukari, you can sub in Shinji who can do some good work if you can secure a Nihil Axe for him and fuse something decently powerful into it. Remember that I'm mostly just picking my Tartarus nights in FES based on where I decide to cut recordings for the in-game weeks, you have more than enough free time to do throw away nights where you go into to Tartarus for just one thing when playing casually.
-The biggest mistake I made for this cycle is on the Portable side of things: I didn't fuse a Sun weapon for Mitsuru! We've been able to do that for awhile since Yatagarasu (the first Sun Persona) is level 30 in FES and Portable, but I was putting it off since it wasn't immediately pressing. Welp, I put it off for too long, and it did cause some complications but it ultimately wasn't too big a deal. Like Yukari, Mitsuru doesn't care a huge amount about her weapons attack power and cares more about its secondary effect, so having a relatively weak fused weapon is not much of a drawback if it has such a huge boon as patching out a character's weakness in compensation. I correct this post Tartarus recording and hastily fuse off a Quetzacoatl into a Nihil Sword to make sure I never make this mistake again going forward. The perils of juggling three 80 hour games at the same time!
-As demonstrated in the Portable run of the fight, I make a serious mistake in the Arcane Turret boss fight by not realizing they were weak to ice. I basically never use Mitsuru past the Chariot & Justice fight casually and I'm never really building for Ice at this stage, so I just never tried ice skills on them! Had I known that, the fight would have been completely free, just knock down the turrets and have Ken whack em one at a time to kill them with no fanfare. The Portable version of the fight was about as straightforward as that hypothetical FES fight, with a little bit of caution taken to account for Mitsuru still being weak to fire. The turrets only Null fire skills, so don't worry about healing them up if the Magic Mirrors bounce the spells back.
-ARES! DESTROY MY ENEMIES, AND MY LIFE IS YOURS!!!
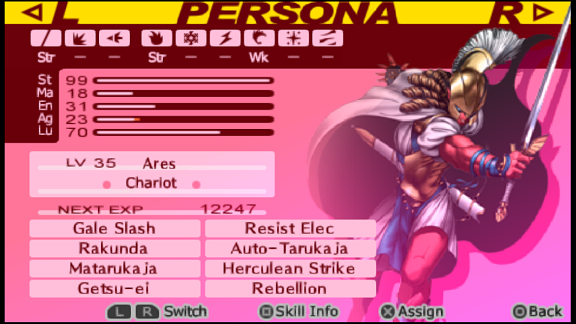
In Reload
-Shinji basically squashes almost everything you come across this cycle. Tag a weakness and shift to him to follow up with Heat Wave. If the enemy survives one, they won't survive a second when his turn comes around again. This is a cheap and easy way to win most fights, though if you want Shuffle Time consistently you can't use it for everything. Conveniently though, there's a number of enemies weak to Slash and Strike, and with pre-emptive strikes causing Distress half the time anyways Shinji can easily set up for crit induced All-Out Attacks.
-Like the previous Tartarus expedition, I took the liberty of clearing out some easy Monad Doors on lower floors to hit Arcana Burst before exploring Tziah. One notable pick up I got is the Devil Arcana: Not only does this double item drops from breakable objects in Tartarus (including Twilight Fragment Altars!) it also doubles item drops from non-boss enemies! This gives us a huge influx of gems and treasure, and it also essentially turns ever Rare Form encounter into two as far as treasure yield goes.
-One amusing little detail about the Pre-Emptive strike distress: this can apply Distress to enemies who are otherwise immune to it. A nice little advantage to have every now and then!
-We come across Dark Zones for the first time in Reload, and unlike in Portable these are not complete ass. Enemies do not react to your presence in Dark Zones, you still have the map, and most wonderfully there are Twilight Fragment altars scattered around Dark Zone maps. Dark Zones can actually occur when re-exploring floors also, giving you a chance for extra gains if you decide to prowl around for a bit of grinding. Just be mindful, the Reaper timer is short when in Dark Zones!
-We also encounter our first Greedy Shadow! This is a special encounter that snatches up all the treasure on the floor and hoists a guessing game on you: every time you make a correct call on which turn to make, you get better and better rewards. Make three correct guesses in a row, and you can subjugate the Greedy Shadow for big rewards and big EXP! This first encounter might just give you the win, I'm not sure on that, but future encounters it is possible to guess wrong and have the chase end without a battle. Greedy Shadow's themselves tend to have big HP pools but also no defense, so firing away with Theurgies is an easy way to win. Eventually Fuuka gets an ability that allows you to just skip the guessing game and trigger the fight with them immediately, but it'll be more than a minute before we get that. Elizabeth does have a request revolving around defeating a Greedy Shadow, so that ability is a good way to clear it if you get unlucky with the run ins you have with these.
-Please take Strong Shadows seriously, especially if they specialize in AOE physicals. Nothing like a Crit to seal your fate...
-The Tartarus bosses are of almost no consequence in Reload at this stage. Even with me picking teams at random and managing to bring the worst people for each fight every time, I still crush them with little issue. The random Strong Shadows are more threatening than these clowns!
Supplemental: Social Links Part 2, or How To Linkmaxx Your School Life
Been meaning to get to this for awhile, but busy busy busy. Anyway!
The Emperor
In all versions of Persona 3, The Emperor is represented by Hidetoshi Odagiri and is associated with Gekkoukan's student council. This is the first "club" link we'll be covering in Arcana order, though the first actual club link you can initiate is Chariot. Odagiri is somewhat unique in that though he is a school related link and follows the normal calendar restrictions those have, his association with the protagonist is largely professional and your only option to earn points for his link outside of Rank Up events is relationship fortunes (Okay Reload has a second option, but it's available very late in the game). Mitsuru will approach you on 4/27 and give you the option to up your membership for the student council, though you can put it off for awhile if you want to work on other links that are available at the time. The student council meets on Mon, Weds, Fri and Sat(except in Portable where Saturday is dropped). Odagiri is also sort of the platonic ideal of a streamlined link, as in all versions except for Vanilla and one rank in Portable, having a matching Persona and picking the correct answer will let you complete the link in 10 interactions. From FES to Reload, the Rank up requirements are,
Initial | 1(22) | 1(7) | 15(22) | 15(22) | 15(22) | 15(22) | 22(22) | 22(22) | Max
Initial | 1(22/34) | 1(7/11) | 15(22/34) | 15(22/34) | 15(7/11) | 15(22/34) | 22(22/34) | 22(22/34) | Max
Initial | O | O | O | O | O | O | O | O | Max
As you can see, Odagiri is pretty easy to max out due to his frequent availability and low requirements. He does need an Oracle burned on him for 1 day in Portable, but the FemC has almost nothing to do on Sunday's until the Sun Social Link enters the picture so that's not really a big deal. For the most part, I don't plan to cover Vanilla progression for these write ups since Vanilla is not the main focus of this LP, but I do want to cover interesting niche cases, and Odagiri is definitely one of them. In Vanilla, his progression is a lot more obnoxious.
Initial | 1(22) | 10(0) | 25(22) | 25(22) | 25(22) | 25(22) | 25(22) | 25(22) | Max
Remember that without a matching Persona, those 22's are actually 15's and that the point bonus you get for attending a non-rank up social link event without a matching Persona is 10. Also note that Relationship Fortunes don't exist in Vanilla and Odagiri never rings you up to hang out. That's right, in Vanilla not only does every single student council meeting have forced downtime after a rank up, there is no point in the link where having a matching Persona actually makes it go any faster, resulting in a link that takes almost twice as long to complete. It also has the unique distinction of being the only dialogue choice driven Social Link in the series where giving the correct answers matters, but having a matching persona doesn't. It's not a semi-automatic link like Devil or Sun, it's not a sidequest driven link like Hermit in 4, it's not like time limited Social Links added in re-releases that are essentially Semi-Automatic with choices in them to screw yourself out of finishing it, it's a just a weirdly annoying link to route in. Onto what Personae we get from this!
For FES and Portable, we have,
Forneus: Level 7
Oberon: Level 15
Take-Mikazuchi: Level 24
King Frost: Level 30 (Special Fusion, requires an item from an Elizabeth request to create)
Naga Raja: Level 36
Kingu: Level 46
Barong: Level 52
Odin: Level 57 (Unlocked at Max Rank)
Emperors serve as our early game Elec access, though many of the Personae found within also double as decent physical attackers. The main outlier is King Frost, who requires a sidequest to be completed to create him anyway. Emperors also have a solid function as easy ways to access good skills that you can then fuse down onto more powerful Personae. Forneus picks up Auto-Sukukaja, Take-Mikazuchi has innate Auto-Tarukaja, Naga Raja has Matarukaja, Kingu has Mediarama and Barong has the very situational Null Poison (but the situation you want it for is absolutely critical). Take-Mikazuchi is also part of the extremely overpowered Thunder Call fusion spell, but the main draw of this Arcana is its Ultimate: Odin. Odin picks up one of the most broken spells in the history of MegaTen in general, Thunder Reign. Thunder Reign is the ultimate Elec spell that deals more than double the damage of Ziodyne, obviously already a good thing. What puts it over something like say, Ragnarok, is its secondary effect: It has a 100% chance of Shocking anything not immune to the status. Remember that Shock guarantees all physical attacks against the affected enemy are now Critical Hits. This is unbelievably broken for multiple reasons. Aside from ratcheting up your party's damage, almost nothing in the game is actually immune to Shock, including the Reaper who can easily be cheesed with this skill. Anything not immune to Knock Down also can be smashed down with All Out Attacks, and if it some how survives you can just fire off another one with the next critical hit in line. It has a bit of RNG to contend with in non-story battles due the randomness of turn order in those, but if you're willing to just reset on The Reaper until you get a good turn order then that hardly matters. The only limiting factor is that Odin himself only picks up Elec Amp and not Boost in addition like Surt does with his passives, so you need to fuse it into him to maximize the damage of Thunder Reign itself. That's relatively easy to accomplish though, so it's not that big of a deal. Due to the excess amount of free time you have to play Arcade games in FES, there's also not really any reason to fuse Odin upward once you have him, so he essentially is just the best Elec Persona in the game. Now for Reload,
Forneus: Level 7
Oberon: Level 16
Take-Mikazuchi: Level 23
King Frost: Level 34 (Special Fusion, requires an item from an Elizabeth request to create)
Naga Raja: Level 43
Belphegor: Level 53
Barong: Level 63
Odin: Level 74 (Unlocked at Max Rank)
Pretty similar, actually, with some of the later reps having their levels slid back a bit. This is hardly noticeable though due to Reload's different level curve. Belphegor is a new addition, being a pretty solid Dark caster, and King Frost now has the added benefit of being one half the extremely powerful King and I Theurgy, though obviously you don't need to have him specifically on hand to cast it after you fuse him initially. Thunder Reign has been nerfed a bit, being a 60% chance to proc Shock instead of 100%, and more things actually resisting that status like you'd expect. He's worth running through to get the spell, but changes to how your nights are spent and the replacement of stat cards with incenses means that like with Surt, you'll likely fuse him up not long after creating him.
The Hierophant
A link actually represented by a duo in all versions of the game, specifically the kindly elder couple Bunkichi and Mitsuko who run the Bookworms used bookstore! This link opens up early on, (with it starting on 4/25 in FES) and is our first example of an "out-of-school" link. It has no direct connection to our day-to-day in Gekkoukan and its schedule runs completely independently of school events that lock us out of "in-school" links. Naturally, this means these links are best pursued when in-school links are not available to pursue. I think these links might also not fall into the Neglect mechanic like in-school links in FES, but I'm not sure on that. At least partially because you get a full week to pursue these links every month. The only major difference between versions for this link is that in Vanilla and FES, it's available Monday-Saturday, while in Portable and Reload it's available Tuesday-Sunday. The reason for this change in Portable is likely the repurposing of the Hermit link for the FemC, making it an in-school link and leaving her with no links to pursue directly on Sundays for awhile otherwise. Reload keeps this change since it generally hews closer to Portable's structure and script beats with a few exceptions. Onto progression!
Initial | 1(29) | 20(29) | 20(29) | 20(14) | 20(22) | 20(21) | 20(29) | 30(7)| Max
Initial | 0(44/67) | 20(29/45) | 20(29/45) | 20(14/22) | 20(22/34) | 20(21/33) | 20(29/45) | 30(7/11)| Max
Initial | O | O | O | O | O | O | O | X | Max
As you can see, the couple is a pretty archetypical streamlined link, with only two notable stopgaps at Rank 5 and Rank 9 potentially resulting in 3 extra timeslots being dedicated to them. FES can get around this for Rank 9 by attending a Walk event with Koromaru that results in a meeting with Bunkichi and getting the link done in 12 days, while the FemC can use her Charm bonus to bypass that altogether and get it done in 12 straight link events. Theoretically she can also bypass the Rank 5 stopgap with the same bonus, but you're not exactly spoiled for choice of who to hang out with early on so it's not super practical, but you could get the link done in 11 days if you put it off at that point. In Reload only the Rank 9 stopgap remains, and there's a new mechanic later on that will allow us to completely bypass that and it get it done in just 10 days spent on it. What are we looking at for Personae here?
In FES and Portable, the Hierophant link grants us the following,
Omoikane: Level 7
Berith: Level 13
Shiisaa: Level 26
Flauros: Level 33
Thoth: Level 41 (Must complete an Elizabeth Request to get the item to Normal fuse him)
Hokuto Seikun: Level 47
Daisojou: Level 53 (Special Fusion, Pentagon Spread)
Kohryu: Level 66 (Special Fusion, Cross Spread, Unlocked at Max Rank)
Hierophant is kind of an early game hero Arcana. Omoikane grants access to Zio skills as well as the ever useful Auto-Rakukaja, Berith is just a good beater with Auto-Tarukaja and a decent ST stat, and Shiisaa is amazingly useful in FES, bringing wide coverage in Ice Boosted Mabufu, Mazio and the ever useful Gale Slash. The Arcana kind of tapers off at that point, with Flaurous and Hokuto Seikun being kind of mid, though Hokuto is at least an easy high level access to Elec Boost. Thoth is also easy access to Mediarama, though that's more useful to the MC who's going to have a much lower Lovers Rank at the time Saki Mitama becomes available. Daisojou is a pretty great pick up in FES also, with Hama Boosted Samsara being essentially guaranteed insta-death on Light weak enemies, and pretty close to it against things that are neutral. It's also an easy material for Growth 3, though I prefer the Sun Persona Jatayu for that who doesn't need a special fusion to be created directly and also produces the card for the skill. Kohryu is kind of mid for an Ultimate Persona honestly, with plenty of things besides him bringing Mediarahan and Samarecarm to the table, though he does pick up the Null Strike and Null Pierce passives with enough levels.
Over in Reload,
Omoikane: Level 7
Berith: Level 13
Shiisaa: Level 23
Flauros: Level 33 (Special Fusion)
Thoth: Level 40 (Once again, needs an item from Elizabeth to Normal fuse)
Mishaguji: Level 48
Daisoujou: Level 59
Kohryu: Level 71 (Special Fusion, Unlocked at Max Rank)
Remarkably similar to the older versions for once, and kind of to its detriment. The lower rungs have most of the same stuff they did originally, though Berith lost Auto-Taru for more physical attacks while Shiisaa dropped Mazio and Gale Slash to pick up Herculean Strike at level 29, which isn't a bad trade per se. Flauros is a bit more appealing here, picking up both Crit Rate Boost AND Apt Pupil, serving as easy material for chain fusing those skills into something beter. Mishaguji provides easy access to Deathbound and Ziodyne, which can also potentially be helpful. Daisojou is relatively less helpful here since like Portable insta-kills aren't quite as reliable but it can be a fun way to mix things up if you're willing to foot the 40 SP cost per cast for Samsara. Since he's a Normal Fusion now, he's also a relatively better source for Growth 3 though again not a super necessary one (not the least which because a lot of things have picked up Growth 3). Kohryu has been buffed up a bit to provide access to some more appealing skills, namely Concentrate (aka Mind Charge) and Spell Master, a passive that halves SP consumption. He's not the only means of getting that passive, but with the Lovers Major Arcana card in effect he can learn it on fusion. He also comes with Makougaon by default, making him a good Light caster if you get him the necessary passives for it.
The Lovers
The Lovers Arcana is represented across all versions of the game by fellow SEES member Yukari Takeba, and is another potential romantic Social Link for the MC. Yukari's link notably gets a huge shifting around for the FemC: for the male Protagonist Yukari is not available until July 25th at the earliest, requires Max Charm, and provided you do start her link at the first chance, Summer Vacation quickly stomps out any opportunity to seriously advance it until September. By contrast, Yukari is the FemC's full on gal-pal and is available to hang out with as early as 4/28 with no special requirements to link with her. In a moment of give and take, Yukari is only available to hang with on Tuesdays and Fridays for the FemC, while the MC can chat her up on Mondays, Wednesdays, Thursdays and Saturdays. Naturally, this has implications on how useful the Lovers Arcana is within the various different versions of Persona 3, but we'll cover that in more detail below. As far as progression goes, Yukari is one of the more demanding links in the game, just like Fuuka.
Initial | 1(29) | 0(15) | 22(22) | 30(22) | 30(22) | 35(22) | 40(22) | 55(22) | Max
Initial | 0(22/34) | 15(0) | 22(22/34) | 22(0) | 30(44/68) | 30(0) | 35(22/34) | 40(22/34) | Max
Initial | O | X | O | O | O | X | O | X | Max
Yukari's progression is a bit interesting, as she hits several stopgaps but at the same time is slightly less demanding when it comes to points compared to say, Fuuka. She enters at a very crowded point in the schedule, so this is much appreciated. Funnily enough, her progression is probably even slower for the FemC, with basically no opportunities to get the link done any faster even if you have the max Charm bonus. Likely an accommodation of how much earlier she enters the link pool mixed with just how few links the FemC has to choose from compared to the MC at that point. Reload largely follows the FES progression, though with a few less moments where you need to do extra work to keep her moving along. Like Fuuka, it's desirable to leave Yukari's last couple events for the end of the game due to a mechanic that will help keep this link moving smoothly at that point. Just as one other notable thing, Yukari is notorious for being the one social link that regularly sees players blundering into a dialogue that prompts a reversed link, at least in the PS2 versions. Her Rank 5 event has a final choice that will put the link in Reverse if you pick it, though if you do screw that up it is possible to correct this with a relationship fortune or the rarely seen Make Up events. Reload made this choice more overtly negative to steer players clear of it, which kind of makes it a lot funnier if you pick it. Onto Personae!
In FES and Portable we have,
Pixie: Level 2
Alp: Level 6
Tam Lin*: Level 13
Narcissus: Level 20
Queen Mab: Level 27
Saki Mitama: Level 39
Titania: Level 48
Raphael: Level 61
Cybele: Level 68 (Unlocked at Max Rank)
*Exclusive to Portable
The Lovers is the first Arcana where I can't really say anything in it is super notable. Admittedly, this is pretty heavily impacted by the Arcana being an early game one with a relatively late link, meaning nearly every other Arcana available alongside it gets considerable fusion bonuses while Lovers slums it a bit. Narcissus of course yields us the incredibly helpful Narcissus Flower, and he at least has a pretty solid resistance spread. I also have a tendency to have Raphael as my auto-team buffer since he has innate Auto-Maraku while several Personae below him can be fused up with Auto-Mataru and Masuku. Cybele is a fairly bad Pierce attacker with Samarecarm and Bow Mastery for flavor, though she is one of the options for getting Spell Master if you're so inclined. The Arcana is more appealing in Portable for the FemC since she can max out the Lovers social link well before the MC can even start it. Considering this, Saki Mitama and Titania jump up a bit in usefulness. Saki Mitama secures Mediarama immediately and is one level shy of learning Divine Grace, while Titania will fuse in with both of those skills and picks up Ice Amp within one more level. Still not an Arcana I'm super hot on, but they have a bit more going for them when used by the FemC. Oh yeah, Tam Lin was also added and he is extremely whatever.
In Reload we have,
Pixie: Level 2
Silky: Level 5
Tam Lin: Level 13
Narcissus: Level 23
Queen Mebd: Level 28
Saki Mitama: Level 36
Titania: Level 49
Raphael: Level 60
Cybele: Level 67 (Unlocked at Max Rank)
Alp has been traded out for Silky (A proto Jack Frost ice caster) but otherwise the Arcana is fairly similar in use to how it is in Portable. Most of the Personae within either draw/fuse in with their core skills already learned, or pick them up within a single level up from their base. Saki Mitama, for instances, only requires a single level up to get Medirama instead of the ridiculous three he needed in prior versions to do so (with the added perk of a maxed out link also affording him Divine Grace). Titania loses her healing and Ice amp for a wider spread of ice spells, Freeze Boost, and Concentrate. Raphael picks up the somewhat unique Angelic Grace Passive, which gives a decent evasion boost against all magic elements, in addition to Heat Riser, while Cybele has a more complacent role as a Light caster with Makougaon and Light Amp. She also picks up Mediarahan in lieu of Samarecarm while also retaining Spell Master. Still a pretty whatever Arcana for my money, but there a bit easier to swing in this version.
The Chariot
The Chariot Arcana is represented by Kazushi Miyamoto (or Kaz for short) in FES and Reload, as well as for the MC in Portable. The Chariot social link is first available on 4/23, though you are not forced to start it right away. That said, if you have not joined a club by 5/26, the game forces you to on 5/27. Once started, you can advance the link on Mon, Tues, Thurs and Fri. This is the first school club social link you are faced with, and unlike the previously discussed club link you're actually given a choice of multiple clubs to join for the link rather than how The Emperor is singularly represented by the Student Council. Unlike Persona 4 though, this has almost no bearing on the script for the link. You can join the Track team, the Swim team, or the Kendo team and in all instances reality will be re-written to make sure Kaz is on the same team as you. The team choice mostly just serves as set dressing with some minor bits of flavor text getting subbed out within the link itself. Due to the lack of any real meaning to the choice and the fact that Kaz (and the later met Mamoru for that matter) are so obviously intended to be Track stars, Reload decided to drop this choice and just make the Track variant of the link the only one. A little disappointing as far as flavor goes, but I'm not super pressed about it. The other main notable thing about this link is that it also directly unlocks the Strength social link, with the Rank 3 event feeding directly into the Strength 1 event if you've made the right choices. The progression for Kaz's link is as follows,
Initial | 1(7) | 15(14) | 15(22) | 15(29) | 15(21) | 22(29) | 22(7) | 22(22) | Max
Initial | O | X | O | O | O | O | X | O | Max
Like Kenji who unlocks pretty much alongside him, Kaz is not an overly complicated link in terms of extra work needed to progress it, though he is somewhat infamous for his counter-intuitive dialogue choices when it comes to his preferred answers. Past that though, he's a pretty easy link to max out and is regularly available during a standard school week, so it's rare to see a playthrough that doesn't have him maxed out before October or even before the Summer begins.
For the FemC in Portable, Kaz is replaced with Rio Iwasaki and you're are faced with the two team choices of Tennis or Volleyball. I'm not sure why the FemC gets less options here, effort I guess. Rio's link can be started on 4/24, and is available to advance on Mon, Weds and Fri. Like with the MC's Chariot link, you're forced to start Rio's link on 5/27 if you haven't done so by then. Rio has no association with the Strength link, though she does pick up the event flag for unlocking the Tower link. Rio's progression is as follows,
Initial | 0(15/22) | 15(15/22) | 15(45/66) | 22(0) | 30(22/34) | 15(45/66) | 0(30/44) | 40(15/22) | Max
Not an overly complicated link to advance by any means, with some of the later levels being bizarrely light in their requirements even. There's only one point in the link where Max Charm is necessary to keep it moving at full speed, and conveniently it's at a point where you've unlocked many other links to pad out the days until you can shift back to Rio and get her moving again. For our schedule, we finish her a bit later than Kaz, but you can totally get her done in around the same time as him if you so desire. But what does the Chariot Arcana grant us in gameplay?
For FES and Portable, the Chariot Arcana has,
Ara Mitama: Level 6
Chimera: Level 9
Zouchouten: Level 14
Ares: Level 19
Oumitsunu: Level 30
Nata Taishi: Level 37 (Requires an Item from Elizabeth to fuse)
Koumokuten: Level 43
Thor: Level 53 (Unlocked at Max Rank)
Chariot is the first major Physical Arcana you see in the game, and they are definitely the lesser of the two early game physical reps. Physical in general is a bit of an underwhelming specialization in FES and Portable, Persona 3 definitely favored Magic on all fronts in its earlier versions. The Physical inheritance types have the unfortunate rub of being completely incapable of inheriting any attacking magic that isn't Almighty type, meaning you can't even really have them function as mixed attackers beyond what they come with. And since by and large they don't have any kind of ways to boost their damage beyond the ST stat, Physical attackers have tendency to punch softer than you'd expect. As for Chariot itself, the Arcana mostly focuses on Strike and Counter skills, and this does give them some unique applications in fusion at least. The only ones among them though that jump out to me as awesome, or at least good enough to use out of the box, are Nata Taishi and Thor. Nata Taishi picks up Herculean Strike, a decently strong Strike AOE. Nata Taishi himself has pretty solid stats, so he can do well using it without any need to immediately fuse him off into something better. The Portable version produces a Card for Herculean Strike, creating a mixed blessing of Nata Taishi being desirable to level up but even easier to drop from the roster depending on how you've been playing. Thor is genuinely pretty good, and the only non-physical inheritance type among the Arcana. Thor picks up Elec Amp, Auto Mataru, High Counter AND Vicious Strike. He also combines with Take-Mikazuchi to create the Thunder Call fusion spell in FES, which is an AOE Elec spell with a 100% chance to shock like Thunder Reign. It's quite a bit weaker than Thunder Reign in terms of damage, but it has its niche uses. Note that in Portable I have maxed out the ST of an Ares, but that had nothing to do with Ares himself having any notable traits. He just happened to be the physically strongest Persona I had when I decided to invest in a ton of ST boosting cards.
For Reload, we have,
Ara Mitama: Level 6
Chimera: Level 9
Zouchouten: Level 14
Mithras: Level 24
Oni: Level 31
Shiki-Ouji: Level 45
Koumokuten: Level 52
Thor: Level 64
Quite a few new faces here! Chariot fares much better in Reload due to physical attacks just being way stronger (both having actual boosting passives as well as more favorable damage calculations) and having some actually interesting reps plus skill access. Mithras is highly important to fuse to get a very good Theurgy later, Shiki-Ouji has his trademark good physical resistances (though Slash attacks slip his guard in this game), Koumokuten picks up the highly valuable Enduring Soul Passive and Thor is among your earliest options for getting access to the all powerful God's Hand skill. Sadly Thor has lost Auto Mataru, reducing his innate support ability, but he's still a pretty solid Elec and Physical hybrid. He can be like having two Akihiko's! Reload's inheritance system also makes Chariots a lot less singular in use, and you scoop up way more Skill Cards than you do in Portable, so its fairly easy to customize them into reliable beat sticks.
The Justice
The Justice Arcana is represented by the Student Council member Chihiro Fushimi for FES, Reload, and the MC in Portable. There's a fairly convoluted sequence of steps you must take to gain access to this link, first and foremost being that you must actually be a member of the Student Council in order to even have Chihiro manifest in the game. Once you start the Emperor Link, Chihiro will appear in the second floor hallway on her regularly scheduled days (Tues, Thurs, and Sat ) and you must speak to her on 3 separate occasions and provide her with the correct answers. In order, these are "I want to talk", "I am Male", and "Hello" into "Let's Walk Home Together". Once that's accomplished, she'll agree to hang out the fourth you talk to her and the link begins properly. Assuming you deduce all that, Chihiro is almost assuredly the first romance you will encounter in FES since she comes into the picture fairly early and advances to a romantic stage very quickly considering her personality. Chihiro's progression for FES and Reload is as follows,
Initial | 1(36) | 22(14) | 22(22) | 22(58) | 30(29) | 30(14) | 30(7) | 40(21) | Max
Initial | O | X | O | O | O | X | O | O | Max
Not a super complicated link altogether, a couple phone calls and standard events need to be taken in order to keep her moving as fast as possible, but about 14 days of investment is not at all bad for a Romantic link. As per usual, it's even lighter in Reload with only 12 days being needed to round this link out. One thing to note about Chihiro though is that she goes Romantic super early compared to other links in FES. Chihiro's Romance kicks in at Rank 5, causing the jealousy mechanic to become a consideration much quicker. That said, her only perceived rival at the time is Yuko, who has availability asynchronous with Chihiro most of the time, so you're not too likely to run afoul of jealousy here. Best to get Chihiro done and dusted before Fuuka enters the picture though. Reload moves the Romance up to Rank 9 and makes it optional, as per usual. One other notable thing about Chihiro is that she has an instant reversal landmine at Rank 5, same as Yukari coincidentally enough. You'd have to be seriously dense to blunder into this one by contrast though, so it isn't too much of a concern.
For Portable, the Justice Arcana is instead represented by fellow SEES member Ken Amada. Ken's Social Link can be initiated by speaking to him as early as the first Tuesday after he joins, which is 9/1. Ken is a Night time social link, and is available to hang out with on Tues and Thurs. A limited set of days to be sure, but he joins early enough and at point where you're just polishing off your academics, it really shouldn't be much of an issue to get him done well before December even begins. One thing that applies to Ken and fellow link replacer Koromaru is that their usual nights to interact can be sidelined due to ongoing story events. To a certain extent, this is also true of other SEES members, but because most of them are daytime school links, plot events that sideline them tend to coincide with periods of inactivity for other school links anyway. Disregarding that, Ken's progression is as follows,
Initial | 0(37/56) | 15(51/79) | 22(22/33) | 30(58/90) | 31(30/44) | 35(15/22) | 40(22/34) | 40(22/34) | Max
There is actually an alternate set of point requirements for Ken in the last couple ranks of his link but uhhhhh we're not gonna talk about that. Regardless, Ken doesn't really take that much effort to max out. He slows down a bit by the end of the link, but the FemC finds herself flush with daytime freedom much sooner than the MC does, so it's pretty easy to work in Oracles for him among your day to day. Moving onto our Justice Personae.
For FES and Portable, we have,
Angel: Level 4
Archangel: Level 10
Principality: Level 16
Power: Level 25
Virtue: Level 32
Dominion: Level 42
Throne: Level 51
Melchizedek: Level 59 (Unlocked at Max Rank)
Perhaps unsurprisingly with all the Angel reps, the Justice Arcana focuses heavily on the Light element and all Personae within it are Light inheritance type except for Angel (wind) and Melchizedek (strike). This actually makes the Arcana somewhat interesting as far as fusion goes, as there's less of a limit on the magic they can inherit. True they can't pick up physical, death, or ailment skills, but everything else is fair game. Their direct specialization in Light magic is whatever for a good chunk of the game, but it becomes pretty good by the back half of Vanilla and FES due to boosted Hamoans being fairly reliable. This is less the case in Portable, and regardless the Arcana as a whole gets blown out on this front by Daisoujou. All that said though, nothing particularly great fuses into the Justice Arcana for most of the game and the more interesting reps are fairly backloaded. Dominion is your earliest access to Hama Boost Hamaon, which is quite good, and he has some innate Elec coverage in addition to whatever you can fuse onto him. Throne is an extremely easy way to access Mediarahan, making him worth fusing on that merit alone. Melchizedek isn't as cracked as the Elemental Specialist ultimate Personae, but he does come in with some pretty good stuff. On fusion he'll have Mediarahan, Fist Master/Weapons Master, and Akasha Arts. With a few more levels, he patches out his Dark weakness with Repel Dark and picks up the ever helpful God's Hand. Not my favorite Arcana, but they're solid enough. Sadly they suffer just a tad in Portable, where the Justice Social Link is available way later, at a point where the MC has almost certainly maxed it out already.
In Reload, the line up looks like,
Angel: Level 4
Archangel: Level 10
Principality: Level 16
Power: Level 25
Virtue: Level 32
Dominion: Level 42
Throne: Level 52
Melchizedek: Level 66
The Justice Arcana is remarkably similar to the older versions of the game, in stark contrast to what we've covered so far. Angel and Dominion have swapped Inheritance types, and Melchizedek is Elec Inheritance for some reason, but that matters considerably less because Fusion Inheritance is much more flexible in Reload compared to FES/Portable, not even just considering you can outright pick what skills carry over now. There's not really too much interesting to say about the Arcana though. Power has a slightly more interesting role as a reliable physical attacker now, but otherwise the bulk of the changes is just some healing skills being dropped and the Kouha line of skills being slid into a few of the reps. Throne and Melchizedek have become notably worse in this version. Throne has traded in Mediarahan for Maragion, which sucks, and Melchizedek has lost Auto Mataru and Weapon Master in exchange for Hama skills and Revolution, the former of which just kind of sucks and the latter is just whatever to me. I definitely care for this Arcana as a whole much less in Reload, even though we still have Chihiro to try and make the Arcana an early game hero.
The Hermit

For FES, the MC in Portable and Reload, the Hermit Arcana is represented by the mysterious Maya, a player in a familiar sounding MMO who is totally not someone the protagonist knows in real life. What would the chances even be! The link is not automatically initiated, but is made available very early on with no work required on the player's part. Junpei will gift the MC Innocent Sin Online the evening before the first holiday off of school, in this case 4/28 with the link being an option to start on 4/29. The Hermit link is available on Sundays and Holidays only, giving it the somewhat unique nature of having both a rigid and extremely flexible schedule. In Vanilla, FES and, curiously enough given how quality of life the port introduced, Portable, this link also has the obnoxious unique trait of consuming your entire day to pursue. You don't even get the Late Night timeslot in Vanilla and FES, it is the only player engaged activity that automatically transitions you to the next day straight away. For a fun bit of trivia, there is one bizarre edge case it doesn't do this in Vanilla: On the day of the Summer Festival (which is not a forced event in Vanilla), hanging out with Maya advances you to evening like any other event would. Very strange. Regardless, this link is available at a point where there is close to no competition for it in FES, and literally no competition in Vanilla since you can't spend time at Bookworms on Sunday in the PS2 versions and relationship fortunes didn't exist. Portable and Reload make it a bit more of a hassle to work in with no late night time slot and Bookworms being available on Sunday but not Monday instead, but you still have pretty slim pickings when this link comes up. It is advisable to knock it out quickly though, as Sunday becomes a hotly contested day once school resumes post-Summer vacation and you really don't want to be sacrificing entire days to this link. The progression for it is as follows,
Initial | 1(40) | 20(29) | 20(22) | 20(29) | 20(29) | 20(29) | 20(29) | 20(14) | Max
Initial | O | O | O | X | O | O | O | X | Max
Thankfully considering the obnoxious penalty of losing your entire day when hanging out with her, Maya is very much a Streamlined link. There's only one point in the link where you don't get enough points from dialogue choices, and in Portable that can be circumvented with max charm for a clean 10 day link. This is the one time where a link is actually slower in Reload, albeit that's probably a compensation for the fact that there's no major time loss tied to this link anymore and that the other links it can share days with go by much quicker. One thing to note about the one time where dialogue choices alone are not enough to keep the link going, FES did us a solid with the addition of the Relationship Fortunes, allowing us to develop Maya's affection at the same rate with no additional time loss. It's not super important by the time it becomes relevant, but it's a nice little efficiency.
For the FemC, the link is instead represented by the Library/Health Committed member Saori Hasegawa. Saori's version of the link begins on 5/8 when the FemC is forced to pick between the Library or Health Committed, with Saori employing Schrodinger's Club Member to materialize in whichever one you pick. Interestingly, while the link is initiated on a Friday, Saori can only be hung out with on Tues and Thurs, competing with Junpei (and Yukari on Tues) for affection. Saori is kind of the reverse of Ken, replacing a link that had dedicated time slots for itself with a standard school link, albeit this is less notable a distinction in Portable since the first two exam week leadups don't lock you out of in-school links. Saori is also notable for having one of the more depressing links in the game, but that's neither here nor there. Saori also contains one of the rare instances for the FemC where the same link triggers another link despite being represented by a different character. In this case, Saori tips the FemC off on Tanaka and the Devil link much like Maya does for the MC. Her progression is as follows,
Initial | 0(30/44) | 15(30/44) | 15(29/45) | 22(15/22) | 22(29/45) | 0(22/34) | 40(44/68) | 22(44/68) | Max
Very Streamlined link we have here, with only one instance where we need maxed out charm. Half the time, we don't even need to have a Hermit Persona to keep Saori moving along, even if we don't have Max Charm. Since she shares her availability with Junpei's and half of Yukari's schedule, we can easily delay her until she becomes a clean 10 days. Delaying the emotional destruction! On a gameplay level, this isn't much of a big deal due to the next section.
In FES and Portable, the Hermit Arcana has the following as its Personae representatives,
Yomotsu Shikome: Level 9
Naga: Level 17
Lamia: Level 25
Mothman: Level 32
Taraka: Level 38
Kurama Tengu: Level 44
Nebiros: Level 50 (Requires an item from Elizabeth to fuse)
Kumbhanda: Level 56
Arahabaki: Level 60 (Special Fusion, Unlocked at Max Rank)
Talk about a one-hit wonder Arcana. Yomotsu Shikome is a fantastic early game Persona, having innate Bufu and picking up Auto-Tarukaja at Level 11, immediately achievable with a Rank 3 Social Link. Since she's more than likely going to be fused off of Jack Frost, she can have Ice Boost to augment the damage even further. Her Death inheritance type also allows her to grab any core element spells that happen to be in the fusion pool. Past that, there's just nothing super notable in the Arcana. Its Phys reps in Naga and Taraka are extremely vanilla and not super potent. Most of the Arcana focuses on Ailment skills which are not that great in Persona 3, sad to say. Kurama Tengu is an easy way to get Growth 2, but Quetzacoatl also has that and it's less helpful in Portable when you can just get skill cards instead. Nebiros is designed to set up the Ghastly Wail combo, which just isn't a practical thing to do when he's available at a time where you can insta-kill things with raw damage through Personae like Surt and Odin. Arahabaki is not the physical wall she often is, with her main notability being picking up two passives that nullify her existing weaknesses, which require additional leveling past what the Social Link bonus rewards to even get. Kumbhanda is notable for having innate Auto-Masukukaja, which means I often fuse him into a Melchizedek, who I then turn around and fuse to create Raphael, easily giving me all Auto Team Buff passives on a single Persona. Kumbhanda does pick up Fire Amp, but that's not too helpful when Surt starts with Fire Boost AND picks up Fire Amp via leveling. Just a lackluster Arcana all around save for some early game dominance with Yomotsu Shikome.
In Reload, what we're looking at is,
Onmoraki: Level 8
Naga: Level 17
Lamia: Level 25
Mothman: Level 31
Dakini: Level 38
Kurama Tengu: Level 46
Nebiros: Level 52 (Requires an item from Elizabeth to fuse)
Kumbhanda: Level 61
Arahabaki: Level 68 (Unlocked at Max Rank)
Pour one out for Yomotsu Shikome, she's on the outs for this game. A lot of the returning reps are quite similar to how they are in FES and Portable, though some have gotten some tune ups. Kurama Tengu now gives access to Garudyne, Nebiros picks up some Death skills, and Kumbhanda has become a hybrid Wind/Pierce attacker with Myriad Arrows and Magarudyne, plus some flavor skills like Dekunda and Insta-Heal. The new reps are actually quite good, Onmoraki is your earliest access to Eiha skills while Dakini picks up Herculean Strike and Strike Boost, plus High Counter. Arahabaki has been buffed up considerably, innately repelling Slash and Pierce attacks, and picking up Strike repel via leveling to patch out a strike weakness. They pick up a weakness to Dark which they also get a Repel passive for, though the trade off here is an Ice weakness that they DO NOT patch out by default. Not my favorite Arcana still, but it at least has some interesting Niche picks. Arahabaki is a great wall, an unusual thing to find in Persona 3, though she has little output with damage if you aren't doing some skill carding or precise fusing for her.
The Fortune

In FES, the Male story in Portable and Reload, The Fortune Arcana is represented by paternally pressured pre-med Keisuke Hiraga. Keisuke represents a culture club, with a choice between Art, Music and Photography in pre-Reload versions of the game. His Schrodinger's Club becomes available to join on 6/17, though unlike the Sports Clubs you are not ultimately forced to join. It's a good idea to join though, because beyond the obvious value of developing more links, joining a club also unlocks Fuuka's social link. Keisuke is available to hang out with Tues, Weds and Thurs, and the link itself has no pre-reqs beyond reaching the appropriate Calendar date to start it. The progressions are as follows,
Initial | 0(0) | 15(22) | 15(29) | 15(22) | 15(22) | 15(22) | 22(22) | 22(22) | Max
Initial | O | O | O | O | O | O | O | O | Max
A truly streamlined link, having the matching Persona and picking the correct choices allows you to complete this link in a minimum of 10 hang outs, and you don't even need the former until after Rank 7! In Portable, you don't even need the former at all. In a bit of meta-irony, despite the ease at which his link can be completed Keisuke often finds himself left languishing from the playerbase due to being a relatively unpopular character. But that's not really the focus of these write ups.
Portable revamps this link considerably, instead handing it off to the enigmatic Ryoji Mochizuki, who enters the story after the Hanged Man boss fight. Naturally, this indirectly weakens the Fortune Arcana for the FemC since it is a very long while before she can make use of it at a strength level similar to the MC. Now I'm not actually going to go into the progression for this link, because the actual choices you take for it largely don't matter. Ryoji's link is a semi-automatic one of sorts that will always go up when interacted with (save one notable landmine you can hit that's fairly obvious when it pops up). In fact, it also has some automatic advancements, making it the only link in any version of the game that switches between Automatic to any other link type beyond the first rank. Another quirk of this Link is that when you are given the option to advance it on your own time, you MUST do so or it will stall out prematurely. Counter-intuitively, this means you must also accept Sunday date invitations from this link, events that normally don't result in direct rank ups for other characters but do for Ryoji. The dates this link can/will go up are as follows,
11/9 (Automatic Initiation), 11/12 (Automatic), 11/13 (Talk to after school), 11/15 (Date Invitation), 11/19 (Automatic*), 11/22 (Automatic), 11/27 (Automatic), 11/29 (Date Invite), 12/1 (Talk to After School), 12/31 (Automatic)
*11/19 has a dialogue prompt that can cut the link's progress off then and there, though it's pretty obvious to avoid. It should go without saying, but the automatic progressions also only happen if you've completed the previous events that were up to your discretion.
Ryoji doesn't really take any effort to max out, but not knowing that you need to accept every opportunity to hang out with him can easily stall this link well before the finish line. If you've been playing even mildly optimally though, you shouldn't really have too many options besides him to hang out with once he enters the picture. Onto Personae!
In FES and Portable, we have,
Fortune: Level 17
Empusa: Level 23 (Requires Elizabeth Request item to fuse)
Kusi Mitama: Level 29
Clotho: Level 38
Lachesis: Level 45
Atropos: Level 54
Norn: Level 62 (Unlocked at Max Rank, can only be fused via Triangle Spread of Clotho, Lachesis and Atropos)
The most hyperfocused Arcana in the game. Fortune is stacked with Wind casters and that is it. Everything picks up the Garu line and maybe a healing spell or two. If you need a Wind caster, this Arcana has you covered, particularly once the Sisters of Fate become available as they tout Wind Boost by default, and then Boost and Amp by Atropos. I usually wait until the very end with Norn before doing anything with this Arcana though. A non-4+ spread special fusion, Norn comes in with the Ultimate Wind spell in Phanta Rhei, as well as innate Wind Amp. She can easily snag Wind Boost off of Atropos via fusion, making her even more ready to use than Surt really. She also picks up Elec Drain at level 69(nice) to patch out her sole weakness. Maybe do a little extra fusing to get Mediarahan or something onto Atropos, and you're off to the races with an excellent Wind User and support tank.
In Reload, we have,
Fortune: Level 15 (Special Fusion)
Sandman: Level 20
Kushi Mitama: Level 28
Clotho: Level 37
Lachesis: Level 44
Atropos: Level 56
Norn: Level 65 (Special Fusion)
Lakshmi: Level 73 (Unlocked at Max Rank)
The Arcana is largely the same here, with some minor changes thrown in. Sandman gives you an early Ailment Specialist with the decent combo of Tentarafoo and Confuse Boost. Clotho and Lachesis pick up more support spells in buffs, debuffs, and the fairly useful pick up of Mediarama in Lachesis' case. Atropos picks up Ziodyne for more coverage options, and Norn is the same offensively while trading out Elec Abosrb for Mediarahan and later Salvation. She also has better resistances outside of that, now nullifying fire and repelling ice in addition to her wind drain. Lakshmi is a former Empress Persona who seemingly got a glow up but is probably less useful than she was originally and definitely less useful than Norn funnily enough. She comes in with Ice skills, but no relevant Boost passives and not even Diamond Dust. She also redundantly picks up Amrita Shower AND Salvation, which is extra pointless since Norn will easily already have the latter by the time you can fuse her. Very weird addition to say the least, not sure why she's the ultimate when Norn is so much better and doesn't require a maxed out link anymore. Probably a slightly better Arcana on the whole though for this version, and Norn is still a fantastic late game addition to your roster who is dead simple to set up as your Wind specialist.
Been meaning to get to this for awhile, but busy busy busy. Anyway!
The Emperor
In all versions of Persona 3, The Emperor is represented by Hidetoshi Odagiri and is associated with Gekkoukan's student council. This is the first "club" link we'll be covering in Arcana order, though the first actual club link you can initiate is Chariot. Odagiri is somewhat unique in that though he is a school related link and follows the normal calendar restrictions those have, his association with the protagonist is largely professional and your only option to earn points for his link outside of Rank Up events is relationship fortunes (Okay Reload has a second option, but it's available very late in the game). Mitsuru will approach you on 4/27 and give you the option to up your membership for the student council, though you can put it off for awhile if you want to work on other links that are available at the time. The student council meets on Mon, Weds, Fri and Sat(except in Portable where Saturday is dropped). Odagiri is also sort of the platonic ideal of a streamlined link, as in all versions except for Vanilla and one rank in Portable, having a matching Persona and picking the correct answer will let you complete the link in 10 interactions. From FES to Reload, the Rank up requirements are,
Initial | 1(22) | 1(7) | 15(22) | 15(22) | 15(22) | 15(22) | 22(22) | 22(22) | Max
Initial | 1(22/34) | 1(7/11) | 15(22/34) | 15(22/34) | 15(7/11) | 15(22/34) | 22(22/34) | 22(22/34) | Max
Initial | O | O | O | O | O | O | O | O | Max
As you can see, Odagiri is pretty easy to max out due to his frequent availability and low requirements. He does need an Oracle burned on him for 1 day in Portable, but the FemC has almost nothing to do on Sunday's until the Sun Social Link enters the picture so that's not really a big deal. For the most part, I don't plan to cover Vanilla progression for these write ups since Vanilla is not the main focus of this LP, but I do want to cover interesting niche cases, and Odagiri is definitely one of them. In Vanilla, his progression is a lot more obnoxious.
Initial | 1(22) | 10(0) | 25(22) | 25(22) | 25(22) | 25(22) | 25(22) | 25(22) | Max
Remember that without a matching Persona, those 22's are actually 15's and that the point bonus you get for attending a non-rank up social link event without a matching Persona is 10. Also note that Relationship Fortunes don't exist in Vanilla and Odagiri never rings you up to hang out. That's right, in Vanilla not only does every single student council meeting have forced downtime after a rank up, there is no point in the link where having a matching Persona actually makes it go any faster, resulting in a link that takes almost twice as long to complete. It also has the unique distinction of being the only dialogue choice driven Social Link in the series where giving the correct answers matters, but having a matching persona doesn't. It's not a semi-automatic link like Devil or Sun, it's not a sidequest driven link like Hermit in 4, it's not like time limited Social Links added in re-releases that are essentially Semi-Automatic with choices in them to screw yourself out of finishing it, it's a just a weirdly annoying link to route in. Onto what Personae we get from this!
For FES and Portable, we have,
Forneus: Level 7
Oberon: Level 15
Take-Mikazuchi: Level 24
King Frost: Level 30 (Special Fusion, requires an item from an Elizabeth request to create)
Naga Raja: Level 36
Kingu: Level 46
Barong: Level 52
Odin: Level 57 (Unlocked at Max Rank)
Emperors serve as our early game Elec access, though many of the Personae found within also double as decent physical attackers. The main outlier is King Frost, who requires a sidequest to be completed to create him anyway. Emperors also have a solid function as easy ways to access good skills that you can then fuse down onto more powerful Personae. Forneus picks up Auto-Sukukaja, Take-Mikazuchi has innate Auto-Tarukaja, Naga Raja has Matarukaja, Kingu has Mediarama and Barong has the very situational Null Poison (but the situation you want it for is absolutely critical). Take-Mikazuchi is also part of the extremely overpowered Thunder Call fusion spell, but the main draw of this Arcana is its Ultimate: Odin. Odin picks up one of the most broken spells in the history of MegaTen in general, Thunder Reign. Thunder Reign is the ultimate Elec spell that deals more than double the damage of Ziodyne, obviously already a good thing. What puts it over something like say, Ragnarok, is its secondary effect: It has a 100% chance of Shocking anything not immune to the status. Remember that Shock guarantees all physical attacks against the affected enemy are now Critical Hits. This is unbelievably broken for multiple reasons. Aside from ratcheting up your party's damage, almost nothing in the game is actually immune to Shock, including the Reaper who can easily be cheesed with this skill. Anything not immune to Knock Down also can be smashed down with All Out Attacks, and if it some how survives you can just fire off another one with the next critical hit in line. It has a bit of RNG to contend with in non-story battles due the randomness of turn order in those, but if you're willing to just reset on The Reaper until you get a good turn order then that hardly matters. The only limiting factor is that Odin himself only picks up Elec Amp and not Boost in addition like Surt does with his passives, so you need to fuse it into him to maximize the damage of Thunder Reign itself. That's relatively easy to accomplish though, so it's not that big of a deal. Due to the excess amount of free time you have to play Arcade games in FES, there's also not really any reason to fuse Odin upward once you have him, so he essentially is just the best Elec Persona in the game. Now for Reload,
Forneus: Level 7
Oberon: Level 16
Take-Mikazuchi: Level 23
King Frost: Level 34 (Special Fusion, requires an item from an Elizabeth request to create)
Naga Raja: Level 43
Belphegor: Level 53
Barong: Level 63
Odin: Level 74 (Unlocked at Max Rank)
Pretty similar, actually, with some of the later reps having their levels slid back a bit. This is hardly noticeable though due to Reload's different level curve. Belphegor is a new addition, being a pretty solid Dark caster, and King Frost now has the added benefit of being one half the extremely powerful King and I Theurgy, though obviously you don't need to have him specifically on hand to cast it after you fuse him initially. Thunder Reign has been nerfed a bit, being a 60% chance to proc Shock instead of 100%, and more things actually resisting that status like you'd expect. He's worth running through to get the spell, but changes to how your nights are spent and the replacement of stat cards with incenses means that like with Surt, you'll likely fuse him up not long after creating him.
The Hierophant
A link actually represented by a duo in all versions of the game, specifically the kindly elder couple Bunkichi and Mitsuko who run the Bookworms used bookstore! This link opens up early on, (with it starting on 4/25 in FES) and is our first example of an "out-of-school" link. It has no direct connection to our day-to-day in Gekkoukan and its schedule runs completely independently of school events that lock us out of "in-school" links. Naturally, this means these links are best pursued when in-school links are not available to pursue. I think these links might also not fall into the Neglect mechanic like in-school links in FES, but I'm not sure on that. At least partially because you get a full week to pursue these links every month. The only major difference between versions for this link is that in Vanilla and FES, it's available Monday-Saturday, while in Portable and Reload it's available Tuesday-Sunday. The reason for this change in Portable is likely the repurposing of the Hermit link for the FemC, making it an in-school link and leaving her with no links to pursue directly on Sundays for awhile otherwise. Reload keeps this change since it generally hews closer to Portable's structure and script beats with a few exceptions. Onto progression!
Initial | 1(29) | 20(29) | 20(29) | 20(14) | 20(22) | 20(21) | 20(29) | 30(7)| Max
Initial | 0(44/67) | 20(29/45) | 20(29/45) | 20(14/22) | 20(22/34) | 20(21/33) | 20(29/45) | 30(7/11)| Max
Initial | O | O | O | O | O | O | O | X | Max
As you can see, the couple is a pretty archetypical streamlined link, with only two notable stopgaps at Rank 5 and Rank 9 potentially resulting in 3 extra timeslots being dedicated to them. FES can get around this for Rank 9 by attending a Walk event with Koromaru that results in a meeting with Bunkichi and getting the link done in 12 days, while the FemC can use her Charm bonus to bypass that altogether and get it done in 12 straight link events. Theoretically she can also bypass the Rank 5 stopgap with the same bonus, but you're not exactly spoiled for choice of who to hang out with early on so it's not super practical, but you could get the link done in 11 days if you put it off at that point. In Reload only the Rank 9 stopgap remains, and there's a new mechanic later on that will allow us to completely bypass that and it get it done in just 10 days spent on it. What are we looking at for Personae here?
In FES and Portable, the Hierophant link grants us the following,
Omoikane: Level 7
Berith: Level 13
Shiisaa: Level 26
Flauros: Level 33
Thoth: Level 41 (Must complete an Elizabeth Request to get the item to Normal fuse him)
Hokuto Seikun: Level 47
Daisojou: Level 53 (Special Fusion, Pentagon Spread)
Kohryu: Level 66 (Special Fusion, Cross Spread, Unlocked at Max Rank)
Hierophant is kind of an early game hero Arcana. Omoikane grants access to Zio skills as well as the ever useful Auto-Rakukaja, Berith is just a good beater with Auto-Tarukaja and a decent ST stat, and Shiisaa is amazingly useful in FES, bringing wide coverage in Ice Boosted Mabufu, Mazio and the ever useful Gale Slash. The Arcana kind of tapers off at that point, with Flaurous and Hokuto Seikun being kind of mid, though Hokuto is at least an easy high level access to Elec Boost. Thoth is also easy access to Mediarama, though that's more useful to the MC who's going to have a much lower Lovers Rank at the time Saki Mitama becomes available. Daisojou is a pretty great pick up in FES also, with Hama Boosted Samsara being essentially guaranteed insta-death on Light weak enemies, and pretty close to it against things that are neutral. It's also an easy material for Growth 3, though I prefer the Sun Persona Jatayu for that who doesn't need a special fusion to be created directly and also produces the card for the skill. Kohryu is kind of mid for an Ultimate Persona honestly, with plenty of things besides him bringing Mediarahan and Samarecarm to the table, though he does pick up the Null Strike and Null Pierce passives with enough levels.
Over in Reload,
Omoikane: Level 7
Berith: Level 13
Shiisaa: Level 23
Flauros: Level 33 (Special Fusion)
Thoth: Level 40 (Once again, needs an item from Elizabeth to Normal fuse)
Mishaguji: Level 48
Daisoujou: Level 59
Kohryu: Level 71 (Special Fusion, Unlocked at Max Rank)
Remarkably similar to the older versions for once, and kind of to its detriment. The lower rungs have most of the same stuff they did originally, though Berith lost Auto-Taru for more physical attacks while Shiisaa dropped Mazio and Gale Slash to pick up Herculean Strike at level 29, which isn't a bad trade per se. Flauros is a bit more appealing here, picking up both Crit Rate Boost AND Apt Pupil, serving as easy material for chain fusing those skills into something beter. Mishaguji provides easy access to Deathbound and Ziodyne, which can also potentially be helpful. Daisojou is relatively less helpful here since like Portable insta-kills aren't quite as reliable but it can be a fun way to mix things up if you're willing to foot the 40 SP cost per cast for Samsara. Since he's a Normal Fusion now, he's also a relatively better source for Growth 3 though again not a super necessary one (not the least which because a lot of things have picked up Growth 3). Kohryu has been buffed up a bit to provide access to some more appealing skills, namely Concentrate (aka Mind Charge) and Spell Master, a passive that halves SP consumption. He's not the only means of getting that passive, but with the Lovers Major Arcana card in effect he can learn it on fusion. He also comes with Makougaon by default, making him a good Light caster if you get him the necessary passives for it.
The Lovers
The Lovers Arcana is represented across all versions of the game by fellow SEES member Yukari Takeba, and is another potential romantic Social Link for the MC. Yukari's link notably gets a huge shifting around for the FemC: for the male Protagonist Yukari is not available until July 25th at the earliest, requires Max Charm, and provided you do start her link at the first chance, Summer Vacation quickly stomps out any opportunity to seriously advance it until September. By contrast, Yukari is the FemC's full on gal-pal and is available to hang out with as early as 4/28 with no special requirements to link with her. In a moment of give and take, Yukari is only available to hang with on Tuesdays and Fridays for the FemC, while the MC can chat her up on Mondays, Wednesdays, Thursdays and Saturdays. Naturally, this has implications on how useful the Lovers Arcana is within the various different versions of Persona 3, but we'll cover that in more detail below. As far as progression goes, Yukari is one of the more demanding links in the game, just like Fuuka.
Initial | 1(29) | 0(15) | 22(22) | 30(22) | 30(22) | 35(22) | 40(22) | 55(22) | Max
Initial | 0(22/34) | 15(0) | 22(22/34) | 22(0) | 30(44/68) | 30(0) | 35(22/34) | 40(22/34) | Max
Initial | O | X | O | O | O | X | O | X | Max
Yukari's progression is a bit interesting, as she hits several stopgaps but at the same time is slightly less demanding when it comes to points compared to say, Fuuka. She enters at a very crowded point in the schedule, so this is much appreciated. Funnily enough, her progression is probably even slower for the FemC, with basically no opportunities to get the link done any faster even if you have the max Charm bonus. Likely an accommodation of how much earlier she enters the link pool mixed with just how few links the FemC has to choose from compared to the MC at that point. Reload largely follows the FES progression, though with a few less moments where you need to do extra work to keep her moving along. Like Fuuka, it's desirable to leave Yukari's last couple events for the end of the game due to a mechanic that will help keep this link moving smoothly at that point. Just as one other notable thing, Yukari is notorious for being the one social link that regularly sees players blundering into a dialogue that prompts a reversed link, at least in the PS2 versions. Her Rank 5 event has a final choice that will put the link in Reverse if you pick it, though if you do screw that up it is possible to correct this with a relationship fortune or the rarely seen Make Up events. Reload made this choice more overtly negative to steer players clear of it, which kind of makes it a lot funnier if you pick it. Onto Personae!
In FES and Portable we have,
Pixie: Level 2
Alp: Level 6
Tam Lin*: Level 13
Narcissus: Level 20
Queen Mab: Level 27
Saki Mitama: Level 39
Titania: Level 48
Raphael: Level 61
Cybele: Level 68 (Unlocked at Max Rank)
*Exclusive to Portable
The Lovers is the first Arcana where I can't really say anything in it is super notable. Admittedly, this is pretty heavily impacted by the Arcana being an early game one with a relatively late link, meaning nearly every other Arcana available alongside it gets considerable fusion bonuses while Lovers slums it a bit. Narcissus of course yields us the incredibly helpful Narcissus Flower, and he at least has a pretty solid resistance spread. I also have a tendency to have Raphael as my auto-team buffer since he has innate Auto-Maraku while several Personae below him can be fused up with Auto-Mataru and Masuku. Cybele is a fairly bad Pierce attacker with Samarecarm and Bow Mastery for flavor, though she is one of the options for getting Spell Master if you're so inclined. The Arcana is more appealing in Portable for the FemC since she can max out the Lovers social link well before the MC can even start it. Considering this, Saki Mitama and Titania jump up a bit in usefulness. Saki Mitama secures Mediarama immediately and is one level shy of learning Divine Grace, while Titania will fuse in with both of those skills and picks up Ice Amp within one more level. Still not an Arcana I'm super hot on, but they have a bit more going for them when used by the FemC. Oh yeah, Tam Lin was also added and he is extremely whatever.
In Reload we have,
Pixie: Level 2
Silky: Level 5
Tam Lin: Level 13
Narcissus: Level 23
Queen Mebd: Level 28
Saki Mitama: Level 36
Titania: Level 49
Raphael: Level 60
Cybele: Level 67 (Unlocked at Max Rank)
Alp has been traded out for Silky (A proto Jack Frost ice caster) but otherwise the Arcana is fairly similar in use to how it is in Portable. Most of the Personae within either draw/fuse in with their core skills already learned, or pick them up within a single level up from their base. Saki Mitama, for instances, only requires a single level up to get Medirama instead of the ridiculous three he needed in prior versions to do so (with the added perk of a maxed out link also affording him Divine Grace). Titania loses her healing and Ice amp for a wider spread of ice spells, Freeze Boost, and Concentrate. Raphael picks up the somewhat unique Angelic Grace Passive, which gives a decent evasion boost against all magic elements, in addition to Heat Riser, while Cybele has a more complacent role as a Light caster with Makougaon and Light Amp. She also picks up Mediarahan in lieu of Samarecarm while also retaining Spell Master. Still a pretty whatever Arcana for my money, but there a bit easier to swing in this version.
The Chariot
The Chariot Arcana is represented by Kazushi Miyamoto (or Kaz for short) in FES and Reload, as well as for the MC in Portable. The Chariot social link is first available on 4/23, though you are not forced to start it right away. That said, if you have not joined a club by 5/26, the game forces you to on 5/27. Once started, you can advance the link on Mon, Tues, Thurs and Fri. This is the first school club social link you are faced with, and unlike the previously discussed club link you're actually given a choice of multiple clubs to join for the link rather than how The Emperor is singularly represented by the Student Council. Unlike Persona 4 though, this has almost no bearing on the script for the link. You can join the Track team, the Swim team, or the Kendo team and in all instances reality will be re-written to make sure Kaz is on the same team as you. The team choice mostly just serves as set dressing with some minor bits of flavor text getting subbed out within the link itself. Due to the lack of any real meaning to the choice and the fact that Kaz (and the later met Mamoru for that matter) are so obviously intended to be Track stars, Reload decided to drop this choice and just make the Track variant of the link the only one. A little disappointing as far as flavor goes, but I'm not super pressed about it. The other main notable thing about this link is that it also directly unlocks the Strength social link, with the Rank 3 event feeding directly into the Strength 1 event if you've made the right choices. The progression for Kaz's link is as follows,
Initial | 1(7) | 15(14) | 15(22) | 15(29) | 15(21) | 22(29) | 22(7) | 22(22) | Max
Initial | O | X | O | O | O | O | X | O | Max
Like Kenji who unlocks pretty much alongside him, Kaz is not an overly complicated link in terms of extra work needed to progress it, though he is somewhat infamous for his counter-intuitive dialogue choices when it comes to his preferred answers. Past that though, he's a pretty easy link to max out and is regularly available during a standard school week, so it's rare to see a playthrough that doesn't have him maxed out before October or even before the Summer begins.
For the FemC in Portable, Kaz is replaced with Rio Iwasaki and you're are faced with the two team choices of Tennis or Volleyball. I'm not sure why the FemC gets less options here, effort I guess. Rio's link can be started on 4/24, and is available to advance on Mon, Weds and Fri. Like with the MC's Chariot link, you're forced to start Rio's link on 5/27 if you haven't done so by then. Rio has no association with the Strength link, though she does pick up the event flag for unlocking the Tower link. Rio's progression is as follows,
Initial | 0(15/22) | 15(15/22) | 15(45/66) | 22(0) | 30(22/34) | 15(45/66) | 0(30/44) | 40(15/22) | Max
Not an overly complicated link to advance by any means, with some of the later levels being bizarrely light in their requirements even. There's only one point in the link where Max Charm is necessary to keep it moving at full speed, and conveniently it's at a point where you've unlocked many other links to pad out the days until you can shift back to Rio and get her moving again. For our schedule, we finish her a bit later than Kaz, but you can totally get her done in around the same time as him if you so desire. But what does the Chariot Arcana grant us in gameplay?
For FES and Portable, the Chariot Arcana has,
Ara Mitama: Level 6
Chimera: Level 9
Zouchouten: Level 14
Ares: Level 19
Oumitsunu: Level 30
Nata Taishi: Level 37 (Requires an Item from Elizabeth to fuse)
Koumokuten: Level 43
Thor: Level 53 (Unlocked at Max Rank)
Chariot is the first major Physical Arcana you see in the game, and they are definitely the lesser of the two early game physical reps. Physical in general is a bit of an underwhelming specialization in FES and Portable, Persona 3 definitely favored Magic on all fronts in its earlier versions. The Physical inheritance types have the unfortunate rub of being completely incapable of inheriting any attacking magic that isn't Almighty type, meaning you can't even really have them function as mixed attackers beyond what they come with. And since by and large they don't have any kind of ways to boost their damage beyond the ST stat, Physical attackers have tendency to punch softer than you'd expect. As for Chariot itself, the Arcana mostly focuses on Strike and Counter skills, and this does give them some unique applications in fusion at least. The only ones among them though that jump out to me as awesome, or at least good enough to use out of the box, are Nata Taishi and Thor. Nata Taishi picks up Herculean Strike, a decently strong Strike AOE. Nata Taishi himself has pretty solid stats, so he can do well using it without any need to immediately fuse him off into something better. The Portable version produces a Card for Herculean Strike, creating a mixed blessing of Nata Taishi being desirable to level up but even easier to drop from the roster depending on how you've been playing. Thor is genuinely pretty good, and the only non-physical inheritance type among the Arcana. Thor picks up Elec Amp, Auto Mataru, High Counter AND Vicious Strike. He also combines with Take-Mikazuchi to create the Thunder Call fusion spell in FES, which is an AOE Elec spell with a 100% chance to shock like Thunder Reign. It's quite a bit weaker than Thunder Reign in terms of damage, but it has its niche uses. Note that in Portable I have maxed out the ST of an Ares, but that had nothing to do with Ares himself having any notable traits. He just happened to be the physically strongest Persona I had when I decided to invest in a ton of ST boosting cards.
For Reload, we have,
Ara Mitama: Level 6
Chimera: Level 9
Zouchouten: Level 14
Mithras: Level 24
Oni: Level 31
Shiki-Ouji: Level 45
Koumokuten: Level 52
Thor: Level 64
Quite a few new faces here! Chariot fares much better in Reload due to physical attacks just being way stronger (both having actual boosting passives as well as more favorable damage calculations) and having some actually interesting reps plus skill access. Mithras is highly important to fuse to get a very good Theurgy later, Shiki-Ouji has his trademark good physical resistances (though Slash attacks slip his guard in this game), Koumokuten picks up the highly valuable Enduring Soul Passive and Thor is among your earliest options for getting access to the all powerful God's Hand skill. Sadly Thor has lost Auto Mataru, reducing his innate support ability, but he's still a pretty solid Elec and Physical hybrid. He can be like having two Akihiko's! Reload's inheritance system also makes Chariots a lot less singular in use, and you scoop up way more Skill Cards than you do in Portable, so its fairly easy to customize them into reliable beat sticks.
The Justice
The Justice Arcana is represented by the Student Council member Chihiro Fushimi for FES, Reload, and the MC in Portable. There's a fairly convoluted sequence of steps you must take to gain access to this link, first and foremost being that you must actually be a member of the Student Council in order to even have Chihiro manifest in the game. Once you start the Emperor Link, Chihiro will appear in the second floor hallway on her regularly scheduled days (Tues, Thurs, and Sat ) and you must speak to her on 3 separate occasions and provide her with the correct answers. In order, these are "I want to talk", "I am Male", and "Hello" into "Let's Walk Home Together". Once that's accomplished, she'll agree to hang out the fourth you talk to her and the link begins properly. Assuming you deduce all that, Chihiro is almost assuredly the first romance you will encounter in FES since she comes into the picture fairly early and advances to a romantic stage very quickly considering her personality. Chihiro's progression for FES and Reload is as follows,
Initial | 1(36) | 22(14) | 22(22) | 22(58) | 30(29) | 30(14) | 30(7) | 40(21) | Max
Initial | O | X | O | O | O | X | O | O | Max
Not a super complicated link altogether, a couple phone calls and standard events need to be taken in order to keep her moving as fast as possible, but about 14 days of investment is not at all bad for a Romantic link. As per usual, it's even lighter in Reload with only 12 days being needed to round this link out. One thing to note about Chihiro though is that she goes Romantic super early compared to other links in FES. Chihiro's Romance kicks in at Rank 5, causing the jealousy mechanic to become a consideration much quicker. That said, her only perceived rival at the time is Yuko, who has availability asynchronous with Chihiro most of the time, so you're not too likely to run afoul of jealousy here. Best to get Chihiro done and dusted before Fuuka enters the picture though. Reload moves the Romance up to Rank 9 and makes it optional, as per usual. One other notable thing about Chihiro is that she has an instant reversal landmine at Rank 5, same as Yukari coincidentally enough. You'd have to be seriously dense to blunder into this one by contrast though, so it isn't too much of a concern.
For Portable, the Justice Arcana is instead represented by fellow SEES member Ken Amada. Ken's Social Link can be initiated by speaking to him as early as the first Tuesday after he joins, which is 9/1. Ken is a Night time social link, and is available to hang out with on Tues and Thurs. A limited set of days to be sure, but he joins early enough and at point where you're just polishing off your academics, it really shouldn't be much of an issue to get him done well before December even begins. One thing that applies to Ken and fellow link replacer Koromaru is that their usual nights to interact can be sidelined due to ongoing story events. To a certain extent, this is also true of other SEES members, but because most of them are daytime school links, plot events that sideline them tend to coincide with periods of inactivity for other school links anyway. Disregarding that, Ken's progression is as follows,
Initial | 0(37/56) | 15(51/79) | 22(22/33) | 30(58/90) | 31(30/44) | 35(15/22) | 40(22/34) | 40(22/34) | Max
There is actually an alternate set of point requirements for Ken in the last couple ranks of his link but uhhhhh we're not gonna talk about that. Regardless, Ken doesn't really take that much effort to max out. He slows down a bit by the end of the link, but the FemC finds herself flush with daytime freedom much sooner than the MC does, so it's pretty easy to work in Oracles for him among your day to day. Moving onto our Justice Personae.
For FES and Portable, we have,
Angel: Level 4
Archangel: Level 10
Principality: Level 16
Power: Level 25
Virtue: Level 32
Dominion: Level 42
Throne: Level 51
Melchizedek: Level 59 (Unlocked at Max Rank)
Perhaps unsurprisingly with all the Angel reps, the Justice Arcana focuses heavily on the Light element and all Personae within it are Light inheritance type except for Angel (wind) and Melchizedek (strike). This actually makes the Arcana somewhat interesting as far as fusion goes, as there's less of a limit on the magic they can inherit. True they can't pick up physical, death, or ailment skills, but everything else is fair game. Their direct specialization in Light magic is whatever for a good chunk of the game, but it becomes pretty good by the back half of Vanilla and FES due to boosted Hamoans being fairly reliable. This is less the case in Portable, and regardless the Arcana as a whole gets blown out on this front by Daisoujou. All that said though, nothing particularly great fuses into the Justice Arcana for most of the game and the more interesting reps are fairly backloaded. Dominion is your earliest access to Hama Boost Hamaon, which is quite good, and he has some innate Elec coverage in addition to whatever you can fuse onto him. Throne is an extremely easy way to access Mediarahan, making him worth fusing on that merit alone. Melchizedek isn't as cracked as the Elemental Specialist ultimate Personae, but he does come in with some pretty good stuff. On fusion he'll have Mediarahan, Fist Master/Weapons Master, and Akasha Arts. With a few more levels, he patches out his Dark weakness with Repel Dark and picks up the ever helpful God's Hand. Not my favorite Arcana, but they're solid enough. Sadly they suffer just a tad in Portable, where the Justice Social Link is available way later, at a point where the MC has almost certainly maxed it out already.
In Reload, the line up looks like,
Angel: Level 4
Archangel: Level 10
Principality: Level 16
Power: Level 25
Virtue: Level 32
Dominion: Level 42
Throne: Level 52
Melchizedek: Level 66
The Justice Arcana is remarkably similar to the older versions of the game, in stark contrast to what we've covered so far. Angel and Dominion have swapped Inheritance types, and Melchizedek is Elec Inheritance for some reason, but that matters considerably less because Fusion Inheritance is much more flexible in Reload compared to FES/Portable, not even just considering you can outright pick what skills carry over now. There's not really too much interesting to say about the Arcana though. Power has a slightly more interesting role as a reliable physical attacker now, but otherwise the bulk of the changes is just some healing skills being dropped and the Kouha line of skills being slid into a few of the reps. Throne and Melchizedek have become notably worse in this version. Throne has traded in Mediarahan for Maragion, which sucks, and Melchizedek has lost Auto Mataru and Weapon Master in exchange for Hama skills and Revolution, the former of which just kind of sucks and the latter is just whatever to me. I definitely care for this Arcana as a whole much less in Reload, even though we still have Chihiro to try and make the Arcana an early game hero.
The Hermit
For FES, the MC in Portable and Reload, the Hermit Arcana is represented by the mysterious Maya, a player in a familiar sounding MMO who is totally not someone the protagonist knows in real life. What would the chances even be! The link is not automatically initiated, but is made available very early on with no work required on the player's part. Junpei will gift the MC Innocent Sin Online the evening before the first holiday off of school, in this case 4/28 with the link being an option to start on 4/29. The Hermit link is available on Sundays and Holidays only, giving it the somewhat unique nature of having both a rigid and extremely flexible schedule. In Vanilla, FES and, curiously enough given how quality of life the port introduced, Portable, this link also has the obnoxious unique trait of consuming your entire day to pursue. You don't even get the Late Night timeslot in Vanilla and FES, it is the only player engaged activity that automatically transitions you to the next day straight away. For a fun bit of trivia, there is one bizarre edge case it doesn't do this in Vanilla: On the day of the Summer Festival (which is not a forced event in Vanilla), hanging out with Maya advances you to evening like any other event would. Very strange. Regardless, this link is available at a point where there is close to no competition for it in FES, and literally no competition in Vanilla since you can't spend time at Bookworms on Sunday in the PS2 versions and relationship fortunes didn't exist. Portable and Reload make it a bit more of a hassle to work in with no late night time slot and Bookworms being available on Sunday but not Monday instead, but you still have pretty slim pickings when this link comes up. It is advisable to knock it out quickly though, as Sunday becomes a hotly contested day once school resumes post-Summer vacation and you really don't want to be sacrificing entire days to this link. The progression for it is as follows,
Initial | 1(40) | 20(29) | 20(22) | 20(29) | 20(29) | 20(29) | 20(29) | 20(14) | Max
Initial | O | O | O | X | O | O | O | X | Max
Thankfully considering the obnoxious penalty of losing your entire day when hanging out with her, Maya is very much a Streamlined link. There's only one point in the link where you don't get enough points from dialogue choices, and in Portable that can be circumvented with max charm for a clean 10 day link. This is the one time where a link is actually slower in Reload, albeit that's probably a compensation for the fact that there's no major time loss tied to this link anymore and that the other links it can share days with go by much quicker. One thing to note about the one time where dialogue choices alone are not enough to keep the link going, FES did us a solid with the addition of the Relationship Fortunes, allowing us to develop Maya's affection at the same rate with no additional time loss. It's not super important by the time it becomes relevant, but it's a nice little efficiency.
For the FemC, the link is instead represented by the Library/Health Committed member Saori Hasegawa. Saori's version of the link begins on 5/8 when the FemC is forced to pick between the Library or Health Committed, with Saori employing Schrodinger's Club Member to materialize in whichever one you pick. Interestingly, while the link is initiated on a Friday, Saori can only be hung out with on Tues and Thurs, competing with Junpei (and Yukari on Tues) for affection. Saori is kind of the reverse of Ken, replacing a link that had dedicated time slots for itself with a standard school link, albeit this is less notable a distinction in Portable since the first two exam week leadups don't lock you out of in-school links. Saori is also notable for having one of the more depressing links in the game, but that's neither here nor there. Saori also contains one of the rare instances for the FemC where the same link triggers another link despite being represented by a different character. In this case, Saori tips the FemC off on Tanaka and the Devil link much like Maya does for the MC. Her progression is as follows,
Initial | 0(30/44) | 15(30/44) | 15(29/45) | 22(15/22) | 22(29/45) | 0(22/34) | 40(44/68) | 22(44/68) | Max
Very Streamlined link we have here, with only one instance where we need maxed out charm. Half the time, we don't even need to have a Hermit Persona to keep Saori moving along, even if we don't have Max Charm. Since she shares her availability with Junpei's and half of Yukari's schedule, we can easily delay her until she becomes a clean 10 days. Delaying the emotional destruction! On a gameplay level, this isn't much of a big deal due to the next section.
In FES and Portable, the Hermit Arcana has the following as its Personae representatives,
Yomotsu Shikome: Level 9
Naga: Level 17
Lamia: Level 25
Mothman: Level 32
Taraka: Level 38
Kurama Tengu: Level 44
Nebiros: Level 50 (Requires an item from Elizabeth to fuse)
Kumbhanda: Level 56
Arahabaki: Level 60 (Special Fusion, Unlocked at Max Rank)
Talk about a one-hit wonder Arcana. Yomotsu Shikome is a fantastic early game Persona, having innate Bufu and picking up Auto-Tarukaja at Level 11, immediately achievable with a Rank 3 Social Link. Since she's more than likely going to be fused off of Jack Frost, she can have Ice Boost to augment the damage even further. Her Death inheritance type also allows her to grab any core element spells that happen to be in the fusion pool. Past that, there's just nothing super notable in the Arcana. Its Phys reps in Naga and Taraka are extremely vanilla and not super potent. Most of the Arcana focuses on Ailment skills which are not that great in Persona 3, sad to say. Kurama Tengu is an easy way to get Growth 2, but Quetzacoatl also has that and it's less helpful in Portable when you can just get skill cards instead. Nebiros is designed to set up the Ghastly Wail combo, which just isn't a practical thing to do when he's available at a time where you can insta-kill things with raw damage through Personae like Surt and Odin. Arahabaki is not the physical wall she often is, with her main notability being picking up two passives that nullify her existing weaknesses, which require additional leveling past what the Social Link bonus rewards to even get. Kumbhanda is notable for having innate Auto-Masukukaja, which means I often fuse him into a Melchizedek, who I then turn around and fuse to create Raphael, easily giving me all Auto Team Buff passives on a single Persona. Kumbhanda does pick up Fire Amp, but that's not too helpful when Surt starts with Fire Boost AND picks up Fire Amp via leveling. Just a lackluster Arcana all around save for some early game dominance with Yomotsu Shikome.
In Reload, what we're looking at is,
Onmoraki: Level 8
Naga: Level 17
Lamia: Level 25
Mothman: Level 31
Dakini: Level 38
Kurama Tengu: Level 46
Nebiros: Level 52 (Requires an item from Elizabeth to fuse)
Kumbhanda: Level 61
Arahabaki: Level 68 (Unlocked at Max Rank)
Pour one out for Yomotsu Shikome, she's on the outs for this game. A lot of the returning reps are quite similar to how they are in FES and Portable, though some have gotten some tune ups. Kurama Tengu now gives access to Garudyne, Nebiros picks up some Death skills, and Kumbhanda has become a hybrid Wind/Pierce attacker with Myriad Arrows and Magarudyne, plus some flavor skills like Dekunda and Insta-Heal. The new reps are actually quite good, Onmoraki is your earliest access to Eiha skills while Dakini picks up Herculean Strike and Strike Boost, plus High Counter. Arahabaki has been buffed up considerably, innately repelling Slash and Pierce attacks, and picking up Strike repel via leveling to patch out a strike weakness. They pick up a weakness to Dark which they also get a Repel passive for, though the trade off here is an Ice weakness that they DO NOT patch out by default. Not my favorite Arcana still, but it at least has some interesting Niche picks. Arahabaki is a great wall, an unusual thing to find in Persona 3, though she has little output with damage if you aren't doing some skill carding or precise fusing for her.
The Fortune
In FES, the Male story in Portable and Reload, The Fortune Arcana is represented by paternally pressured pre-med Keisuke Hiraga. Keisuke represents a culture club, with a choice between Art, Music and Photography in pre-Reload versions of the game. His Schrodinger's Club becomes available to join on 6/17, though unlike the Sports Clubs you are not ultimately forced to join. It's a good idea to join though, because beyond the obvious value of developing more links, joining a club also unlocks Fuuka's social link. Keisuke is available to hang out with Tues, Weds and Thurs, and the link itself has no pre-reqs beyond reaching the appropriate Calendar date to start it. The progressions are as follows,
Initial | 0(0) | 15(22) | 15(29) | 15(22) | 15(22) | 15(22) | 22(22) | 22(22) | Max
Initial | O | O | O | O | O | O | O | O | Max
A truly streamlined link, having the matching Persona and picking the correct choices allows you to complete this link in a minimum of 10 hang outs, and you don't even need the former until after Rank 7! In Portable, you don't even need the former at all. In a bit of meta-irony, despite the ease at which his link can be completed Keisuke often finds himself left languishing from the playerbase due to being a relatively unpopular character. But that's not really the focus of these write ups.
Portable revamps this link considerably, instead handing it off to the enigmatic Ryoji Mochizuki, who enters the story after the Hanged Man boss fight. Naturally, this indirectly weakens the Fortune Arcana for the FemC since it is a very long while before she can make use of it at a strength level similar to the MC. Now I'm not actually going to go into the progression for this link, because the actual choices you take for it largely don't matter. Ryoji's link is a semi-automatic one of sorts that will always go up when interacted with (save one notable landmine you can hit that's fairly obvious when it pops up). In fact, it also has some automatic advancements, making it the only link in any version of the game that switches between Automatic to any other link type beyond the first rank. Another quirk of this Link is that when you are given the option to advance it on your own time, you MUST do so or it will stall out prematurely. Counter-intuitively, this means you must also accept Sunday date invitations from this link, events that normally don't result in direct rank ups for other characters but do for Ryoji. The dates this link can/will go up are as follows,
11/9 (Automatic Initiation), 11/12 (Automatic), 11/13 (Talk to after school), 11/15 (Date Invitation), 11/19 (Automatic*), 11/22 (Automatic), 11/27 (Automatic), 11/29 (Date Invite), 12/1 (Talk to After School), 12/31 (Automatic)
*11/19 has a dialogue prompt that can cut the link's progress off then and there, though it's pretty obvious to avoid. It should go without saying, but the automatic progressions also only happen if you've completed the previous events that were up to your discretion.
Ryoji doesn't really take any effort to max out, but not knowing that you need to accept every opportunity to hang out with him can easily stall this link well before the finish line. If you've been playing even mildly optimally though, you shouldn't really have too many options besides him to hang out with once he enters the picture. Onto Personae!
In FES and Portable, we have,
Fortune: Level 17
Empusa: Level 23 (Requires Elizabeth Request item to fuse)
Kusi Mitama: Level 29
Clotho: Level 38
Lachesis: Level 45
Atropos: Level 54
Norn: Level 62 (Unlocked at Max Rank, can only be fused via Triangle Spread of Clotho, Lachesis and Atropos)
The most hyperfocused Arcana in the game. Fortune is stacked with Wind casters and that is it. Everything picks up the Garu line and maybe a healing spell or two. If you need a Wind caster, this Arcana has you covered, particularly once the Sisters of Fate become available as they tout Wind Boost by default, and then Boost and Amp by Atropos. I usually wait until the very end with Norn before doing anything with this Arcana though. A non-4+ spread special fusion, Norn comes in with the Ultimate Wind spell in Phanta Rhei, as well as innate Wind Amp. She can easily snag Wind Boost off of Atropos via fusion, making her even more ready to use than Surt really. She also picks up Elec Drain at level 69(nice) to patch out her sole weakness. Maybe do a little extra fusing to get Mediarahan or something onto Atropos, and you're off to the races with an excellent Wind User and support tank.
In Reload, we have,
Fortune: Level 15 (Special Fusion)
Sandman: Level 20
Kushi Mitama: Level 28
Clotho: Level 37
Lachesis: Level 44
Atropos: Level 56
Norn: Level 65 (Special Fusion)
Lakshmi: Level 73 (Unlocked at Max Rank)
The Arcana is largely the same here, with some minor changes thrown in. Sandman gives you an early Ailment Specialist with the decent combo of Tentarafoo and Confuse Boost. Clotho and Lachesis pick up more support spells in buffs, debuffs, and the fairly useful pick up of Mediarama in Lachesis' case. Atropos picks up Ziodyne for more coverage options, and Norn is the same offensively while trading out Elec Abosrb for Mediarahan and later Salvation. She also has better resistances outside of that, now nullifying fire and repelling ice in addition to her wind drain. Lakshmi is a former Empress Persona who seemingly got a glow up but is probably less useful than she was originally and definitely less useful than Norn funnily enough. She comes in with Ice skills, but no relevant Boost passives and not even Diamond Dust. She also redundantly picks up Amrita Shower AND Salvation, which is extra pointless since Norn will easily already have the latter by the time you can fuse her. Very weird addition to say the least, not sure why she's the ultimate when Norn is so much better and doesn't require a maxed out link anymore. Probably a slightly better Arcana on the whole though for this version, and Norn is still a fantastic late game addition to your roster who is dead simple to set up as your Wind specialist.
Last edited by Cullen on Wed Jul 09, 2025 12:00 am, edited 7 times in total.
Part 44 is out! We resume exploration, giving Portable some floor time in the process. We also encounter what is generally considered to be the hardest boss in the game in the PS2 versions, and I execute the fight very messily but still somehow win on the first try. Reload on the other hand has fairly rudimentary fights to cap out this expedition and a Monad Passage that is also fairly underwhelming. Next time we'll have one of the most memorable events of the game play out, so look forward to it!
Extra Notes
In FES and Portable
-The Sleeping Table has a pretty notorious reputation for being a common wall for people trying to make progress in Tartarus. Ironically, it's not really an overly complicated or strategically difficult fight... he just hits really damn hard! Without buffs and debuffs, Maragidyne and Megidola light up your team for 250-300 damage, and you need some serious levels to bring those numbers down to something reasonable. HP boosting equipment is a god send for making sure your team doesn't get annihilated. It's also a really good idea to have Yukari at level 43 so that she'll be able to use the much more effective Mediarama, but I didn't feel like grinding out for that so I just soldiered on. Were I to redo the fight, I'd have just subbed in Junpei instead to have someone who can easily tank the Maragidynes. Past that, the Table is able to literally light someone up with Hamaon, which is arguably one of the better things it can do. I'm not overly concerned about someone getting taken out of the fight with that since the protag or Yukari can easily revive them and I have plenty of Homunculi at this point for it to be essentially a free turn for the protag should he get tagged by it. Another obnoxious thing this guy has is Evil Touch into Ghastly Wail, which if your team is not at full HP is almost certainly certain death for the Protag should he get hit by it. Yukari is too dumb to purge Fear if any HP damage is present, and you just know the game will force a lost turn on the protag. Ghastly Wail is also not blocked by Homunculi in this version, so that's no help. I do the fight pretty messy and almost lose, but since the Sleeping Table has a completely random AI pattern, I'll clutch out a win in spite of my mistakes. Were I able to get Ken back in fighting form sooner, it would have gone a lot faster, but I didn't really think I had a chance of winning the fight as it was going so I mostly focused on survival.
-By contrast, the Table was a breeze in Portable in spite of the serious preparation errors I made coming into Tartarus. Partially this is once again due to the strictly consistent team I'm using: everyone is around the same high level of the FemC, meaning they all enjoy her numbers when it comes to the game's level scaling. I also just think they might have toned this guy down due to his infamy, it felt like he wasn't hitting nearly as hard most of the time. Hamaon is even more of a free turn now since Homunculi protect everyone, making this one of the few situations where I appreciate that rework. Evil Touch is of no concern because we can now directly control everyone, making everyone on the team capable of curing Fear with 100% consistency. Had I remembered to get a Sun weapon for Mitsuru, his battle would have been completely free. That mistake force a slightly more cautious approach, but it left enough room to play dangerously every now and again.
-We see an amusing bug with Orgia Mode, exclusive to Portable. When Aigis gets hit with an insta-kill while in Cooldown, if she's bailed out by a Homunculi she will immediately go back into Orgia Mode once her turn comes back around. The "death" purges the Cooldown status, and the Cooldown status itself locks Aigis into the Orgia Mode tactic until it clears naturally and reverts her to Act Freely. As this played out, Aigis essentially didn't have to suffer Cooldown at all and was able to keep up her Orgia Mode bonuses the entire fight. Because Homunculi only work for the Protag in Vanilla/FES, this particular interaction can't happen in those games. One interaction I do think can happen is something we saw in the Hermit fight. Aigis for some reason got 4 turns of Orgia mode when obviously she's supposed to go into Cooldown once she reaches her 4th turn in the mode. I think what happened in that fight is that because she got hit with the Shock status and recovered from it on the turn she was supposed to go into Cooldown, the game forgot to actually apply the Cooldown to her and allowed her another attack. I'm learning about all sorts of interesting niche situations for Orgia Mode in this LP, it was something I basically never used until beginning this LP!
-I got a bunch of Opulent Coins in Portable due to some good luck with Rare Form floors, and good golly molly. Just 5 of those coins netted me a million Yen, in addition to the other treasure I had to unload getting me around 800K! It is much easier to become rich in Portable, and it makes the 9,999,999 cap for money even more obnoxious than it already is in FES.
In Reload
-Not too too much to say here. The bosses are pretty simple in contrast, even considering I continually bring the worst people to them. With Hecatoncheires at the level to learn Auto-Marku, we've gotten our first piece for creating a full team auto-buffer. We'll likely get Auto-Masuku fairly shortly into our next trip into Tartarus when that comes around. Now in FES and Portable, all the Auto team buffs become available around the same time, and I'll likely have a full team buffer for boss fights ready to go before the next moon cycle is out. Reload pushes Auto-Mataru back by quite a bit unless you have the Persona 5 DLC Personae. For context, Auto-Maraku at its earliest is on a Level 47 Persona, Auto-Masuku is tied to a level 54 Persona at its earliest, but Auto-Mataru is on a level 72 Persona at its earliest. Quite the delay on that, but it'll come around sooner than you'd think also.
-Just to reiterate, we definitely want to focus our efforts on making specialists for each element at this point, and we're just about to get access to things that pre-packaged to be good with certain elements while also picking up the next tier of damage increasing passives. Stacking Boost and Amp passives is a huge powerspike for the protag, and will allow us to see those juicy high numbers much more frequently!
-The Monad Passage for this time around mostly just focuses on annoying things. Poison to block out Shifts and Theurgies, SP draining to shut down your spell casters, and then there's just a reasonably potent damage dealer to cap things off because I guess they got lazy. Because I was using Shinji who largely doesn't care about any of those things and just spams Heat Wave, it wasn't too much of an ordeal. Our reward is another boost to our Major Arcana slots and the Tower Arcana card. This one gives +1 to all stats of your stocked Personae, a pretty whatever bonus and not something I'd hyperfocus on getting.
The 6th stream for Persona 3 Vanilla will begin shortly! Let's see how I stack up against the Sleeping Table without any of my normal tools.
Interesting Things I Learned This Stream
-Truth be told? Not really anything. I was surprised to see Ananata as a level 41 Hierophant instead of a level 70 something Aeon, but that's just another case of a Persona being shuffled around between versions. I was very happy with how the Sleeping Table fight went this stream though, I was expecting that to be a fuckshow. This should honestly be the last time where I'm concerned about anything in Vanilla being difficult compared to FES, it's practically an extended victory lap for the remainder of the game going forward.
Part 46 is out! With the passing of Shinji (except in Portable), we're left with little to do but bear with the crushing realization that life goes on without him. After a brief sidequest blitz, things return to practically routine, including some cameo appearances from evening activities we haven't done in a hot minute.
Extra Notes
In FES and Portable
-There are some amusing little details in FES regarding the current batch of sidequests. For one thing, we're actually one visit ahead for the Helmet sidequest due to the fact we had playable time on the day after the Full Moon, allowing us to immediately begin that quest. One other funny thing I noticed is that when you get the Inari Sushi, an NPC actually does appear on screen to give it to you rather than a fade to black. It's the little things.
-With Ken returned to us and his Persona evolved, we finally have our dream team for FES ready to go. Akihiko and Ken have very obvious benefits for front lining them now as they both continue to learn new skills and break into higher tiered magics sooner than every other character except for Koromaru. Akihiko in particular is going to be picking up some very useful skills by level 50. My remaining team member will be Junpei, who has a good support niche in Marakukaja, and he's going to be able to copy Ken's homework when it comes to damage dealing very soon.
-Portable is now in the same boat as FES when it comes to scheduling: there's basically diddly squat to do at night unless we have a Persona we want to pump up with arcade games. Our night time social links are unavailable for a bit, and they're pretty close to maxing out regardless. All this considered, I can now finally start doing Tartarus runs earlier in the month and space those videos out a bit more like I did at the start of the LP. This will necessitate some extra trips for the purpose of rescuing NPCs, but that's hardly a big deal when there's literally nothing else to do otherwise. Reload is almost but not quite there yet since I've neglected Tanaka and Mutatsu a bit there, but we are still going to have some nights this moon cycle where I can easily sacrifice some free time for Tartarus since we've capped Academics and we're on track to finishing off most of the nightly hang outs with SEES.
-The new NPC in Paulownia Mall is actually a sneaky little bit of cross promotion that becomes more overt later in the game. I was also completely unaware of the creepazoid who gives you the Quick Pumps (they're shoes!) prior to recording this video so that was a fun thing to discover on the fly.
In Reload
-As said in the previous section, we're kind of at the point where we can afford to visit Tartarus multiple times in a moon cycle if we feel like spacing it out. Our Academics are finally topped off (okay well they will be once we get Akihiko's Linked episode squared away) so there's not much reason to delay it for so long, even considering the need to rescue NPCs. We still have plenty of time left to finish of Tanaka and Mutatsu and they're past halfway done anyway, so it's really not something to sweat anymore.
-We're finally reaching the point where we can get the really good items from the Antique Store in this version. Take note of what gems and materials get you the big booster accessories, they are key to rocketing your damage into the stratosphere. With how hardy the enemies have become in Reload, it certainly helps to be able to smash them down in short order.
-The upgrade we got to our pre-emptive strike goes a long way in making the combo of Junpei and Mitsuru an effective way to delete encounters in Tartarus, particularly since we've already maxed out their Characteristics.
-Ken gets his new Theurgy, and it is famously pretty busted. Full restore to the entire party including revival, AND Tetrakarn+Makarakarn to everyone. And it charges super quick as well, especially if Ken is under 50% SP. It's an incredible safety net and even on a more pragmatic level its a way to let Ken heal without burning SP. I'll probably keep the usage of it to a minimum just so I have to actually think more carefully about how I approach fights.
-Since we didn't go over it last time, Akihiko's Electric Onslaught is essentially a super charged Ziodyne. With Elec Boost+Amp, Buff Amp and Concentrate, it can hit for some pretty studly numbers. It also has an 80% chance of shocking an enemy, which can be pretty close to 100% against anything not immune to it. Not my favorite Theurgy of the game, but it's a solid single target limit break.
Social Progress
In FES
Star Social Link: Rank 5
Hanged Man Social Link: Max Rank
In Portable
Hierophant Social Link: Max Rank
Hanged Man Social Link: Rank 9
In Reload
Star Social Link: Rank 6
Hierophant Social Link: Rank 6
Unsurprisingly, the team is not really feeling like hanging out at the moment, so we mostly just have focus given on our non-SEES connections. And since it's an exam lead up week, that also means we're mostly focusing on the people out of school. The FemC is going to be remarkably light on that front going forward since most of the out-of-school links the MC had have been dropped from her line up. We still have Nozomi and Mamoru to pad out the exam/holiday weeks in FES, but they won't last forever either. Once Exams wrap up, we'll finally be able to do SEES hang outs again in Reload which should spice up the evenings for as long as those still last.
Part 47 is out! Aside from an Akihiko Linked Episode and some group study sessions, this is a fairly routine part. We also reaffirm that I am in fact, a complete idiot.
Extra Notes
In FES and Portable
-I somehow tricked myself into thinking I had the Tower social link done in FES when actually Mutatsu has been idling at Rank 9 for months in AND out of game. Whoopsie. Luckily I was able to get that corrected over the course of this video. Likely it's a combo of having maxed out the link in Portable and Vanilla that caused me to get confused here. Playing the same 80 hour game 4 times simultaneously lends itself well to mistakes like this, as it turns out.
-My recent Tartarus expedition has resulted in me grabbing two critical Personae in FES: Surt and Thor. Surt will be one of our two main beatsticks going forward, we'll be aiming to cap out his MA so he can use Boosted and Amped Maragidyne's to torch anything not fire immune. Thor is our first access to Auto-Mataru, and in FES specifically he'll be very helpful for chumping a specific boss later. Not that that's really necessary, but it's fun!
-Portable also has access to Surt, and by the video's end Thor as well. Surt is reaching his peak potential a bit faster in Portable due to the stat cards I had on hand, but FES Surt won't take too long to catch up. I mostly just want Thor for Auto-Mataru in Portable, but he's a decent elec caster until the real one makes his debut.
-I fuse two Laevateinns for Junpei and the Protag to use in FES, as it is a pretty considerable power boost for the both of them, and until Surt has Ragnarok and capped MA it's probably the more effective beat stick. For Junpei, sliding him this and the Agni Bracers is probably his most damaging option period. As an added bonus, unlike Gae Bolg that lost Wind Boost in the transition to Portable, the Portable version of Laevateinn still has Fire Boost since that would be useful for Junpei independent of physical attacking. If you're using Junpei there, definitely make it for him. I'm not, so I elect to get right into maxing out Surt.
-Raiding Shinji's room is a lowkey thing you can do in FES and Portable that's afforded a bit more gravitas in Reload. Since Shinji's axes are literally useless without him and not worth claiming in Portable, the pot is sweetened in this version by awarding a Skill Card based on Shinji's level when he was killed/incapacitated. The cards you can get are as follows,
Level 39 or lower: Fatal End
Level 40 to 52: Blade of Fury
Level 53 to 59: Heat Wave
Level 60 to 71: Deathbound
Level 72 to 76: Akasha Arts
Level 77 or higher: God's Hand
Since we didn't use Shinji at all in Portable, we were defaulted to a useless Fatal End card. The Heat Wave card is relatively obtainable if you go hard on the leveling, but everything past that is New Game + exclusive for sure. And only on Hard and below because Maniac/Merciless mode does that obnoxious thing where you can't carry over any bonuses for New Game +.
-We finally ace an exam in FES, and not a moment too soon as we'll need to have done that by next month! We've already had this done for awhile in Portable and Reload due to the requirements for the second exam being relaxed a little.
-We are set for quite some time on money in Portable. Clearing out my request log got me a ton of Opulent Coins along the way, giving me beaucoup bucks to work with. That can go quickly, but it'll be a bit before I need to do any serious compendium pulls.
-In a pretty cool turn of events, we're getting some unique walking events with Koromaru for the FemC. It's nice to see new content in all aspects of the game!
-Rio is maxed out and the FemC is rapidly running out of unique things to do during the day compared to the MC. We will get a small boon in this regard come November.
-We'll hopefully have the Helmet sidequest for Theo done soon, as the reward is very nice in this version of the game.
In Reload
-I've finally maxed out my Academics for this version, giving us one less thing to worry about. We're almost done with night time hang outs also, so who knows, maybe we can get Mutatsu and Tanaka finished up with soon as well!
-The Study events weren't necessary to do, but the cutscenes are very nice so it would feel wrong to skip them.
-We're finally at a point where I can visit Tartarus at my discretion, so I elect to designated 10/20 as the day for it since we have nothing but Tanaka and redundant hang outs on that evening.
Social Progress
In FES
Tower Social Link: Max Rank
Lovers Social Link: Rank 4
Moon Social Link: Rank 4
Sun Social Link: Rank 5
I can't believe I completely forgot Mutatsu.
In Portable
Hanged Man Social Link: Max Rank
Sun Social Link: Rank 4
Chariot Social Link: Max Rank
In Reload
Hierophant Social Link: Rank 7
Sun Social Link: Rank 5
Moon Social Link: Rank 6
Lovers Social Link: Rank 6
Akhiko Hang Outs: DVDs 3/3 Cooking 2/3
I really would have liked to get Akihiko up to Buff Amp at this point, but it just didn't end up working with how I wanted to approach this moon cycle.
The next supplemental video is up! There wasn't too much to include post-Full Moon so I decided to wait two videos before making a compilation. We get a bunch of max outs for the FemC and I finally clean up the Tower social link that I memory holed in FES. Both the FemC and the MC are running out of non-school links to pursue, the FemC especially, but we still have a bit to go before holidays are progression deadzones. I also include the FES version of the Shinji recording, as it gives us something to remember him by (and it's totally not that I just forgot to record it prior to the moon cycle ending!). I have all the stuff recorded to make a Tartarus upload next, and I actually just need to record a little bit more for FES to be fully done with Tartarus for this cycle. I'll also be finished with my side LP diversions soon, allowing me to focus more on regularly updating this LP and thread.
Part 48 is out! Mercifully, we're finally at the point in the game where have almost complete freedom over what we do in the evenings. Reload is the only game where there's any nights I want to avoid Tartarus left, but every other game we essentially have carte blanche over how we spend our evenings. This is good, because we've also hit the point where any trips to the arcade to play stat raising games can actually have an impact that spans to the end of the game. Read below to find out why!
Extra Notes
In FES and Portable
-We finally secure our first ultimate Persona, and he's a darn good one! Surt comes in with Fire Boost and Maragidyne, and by leveling him up two more times past his fusion bonus EXP, he also picks up Ragnarok (A single target Tier 4 fire spell that only he learns, though it can be fused onto other Personae) and Fire Amp, meaning he is perfectly suited to sling high powered fire magic with no extra work required on your part. So long as we're not dealing with anything Fire immune, we can just blast out Maragidyne to end fights immediately once we raise up his MA. For now, I also have to use the Agni Bracers until he gets Fire Amp naturally, but that won't persist for long. Surt also fuses in with Deathbound, one of the strongest Slash attacks in the game, giving him a good secondary option should you boost up his ST a bit. I also fused him with Cool Breeze, effectively creating a perpetual destruction machine. Surt can't cover everything, but there's another elemental specialist we'll be able to make who we can simply swap to whenever Surt is walled out.
-Surt has even more going for him in Portable, as we don't need to do any weapon fusion with him to get Laveateinn, so we can just go straight into maximizing his stats with the magic boosting cards we've been hoarding. I can also use skill cards to hook him up with auto buffs, meaning I'm not losing anything by having to use the Agni Bracers over the Speed Enhancer when running him. I don't get him by the end of this video, but I pick him up pretty early on into the next video (not that it matters too much since Portable is on the sidelines for this run of Tartarus)
-We also pick up Thor, who's not quite up to snuff as Surt is but has some things going for him. He doesn't come in with Elec boost and needs additional levels to pick up Elec Amp after fusing, but he does come in with Vicious Strike (About 60% stronger than Herculean Strike) as well as Auto-Mataru. Having our first auto team buff is a wonderful thing, and he's an obvious choice to enter boss battles with going forward. It'll be a little bit before I can make a designated full auto team buff user for that purpose, but Thor is the first step to that and well worth the pick up.
-In FES, Thor has the more immediately relevant purpose of enabling our next Fusion Spell: Thunder Call! Been awhile since we've seen one of those, as most of the ones I could have used up to this point are pretty junk. Thunder Call is a multi-target elec skill that's about 50% stronger than Maziodyne AND has a 100% chance of shocking the enemies it hits! Very good in some select situations, though generally Thunder Reign is more reliable. To use Thunder Call, you need Thor and Take-Mikazuchi in your stock, making a maxed out Chariot link also a requirement for this Fusion Spell. We've been able to use it for a long time in Portable, but I decided not to exercise that option until I could do it in FES. Sadly, despite no requirements in terms of Personae in order to use it in Portable, the spell is decidedly less useful there. Beyond the requirement to farm items to have a regular supply of it, rather obnoxiously Elemental spells used via item in Portable do not benefit from having the corresponding Boost and Amp passives. While this makes sense for the fixed damage gems, it's a baffling oversight for Fusion Spells. As a result, any elemental fusion spell in Portable totally sucks ass in comparison to just having a specialist cast the highest tiered magic they can, Thunder Call with its 100% shock chance being the one thing that avoids being relegated to complete irrelevance.
-Our payday floors for this section of Tziah are 140, 142, 144, 145, 148, 150, 153, 154 and 156. 150 and 156 are also floors where we can secure the next Legendary Katana, Outenta Mitsuyo. This is also the first time where money chests were giving me 6 figure payouts, the highest I saw being 150k. The average is still around 40K for a money chest, but sometimes you can seriously strike gold!
-My execution of the Hell Knights fight was somewhat sloppy, though that was largely due to a stray Shock getting through and making the fight more perilous. An easy clean up would have been to throw up a Magic Mirror/Attack mirror to account for that potential disaster, but otherwise having Surt blast away made the fight a matter of turns. I didn't have that option in Portable, but my foreknowledge of what could happen in this particular fight and my more evenly leveled team made it of little consequence. Obviously, having Yukari and Aigis patch out their Elec weaknesses was also a huge boon.
In Reload
-The Aohige pharmacy is now selling multi-target status cures beyond just Me Patra gems, and you'd do well to have a good supply of these! These items can be used by anyone, which is much nicer than needing the protagonist or Yukari to cure up the party. We're also at the point where I can earmark a budget for an ailment immunity accessory, which will definitely come in handy for making concerns about ailments a thing of the past.
-This rarely comes up at this stage of the game, but we entered Tartarus on a night where Junpei is unavailable... for some reason. He's willing to read with us but not go to Tartarus. This specific evening probably made more sense in FES and Portable where Junpei wouldn't be willing to hang out with you otherwise. Regardless, I may need to take a second Tartarus trip to fish for a Grand Clock, as I would like Junpei to be usable for the upcoming Full Moon.
-We get to see Ken's Divine Intervention in action, and this skill is cracked. Full heal to the party, revivals to the unlucky, and functional immortality for potentially several turns depending on how dumb the AI wants to be. And if Ken is under 50%, he charges this thing QUICK. It can be a totally valid strategy to have Ken quickly deplete his SP and then just have him Turtle with Guard and EN boosting equipment, waiting in the wings to fire off his immortality button. This kind of strategy actually benefits from Ken NOT having his characteristic, since recovering SP would take him out of his Charge condition. I consider this a pretty boring way to play though, so I'll being sparing us all the Turtle Ken strat.
-It's been mentioned by commenters in the thread that with some Dark Boosting equipment, Hound of Hades from Koromaru can do some pretty solid damage! I personally much prefer Power Howling, especially for something we get in the next video, but in a more magic oriented team like the one I went with for this expedition, it's certainly not a terrible option.
-With our upgraded pre-emptive strikes, Mitsuru's Ailment Surge can see some pretty regular and helpful use. Something like Getsu-ei has a near guaranteed crit chance with Distress and Ailment Surge in play, and Distress from pre-emptive strikes can be inflicted on things that are normally immune to the ailment altogether. It's somewhat limited in use, but it can be nice for the pesky weakness-free enemies!
-We get to see what happens when you fail a Greedy Shadow encounter. Sometimes party members will chime in and call the correct turn for you, but I'm not sure what exactly determines this. The whole thing seems to just be luck, but thankfully Fuuka later learns a skill that just shuts off the choice aspect of these encounters and gives you the win.
-Fuuka also picked up Escape Plan, much sooner than she does in FES/Portable! This handy skill allows you to Traesto out of Tartarus back to the lobby simply by asking Fuuka. It's slightly nerfed in Reload, requiring SP to use and not being as necessary between access points being more common and Floor Jump being a thing, but it's nice when you need to get out immediately.
-Not much to say about the boss encounters here, we're about to totally stomp them on the power curve and I already crush them with little difficulty.
Part 49 is out! Quite a lot is accomplished this go around, as we only have 2 more nightly hang outs to get everyone's characteristics maxed out, which will be happening in the next standard video. We also get a couple more maxed social links for the FemC, with several more cresting on completion. We're actually are pretty quickly going to find ourselves with empty daytime slots for the FemC as there are fewer links to actually work with during the day time for her at this point. Next time we'll be back to Tartarus to finish off the remainder of the bosses this cycle!
Extra Notes
In FES and Portable
-Now that we've finally gotten Thunder Call in FES, there are a number of Fusion Spell requests that we can knock out in rapid succession provided I feel like footing the compendium costs for the relevant Personae. It's not super critical on a first playthrough, but it's a good idea to pursue this request line until its end if you're planning to take on the Bonus Boss of the game.
-I take the opportunity to detonate Yukari's infamous landmine hug choice. This is where most people likely see their first Reversed link, I know I blundered into this one. Having a Link reverse halts your ability to progress it until you reconcile with the reversed link rep. In Vanilla, your only choice for this was to dedicate one of their scheduled days to a Reconciliation Event, where you needed to pick the right dialogue choice in order to smooth things over. FES added the option to bribe the gods into fixing your faux pas, with Relationship Fortunes having the secondary effect of unreversing links. For my part, I just reload my save since I just wanted to demonstrate what a reversed link is like.
-For the most part, you're probably never going to see reversed links for Male characters as you get a ridiculously generous 90 days to ignore them before they reverse. Female characters have a tighter 60 day allowance with the jealousy mechanic to contend with, so it's more probable to see them go into reverse even without picking a landmine.
-We have more interesting things going on in Portable this go around, such as a couple unique scenes like returning to Shinji's
-I screwed up Ken's rank 7 event in this video a bit as the guide I'm using wrote the correct choices in a very confusing manner. I'll probably redo this segment on my own time to make sure Ken's link isn't completely off the intended completion schedule, though it's not really a big deal if that happens.
-We get the first Maid Costume armor, a new quest reward for the helmet sidequest and an exclusive pick up for the FemC. The Maid armors existed in FES (though disappointingly no variant for the MC, the cowards) but have been slightly buffed in the transition to Portable. They used to be around 92 defense with no special effect. Now they are 118 defense with SP +50 on them! Perfectly suitable end game armor now, and well worth your time to complete the relevant requests for them. The FemC gets hers a bit ahead of schedule, the remainder will be obtainable later.
In Reload
-Akihiko finally gets Buff Amp, which is a key component of his end game damage prospects. Buff Boost had a relatively minor impact on Akihiko's gains from buff effects, but Buff Amp effectively doubles the effect of each buff placed on Akihiko. Combined with the increasingly powerful skills he's going to get going forward, he can be a solid boss killer with the right set up.
-Fuuka gets her Weakness Mitigator passive and this one is whatever. It's only a 5% increase over the original effect, you're obviously better off just avoiding having your weakness hit altogether. You won't always be able to pull that off though, so I guess this is there for those occasional misplays.
-Ken gets his Spirit Refresh characteristic finally, which serves as a counterbalance to his low SP pool. 5 SP per turn isn't much, but it is comparable to getting a 5 SP discount on a spell like Medirama or Recarm. It can also be stacked with Invigorate accessories to give him even more mileage, though of course this is at an anti-synergy with his Theurgy Charge condition. Once it upgrades, it actually does give Ken a lot more mileage, though like other recharge effects the fact it doesn't proc on Once More is a really annoying limitation.
-Hey Mutatsu almost forgot he was in this version of the game.
-As mentioned previously, we're poised to knock out the remaining hang outs within this last in-game week. We'll be taking care of Koromaru's last DVD session at the start of Part 51, and Ken has his final Coffee event on 11/1. Every little bit will help for the next Full Moon!
-If you're looking to scoop up achievements, at this point you have ample free time to play the software that increases Part Time Job payouts and then grind those out for the relevant achievement. I already have that one, so I don't feel the need to waste time on that, but I figured I should mention it is a thing you can do.
Social Progress
In FES
Fortune Social Link: Rank 7
Emperor Social Link: Rank 9
Lovers Social Link: Rank 5
Strength Social Link: Rank 8
Hidetoshi is almost finished, which will afford us the most broken Persona in the game!
In Portable
Star Social Link: Rank 9
Strength Social Link: Rank 8
Justice Social Link: Rank 7
Hermit Social Link: Max Rank
Priestess Social Link: Max Rank
Emperor Social Link: Rank 9
Ditto for Portable. Sad to see Saori go.
In Reload
Lovers Social Link: Rank 8
Temperance Social Link: Rank 7
Fortune Social Link: Rank 5
Strength Social Link: Rank 9
Tower Social Link: Rank 7
Akihiko's Hang Outs: Cooking 3/3 DVDs 3/3
Fuuka's Hang Outs: Gardening 3/3 Reading 3/3
Koromaru's Hang Outs: Brushing 3/3 DVDs/ 2/3
Ken's Hang Outs: DVDs 3/3 Cooking 2/3
As mentioned previously, hang outs are almost completely finished! Koromaru will be completed as soon as Part 51 begins, while Ken will have his taken care of towards the end of that video. I had lost track of Ken's hang outs and thought we were due for that this video, likely because I swapped out a previous cooking opportunity with him for reading with Mitsuru.
The next supplemental video is up! On the MC's side, Keisuke is racked with indecision due to his contrarianism, Yuko stammers her way through romanticizing about the future, and the protagonist avoids a critical bag fumble with Yukari. On the FemC side, Fuuka is finally maxed out, Bebe is cheerfully sewing along, and Hidetoshi sets himself for heartbreak as he's already been passed over twice.
It's back to Tartarus, and we're really cooking with the good stuff now. Surt nukes most encounters in the back half of this Tziah section, and we quickly secure both potent auto-buffs and an extremely good new theurgy in Reload. The only missing thing is some levels for Junpei, which will be corrected once we return for missing people.
Extra Notes
In FES and Portable
-The only notable thing here is the boss. I play a little risky and almost suffer the consequences for it in FES, but I was prepared for that kind of mistake. In general, if you set up an Attack Mirror against the Mythical Gigas you've walled out the worst thing he can do. If he decides to Deathbound into it after Power Charging, he'll pretty much take himself out for you but he's seldom dumb enough to do that. Sadly, he walls out Surt and we don't have the alternative elemental specialist yet, but good 'ol Gae Bolg slaps him down effectively enough. An alternative option would be to come in with more Slash coverage, and if the turn order permits it, Thunder Call into Shock aided crits would set up for mighty All-Out Attacks that would smoke this guy in a hurry, but my particular team isn't very well suited to that. The only other major mistake was leaving Junpei with Laveateinn equipped. It's walled out like any other fire attack and Junpei won't throw out attacks that risk a High Counter repel unless he's set to Rush, so he was kind of deadweight outside of turns where he could set up Marakukaja.
In Reload
-We pick up Siegfried, who awards us with two particular boons: one is that he is our earliest access to Auto-Masuku, which when combined with Auto-Maraku allows us to have Sylphid Aura for every single fight going forward. The other thing he allows is the usage of the Theurgy Scarlet Havoc. Provided you have fused a Mithras at some point, this Theurgy is an AoE slash skill with tremendous power and crit rate. It's like Hack 'n Blast but it hits EVERYTHING. It is crazy good, especially considering Siegfried comes in with a crit rate amp skill, picks up Slash Amp, and we can easily card Apt Pupil and Slash Boost onto him to augment the damage of Scarlet Havoc even further. Considering this skill can also crit, the amount of damage boosts it can rack up is pretty insane, and it devastates most of the bosses we face going forward.
-Somewhat related although not super important thing to note: Crit Rate Amp does not stack with Crit Rate Boost, it overwrites it. It DOES stack with Apt Pupil however. Good thing to keep in mind when building a crit focused Persona.
-Nothing too notable about the bosses this go around. I went into the Demented Knights fight with the worst team possible and still smashed them into bits. We're pretty well set for any combat encounter at this point.
-The Monad Passage awards us another +1 Draw card in the Star Arcana. Very nice pick up, doubling our chances to get additional card picks from Major Arcana draws, AND it stacks with Justice for 3 picks if you manage to get both. One thing to keep in mind with it though: You cannot opt out of picking cards in Reload, which is unfortunate. It is entirely possible to be forced into drawing a useless card like Temperance if you stack these up early on, so be considerate of that when they appear.
Part 51 is out! October winds down and feeds into a chilly November reception as we are poised to take on the final Full Moon Shadow. It's been a long road, but we're ready to finally rid the world of the Dark Hour and the malevolent influence of the Shadows once and for all! Shame we couldn't get all the Social Links maxed out, but nothing is ever perfect. At least we managed to finish off the team hang outs just under the wire!
Extra Notes
In FES & Portable
-Not too much to say for either game really, a pretty standard week all things considered. About the only potential consideration I could say you should make is possibly fusing an Atropos and setting your Protag up with Vayu Bracers. A fully boosted Magarula can come in handy for the upcoming boss fight, but it's far from necessary.
-I didn't feel it super necessary to point out in video, one more person has gotten lost in Tartarus for Portable as well. Like Reload, you can just make a quick trip on 11/2 to grab them.
In Reload
-Koromaru has finally gotten all his hang outs done, and we have Auto-Masukunda now! As mentioned previously, there is no equivalent to the Auto Team buffs for debuffs, so this is a pretty interesting and unique trait Koromaru has (though debuffs do have the benefit of the omni-inflicter, Debilitate). This ability isn't too useful in major boss fights, but it can be a nice boon in Tartarus where it gives you extremely high accuracy in dodge for the entirety of most fights you'll get into if you play well. For stuff like Full Moon bosses, it's not exactly something that's going to mark a consistent benefit for your strategy, but Koromaru has tons of other things he can do for you.
-We finally have free time to work on Tanaka and Mutatsu again. As you can see, we're already quickly speeding them to max out, so there's no harm in delaying them until the late game. It helps that Devil Personae mostly kind of stink while Tower doesn't get the really good stuff until the end game, so there's not much harm in ignoring these guys for awhile.
-We could have gotten the Gardening Software sooner, but again we've had more practical things to do. We did get to see a funny interaction it has, where if you have a plot that's already growing or ready to harvest, you still benefit from the Software's yield bonus.
-The Part Time Master software is mostly just for speeding up the achievement that requires you to get a certain amount of money from the part time jobs. Even in the early game these jobs pay you in beans, so this doesn't serve much practical benefit past that. We're going to have a number of empty nights coming up eventually though, so I'll be sure to try and demo the part time jobs when we have the chance.
-Yuko yields us Atavaka for finishing her link, which is notably the lowest leveled thing in Reload that has Auto-Mataru. Level 72 though, so that's still a ways off. It is possible to get that skill sooner if you get lucky with skill mutations, but that's not a level of RNG I enjoy grappling with, especially because Reload features a worse version of it than what's been featured in recent MegaTen games. Would it kill you to tell me what the skill is changing into ahead of time?
-Ken gets his Spirit Refresh passive, netting him an extra 10 SP to spend every time his turn comes around. It's not exactly a discount on par with Yukari's (even considering Yukari's is exclusive to healing skills), but every little bit can help.
-As mentioned previously, we have some more people to save. Once again I can't grab the rewards for this immediately, but it kind of works out this time since I had more pertinent things I wanted to do on other nights where all the missing people were finally available to rescue.
Social Progress
In FES
Fortune Social Link: Rank 8
Strength Social Link: Rank 9
Lovers Social Link: Rank 6
Emperor Social Link: Rank 10
Sun Social Link: Rank 6
We finally maxed out Hidetoshi's link, granting us the right to fuse the most broken Persona in the pre-Reload versions of Persona 3. We're not quite at the level to fuse him yet, but we'll be making him post-haste once we do reach that point.
In Portable
Temperance Social Link: Rank 9
Strength Social Link: Rank 9
Justice Social Link: Rank 8
Sun Social Link: Rank 5
I had the option to Max out Emperor here as well, but I passed on it since I screwed up Ken's link slightly and needed a relationship fortune to keep it on schedule. I'm a few levels off from Odin in this version anyway, and we have a few free days in November I can close out the link.
In Reload
Temperance Social Link: Rank 9
Magician Social Link: Rank 7
Strength Social Link: Max Rank
Lovers Social Link: Rank 9
Sun Social Link: Rank 6
Devil Social Link: Rank 9
Tower Social Link: Rank 9
Koromaru Hang Outs: Brushing 3/3 DVDs 3/3
Ken Hang Outs: Cooking 3/3 DVDs 3/3
We've officially completed every single nightly hang out with SEES, including the largely useless Shinji hang outs! Nights are going to be a lot breezier going forward as we are also poised to quickly finish Mutatsu and Tanaka's links as well. Speaking of, we've got a ton of links lined up to max out, so we can expect a cascade of Max Rank events to happen in the near future.
The next supplemental video is up! Keisuke continues to flip flop while the protagonist flops out, and Hidetoshi is done and dusted, giving us access to the overtuned Thunder Reign spell in due time. Also we get more reason to question Ikutsuki's reasoning for installing cameras in everyone's rooms. On the Portable side, Bebe's link picks up a distinct romantic overtone towards the end just like Hidetoshi's. Also like Hidetoshi's, you can't actually act on this and these guys both willingly relegate themselves to cuck status at this stage of the LP.
Part 53 is out! Things have been rough for SEES as a of late, another death hangs in the air in addition to Ikutsuki's betrayal. We'll just have to soldier on with routine until Mitsuru at least attempts to bounce back. Meanwhile, a mysterious new transfer student arrives at Gekkoukan...
Extra Notes
In FES & Portable
-Pretty much at the start of the month, we unlock the next block of Tartarus. Looks like the game faked us out with that dead end in Tziah! The new block is pretty unique in that we actually have full access to the entire thing, despite it containing two cycles worth of floors and quests. The next batch of quests that require Shadow item drops won't unlock until December though, so it's up to you how much you want to explore it this month. Note that this is only true for Non-Reload versions of the game, the block is completely conventional in Reload.
-We're now at a point where we are capable of creating Personae that will last us until the end of the game, already having one in Surt. It's at this point it might seriously be worth your while to go and farm Onyx's in order to trade for stat boosting cards so you can fast track new Ultimates to perfection. The absolute best place to do this are the border floors after the last teleporter in Arqa. A good chunk of the encounters there will be enemies that drop Onyx's. We will eventually have enough free time to apply a boost that makes this process faster, but it isn't super necessary. This is less appealing to do in Portable as we have a unique set of sidequests later in the game that award tons of stat boosting cards, though those are also better saved for Bonus Boss Personae.
-New to FES and Portable is the Junpei Encouragement Quest, where you do your best to convince him to stick it out for Chidori. On 11/6, 11/11, 11/14, and 11/22, you have the option to encourage Junpei or put him down. Naturally encouraging him yields a happier result later on down the link. I think you can miss one of these interactions and still get the positive outcome to the quest, but absolutely do not quote me on that because I was not paying enough attention in regards to this for my previous practice playthrough. It's best to just make sure you always do these. It is also possible to encourage Junpei during the day, but it's just easier to find him in the dorm during the Evening.
-Portable Fortune social link is quite weird, mixing automatic advancements and Shinji-style urgency where you must advance it every time you are given an opportunity to do so manually. Unlike Shinji, who at least had a day or two of allowance, this link will legitimately stall and be incompletable if you miss an opportunity to develop it.
In Reload
-With all Hang Outs done and Mutatsu and Tanaka completed in short order, we officially have full control over what we do with our evenings. It'll be much easier to fit in incidental Tartarus trips now, and I'll probably use some nights to just show off some incidental mechanics I've mostly been ignoring because they aren't very useful and are not worth the time.
-We can also start using up our non-social stat software. Stuff like the Muscle and Mental training offer fairly minor boosts, but hey every little bit right?
-The Elizabeth dates have been moved way the hell up for some reason. We're already done with this questline in Reload, while we're just now getting the School date in other versions. The questline concludes in the game's final month in non-Reload versions, if you're curious.
-You'll definitely want to buy Junpei's flowers ASAP lest you forget this sidequest entirely. There's a bit of time before you absolutely need to do it, but we may as well get it off the table right away since it doesn't take any time to do so. As the replacement for the Encouragement Quest in FES and Portable, this one is a lot more generous and easy to complete because you just need to do this one thing after Junpei's Linked Episode.
-The FemC's Fortune link is converted into a Linked Episode in Reload, and it functions pretty similarly to the social link in structure; mixing automatic advancement events with events that need to be advanced at your discretion. Unlike the Fortune link, you're afforded a bit more time for this, but you must complete the discretionary events before the automatic ones can happen or the episode stalls.
Social Progress
In FES
Temperance Social Link: Rank 8
Strength Social Link: Max Rank
Sun Social Link: Rank 7
Lovers Social Link: Rank 7
Junpei's Encouragement Quest: 1/4
Strength is maxed out, and not a moment too soon! This nets us Siegfried in FES and Portable, the original ultimate Persona for the Arcana. He's quite good like in Reload, but for different reasons in this game. Siegfried is the easiest way to access the all powerful Vorpal Blade skill, which due to its unique mechanic is hands down the most powerful physical skill in the game. We'll go over why once we can use it.
In Portable
Star Social Link: Max Rank
Sun Social Link: Rank 6
Fortune Social Link: Rank 1
Junpei's Encouragement Quest: 1/4
In Reload
Magician Social Link: Rank 8
Sun Social Link: Rank 7
Tower Social Link: Max Rank
Devil Social Link: Max Rank
Junpei's Linked Episode: Episode 3 Completed, Encouragement Quest Complete
New Linked Episode: Episode 1 Completed
Not too much movement on this front. That being said, next time around and perpetually into the future we're about to be seeing Rank Up events at a much greater frequency, as we will be unlocking a mechanic that completely invalidates the need for dates, relationship fortunes and non-rank up events.
Supplemental: Social Links Part 3, or how making news friends is child's play
I've been so out of it this month, I've been meaning to update on this forever. Let's get to it!
The Strength

For FES, the MC in Portable and Reload, the Strength Arcana is represented by the sports team manager Yuko Nishiwaki. In another case of Schrodinger's Social Link, she happens to manage whatever team you join for the Chariot link. Her unlock is rather unique, at the end of the Rank 2 Chariot event, you can extend an invitation to Yuko to walk home together. She'll decline in this instance, but you'll be prompted to try again on the Rank 3 event. She'll accept this time, and initiate her social link within the Chariot social, creating one of two instances where you get two rank ups from a single link event (the latter of which is tied to Automatic Links). For some fun trivia, if you happen to initiate Yuko's link on a day where the Death social link is scheduled to rank up, you can have a day with 4 Rank up events provided you hung out with the Devil or the Tower during the evening. Portable allows for this with one other event, once again tied to automatic links, though you're not liable to be able to make it happen in a playthrough that has any level of optimization. Disregarding all that, Yuko is available to hang out with on Wednesdays and Saturdays. Hanging out with her is required to eventually unlock the Tower link. Her progression is as follows,
Initial | 1(36) | 15(21) | 15(29) | 22(21) | 22(7) | 35(29) | 40(7) | 29(40) | Max
Initial | O | O | X | O | X | X | X | O | Max
As what will almost certainly be your first potentially romantic link (or forced romance in the case of FES), it's perhaps not too surprising Yuko is one of the slower and more demanding links to advance, regularly hitting roadblocks even in Reload. Mercifully, Yuko's romance activates quite later compared to other romantic links, so jealousy is not much of a concern with her. You'll likely max her out relatively late compared to her start time on account of this and her fairly limited availability.
For the FemC in Portable, Yuko is relegated to the occasional cameo within other links and various story events, while SEES member Koromaru takes up the representative for the Arcana. Koromaru first becomes available after 8/15 and is the first replacement link that also moves an Arcana to the night timeslot, though in the context of these posts we previously already saw this with Ken and the Justice link. While his standard walk events are still available, Koromaru is also available to social link with on Mon, Weds, Thur, Sat and any Holiday. A really generous spread for a link that becomes available when you're starting to run out of things to do during the evening anyway. Perhaps accounting for this, Koromaru's progression is as follows,
Initial | 15(7/11) | 15(14/22) | 20(7/11) | 20(14/22) | 30(7/11) | 25(7/11) | 30(14/22) | 50(7/11) | Max
Hands down the slowest link in the game, having the unique distinction of being the only link in any version of the game that doesn't award enough points on Rank 2 to effortlessly make it onto Rank 3. Only 2 ranks can be acquired just by getting the right dialogue choices, and you need to stack the matching Arcana bonus and maxed out charm to have that happen. That being said, Koromaru's schedule is so generous and you have so little else to do during evenings by the time he becomes available, you're still liable to finish this with multiple in-game months to spare. Moving on to available Personae.
For FES and Portable, we have
Valkyrie: Level 11
Rakshasa: Level 16
Titan: Level 23
Jikokuten: Level 29
Hanuman: Level 37
Narasimha: Level 46
Kali: Level 55
Siegfried: Level 59 (Unlocked at Max Rank)
Fun fact, every single Strength Persona has the Slash inheritance type, meaning most Magic is off limits via inheritance even if some of them do have magic within their default skill lists. Beyond that little tidbit, Strength is kind of the reverse of Hermit in terms of usefulness. While Valkyrie is a means of getting Auto-Tarukaja and Mabufu easily and Rakshasa is easy access to Getsu-Ei, nothing in the Arcana really jumps out and says "I'm awesome!" until the very end. Any notable skills they have up until Kali can usually be found elsewhere, often on lower leveled things. Kali picks up some pretty great skills naturally though, having Apt Pupil and Deathbound for some serious Critical potential. This gets blown out by Siegfried, who is easily one of the best physical Personae in the game. Siegfried picks up Auto-Masuku, High Counter, 2-Handed Sword Mastery, Arms Master to halve HP costs of physical skills, and the real feather in his cap: Vorpal Blade. Vorpal Blade is easily the best physical skill in FES and Portable, an AOE slash attack that has a unique quirk: when its user is in the Great condition, the damage of Vorpal Blade is Doubled!!! By capping Siegfried's ST, this skill can do some serious damage when your protag is in the Great Condition, and since there's not really much going on during the evenings of the end game, this is a trivial condition to fulfill. It's even better in Portable where the Great condition will never wear off. As an added bonus, Siegfried has pretty good resistances, nullifying Slash and Light skills and having 50% resistance to Strike skills, definitely the more threatening line up of physical skills in the game. He has a weakness to Dark skills, but it's fairly trivial to patch out as he can easily be fused off of Daisoujou for Null Dark. Pretty good stuff!
In Reload, we have
Valkyrie: Level 10
Rakshasa: Level 15
Matador: Level 22
Jikokuten: Level 29
Hanuman: Level 36
White Rider: Level 46
Siegfried: Level 54
Kali: Level 63
Atavaka: Level 72 (Unlocked at Max Rank)
The arcana is pretty similar for most of the game, Matador being added to the line up in place of Titan but he's not really anything special. White Rider enters the fold, giving the Arcana a Pierce focused Persona if you're so inclined, but once again the Arcana really takes off with Siegfried. Despite being demoted in level and ultimate status, Siegfried is arguably even better here. Vorpal Blade is on the out for his skill list (though the skill itself is still in the game) but the gimmick of it was jettisoned anyway so that hardly matters, Deathbound is close enough and he has that now. In addition to having Brave Blade now for a single target beatstick, he still gets Auto Masuku, gets Crit Rate Amp (a flat 15% added to your critical chance!), he learns Slash Amp, Auto Rebellion for additional crit chance, and you can easily card Slash Boost onto him for some real razor edge efficiency. Siegfried also enables the Theurgy Scarlet Havoc, an extremely powerful Slash attack that he is well suited to using! No Arms Master in this game though, sadly. By contrast, Kali is pretty much the same as she was before, just picking up Heat Wave and the nerfed Vorpal Blade in this version. Atavaka actually isn't a new Persona for this game, funnily enough, he's instead an Aeon who has been repurposed into the ultimate Strength Persona. He's fairly whatever, not having any multi-targeting physical skills (just a rather useless Maragidyne by default) and is another means of getting God's Hand. His real purpose lies at the end of his skill list. He's one of your options for getting Auto-Mataru, and in fact he's the earliest one as that skill was moved way back for when you learn it in Reload. He also picks up the extremely potent Firm Stance passive if he gets two more levels after being fused. This passive disables your dodge chance, but halves all incoming damage. It's an interesting option to run, and there's at least one fight where passing this around to many different Personae could come in handy.
The Hanged Man

Across all versions of Persona 3, the Hanged Man Arcana is represented by the grade school girl Maiko. The starting point for this link automatically becomes available on 5/6, when the protag eavesdrops on some students at the school entrance who mention a young girl who hangs out at Naganaki Shrine all the time, and somewhat creepily decides to goes to check it out. Maiko has a small fetch quest where you must feed her Weird Takoyaki, followed by giving her a Mad Bull. Once those requirements have been met, you can start her link the next day she's at the shrine, which can be pretty soon since she's there everyday except for Sunday (and non-Summer/Winter vacation holidays but that rarely comes up). This is the other main early game out-of-school link next to Hierophant and is an easy one to develop during exam time and Summer Vacation. The progression is as follows,
Initial | 1(22) | 20(7) | 20(22) | 20(29) | 30(29) | 15(0) | 30(51) | 30(22) | Max
Initial | 0(22/34) | 20(7/11) | 20(22/34) | 20(29/45) | 30(29/45) | 15(0/0) | 30(51/79) | 30(22/34) | Max
Initial | O | O | O | O | O | X | O | O | Max
A link that becomes more and more streamlined with each entry, going from 3 instances of inevitable downtime to 2 to 1. It's pretty easy to finish Maiko's link very early if you so desire, though like all out-of-school links it's just best practice to wait until it's the only option. Because of the increased amount of activities available in Reload, this does result in her finishing relatively late despite being the fastest version of the link. Moving onto Personae.
In FES and Portable, we have
Inugami: Level 10
Take-Minakata: Level 21
Orthrus: Level 28
Vasuki: Level 38
Ubelluris: Level 48
Hecatoncheires: Level 54
Hell Biker (Requires Elizabeth Request item to fuse): Level 60
Attis (Unlocked at Max Rank): Level 67
Nothing all that impressive here, I usually just end up using Hanged Man Personae as a matter of happenstance. Take-Minakata is easy access to Mazio if you need it, ditto for Orthrus if you need something to mix Fire Boost into a fusion. The rest either have useless skills, or the things they bring to the table are found on lower leveled Personae that are just better. Hell Biker is theoretically a top class Fire caster, but Surt has everything he gets that matters (the key difference being a Slash physical over a Strike physical) plus the Tier 4 Fire spell AND Fire Boost+Amp. Attis picks up Enduring Soul if leveled to 75 and fuses in with a patch to his only weakness, but he has no good unique skills and requires excessive tuning to be given any kind of niche. The main use of Hanged Man as an Arcana is weapon fusion, with the Arcana granting an always useful boost to your HP that scales fairly well throughout the game. True, Legion weapons give double to bonus of even the strongest Hanged Man Personae, but Legion weapons also tank your weapon and All-Out Attack damage. The amount of durability afforded can definitely find itself being not as worthwhile as your output in a number of situations, so it's definitely something to consider.
In Reload, we have
Inugami: Level 10
Take-Minakata: Level 20
Orthrus: Level 27
Vasuki: Level 38
Hecatoncheires: Level 47
Mada (Special Fusion): Level 57
Hell Biker (Must Complete Episode 5 of Shinji's Linked Episode): Level 65
Attis (Unlocked at Max Rank): Level 73
The early Hanged Man Personae are mostly the same as they were in prior versions, though Take-Minakata dropped Mazio in exchange for picking up Elec Boost at level 25. Where it gets interesting is Hecatoncheires, who now has Auto-Marakukaja, making him a key piece for getting your auto team buffer set up. Mada picks up Strike Amp, making him a good material for creating a Strike specialist, while Hell Biker picks up a number of good utility pieces such as Dark spells, innate Life Aid, Bloody Charge and Enduring Soul. Attis, unfortunately, is mostly the same as he was in FES and Portable. Megidola is subbed for the stronger Megidolaon, and he has Endure to pad out his survivability until he gets Enduring Soul. Other than that, there's the rather useless addition of Mahamaon, and his defenses are considerably worse with a Dark weakness added and no Light Repel in his skill pool anymore. Obviously it's much easier to tune up Personae in Reload, but I just don't really consider Attis worth the effort when he doesn't have anything that makes him particularly good on his own merits.
The Death

Hey an easy one to write about for once! Across all versions of the game, The Death Arcana is represented by Pharos, a mysterious boy known only to the protagonist who only appears during the Dark Hour at least until the very last rank. This is the other main Automatic link of the game alongside The Fool, requiring no effort on your part to advance and completing as a matter of story progression. The dates this link advances are 6/12, 7/12, 8/7, 9/12, 10/6 and 11/4. Obviously, this is another link that skips a couple ranks since that's only 6 dates where it goes up, 6/12 and 9/12 being the only times it goes up by 1. Not too much else to say here, onto its reps!
In FES and Portable, we have,
Ghoul: Level 18
Pale Rider: Level 24 (Requires Elizabeth Request item to fuse)
Loa: Level 31
Samael: Level 37
Mot: Level 45
Alice: Level 56 (Special Fusion)
Thanatos: Level 64 (Unlocked at Max Rank, Special Fusion)
The Death Arcana blows ass. As you'd imagine from their epithet, this Arcana specializes in the Death element. The tier 1 death spells aren't reliable enough for these guys to be super important picks in the early game, while mid-game you can find plenty of things outside the Death Arcana that have Mudoon. And that's kind of the problem there, Death Personae don't really have much going for them outside of their specialization. They'll have useless physical skills (Ghoul), random tier 2 elements that they have no innate inclination towards (Pale Rider, Loa), they'll have the powerful but woefully SP inefficient Almighty spells (Samael) or they have the Evil Smile/Ghastly Wail combo that is useless in your hands (Mot). Alice is normally a potent caster in other MegaTen games, but she's composed of low-tier trash in this game, making it difficult to give her a worthwhile skillset without literal hours a inheritance chicanery. Thanatos has decent resistances with an easily patched Light weakness and 1-Handed Sword mastery, but his innate offensive options are Mahamoan with no boost, Tempest Slash, Megidola and Ghastly Wail. Picking up Brave Blade at level 71 does little to help him. Useless Arcana from top to bottom.
In Reload, we have,
Pisaca: Level 15
Pale Rider: Level 23 (Requires Elizabeth Request item to fuse)
Loa: Level 33
Samael: Level 41
Mot: Level 58
Alice: Level 68 (Special Fusion)
Thanatos: Level 71 (Unlocked at Max Rank, Special Fusion)
So we have level bumps across the board, save for Ghoul being yeeted from the roster for Pisaca. Anything worth your time here this go around? Ehhh, not really. Many of them pick up the Eiha line as a more reliable way to contribute, but that's not an uncommon spell line among other Arcana. Some of them, like Mot, have the exact same useless specializations as they did in the older versions of the game! Thanatos is a lot better this go around at least. For one thing, he picks up Dark Amp and Maeigaon, a pretty potent combo. He also grabs Enduring Soul and Megidolaon, the latter of which being much more worth the bang for its buck in this version of the game. Past that though, I'd mostly give this Arcana a miss.
The Temperance

Across all versions of Persona 3, the Temperance Arcana is represented by the quirky French exchange student Andre Laurent Jean Geraux aka Bebe. This is liable to be the first social link you run into that actually faces you with some pre-requisites before you can initiate it. For starters, aside from a brief appearance on the first day of school, you will otherwise not meet Bebe until you have reached Rank 3 of the Hierophant Social Link. Once that is done, Bebe will occupy the Home Economics room, and you can join his sewing club provided you have the Level 2 Academics required to decipher the note on the door. Once the link is initiated, it will be available to advance on Tues, Weds and Thurs, same as the MC's Fortune Social Link. A unique quirk this link has is that it can actually be permanently missable: if you fail to start it before the third full moon comes and goes (Empress and Emperor fight plus Fuuka's introduction) Bebe will disappear from the game forever and his note will instead somewhat shade the player for not finding him. I'm not actually sure if Reload retains this, so if anyone knows then feel free to share since I'm long past the point where I could easily test that. Regardless, his progression is as follows,
Initial | 1(29) | 15(29) | 15(22) | 14(14) | 16(36) | 6(22) | 22(22) | 22(22) | Max
Initial | 0(29/45) | 15(29/45) | 15(22/34) | 15(29/45) | 15(36/56) | 10(22/34) | 22(22/34) | 22(22/34) | Max
Initial | O | O | O | O | O | O | O | O | Max
In a rather amusing coincidence given their schedule overlap, Bebe is another true streamlined link. Provided you always pick the right choices and have the matching Persona, Bebe can be completed in exactly 10 link events, making it quite simple to max him out. Incidentally, this is one of the few links where completing it alters the game world slightly if done before a certain point. At the time I'm writing this, we're actually getting quite close to this event! Onto available Personae,
In FES and Portable, we have,
Nigi Mitama: Level 12
Mithra: Level 22
Genbu: Level 29
Seiryuu: Level 36
Oukuninushi: Level 44
Suzaku: Level 51
Byakko: Level 57
Yurlungur: Level 64 (Unlocked at Max Rank)
The Temperance Arcana is kind of a true generalist Arcana, each Persona in it focuses on different core elements. Nigi Mitama has wind and healing, Mithra comes in with Ice and Light, Genbu is Ice and physical, so on and so forth. Sadly, none of them really jump out and say "I'm awesome!" With a stock of 12, you can easily just make specialists for any situation, so Temperance Personae being multi-purpose is often to their detriment. Byakko is a fine enough Elec caster, but he's also in the same level bracket as the vastly superior Thor and Odin, so he doesn't get much room to shine. Yurlungur picks up Mediarahan and Samarecarm, which many different things BEFORE him grant you, though he is easy access to Mabufudyne and Ice Amp at least. Not too much to say about these guys really, I usually just end up making them to immediately fuse them into something else as they often have passives I happen to desire for other things. As a fun bit of trivia at least, Yurlungur was actually newly added in FES; Byakko was the original ultimate for this Arcana.
In Reload, we have,
Nigi Mitama: Level 12
Mitra: Level 22
Genbu: Level 30
Seiryu: Level 38
Okuninushi: Level 44
Suzaku: Level 55
Byakko: Level 63
Yurlungur: level 71 (Unlocked at Max Rank)
The Arcana is mostly the same here, but a couple of them are slightly more interesting. Oukuninushi picks up Deathbound in this version, making him a pretty potent Slash user with the right passives. Suzaku is a good base for a dedicated Fire user as Surt is slightly further down the line in this version. Yurlungur switches gears from a generalist to being a dedicated Light caster with Maziodyne as an extra option, in addition to having decent resistances and several evade skills (Including Evade Dark for his weakness). With skill cards being more readily available, I actually do find myself using Temperance Personae a bit more here, as they tend to cover a waterfront of helpful passives with the corresponding attack skills, meaning they don't take an overly large amount of customization to make work. Yurlungur is still a pretty whatever Ultimate, but he's a bit more interesting than he was previously.
I've been so out of it this month, I've been meaning to update on this forever. Let's get to it!
The Strength
For FES, the MC in Portable and Reload, the Strength Arcana is represented by the sports team manager Yuko Nishiwaki. In another case of Schrodinger's Social Link, she happens to manage whatever team you join for the Chariot link. Her unlock is rather unique, at the end of the Rank 2 Chariot event, you can extend an invitation to Yuko to walk home together. She'll decline in this instance, but you'll be prompted to try again on the Rank 3 event. She'll accept this time, and initiate her social link within the Chariot social, creating one of two instances where you get two rank ups from a single link event (the latter of which is tied to Automatic Links). For some fun trivia, if you happen to initiate Yuko's link on a day where the Death social link is scheduled to rank up, you can have a day with 4 Rank up events provided you hung out with the Devil or the Tower during the evening. Portable allows for this with one other event, once again tied to automatic links, though you're not liable to be able to make it happen in a playthrough that has any level of optimization. Disregarding all that, Yuko is available to hang out with on Wednesdays and Saturdays. Hanging out with her is required to eventually unlock the Tower link. Her progression is as follows,
Initial | 1(36) | 15(21) | 15(29) | 22(21) | 22(7) | 35(29) | 40(7) | 29(40) | Max
Initial | O | O | X | O | X | X | X | O | Max
As what will almost certainly be your first potentially romantic link (or forced romance in the case of FES), it's perhaps not too surprising Yuko is one of the slower and more demanding links to advance, regularly hitting roadblocks even in Reload. Mercifully, Yuko's romance activates quite later compared to other romantic links, so jealousy is not much of a concern with her. You'll likely max her out relatively late compared to her start time on account of this and her fairly limited availability.
For the FemC in Portable, Yuko is relegated to the occasional cameo within other links and various story events, while SEES member Koromaru takes up the representative for the Arcana. Koromaru first becomes available after 8/15 and is the first replacement link that also moves an Arcana to the night timeslot, though in the context of these posts we previously already saw this with Ken and the Justice link. While his standard walk events are still available, Koromaru is also available to social link with on Mon, Weds, Thur, Sat and any Holiday. A really generous spread for a link that becomes available when you're starting to run out of things to do during the evening anyway. Perhaps accounting for this, Koromaru's progression is as follows,
Initial | 15(7/11) | 15(14/22) | 20(7/11) | 20(14/22) | 30(7/11) | 25(7/11) | 30(14/22) | 50(7/11) | Max
Hands down the slowest link in the game, having the unique distinction of being the only link in any version of the game that doesn't award enough points on Rank 2 to effortlessly make it onto Rank 3. Only 2 ranks can be acquired just by getting the right dialogue choices, and you need to stack the matching Arcana bonus and maxed out charm to have that happen. That being said, Koromaru's schedule is so generous and you have so little else to do during evenings by the time he becomes available, you're still liable to finish this with multiple in-game months to spare. Moving on to available Personae.
For FES and Portable, we have
Valkyrie: Level 11
Rakshasa: Level 16
Titan: Level 23
Jikokuten: Level 29
Hanuman: Level 37
Narasimha: Level 46
Kali: Level 55
Siegfried: Level 59 (Unlocked at Max Rank)
Fun fact, every single Strength Persona has the Slash inheritance type, meaning most Magic is off limits via inheritance even if some of them do have magic within their default skill lists. Beyond that little tidbit, Strength is kind of the reverse of Hermit in terms of usefulness. While Valkyrie is a means of getting Auto-Tarukaja and Mabufu easily and Rakshasa is easy access to Getsu-Ei, nothing in the Arcana really jumps out and says "I'm awesome!" until the very end. Any notable skills they have up until Kali can usually be found elsewhere, often on lower leveled things. Kali picks up some pretty great skills naturally though, having Apt Pupil and Deathbound for some serious Critical potential. This gets blown out by Siegfried, who is easily one of the best physical Personae in the game. Siegfried picks up Auto-Masuku, High Counter, 2-Handed Sword Mastery, Arms Master to halve HP costs of physical skills, and the real feather in his cap: Vorpal Blade. Vorpal Blade is easily the best physical skill in FES and Portable, an AOE slash attack that has a unique quirk: when its user is in the Great condition, the damage of Vorpal Blade is Doubled!!! By capping Siegfried's ST, this skill can do some serious damage when your protag is in the Great Condition, and since there's not really much going on during the evenings of the end game, this is a trivial condition to fulfill. It's even better in Portable where the Great condition will never wear off. As an added bonus, Siegfried has pretty good resistances, nullifying Slash and Light skills and having 50% resistance to Strike skills, definitely the more threatening line up of physical skills in the game. He has a weakness to Dark skills, but it's fairly trivial to patch out as he can easily be fused off of Daisoujou for Null Dark. Pretty good stuff!
In Reload, we have
Valkyrie: Level 10
Rakshasa: Level 15
Matador: Level 22
Jikokuten: Level 29
Hanuman: Level 36
White Rider: Level 46
Siegfried: Level 54
Kali: Level 63
Atavaka: Level 72 (Unlocked at Max Rank)
The arcana is pretty similar for most of the game, Matador being added to the line up in place of Titan but he's not really anything special. White Rider enters the fold, giving the Arcana a Pierce focused Persona if you're so inclined, but once again the Arcana really takes off with Siegfried. Despite being demoted in level and ultimate status, Siegfried is arguably even better here. Vorpal Blade is on the out for his skill list (though the skill itself is still in the game) but the gimmick of it was jettisoned anyway so that hardly matters, Deathbound is close enough and he has that now. In addition to having Brave Blade now for a single target beatstick, he still gets Auto Masuku, gets Crit Rate Amp (a flat 15% added to your critical chance!), he learns Slash Amp, Auto Rebellion for additional crit chance, and you can easily card Slash Boost onto him for some real razor edge efficiency. Siegfried also enables the Theurgy Scarlet Havoc, an extremely powerful Slash attack that he is well suited to using! No Arms Master in this game though, sadly. By contrast, Kali is pretty much the same as she was before, just picking up Heat Wave and the nerfed Vorpal Blade in this version. Atavaka actually isn't a new Persona for this game, funnily enough, he's instead an Aeon who has been repurposed into the ultimate Strength Persona. He's fairly whatever, not having any multi-targeting physical skills (just a rather useless Maragidyne by default) and is another means of getting God's Hand. His real purpose lies at the end of his skill list. He's one of your options for getting Auto-Mataru, and in fact he's the earliest one as that skill was moved way back for when you learn it in Reload. He also picks up the extremely potent Firm Stance passive if he gets two more levels after being fused. This passive disables your dodge chance, but halves all incoming damage. It's an interesting option to run, and there's at least one fight where passing this around to many different Personae could come in handy.
The Hanged Man
Across all versions of Persona 3, the Hanged Man Arcana is represented by the grade school girl Maiko. The starting point for this link automatically becomes available on 5/6, when the protag eavesdrops on some students at the school entrance who mention a young girl who hangs out at Naganaki Shrine all the time, and somewhat creepily decides to goes to check it out. Maiko has a small fetch quest where you must feed her Weird Takoyaki, followed by giving her a Mad Bull. Once those requirements have been met, you can start her link the next day she's at the shrine, which can be pretty soon since she's there everyday except for Sunday (and non-Summer/Winter vacation holidays but that rarely comes up). This is the other main early game out-of-school link next to Hierophant and is an easy one to develop during exam time and Summer Vacation. The progression is as follows,
Initial | 1(22) | 20(7) | 20(22) | 20(29) | 30(29) | 15(0) | 30(51) | 30(22) | Max
Initial | 0(22/34) | 20(7/11) | 20(22/34) | 20(29/45) | 30(29/45) | 15(0/0) | 30(51/79) | 30(22/34) | Max
Initial | O | O | O | O | O | X | O | O | Max
A link that becomes more and more streamlined with each entry, going from 3 instances of inevitable downtime to 2 to 1. It's pretty easy to finish Maiko's link very early if you so desire, though like all out-of-school links it's just best practice to wait until it's the only option. Because of the increased amount of activities available in Reload, this does result in her finishing relatively late despite being the fastest version of the link. Moving onto Personae.
In FES and Portable, we have
Inugami: Level 10
Take-Minakata: Level 21
Orthrus: Level 28
Vasuki: Level 38
Ubelluris: Level 48
Hecatoncheires: Level 54
Hell Biker (Requires Elizabeth Request item to fuse): Level 60
Attis (Unlocked at Max Rank): Level 67
Nothing all that impressive here, I usually just end up using Hanged Man Personae as a matter of happenstance. Take-Minakata is easy access to Mazio if you need it, ditto for Orthrus if you need something to mix Fire Boost into a fusion. The rest either have useless skills, or the things they bring to the table are found on lower leveled Personae that are just better. Hell Biker is theoretically a top class Fire caster, but Surt has everything he gets that matters (the key difference being a Slash physical over a Strike physical) plus the Tier 4 Fire spell AND Fire Boost+Amp. Attis picks up Enduring Soul if leveled to 75 and fuses in with a patch to his only weakness, but he has no good unique skills and requires excessive tuning to be given any kind of niche. The main use of Hanged Man as an Arcana is weapon fusion, with the Arcana granting an always useful boost to your HP that scales fairly well throughout the game. True, Legion weapons give double to bonus of even the strongest Hanged Man Personae, but Legion weapons also tank your weapon and All-Out Attack damage. The amount of durability afforded can definitely find itself being not as worthwhile as your output in a number of situations, so it's definitely something to consider.
In Reload, we have
Inugami: Level 10
Take-Minakata: Level 20
Orthrus: Level 27
Vasuki: Level 38
Hecatoncheires: Level 47
Mada (Special Fusion): Level 57
Hell Biker (Must Complete Episode 5 of Shinji's Linked Episode): Level 65
Attis (Unlocked at Max Rank): Level 73
The early Hanged Man Personae are mostly the same as they were in prior versions, though Take-Minakata dropped Mazio in exchange for picking up Elec Boost at level 25. Where it gets interesting is Hecatoncheires, who now has Auto-Marakukaja, making him a key piece for getting your auto team buffer set up. Mada picks up Strike Amp, making him a good material for creating a Strike specialist, while Hell Biker picks up a number of good utility pieces such as Dark spells, innate Life Aid, Bloody Charge and Enduring Soul. Attis, unfortunately, is mostly the same as he was in FES and Portable. Megidola is subbed for the stronger Megidolaon, and he has Endure to pad out his survivability until he gets Enduring Soul. Other than that, there's the rather useless addition of Mahamaon, and his defenses are considerably worse with a Dark weakness added and no Light Repel in his skill pool anymore. Obviously it's much easier to tune up Personae in Reload, but I just don't really consider Attis worth the effort when he doesn't have anything that makes him particularly good on his own merits.
The Death
Hey an easy one to write about for once! Across all versions of the game, The Death Arcana is represented by Pharos, a mysterious boy known only to the protagonist who only appears during the Dark Hour at least until the very last rank. This is the other main Automatic link of the game alongside The Fool, requiring no effort on your part to advance and completing as a matter of story progression. The dates this link advances are 6/12, 7/12, 8/7, 9/12, 10/6 and 11/4. Obviously, this is another link that skips a couple ranks since that's only 6 dates where it goes up, 6/12 and 9/12 being the only times it goes up by 1. Not too much else to say here, onto its reps!
In FES and Portable, we have,
Ghoul: Level 18
Pale Rider: Level 24 (Requires Elizabeth Request item to fuse)
Loa: Level 31
Samael: Level 37
Mot: Level 45
Alice: Level 56 (Special Fusion)
Thanatos: Level 64 (Unlocked at Max Rank, Special Fusion)
The Death Arcana blows ass. As you'd imagine from their epithet, this Arcana specializes in the Death element. The tier 1 death spells aren't reliable enough for these guys to be super important picks in the early game, while mid-game you can find plenty of things outside the Death Arcana that have Mudoon. And that's kind of the problem there, Death Personae don't really have much going for them outside of their specialization. They'll have useless physical skills (Ghoul), random tier 2 elements that they have no innate inclination towards (Pale Rider, Loa), they'll have the powerful but woefully SP inefficient Almighty spells (Samael) or they have the Evil Smile/Ghastly Wail combo that is useless in your hands (Mot). Alice is normally a potent caster in other MegaTen games, but she's composed of low-tier trash in this game, making it difficult to give her a worthwhile skillset without literal hours a inheritance chicanery. Thanatos has decent resistances with an easily patched Light weakness and 1-Handed Sword mastery, but his innate offensive options are Mahamoan with no boost, Tempest Slash, Megidola and Ghastly Wail. Picking up Brave Blade at level 71 does little to help him. Useless Arcana from top to bottom.
In Reload, we have,
Pisaca: Level 15
Pale Rider: Level 23 (Requires Elizabeth Request item to fuse)
Loa: Level 33
Samael: Level 41
Mot: Level 58
Alice: Level 68 (Special Fusion)
Thanatos: Level 71 (Unlocked at Max Rank, Special Fusion)
So we have level bumps across the board, save for Ghoul being yeeted from the roster for Pisaca. Anything worth your time here this go around? Ehhh, not really. Many of them pick up the Eiha line as a more reliable way to contribute, but that's not an uncommon spell line among other Arcana. Some of them, like Mot, have the exact same useless specializations as they did in the older versions of the game! Thanatos is a lot better this go around at least. For one thing, he picks up Dark Amp and Maeigaon, a pretty potent combo. He also grabs Enduring Soul and Megidolaon, the latter of which being much more worth the bang for its buck in this version of the game. Past that though, I'd mostly give this Arcana a miss.
The Temperance
Across all versions of Persona 3, the Temperance Arcana is represented by the quirky French exchange student Andre Laurent Jean Geraux aka Bebe. This is liable to be the first social link you run into that actually faces you with some pre-requisites before you can initiate it. For starters, aside from a brief appearance on the first day of school, you will otherwise not meet Bebe until you have reached Rank 3 of the Hierophant Social Link. Once that is done, Bebe will occupy the Home Economics room, and you can join his sewing club provided you have the Level 2 Academics required to decipher the note on the door. Once the link is initiated, it will be available to advance on Tues, Weds and Thurs, same as the MC's Fortune Social Link. A unique quirk this link has is that it can actually be permanently missable: if you fail to start it before the third full moon comes and goes (Empress and Emperor fight plus Fuuka's introduction) Bebe will disappear from the game forever and his note will instead somewhat shade the player for not finding him. I'm not actually sure if Reload retains this, so if anyone knows then feel free to share since I'm long past the point where I could easily test that. Regardless, his progression is as follows,
Initial | 1(29) | 15(29) | 15(22) | 14(14) | 16(36) | 6(22) | 22(22) | 22(22) | Max
Initial | 0(29/45) | 15(29/45) | 15(22/34) | 15(29/45) | 15(36/56) | 10(22/34) | 22(22/34) | 22(22/34) | Max
Initial | O | O | O | O | O | O | O | O | Max
In a rather amusing coincidence given their schedule overlap, Bebe is another true streamlined link. Provided you always pick the right choices and have the matching Persona, Bebe can be completed in exactly 10 link events, making it quite simple to max him out. Incidentally, this is one of the few links where completing it alters the game world slightly if done before a certain point. At the time I'm writing this, we're actually getting quite close to this event! Onto available Personae,
In FES and Portable, we have,
Nigi Mitama: Level 12
Mithra: Level 22
Genbu: Level 29
Seiryuu: Level 36
Oukuninushi: Level 44
Suzaku: Level 51
Byakko: Level 57
Yurlungur: Level 64 (Unlocked at Max Rank)
The Temperance Arcana is kind of a true generalist Arcana, each Persona in it focuses on different core elements. Nigi Mitama has wind and healing, Mithra comes in with Ice and Light, Genbu is Ice and physical, so on and so forth. Sadly, none of them really jump out and say "I'm awesome!" With a stock of 12, you can easily just make specialists for any situation, so Temperance Personae being multi-purpose is often to their detriment. Byakko is a fine enough Elec caster, but he's also in the same level bracket as the vastly superior Thor and Odin, so he doesn't get much room to shine. Yurlungur picks up Mediarahan and Samarecarm, which many different things BEFORE him grant you, though he is easy access to Mabufudyne and Ice Amp at least. Not too much to say about these guys really, I usually just end up making them to immediately fuse them into something else as they often have passives I happen to desire for other things. As a fun bit of trivia at least, Yurlungur was actually newly added in FES; Byakko was the original ultimate for this Arcana.
In Reload, we have,
Nigi Mitama: Level 12
Mitra: Level 22
Genbu: Level 30
Seiryu: Level 38
Okuninushi: Level 44
Suzaku: Level 55
Byakko: Level 63
Yurlungur: level 71 (Unlocked at Max Rank)
The Arcana is mostly the same here, but a couple of them are slightly more interesting. Oukuninushi picks up Deathbound in this version, making him a pretty potent Slash user with the right passives. Suzaku is a good base for a dedicated Fire user as Surt is slightly further down the line in this version. Yurlungur switches gears from a generalist to being a dedicated Light caster with Maziodyne as an extra option, in addition to having decent resistances and several evade skills (Including Evade Dark for his weakness). With skill cards being more readily available, I actually do find myself using Temperance Personae a bit more here, as they tend to cover a waterfront of helpful passives with the corresponding attack skills, meaning they don't take an overly large amount of customization to make work. Yurlungur is still a pretty whatever Ultimate, but he's a bit more interesting than he was previously.
Last edited by Cullen on Thu Jul 10, 2025 10:06 pm, edited 2 times in total.
The next supplemental video is up! Another boss compilation, and this section of the game throws some interesting curve balls our way. We're starting to break into the more powerful tools in the game, but the bosses themselves can easily run roughshod on you if you are unprepared for them. The FES boss fights in particular have been interesting, as playing this game so many times in relatively quick succession has naturally resulted in me getting better at it and allowing me to move through it more efficiently. The knock on effect of this is that I'm generally at lower levels with less resources than my practice playthroughs, resulting in successful fights that usually go off script horribly since my practice attempts aren't exactly relevant to the set ups I'm using currently. It's been interesting, to say the least. Onto the rankings!
Reload Heartless Relic=Raging Turret=Portable Arcane Turrets<FES Arcane Turrets
There are only going to be a handful of Reload bosses outside of the Full Moon that I'm going to have much to say about as the overwhelming might of Theurgy trivializes most of them and that's only become more pronounced as both SEES gains more power and the protagonist gets more well optimized Personae. Portable has had an interesting thing going on where because I'm using a more stable line up that is more or less equally leveled, damage is easier to keep on top of. It also helps I've been able to completely eliminate weaknesses, which is the major problem the All Girls team originally faced. Figuring out these Turrets are also weak to ice was a huge get for Mitsuru. FES isn't that much harder, I just happened to be lacking in the effective counterplay option, and had to rely on Ken for a lot of extra damage. Weaknesses were less of a concern though.
Reload Terminal Table=Reload Isolated Castle<Reload Jotun of Authority<Portable Sleeping Table<FES Sleeping Table
The Jotun of Authority fight in Reload was a little shaky as I was lacking in options for countering enemy buffs as well as ailments stalling my offensive output. A cleaner set up could have made the fight go a lot faster, but it was still generally easier than the fights featured in FES and Portable. Sleeping Table is probably the most notorious boss from the older versions of Persona 3, and it just comes down to the fact that he hits damn hard, never lets up, and when he does give you a break it's just to cast the incredibly obnoxious Fear ailment that's guaranteed to screw you over, or Hamaon. Hamaon is probably the most desirable thing for him to do since you should have enough Homunculi to wall it out for the protag, and it's not a super huge deal if Akihiko or Yukari get nailed with it. I kind of suspect the boss got nerfed a bit in Portable, because the level differential wasn't that much between Portable and FES, and he wasn't striking me nearly as hard there. The FES attempt was pretty messy, but I got lucky where it mattered so I ended up winning on the first try. On a hypothetical re-attempt, I'd probably just drop Yukari from the line up in lieu of having Junpei to tank Maragidynes, and have the Protag go all in on support and healing while I let Ken whack the thing to death.
Portable Fortune & Strength<FES Fortune & Strength<Reload Fortune & Strength
Of this batch of fights, this is probably the biggest divide I felt between the LP run and my practice playthrough for FES. This fight is no big deal in Portable as the roulette wheel is much easier to land, essentially guaranteeing you'll get a good effect even when Fortune starts cheating (assuming he even gets a chance to). Throw up an attack mirror during the Strength portion of the fight and you're golden. FES has a trickier wheel to land, though it might have been an input delay thing also. I was having a tougher time with this fight compared to my practice run, I strongly suspect I had racked up a few more levels and some stronger Personae for that playthrough. Regardless, the fight is still largely in the clear once Strength goes down since Fortune doesn't really do much outside of The Wheel. Since I didn't really get to mention it on the update proper, it's a fun little thing that the buffing/debuffing effects of the wheel are one of the few ways you can actually refresh buffs/debuffs instead of needing to reapply them. This is probably the Reload fight that is the closest to the original boss battles in terms of what the bosses actually do. The wheel is way harder to consistently land a good effect on this time around, and Strength has picked up some physical resistances that stymie your offense a bit since you just so happen to be picking up some fantastic physical options at this point. Still, this is one of the easier Full Moon battles on the whole, so the rankings here are represent a fairly marginal difference.
Reload Pagoda of Disaster=Reload Dancing Beast Wheel<Portable Hell Knights<FES Hell Knights
Reload offers us more speed bumps that I bulldoze over as I ascend the tower. The Hell Knights fight is a good example of how lack of team control can cause complications in my approach, since I can't simply force Akihiko to Matarunda these guys and I can't force Ken to make sensible healing decisions if I need him to. The fight definitely could have gone better, but we do get a good taste of how the fine tuned elemental specialist can dramatically speed up the fights we're getting into. With a cleaner set up, it probably would have been easier than the Portable attempt, where I technically had less to work with but had considerably more control over the fight. As always, having the weaknesses of the ladies patched out takes a whole load of stress off.
Reload Jobbers<FES Mythical Gigas<Portable Mythical Gigas
It's pretty hard to say much about the Reload fights at this point, the more interesting stuff is saved for the Monad Passages, and even that usually boils down to fights having a specific gimmick relating to ailments or unusual spells like Spirit Drain. It might seem weird that I'm rating the Mythical Gigas higher in Portable than in FES despite the Portable fight being a lot cleaner, but that's because of the simple fact that if the Gigas pops a crit on Deathbound, you lose outright in Portable. I had a slight bit of bad luck in FES as I decided to play risky and skip upping an attack mirror, but the fight otherwise would have been trivial if I had done that. Had the same thing happened in Portable, I'd have been loading up my save for a runback, so I think that's worth a higher ranking even if it's a dumb reason.
FES & Portable Strega<<<<<<<<<<<<<<<<<<<<<<<<<<<<<<<<<<<<<<<<<<<<<<<<<<<Reload Strega
Strega in the old versions of Persona 3 are notorious for being complete jokes. Even if you don't nuke them down with Thunder Call like I did, they are wimpy single element specialist that are comedically easy to wall out and burst down over a matter of a few turns. The fact you can set them up for FES' cracked All-Out Attacks is just insult to injury for them. Reload turns them into something resembling an actual challenge, giving them much greater versatility in the attacks they can use as well as their own answer to the shift mechanic. Careless play can absolutely result in a loss here, but luckily we still have options to crit them into the ground such as our pal Junpei. Be mindful of your weaknesses and keep your defensive options in play here, and it should be all gravy.
FES Hanged Man<Portable Hanged Man<<Reload Hanged Man
The Portable fight comes in harder for the same reason as Mythical Gigas: if you don't set up Attack Mirrors like I did, you can easily suffer a loss due to stray crits. Akasha Arts is another high crit skill like Deathbound, so it's a very real concern whenever it gets launched at you. Of course in either version, Attack Mirrors nullify this threat and often lead to the boss killing himself. Portable also allowed me to easily clear away the statues with Yukari, while I needed to dedicate two actions to it in FES. This is one of the rare situations where having the protag up a Mind Charge can lead to better damage, since you can't actually hit the boss until the statues are cleared. The boss is a lot more competitive in Reload, where the statues have more difficult to work around resistances, and Hanged Man himself can give himself a bunch of free turns, Dragon Eye style. Staying on top of the actual damage he deals is probably easier here, but you are much more likely to actually be taking damage this go around compared to FES and Portable, where I just bounced everything back at him.