Existential Trauma And Little Bits Of History Repeating - Let's Play Azur Lane!
Those three will get their time in the sun, I promise. At the moment, I'm preferentially taking votes for botes from the 2 Crimson Axis core groups (Ironblood and Sakura), as I've already done a writeup for HMS and USN members; Sort of trying to keep things rotating so everyone gets a fair shake. (Or, in Aoba's case, another fair kick in the ass)
-

- Site Admin
EVENT: CRIMSON ECHOES

Crimson Echoes - Part 1
Here is where it all began. Well, sort of. Maybe. Not actually. It… Look, there’s time fuckery, alternate worlds, the introduction of the Sirens, the otherworldly, much more advanced shipgirls that go in for a “Deadly Sea Life” aesthetic… But this is before the main story (as much as it exists so far), and also the first part of the history of two of the villains (well, for a while) of Azur Lane: Akagi and Kaga.
The setting: The Sakura Empire (Japan.) The Beginning: A Fleet Exercise to determine who will become the new Fleet Leader. The Contestants… Well, there’s only two real contenders, on whom the story focuses: Amagi (not Akagi, although she is present in the story), and Kaga (who is currently a Battleship.) And, as Grump has noted, this storyline, with the tragedy that results, and the villainy that comes after, is a big ol’ middle finger to a comment about Azur Lane by the KanColle crew that Azur Lane has no moments that make you cry. Because this is an emotional storyline, that, funnily enough, has the framing device of the shitwrecking you gave them at the end of 3-4.
 Ask anyone that’s played AL long enough to have gotten into Crimson Echoes at least once, and they’ll all agree that Amagi’s the reason Akagi turned out so sane, up to that point.
This is obviously some strange new definition of "Sane" that I'm not aware of. Nonetheless, there is, in fact, a historical part of this (technically two, as we discuss in the second part.) Take it away, Grump!
 Okay. This is going to be a big brick of text because a big point in Crimson Echoes, specifically at the end of the A-side story, is that the AL ‘verse still ends up with the Washington Naval Treaty of 1922 being signed.
This is going to be a big tangled mess of Political shenanigans, buggery, horseshit, ‘what’, more Politics, backstabbing, and the story of a treaty that, while started to minimize the potential catastrophe of another Naval Arms Race after World War 1, was explicitly written to screw the little guy.
So, firstly, before anyone asks, the nations that signed the 1922 treaty did not include Germany. The Imperial German Fleet had been almost-entirely scuttled at Scapa Flow in 1919, in order to prevent the ships from being claimed as war prizes, and as a very large middle finger to France, which was loudest in clamouring for ownership of the Hochseeflotte, though Italy also wanted a piece of the pie. So Germany burnt the pie to ashes instead.
The Naval Treaty of 1922 between the United Kingdom, France, Italy, America, and Japan, was specifically a treaty written by and for the victorious nations of the Entente in World War 1. Before the Treaty Conference had even begun, President Woodrow Wilson had announced plans for the US to make Fifty state-of-the-art battleships, and all signs pointed to a massively escalating arms race among former allies as they began jockeying against each other in games of puffery and pomp.
So, thus, treaty talks. Which, very quickly involved the UK and US Dictating terms and everyone else being forced to say ‘fuck it, fine, so long as you hold up your ends of the bargain, hmm?’
Some details of the treaty include things like tonnage limitations and a moratorium on the construction of Battleships. But the long and short of it is that, by the rules of the treaty, the five nations of the UK, US, Japan, France, and Italy, were given tonnage ratios of 5:5:3:1.75:1.75, with hard rules of ‘No battleships over 35,000 tons, no carriers over 27,000 tons (Though existing carriers don’t count, ships under 10,000 tons don’t count as carriers, and you can convert two battleship hulls of up to 33,000 tons into carriers), and ‘no Cruisers over 10,000 tons and no guns over 8” in bore’
Incidentally, this is also what started to un-blur the lines between Light and Heavy cruisers, though that particular distinction was not finalized until the Second London Naval Treaty of 1931
Now, that’s all well and good in intention, but there’s some political backstabbing going on here. Namely, the American Delegates, who proposed much of the core aspects of the WNT and were generally in a good position overall, demanded, in closed-room talks, that England abandon the Anglo-Japanese Alliance, which had been extant since 1902.
There’s a myriad of reasons as to why that Treaty died, but the political backbiting and dissolution of trust between England and Japan is often cited as one of the core political reasons for Japan’s Entry into World War 2.
But that’s all Shouting into the wind at the moment. In Regards to Crimson Echoes, the main effects of the WNT are, as shown in the video, The sudden Stop to all the good cheer. Japan had to use Tosa’s incomplete hull for weapons testing, Kaga would’ve been scrapped in the slipways were it not for the Kanto Earthquake completely destroying Amagi, and Mikasa only escaped the scrapper’s saw and torch because she was already being decommissioned as a museum ship, and as part of the museum emplacement, much of her hull below the waterline was encased in concrete.
And, with the 5:5:3 Ratio between Anglo and non-Anglo, a big chunk of Japan’s populace quickly chafed under the treaty’s limitations, seeing it as unfair, and likely that they were simply being seen as ‘inferior’ to the Western nations.
It soon became an internal schism within the Japanese Navy itself, with Senior officers soon Arguing as ‘Treaty’ or ‘Fleet’ factions, with the Treaty faction arguing that the treaty limited the other major nations far more sharply than Japan’s own limited economy limited their own shipbuilding, and the Fleet faction, which was allied with the IJA’s Ultranationalists, wanted to annul the treaty and proceed with, quote, “Unlimited Naval Growth to Supplant the Supremacy of the Royal Navy and American Fleets” unquote.
With the addition of the Incredibly-restrictive London Naval Treaty introduced in an attempt to cork the WNT’s blatant loopholes, the Japanese Treaty faction soon fell to infighting as some wanted to keep to the WNT but not the LNT, and some wanted to hold the course. But, with growing tension between Japan and the US over Japan’s involvement in China (before it devolved into Japan’s Invasion of China), blatant treaty violations by other signatories not being penalized, and a large boost in Japanese Militarism fostered both by the worldwide depression and a slow ideological shift into a desire to be seen as a ‘true’ Great Power on the international stage, regardless of how many corpses needed to be stepped over on that path, Japan formally withdrew from both the Washington and London Naval Treaties in December, 1934.
Of course, it's a story of two parts, so after that little history lesson, let's take a look at the tragic part.

Crimson Echoes - Part 2
So, the final song was also the PV for the Crimson Echoes event, and, while the video I’ve linked has… Well, I thought I could polish it up a little. Some of the lines, I had trouble working out how the hell they came to the conclusions they came to. The scan in English is still fucky, but hey, it comes closer to the spirit of the thing. The, uhh, first commenter has a better translation than me, but... We both had the intention of getting across what it's actually going for, so...
On the flipside, the music is like goddamn crack in that it’s not only catchy, but addictive. ‘Coeur’ in the Polaris Event is another standout
“BREAK!” LYRICS TRANSLATION
Performed by Hige Driver
Uesaka Sumire - vocals
(To) Get up the nerve,
And stand up for the faith
If you can still do it!
Black and white smoke rises up to the blue sky
The decisive battle is coming
Bombs resonate in the sky
Birds cry far away
Oh, the last hope
How difficult to bear alone.
Let her fly away!
Fierce and devastating, your identity
It’s so good that it’s strong
Raise your determination
The fastest strike is the first
An unwavering revolution makes legends
The age has changed
And I have changed
Things have changed
And IIIIII...
BREAK!
Crying loudly, in your bloody armour
The decisive battle is coming
There’s nothing left to lose anymore
Until my life has turned to dust
This pain in my chest
After all this
It gets stronger!
Fierce and devastating, your identity
A little sweeter now
Raising your fist high
And it’s good night with your second strike
The hot fight continues watched by these blue eyes
(To) Get up the nerve
This is the end of the world
And my heart is built so old
(And) Stand up for the faith
If you can still do it.
Calm in the back of your mind
Just shout your anger
Fierce and devastating, your identity
It’s so good that it’s strong
Raise your determination
The fastest strike is the first
An unwavering revolution makes legends
The age has changed
And I have changed
Even if this body is done
In my heart, it isn’t over
BREAK!
Crimson Echoes - Part 1
Here is where it all began. Well, sort of. Maybe. Not actually. It… Look, there’s time fuckery, alternate worlds, the introduction of the Sirens, the otherworldly, much more advanced shipgirls that go in for a “Deadly Sea Life” aesthetic… But this is before the main story (as much as it exists so far), and also the first part of the history of two of the villains (well, for a while) of Azur Lane: Akagi and Kaga.
The setting: The Sakura Empire (Japan.) The Beginning: A Fleet Exercise to determine who will become the new Fleet Leader. The Contestants… Well, there’s only two real contenders, on whom the story focuses: Amagi (not Akagi, although she is present in the story), and Kaga (who is currently a Battleship.) And, as Grump has noted, this storyline, with the tragedy that results, and the villainy that comes after, is a big ol’ middle finger to a comment about Azur Lane by the KanColle crew that Azur Lane has no moments that make you cry. Because this is an emotional storyline, that, funnily enough, has the framing device of the shitwrecking you gave them at the end of 3-4.
Ask anyone that’s played AL long enough to have gotten into Crimson Echoes at least once, and they’ll all agree that Amagi’s the reason Akagi turned out so sane, up to that point.This is obviously some strange new definition of "Sane" that I'm not aware of. Nonetheless, there is, in fact, a historical part of this (technically two, as we discuss in the second part.) Take it away, Grump!
Okay. This is going to be a big brick of text because a big point in Crimson Echoes, specifically at the end of the A-side story, is that the AL ‘verse still ends up with the Washington Naval Treaty of 1922 being signed.This is going to be a big tangled mess of Political shenanigans, buggery, horseshit, ‘what’, more Politics, backstabbing, and the story of a treaty that, while started to minimize the potential catastrophe of another Naval Arms Race after World War 1, was explicitly written to screw the little guy.
So, firstly, before anyone asks, the nations that signed the 1922 treaty did not include Germany. The Imperial German Fleet had been almost-entirely scuttled at Scapa Flow in 1919, in order to prevent the ships from being claimed as war prizes, and as a very large middle finger to France, which was loudest in clamouring for ownership of the Hochseeflotte, though Italy also wanted a piece of the pie. So Germany burnt the pie to ashes instead.
The Naval Treaty of 1922 between the United Kingdom, France, Italy, America, and Japan, was specifically a treaty written by and for the victorious nations of the Entente in World War 1. Before the Treaty Conference had even begun, President Woodrow Wilson had announced plans for the US to make Fifty state-of-the-art battleships, and all signs pointed to a massively escalating arms race among former allies as they began jockeying against each other in games of puffery and pomp.So, thus, treaty talks. Which, very quickly involved the UK and US Dictating terms and everyone else being forced to say ‘fuck it, fine, so long as you hold up your ends of the bargain, hmm?’
Some details of the treaty include things like tonnage limitations and a moratorium on the construction of Battleships. But the long and short of it is that, by the rules of the treaty, the five nations of the UK, US, Japan, France, and Italy, were given tonnage ratios of 5:5:3:1.75:1.75, with hard rules of ‘No battleships over 35,000 tons, no carriers over 27,000 tons (Though existing carriers don’t count, ships under 10,000 tons don’t count as carriers, and you can convert two battleship hulls of up to 33,000 tons into carriers), and ‘no Cruisers over 10,000 tons and no guns over 8” in bore’
Incidentally, this is also what started to un-blur the lines between Light and Heavy cruisers, though that particular distinction was not finalized until the Second London Naval Treaty of 1931
Now, that’s all well and good in intention, but there’s some political backstabbing going on here. Namely, the American Delegates, who proposed much of the core aspects of the WNT and were generally in a good position overall, demanded, in closed-room talks, that England abandon the Anglo-Japanese Alliance, which had been extant since 1902.There’s a myriad of reasons as to why that Treaty died, but the political backbiting and dissolution of trust between England and Japan is often cited as one of the core political reasons for Japan’s Entry into World War 2.
But that’s all Shouting into the wind at the moment. In Regards to Crimson Echoes, the main effects of the WNT are, as shown in the video, The sudden Stop to all the good cheer. Japan had to use Tosa’s incomplete hull for weapons testing, Kaga would’ve been scrapped in the slipways were it not for the Kanto Earthquake completely destroying Amagi, and Mikasa only escaped the scrapper’s saw and torch because she was already being decommissioned as a museum ship, and as part of the museum emplacement, much of her hull below the waterline was encased in concrete.
And, with the 5:5:3 Ratio between Anglo and non-Anglo, a big chunk of Japan’s populace quickly chafed under the treaty’s limitations, seeing it as unfair, and likely that they were simply being seen as ‘inferior’ to the Western nations.
It soon became an internal schism within the Japanese Navy itself, with Senior officers soon Arguing as ‘Treaty’ or ‘Fleet’ factions, with the Treaty faction arguing that the treaty limited the other major nations far more sharply than Japan’s own limited economy limited their own shipbuilding, and the Fleet faction, which was allied with the IJA’s Ultranationalists, wanted to annul the treaty and proceed with, quote, “Unlimited Naval Growth to Supplant the Supremacy of the Royal Navy and American Fleets” unquote.
With the addition of the Incredibly-restrictive London Naval Treaty introduced in an attempt to cork the WNT’s blatant loopholes, the Japanese Treaty faction soon fell to infighting as some wanted to keep to the WNT but not the LNT, and some wanted to hold the course. But, with growing tension between Japan and the US over Japan’s involvement in China (before it devolved into Japan’s Invasion of China), blatant treaty violations by other signatories not being penalized, and a large boost in Japanese Militarism fostered both by the worldwide depression and a slow ideological shift into a desire to be seen as a ‘true’ Great Power on the international stage, regardless of how many corpses needed to be stepped over on that path, Japan formally withdrew from both the Washington and London Naval Treaties in December, 1934.
Of course, it's a story of two parts, so after that little history lesson, let's take a look at the tragic part.
Crimson Echoes - Part 2
So, the final song was also the PV for the Crimson Echoes event, and, while the video I’ve linked has… Well, I thought I could polish it up a little. Some of the lines, I had trouble working out how the hell they came to the conclusions they came to. The scan in English is still fucky, but hey, it comes closer to the spirit of the thing. The, uhh, first commenter has a better translation than me, but... We both had the intention of getting across what it's actually going for, so...
On the flipside, the music is like goddamn crack in that it’s not only catchy, but addictive. ‘Coeur’ in the Polaris Event is another standout“BREAK!” LYRICS TRANSLATION
Performed by Hige Driver
Uesaka Sumire - vocals
(To) Get up the nerve,
And stand up for the faith
If you can still do it!
Black and white smoke rises up to the blue sky
The decisive battle is coming
Bombs resonate in the sky
Birds cry far away
Oh, the last hope
How difficult to bear alone.
Let her fly away!
Fierce and devastating, your identity
It’s so good that it’s strong
Raise your determination
The fastest strike is the first
An unwavering revolution makes legends
The age has changed
And I have changed
Things have changed
And IIIIII...
BREAK!
Crying loudly, in your bloody armour
The decisive battle is coming
There’s nothing left to lose anymore
Until my life has turned to dust
This pain in my chest
After all this
It gets stronger!
Fierce and devastating, your identity
A little sweeter now
Raising your fist high
And it’s good night with your second strike
The hot fight continues watched by these blue eyes
(To) Get up the nerve
This is the end of the world
And my heart is built so old
(And) Stand up for the faith
If you can still do it.
Calm in the back of your mind
Just shout your anger
Fierce and devastating, your identity
It’s so good that it’s strong
Raise your determination
The fastest strike is the first
An unwavering revolution makes legends
The age has changed
And I have changed
Even if this body is done
In my heart, it isn’t over
BREAK!
-
- Site Admin
Aoba deserves Delinquent Hiryuu's baseball bat. Not to hold... To be repeatedly whacked by. This will probably be a common theme in the LP, along with my hatred of Akagi, my squeeing over cuteships, and my demand for "FEED THEM TO WARSPITE!!!" fanart.Salted Grump wrote: ↑Fri Aug 07, 2020 3:02 pmThose three will get their time in the sun, I promise. At the moment, I'm preferentially taking votes for botes from the 2 Crimson Axis core groups (Ironblood and Sakura), as I've already done a writeup for HMS and USN members; Sort of trying to keep things rotating so everyone gets a fair shake. (Or, in Aoba's case, another fair kick in the ass)
Get on it. You know you want to.
Well, because some Cheeky Welsh Git is holding the second half of the Crimson Echoes update hostage until I crank out a history post, Onwards!
Today, we'll be taking a look at the girl that everyone gets after 8 days of logging in, the German Heavy Cruiser Prinz Eugen.
So. This is where things get sticky. See, Prinz Eugen, named after Prince Eugene of Savoy (incidentally, an Austrian General), was constructed and spent almost all of her 6 years of existence under the command of Nazi Germany. As a result, almost all of the images of her from a historical context have some Nazi livery somewhere on them, most notably a photograph taken of her bow after she and Leipzig had an incident of 'being in the same spot at the same time' that nearly bisected the older cruiser.
So, I'm going to bend the rules of 'no political shit', and say this straight-up.
Everyone knows that the Nazis are utter shit. Shit heaped upon shit with a crusty shit topping, with a cherry of shit atop the shit sundae that is the fact that the ideology even existed for more than 5 minutes, much less got beyond a drunken scribble on a beerhall napkin. But, the Nazi party was in power in Germany for 12 years, which is universally regarded as a Dark Time in the world's history.
Azur Lane, at its core, is a game about cute girls doing cute things when they're not unloading a few billion shells downrange, and direct references to the history involved has been relatively sparing, with a heavy focus on the girls involved. This also includes extremely heavy vetting from the historical records by the developers; this is one reason that the game's Ironblood Faction only has (As of this writing) some 38 girls. (Of which one, Z2, is not even in the EN servers yet, and Four are Priority Research, meaning they had at least partial blueprints, but never made it to 'even halfway complete' if they were ever laid down in construction in the first place.)
Of those 38 ships chosen, only One, the U-boat U-47, is confirmed to have had a commander that was known to be a vocal Nazi. (U-47 is only in the game because the exploit of sneaking into the most-heavily fortified naval base in the Atlantic and sinking a battleship, then sneaking out, is incredibly noteworthy)
So, here's the stickiness. I want to talk about the Ship's history, but a big part of that history is entwined with being under the command of the world's scummiest scumfuckers to ever fuck scum.
So, with that out of the way, and with the knowledge that things are not going to be happy and rosy and all that happy fucking horseshit, let's Actually Look at the 'Lucky Prince'

Witness the birth of this fully-constructed heavy Cruiser! Prinz Eugen's Launching Ceremony was in 1938
So, Prinz Eugen was probably the most-charmed capital ship not named Seydlitz (The WWI Battlecruiser that laughed her way through Dogger Bank and Jutland) that Germany ever produced. Directly involved in the Sinking of Hood (And pounding the tar out of Prince of Wales), having nearly every bomb dropped in her direction miss cleanly for 5 years, and even taking minimal damage from mines, she somehow managed to avoid serious damage on nearly every occasion of battle. Even when her stern got shot off.
But, you're here for the technical details first, so let's do the quick rundown, and point out just how Hard she broke the rules.
Firstly, in 1935, Germany signed a treaty with the British, bringing it, at least nominally, in line with the Washington and London Naval Treaties, with things like 'No cruisers over 10,000 tons' and 'No battleships over 35,000 tons'
Prinz Eugen, when fully emptied of supplies and consumables, tipped the scales at Sixteen Thousand, Nine Hundred, and Seventy tons. Fully loaded for a long mission? Try Nineteen Thousand.
She's a big girl; In comparison, Warspite weighed some Thirteen thousand more tons, but was also Fifty-three Feet shorter than Eugen (644' versus 697', from stem to stern).
Gun-wise, Eugen toted eight 8" long-barrel cannons, a dozen 4" Dual-purpose secondary guns, and two pairs of broadside torpedo launchers, giving her tactical flexibility, which combined with her top speed of 32 knots (about 60 kph), allowed her to chase down and bully smaller ships; in essence, she was born and raised as a commerce raider.
"But Grump," you might wail in confusion, "Why does Eugen have Big Baps, while her older sister is Flatter than a Washboard?"
That, kind and confused viewers, is due to a radical redesign of the two ships' bows; Hipper had a classic 'straight' bow, with only a slight rake, or angling, forwards. It was swiftly found that the straight bow would not cut the mustard when operating in heavy seas, especially the kind expected in the Atlantic, and so Eugen, while under construction, was retrofit with a heavily raked 'clipper' bow, causing her to more-easily ride up heavy waves instead of plowing through them. HIpper eventually was also retrofit with a clipper bow as well, so the joke within AL players is that Hipper'll grow 4 cup sizes upon her retrofit.
So, yeah. Boob jokes aside, let us continue.
A painting of Eugen and Bismarck at Gotenhafen, in early April 1941, done by Ivan Berryman
So, Eugen's maiden combat voyage was, surprising to some, the same voyage as Bismarck's. I'm not going to get in depth about the underlying politics and sundry that resulted in two capital ships sneaking out into the Ocean like they're teenagers going to egg a neighbour's house, especially as the original plan for the 'Rhine Drill' was to have Bismarck accompanied by the Ugly Sisters, both Hipper-class, and Deutschland, which would've been an incredibly formidable, and honestly terrifying raiding force.
Shortly before her deployment, Eugen got one last gift; a Hydrophone array.
For those unfamiliar with what that is, essentially, they're underwater microphones, and used by submarines to seek out potential targets. On Eugen, however, her Hydrophones had a similar use; seeking out potential targets in the pea soup fog that covers much of the North Atlantic, as they had range that could ignore the curvature of the horizon, and beyond-horizon radar was still a pipe dream to German science. (Because the Cavity Magnetron had not yet been grok'd by them; that little invention gave the British and US a massive advantage for the duration of the war.)
Now, The Battle of Denmark Strait has been recorded and discussed to death, but I have copies of the personal accounts of people who were there, albeit from the perspective of the Bismarck, Hood, and Prince of Wales' crews.
So, I'm going to directly Quote. (Sourced from 'The Discovery of The Bismarck', by Doctor Robert Ballard, published 1991)

Little Red Riding Hood has reason to be a nervous wreck, considering she nearly had her head ripped clean off by Bizko. Give her a hug and some tea.
Eugen, for her part in that little engagement, moved ahead of Bismarck due to the big ship's guns having temporarily knocked out Bismarck's forward-facing Radar set; with Eugen acting as forward eyes for the two raiders, they continued on, while Suffolk and Norfolk tended to their bruises and chased after the German ships, vectoring in additional forces to try and stomp the breakout before it became a worse situation.
And then, at 5:07 AM, on May 24th, 1941, Bismarck and Prinz Eugen tangled with Hood and Prince of Wales.

Painted by Claus Bergen, 'Battle of the Strait' has Eugen front and Centre with Bismarck trailing behind.
Again, this battle is a big one, so you're going to get a transcription instead of my inadequate words to describe it.
HMS Hood, the Pride of the Royal Navy, at anchor around 1931. An incredibly pretty ship, too.

Today, we'll be taking a look at the girl that everyone gets after 8 days of logging in, the German Heavy Cruiser Prinz Eugen.
So. This is where things get sticky. See, Prinz Eugen, named after Prince Eugene of Savoy (incidentally, an Austrian General), was constructed and spent almost all of her 6 years of existence under the command of Nazi Germany. As a result, almost all of the images of her from a historical context have some Nazi livery somewhere on them, most notably a photograph taken of her bow after she and Leipzig had an incident of 'being in the same spot at the same time' that nearly bisected the older cruiser.
So, I'm going to bend the rules of 'no political shit', and say this straight-up.
Everyone knows that the Nazis are utter shit. Shit heaped upon shit with a crusty shit topping, with a cherry of shit atop the shit sundae that is the fact that the ideology even existed for more than 5 minutes, much less got beyond a drunken scribble on a beerhall napkin. But, the Nazi party was in power in Germany for 12 years, which is universally regarded as a Dark Time in the world's history.
Azur Lane, at its core, is a game about cute girls doing cute things when they're not unloading a few billion shells downrange, and direct references to the history involved has been relatively sparing, with a heavy focus on the girls involved. This also includes extremely heavy vetting from the historical records by the developers; this is one reason that the game's Ironblood Faction only has (As of this writing) some 38 girls. (Of which one, Z2, is not even in the EN servers yet, and Four are Priority Research, meaning they had at least partial blueprints, but never made it to 'even halfway complete' if they were ever laid down in construction in the first place.)
Of those 38 ships chosen, only One, the U-boat U-47, is confirmed to have had a commander that was known to be a vocal Nazi. (U-47 is only in the game because the exploit of sneaking into the most-heavily fortified naval base in the Atlantic and sinking a battleship, then sneaking out, is incredibly noteworthy)
So, here's the stickiness. I want to talk about the Ship's history, but a big part of that history is entwined with being under the command of the world's scummiest scumfuckers to ever fuck scum.
So, with that out of the way, and with the knowledge that things are not going to be happy and rosy and all that happy fucking horseshit, let's Actually Look at the 'Lucky Prince'
Witness the birth of this fully-constructed heavy Cruiser! Prinz Eugen's Launching Ceremony was in 1938
So, Prinz Eugen was probably the most-charmed capital ship not named Seydlitz (The WWI Battlecruiser that laughed her way through Dogger Bank and Jutland) that Germany ever produced. Directly involved in the Sinking of Hood (And pounding the tar out of Prince of Wales), having nearly every bomb dropped in her direction miss cleanly for 5 years, and even taking minimal damage from mines, she somehow managed to avoid serious damage on nearly every occasion of battle. Even when her stern got shot off.
But, you're here for the technical details first, so let's do the quick rundown, and point out just how Hard she broke the rules.
Firstly, in 1935, Germany signed a treaty with the British, bringing it, at least nominally, in line with the Washington and London Naval Treaties, with things like 'No cruisers over 10,000 tons' and 'No battleships over 35,000 tons'
Prinz Eugen, when fully emptied of supplies and consumables, tipped the scales at Sixteen Thousand, Nine Hundred, and Seventy tons. Fully loaded for a long mission? Try Nineteen Thousand.
She's a big girl; In comparison, Warspite weighed some Thirteen thousand more tons, but was also Fifty-three Feet shorter than Eugen (644' versus 697', from stem to stern).
Gun-wise, Eugen toted eight 8" long-barrel cannons, a dozen 4" Dual-purpose secondary guns, and two pairs of broadside torpedo launchers, giving her tactical flexibility, which combined with her top speed of 32 knots (about 60 kph), allowed her to chase down and bully smaller ships; in essence, she was born and raised as a commerce raider.
"But Grump," you might wail in confusion, "Why does Eugen have Big Baps, while her older sister is Flatter than a Washboard?"
That, kind and confused viewers, is due to a radical redesign of the two ships' bows; Hipper had a classic 'straight' bow, with only a slight rake, or angling, forwards. It was swiftly found that the straight bow would not cut the mustard when operating in heavy seas, especially the kind expected in the Atlantic, and so Eugen, while under construction, was retrofit with a heavily raked 'clipper' bow, causing her to more-easily ride up heavy waves instead of plowing through them. HIpper eventually was also retrofit with a clipper bow as well, so the joke within AL players is that Hipper'll grow 4 cup sizes upon her retrofit.
So, yeah. Boob jokes aside, let us continue.
A painting of Eugen and Bismarck at Gotenhafen, in early April 1941, done by Ivan Berryman
So, Eugen's maiden combat voyage was, surprising to some, the same voyage as Bismarck's. I'm not going to get in depth about the underlying politics and sundry that resulted in two capital ships sneaking out into the Ocean like they're teenagers going to egg a neighbour's house, especially as the original plan for the 'Rhine Drill' was to have Bismarck accompanied by the Ugly Sisters, both Hipper-class, and Deutschland, which would've been an incredibly formidable, and honestly terrifying raiding force.
Shortly before her deployment, Eugen got one last gift; a Hydrophone array.
For those unfamiliar with what that is, essentially, they're underwater microphones, and used by submarines to seek out potential targets. On Eugen, however, her Hydrophones had a similar use; seeking out potential targets in the pea soup fog that covers much of the North Atlantic, as they had range that could ignore the curvature of the horizon, and beyond-horizon radar was still a pipe dream to German science. (Because the Cavity Magnetron had not yet been grok'd by them; that little invention gave the British and US a massive advantage for the duration of the war.)
Now, The Battle of Denmark Strait has been recorded and discussed to death, but I have copies of the personal accounts of people who were there, albeit from the perspective of the Bismarck, Hood, and Prince of Wales' crews.
So, I'm going to directly Quote. (Sourced from 'The Discovery of The Bismarck', by Doctor Robert Ballard, published 1991)
On the evening of May 21, as the Bismarck and Prinz Eugen left the Bergen Fjords, Admiral John Tovey reinforced the north Atlantic patrols.
The cruiser Norfolk was already patrolling the narrow Denmark Strait. Now he ordered the cruiser Suffolk, then in port at Iceland, to join her.
The cruisers Birmingham and Manchester, patrolling the Iceland-faroes gap, were ordered to refuel immediately and continue their patrol.
At the same time, Tovey ordered Vice-Admiral Lancelot Holland aboard the Battlecruiser Hood to leave Scapa Flow with the brand-new battleship Prince of Wales and sail for Hvalfjord, Iceland, where they would be free to intercept a breakout through the Denmark Strait.
The fleet at Scapa was warned to be ready to sail on short notice to reinforce the Iceland-Faroes passage. As well as the King George V, this included the Aircraft Carrier Victorious and the Battlecruiser Repulse.
On May 22nd, Bismarck and Eugen bade farewell to their escorting flotilla of destroyers and minesweepers. Now, they were on their own. On both ships, crewmen painted over the swastikas on the forecastle and quarterdeck; they were identification for friendly aircraft, but the only planes they would see now would be hostile.
Luftwaffe aerial surveillance of Scapa Flow had revealed "Four battleships, one possible Aircraft Carrier, six cruisers, several destroyers. Thus no change from may 21, and passage through Norwegian Narrows not noticed."
This was horribly inaccurate. The Luftwaffe had been fooled by the oldest trick in the book. Two of the four battleships at anchor were dummies made of wood and canvas.
At Noon on the 23rd, Bismarck and Eugen were due north of Iceland, and about to enter the Denmark Strait. This was the most perilous point of the breakout. A British minefield stretched from the Horn of Iceland toward the Greenland coast, narrowing the strait to no more than thirty miles at its smallest point.
The German ships charged southwest though ice-infested waters at a 'damn the consequences' speed of 27 knots.
In the early evening, the weather conditions in the narrowest part of the Strait favoured the patrolling British heavy cruisers Norfolk and Suffolk. To the north, the water was clear and visibility good. to the south lay fog, the thick cloudbank concealing the two cruisers.
The British took full advantage of these conditions as they patrolled; the swift, lightly-armoured ship built in the 1920's, derisively nicknamed 'tinclads' would be no match for the Bismarck in Battle, but were well-suited for shadowing the battleship.
Captain Robert Ellis, on the Suffolk, was the point man, since his ship's new-model radar could sweep a thirteen-mile radius, except for a small sector astern.
At 7:22 PM, The Bismarck's alarm bells sounded; her hydrophones and radar had picked up a ship off the Port bow. This was Suffolk, racing on a southwest course to travel along the edge of the fog bank; briefly, the three-stacked silhouette of the cruiser was in sight before she plunged into the mist. There was no time to get a bearing or open fire.
Aboard Suffolk, Able Seamen Newell, in the after starboard lookout was scanning his sector with binoculars. In these latitudes, the ice and light played tricks, and even the most-experienced sailor could be fooled. Suddenly, a great black shape loomed out of the mist no more than seven miles away. "Ship bearing Green one-four-o" he shouted. Then a second ship appeared, and he shouted the alarm again.
Captain Ellis brought Suffolk hard over and she heeled heavily to starboard as he brought her deep into the fog, while alarm bells rang and sailors rushed to action stations, china and cutlery clattering to the floor in the messdecks.
Once safely in the fog, Suffolk slowed down and waited for Bismarck and Eugen to pass her before taking up a position to the rear, just within radar range.
At thirteen miles, this meant the Bismarck's guns could easily reach her at any time. The cruiser roared along at 30 knots, edging at her top speed, and the vibration was tremendous. It was all she could do to keep up with the big German ships, which had increased speed.
In the plotting room, the Suffolk's piloting officer found it nearly impossible to hold the ruler on the chart due to the way the ship was shaking.
Meanwhile, Norfolk had been alerted and was racing back through the fog to join Suffolk. But her captain had misjudged his relative position and emerged six miles in front of Bismarck, with the great gray leviathan closing fast.
Before Norfolk could escape back into the mist, five salvoes straddled her. One shell bounced off the water and ricocheted off of the Captain's bridge. But only shell splinters landed aboard, and no one was hurt.
Three hundred miles to the south, Vice-Admiral Holland aboard the Hood had received Norfolk's report. Already the Hood was racing on a converging course that would bring him within range early the next morning. Bismarck's first battle was about to begin.
Little Red Riding Hood has reason to be a nervous wreck, considering she nearly had her head ripped clean off by Bizko. Give her a hug and some tea.
Eugen, for her part in that little engagement, moved ahead of Bismarck due to the big ship's guns having temporarily knocked out Bismarck's forward-facing Radar set; with Eugen acting as forward eyes for the two raiders, they continued on, while Suffolk and Norfolk tended to their bruises and chased after the German ships, vectoring in additional forces to try and stomp the breakout before it became a worse situation.
And then, at 5:07 AM, on May 24th, 1941, Bismarck and Prinz Eugen tangled with Hood and Prince of Wales.
Painted by Claus Bergen, 'Battle of the Strait' has Eugen front and Centre with Bismarck trailing behind.
Again, this battle is a big one, so you're going to get a transcription instead of my inadequate words to describe it.
The mood aboard Hood and Prince of Wales was one of high anticipation. The German ships, less than one hundred miles away, and the two British capital ships were closing fast; Admiral Lancelot Holland, in command of the small fleet, was concerned, however. While he had eighteen big guns to the Bismarck's eight, the Bismarck was faster and better-armoured than the 22-year old Battlecruiser, and much faster than the Prince of Wales.
Hood's greatest weakness was her lightly-armoured decks; in her heyday, the weight savings had given her greater speed than her contemporaries, but as fire control improved, the risk of a plunging shell from long range had a good chance of punching into her delicate innards. Combined with a stripped turbine from her aborted pursuit of Dunkerque's sister ship, Strasbourg, at Mers-el-Kebir, and Hood's vaunted top speed had also been hobbled to twenty-six knots instead of her normal thirty-one. Meanwhile, Prince of Wales was well-armoured and ready for a fight, but she was brand-new, less than two weeks out of the shipyard and will a large contingent of civilian workers still trying to iron out the kinks in the battleship's main turrets. (The King George V class' quadruple 14" turrets would always have thorny issues with reloading and jamming through the duration of the war)
Civilian workers were still aboard the Prince, in fact, when she went into the battle, and everyone knew the likelihood of a malfunction was incredibly high. (The Germans, incidentally, mistook wales for her older sister ship, unable, or unwilling to believe that so green a ship would be pressed into service.)
Admiral Holland's limited forces presented an issue, so he came up with a plan to take advantage of them as much as possible. By adjusting course northwards, he would intercept Prinz Eugen and Bismarck shortly after 2 AM local time, just after sunset in those altitudes. There were two advantages to that; firstly, Hood would approach almost head-on, with the combined speed between the two forces being approximately 56 knots. This would minimize the time Hood spent under risk of plunging fire, as the closer the range, the flatter the shell trajectory. Equally important, by emerging out of darkness with the enemy silhouetted by the sunset, there was the possibility of surprise. Hood and Wales would tangle with Bismarck, while Suffolk and Norfolk were to attack Prinz Eugen; on paper, it was a plan that gave the attackers every possible advantage except one; they would be crossed by the German 'T', allowing the full might of the German ships' guns to fire freely, while limited to only their forward guns between Hood and Wales.
HMS Hood, the Pride of the Royal Navy, at anchor around 1931. An incredibly pretty ship, too.
Around midnight, the Bismarck and Eugen disappeared in a heavy snow squall, and both Norfolk and Suffolk lost contact; that instantly threw Admiral Holland's plan into jeopardy.
Because the Greenland coast prevented the German ships from heading further west, Holland figured on three possibilities; First, Bismarck and Eugen could continue heading on their initial course to the southwest. Secondly, they could turn easterly and head straight south, or, most unlikely, the German ships could double back through the strait. On the assumption that the German vessels would continue their breakout attempt, Holland ordered his small fleet to turn north and slow down, with the intent of surprising the Germans with a head-on approach. He also sent the six escorting destroyers out on the original interception course.
In fact, Bismarck and Eugen had turned slightly westwards, following the edge of the Greenland Ice pack; as a result, Holland's destroyer screen missed the two ships by a distance of less than ten miles, without spotting them. Suffolk finally regained Radar contact at 2:47 AM, and both British battlewagons sprang into action, moving to intercept at top speed. But instead of being head-on, now Bismarck and Hood were nearly parallel, on south-west courses some 35 miles apart. Instead of a favourable high-speed approach, Holland had been forced into a slower beam interception; worse, his other options were even riskier. If he tried to outrace the German ships then come around to go head-on, he could lose them. So now, the battle would be just after Dawn, instead of Dusk.
Aboard Bismarck and Prinz Eugen, most of the men knew the name of Hood, as they had used her painted appearance upon their gunnery targets as the ships had trained together. But only a handful of the experienced sailors had seen her, in between the wars, where she came to represent British naval power in every corner of the globe. Until the beginning of the Second War, Hood had never fired a gun in battle, her power implied, not realized.
As the arctic night waned, the sailors on Hood and prince of Wales, who had already spent hours at battle stations were tense and exhausted, continuing only with adrenaline. Action had been imminent, then delayed, and now they were about to go over the top again. in all, seven thousand officers and men on four ships were racing into conflict.
Captain John Leach, of the Prince of Wales, sat in a chair on the ship's compass platform and worried. His crew was untried. His ship's main guns were balky; he already knew that one of the forward 14-inchers had proven defective and would only be good for a single salvo. The other nine guns were also in question.
Leach was not the only man who was contemplating what was to come. Lieutenant Esmond Knight of the Naval Volunteer Reserve, formerly an actor and birdwatcher, sat in the unarmoured Anti-air fire control station. He was bundled against the cold - several sweaters and a warm scarf, plus his life belt - and he wore a tin hat over the anti-flash hood designed to protect him from the effects of being too near a gun's muzzle blast. He peered through binoculars, on the lookout in the gloom; whatever bit part he played in the coming events, it would be seen by few, applauded by none. It was simply a matter of duty. And quite likely of dying.
Just after 5 AM, Admiral Holland turned to the flag lieutenant and gave the order: "Signal instant readiness for action"
Moments later, Hood flashed the signal to Prince of Wales.
At the same time, Eugen's hydrophones had picked up the sound of high-speed propellers some twenty-five miles distant. Captain Brinkmann reported as such to Bismarck's own captain, Ernest Lindemann, who stood on the port bridge wing of the battleship and watched the battle unfold.
At 5:45, the ships sighted each other.
The weather was calm, but there was a fair swell, causing even the Hood to bob slightly with each wave. To Signalman Ted Briggs, aboard Hood's bridge, the Bismarck "was a very black and sinister-looking effort," but it was unlikely he actually knew which of the two German ships was the Bismarck; due to the similarity in silhouette and profile, it was virtually impossible to tell Bismarck from Eugen at a distance. With the fourteen-mile distance now closing, Admiral Holland ordered his ships to turn and advance, aiming to protect Hood's thin decks from long-range fire, but also cutting his available guns by eight during the headlong charge.
The British opened fire at 5:52 AM, sending great flashes and gouts of cordite smoke high into the air as they sought to cross the thirteen-mile gap. Hood's first salvo fell harmlessly behind Prinz Eugen, dousing much of the cruiser's aft decking with spray from the shell geysers, but otherwise not touching her. Wales, for her part, had already shifted her guns to take aim at Bismarck, preparing to fire when the German ships responded.
in the gunnery computer room, Heinz Jucknat, Adolf Eich, and Franz Halke computed the variables that determined the big guns' aim; wind speed, air temperature, ship speed, distance and bearing of the enemy. Information poured in from fire control stations, but their minds were half on the work, and half on the events they could not see.
Deeper inside Bismarck, in the boiler rooms, Hans Zimmermann and his workmates kept a constant eye on the oil and water supply for the boilers; it was essential that the ship keep maximum steam pressure for both power and maneuverability during the battle. As he checked feed lines and gauges, Zimmerman felt the vibration of the guns firing, and noticed as he had during sea trials how the whole ship plunged with the recoil from a full salvo.
For the men on the bridge, in the fire control stations, or worst of all, inside the turrets, each salvo was a bone-rattling, mind-numbing experience - much like being next to a bomb going off. The roar of the guns was deafening, the air pressure made it nearly impossible to breathe, and the thick clouds of cordite smoke choked and blinded.
With Hood and Wales in close formation, the German gunners had the advantage, dialling in their aim for the singular large target of the two British warships, and blazing away with all they were worth. Prince of Wales' Seventh salvo from her five operable forward guns had straddled the Bismarck, shells falling on either side of the big ship.
The first German Salvo had fallen just ahead of Hood. The second, just astern, and shell splashes blinded the Prince of Wales' forward rangefinders, which followed close behind. Eugen, firing faster than Bismarck could, plinked a high-explosive shell into Hood's spotting top, blowing it apart and killing fifteen men instantly, while starting fires among Hood's ready-to-use 3" rocket ammunition storage; the unguided anti-air rockets swiftly started a roaring blaze between Hood's twin funnels, even as Holland ordered hood to turn 20 degrees port, unmasking her aft guns, to allow all eight of her big guns to open up.
The Bismarck took advantage of the blaze, the turn, and the range in equal measure; her third salvo straddled Hood, but her fourth, less than thirty seconds later, proved deadly.
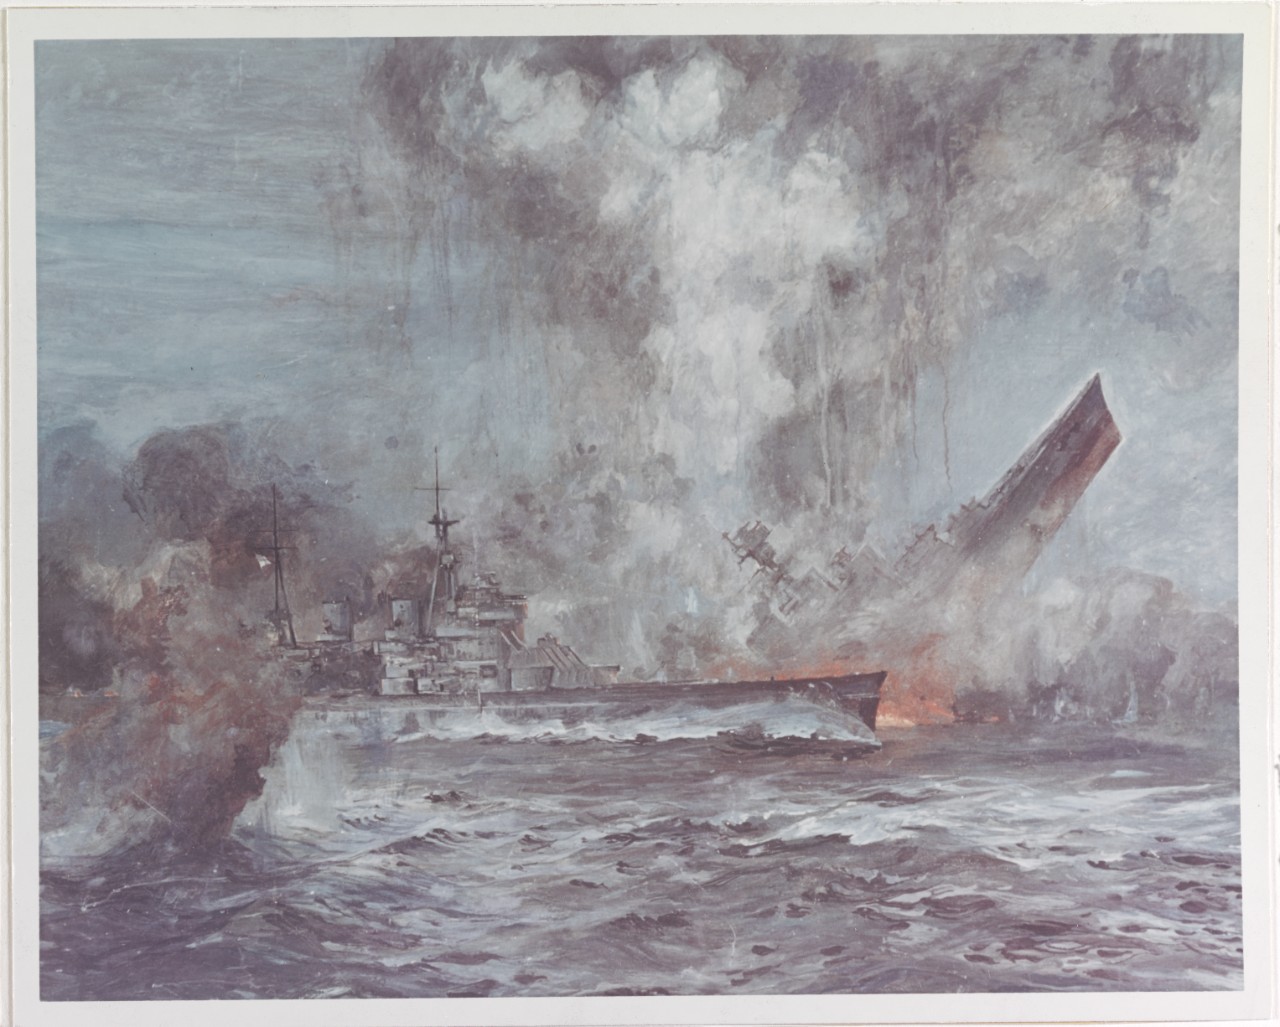
One or more of Bismarck's fifteen-inch shells hit just forward of Hood's aft turrets, punched through the battlecruiser's armoured belt, and exploded deep in her belly, setting off Hood's 4-inch magazine, which sympathetically detonated Hood's main fifteen-inch ammunition stock. What followed was Horrifying to friend and foe alike.
Okay. This started as an examination of Prinz Eugen, but bluntly? She's so heavily entwined with this one battle, that I'm going to have to break this post into chunks. Consider this Part 1 for Eugen, as well as a rather Visceral account of the lead-up to Hood's destruction."At first the Hood was nowhere to be seen; in her place was a colossal pillar of black smoke reaching into the sky. Gradually, at the foot of the pillar, I made out the bow of the Battlecruiser projecting upwards, a sure sign she had broken in two. Then I saw something I could hardly believe; a flash of orange from her forward guns! Although her fighting days had ended, the Hood was firing a final salvo."
On the bridge of Hood, Ted Briggs didn't hear an explosion (A number of eyewitness accounts claimed the Hood blew up without a sound), but a sheet of flame shot around the front of the compass binnacle only feet away, and he was thrown from his feet. As he and others on the bridge scrambled to their feet, Hood listed sharply to starboard, then righted herself momentarily, before listing even more heavily to port. The quartermaster reported loss of steering, and the captain ordered emergency steering; a command by then impossible to execute. There was no time to abandon ship; the ship was abandoning them. As he headed for the starboard bridge exit, Briggs noted that Admiral Holland made no move to leave his position. Briggs himself was just starting down the ladder to the main deck when the water rose to meet him, and he was dragged under.
Swimming frantically to avoid getting snagged by the superstructure and wire aerials, the weight of Hood's dying hulk tried to pull him down with it; through some miracle he ended up on the surface once more, though on the port side of the sinking ship. Fifty yards away, the bow of the Hood was vertical in the water. Then he turned and swam for his life.
He didn't see her sink.
Able Seaman R.E. Tilburn was at his Antiair position on the Hood's boat deck when the Bismarck's fatal salvo hit. A shell tore into the deck beside him, turning his neat world into a maelstrom of of twisted steel and flying splinters. Hardly had he managed to get back to his feet when a cloud of black smoke engulfed him, followed by a blast of flame. There was nothing to do but make for the ice-choked water. As he tore off his gas mask and armoured hat, he was forced to leap over an ammunition locker, then over the side of the mortally-wounded ship. Swimming desperately, to avoid the wreck's suction, one of the Hood's radio aerials managed to lasso his boots; he used his pocketknife to cut himself free.
When he surfaced, Hood was gone.
Midshipman W. J. Dundas had the most amazing escape of all. From his position in the aft spotting top, directly above Hood's after magazine, he was literally washed out of the enclosed station and into the ocean through a shattered window.
-
- Site Admin
SHIP UPDATE: CRIMSON ECHOES
Each event generally has unique ships. Sometimes, they’re added to the permanent pool of ship builds, occasionally having a higher drop rate than usual. Sometimes… They aren’t. But don’t worry, there’s always re-runs if you missed these. And I suspect the Archives are only going to grow bigger with time. So, without further ado!
I have words about Crimson Echoes beyond the ship tally, but that can wait
And you did, and I'm proud of you.
KAGA (BATTLESHIP)

That’s right, you heard me correctly: Kaga. As a battleship. Before the treaty mentioned in the Crimson Echoes main update, Kaga was a battleship, and she’s a lot louder than she is as an Aircraft Carrier. More brash, disdainful of carriers… She’s basically a violent teenager, full of pride.
Well, you know what they say about pride…
She Rejects her Carrier Conversion, Dio!
Girl’s a fountain of Jojo memes because Manjuu are fans of that fucking series. She’s still honestly likeable and a surprisingly beefy asskicker. Fans also nicknamed her ‘Bakaga’ within minutes, referencing both the battleship code, and the fact that she’s a hot-blooded idiot.
Skillwise, she gets two right out of the gate, and, what a shock, they’re both barrages. There’s her main gun barrage, with a 30-50% chance every time she fires her main guns to shoot a barrage of bullets (Fight to Win!), and her other skill, Conquer to Loot!, fires 8 torpedoes straight ahead 10 seconds into the fight, and every 40-20 seconds later.
The Torpedoes are actually aimed at where the nearest enemy currently is, like all Sakura-type torpedoes in the game launched from planes.
Also, As BB Kaga is still Kaga, she procs the 35% Aviation Boost on Akagi if you have them in the same fleet.
Also-Also, there’s a good visual pun in her art. Compare CV Kaga to BB Kaga, and you’ll see they both have armoured belts.
Reflecting the period she’s in, she’s a little crap when it comes to anti-air, but she’s got some beef to her otherwise, and is a respectable pick.
She’s hot-headed, violent, quick to rise to even a perceived challenge, and was the fourth backliner to get a torpedo skill (The first three being Scharnhorst, Gneisenau, and Tirpitz); Give her a big gun and something to shoot at, and she’ll end up being a puddle of a happy fox.
AMAGI

Oh, Amagi. A mama bear who’d probably be a little disgusted with how her kids turned out. Hell, one of her secretary lines is a very tactful way of saying exactly that. Still, she was a good big sister while she was around, a strategist who cared for her charges, thoughtful and kind… Well, until you rouse her. Then shit goes down, as Akagi and Kaga can both attest. Neither of them want to piss off their big sister.
Pretty much everyone loves Amagi, partly because of her personality, partly because of the skills she brings to the table, partly because of her very impressive character art, and partly because she takes no shit from nobody and has ten 41 centimetre guns to back up her displeasure with. Putimaxi does a chibi comic called ‘fox family’ that has Amagi being the adult figure for a pair of disgustingly adorable versions of Akagi and Kaga, and it’s pretty much exactly how the fans of the character see her.
...I would link more than this image, but Putimaxi also does a lot of NSFW stuff, so, uhh... Here's the image he wanted me to post, it's by Putimaxi, and we'll leave it at that.

Funnily enough, the weakness in her body (cause unknown, although she mentions it’s congenital) is reflected a little bit in her stats, being overall a little weaker than Battleships of her ilk. However, her skills more than make up for it.
In reality, Amagi was still under construction when the 1923 Kanto Earthquake Twisted her keel like a pretzel, completely destroying her before she was ever launched. Which is why Kaga got converted into a CV, instead of the original plan of Amagi and Akagi being the conversions
Ageless Phoenix essentially debuffs the enemy’s Firepower, Torpedo, and Aviation stats (IE, all their damage stats) by 3-9% (a pretty significant amount for an all stats debuff), Efficacious Planning reduces burn damage on the entire fleet by 5-15% and buffs the fleet’s Evasion by 4-10% as long as she’s alive, and her all out assault style skill, Crippling Barrage, does a decent frontal assault 40-70% of the time, each time she fires her main guns… And if she’s in a mostly Sakura Empire fleet (4 ships or more), her first salvo’s loading time is decreased by a whopping 25-45%, meaning she can get her first barrage off very quickly.
As such, if you want a decent flagship for a Sakura fleet, Amagi’s a solid pick. After all, she may be a little weak, but that isn’t going to matter if they all die first.
There’s also implications that the coughing of the Player-summonable Amagi is a bit of a play, as she was given a good wisdom cube this time, instead of a defective one. So she’s in much better overall health, if a little pale compared to her wilder younger sister.
As one of two gold-tier battlecruisers, comparing her to HMS Hood is inevitable. Hood’s got more HP, but worse Gun, which reflects the design doctrines in play; pretty much every IJN ship in Azur Lane is all about dishing out the hurt as fast and as hard as possible
TOSA

Introduced in the rerun, Tosa is an interesting one. She’s a warrior. Not a duelist. Not a strategist. She is the epitome of someone who knows damn well the objective of a battle is to win. And, with that hyperfocus, comes a little bit of disdain. She’s blackly amused that you trust her, because trust? Foolish. She hates the phrase “That’s how it’s always been done”, because it implies that’s the correct way, and the only correct way (and rightly so, often.) She’s aware of her flaws, and she will imply very heavily that there will be dire consequences if you touch her lewdly.
Tosa also has arguably one of the most-lethally impressive pieces of swimwear art in the game, not just because of her appearance, but because it has basically exponentially increased the amount of fluff from her multiple tails; like all Kitsune, more tails is more powerful, and both the Tosas and Amagis have a full set of 9 tails each.
Both of her skills are unique. Accomplish Any Feat! has a 45-70% chance of firing a special barrage in addition to her main gun fire, and it has the same placement regardless of her place in the fleet. Crush Any Contender! Is… A more specialised one. Like… really specialised.
Half of it isn’t. Whenever she’s hit, or when someone gets close, she fires a level 1-10 barrage, and then can safely be hit for 15 seconds, before it happens again.
The other… Okay, so:
- She has to be afloat. So far, so normal.
- The other fleet you’re using has to have a Battleship as its Flagship. Ummm…
- Said other fleet is in their 3rd, 4th, or 5th battle…
And then she launches a special barrage 20 seconds into the other fleet’s battle. Or at least, that’s the way it reads. Grump may well correct me. But… Yeah, that’s a highly specific skill.
It’s also impressive as fuck because it means that she’ll be able to reach across multiple map squares and lay down a hard smack to some dipshit.
Historically, Tosa was never completed, and, in fact, some people would argue that she’s probably the angriest character in the game due to said historical fate: Being towed out and used to test weapons on before being scuttled is important, but normally it’s not done on state-of-the-art ships.
The Washington Naval Treaty is what put the nails into Tosa’s coffin, and she is justifiably salty about it; in fact, her incomplete state is reflected in the appearance of her rigging, as there are plates (and the pointy bit of her bow) missing.
HATAKAZE

Hatakaze is a hard girl. Disappointed by her performance, she’s an old lady (yes, an old lady) who is hard on the commander, and, honestly, a little hard on everyone, including herself. But she’s a solid individual, all told, and I respect her.
Skillwise, Hatakaze has the usual All Out Assault, but her unique skill is Swift Defender, and it’s not bad. While she’s alive, the Main Fleet takes 3.5-8% less damage, and Light Cruisers and Destroyers have a 1-10% gun and torp damage debuff when it comes to hurting Hatakaze. She is, after all, a tough veteran. Even if she apparently didn’t do a lot, according to her.
Hatakaze is a Kamikaze-class destroyer, and approximately as old as dirt. (Not really; like pretty much every other girl on the list for Crimson echoes, her birthday is close to or shortly after the Kanto Earthquake). Predating the Fubuki-class, she predates the design revolution that gave destroyers the speed, guns, and torpedoes of a Light Cruiser, and as such is very heavily a torpedo boat in nature and design.
History-wise, she’s a survivor, managing to dodge major attacks for the majority of the war before the Essex-class USS Ticonderoga managed to gank her in 1945. For actual battle service, she scored assists on HMAS Perth and USS Houston in the battle of Sunda Strait, which broke allied resistance in the east indies in 1942
NAKA

A focused gal, Naka is the smallest sister of the Sendai class, and wishes to surpass her sisters. She’s chipper about this, volunteers for work, and, even if she isn’t sure she will be better than her sisters, she still wants to try. If that gives the impression of a try hard, no, she really is just someone who knows their goal, and is happy to work towards it.
Naka is actually the second Naka, as the original was under construction when the Kanto Earthquake hit. She was completely obliterated in fires that burnt for weeks, and upon being recovered, she was promptly scrapped and rebuilt from scratch.
Her wartime service could best be described as ‘being beaten the fuck up’ by everything and their grandchild, but it still took until late 1944 before she met her end; a combination dive-bombing and torpedo attack snapped her in half, taking most of her crew with her to the seabed 3 miles below
Skillwise, apart from her All Out Assault, she’s a buff Cruiser, increasing the Reload and Torpedo stats of her fellow Light Cruisers (and Destroyers) by 3-15% with her Torpedo Squadron skill. With a respectable speed, and solid stats overall, she’s good for a lighter vanguard.
Her sisters, especially Jintsuu, will make you hate PvP Exercises.
ASHIGARA

Ashigara’s… An interesting one. If it weren’t for her questline, I’d just say she’s a hard worker, again, looking to be like her sisters, Myoukou and Nachi… But she’s also someone who doesn’t do well in unfamiliar situations, and, when she gets into the commander… Well, she shows anxiety, folding many, many paper cranes and losing her focus (Apparently, these can figure quite prominently in courtship and weddings.)
The ‘Hungry Wolf’ of the IJN, Ashigara gained that nickname not in combat, but during the diplomatic mission and naval review of the Coronation of King George VI, in 1937. Turns out her incredibly spartan crew quarters had some wag in the newspapers compare her crew to a ‘den of hungry wolves’
Combat-wise, she was involved in heavy action in the East Indies, including being responsible for sinking HMS Exeter and HMS Encounter, as well as generally raising holy hell against the USN advance in 1944. She was eventually killed by the submarine HMS Trenchant, who pounded 5 torpedoes into the hapless cruiser’s side in a frankly brutal display of marksmanship.
The thing is, she’s a good heavy cruiser. Both of her skills have barrage components to them, her All Out Assault, and, more importantly, Flashing Blade of Surabaya, an “Every 20 seconds” skill with a 30-70% of a special barrage, and, on that proccing, a damage buff of 10-20% to other cruisers for 10 seconds. Considering that’s a 70% chance at the top end, it’s well worth maxing out, because it’s going to proc a lot.
MAKINAMI

Part of the Death By Cute brigade, Makinami is upbeat, likes to see others smile (and her questline reflects that), and, like all the cute ships, has a headpat line. Because headpats are good. She’s a bit of a klutz, but that’s mainly because she runs everywhere, so, y’know…
This is also one of the very few times I’ll argue for forgiveness about a “Special Touch” (shudder) line. Because a glomp is a leaping hug, and I am down for both glomps, and hugging Makinami, who deserves hugs and headpats.
Makinami’s one of the Yugumo-class, and as a result, was pretty much the most-advanced destroyer Class Japan ever made in World War 2, though you could argue competition from the Akizuki-class DDs. (We’ll talk one-offs like Shimakaze eventually).
Which didn’t stop her from getting jumped in the battle of Cape Saint George, where the Little Beavers, led by USS Charles Ausburne proceeded to cripple her, then beat her to death with gunfire at point-blank range.
With Full Firepower (30-60% chance of Firepower buff of 20-40% for 10 seconds, every 20 seconds), Double Torpedoes (15-30% of launching two sets of torpedoes every time you launch torps), and an All Out Assault, she’s definitely not a bad destroyer pick.
Again reflecting the general trend of Japanese ships in AL being ‘spray damage first and fast, they can’t hurt you if they’re dead’
Hrm… Maybe I should make a Team Death By Cute, as well as my current project of Operation “Fuck Your Wave”... More on that last one much later.
NAGANAMI

Naganami is a friendly, cute bundle of huggy fluff. She likes being cuddled, she likes cuddling others, she’s a little confused that people think hugging her tail is good luck, and she prefers that you remember that she’s a happy, warm, and loving person, not just a fluffy tail. Hell, even if she’s disappointed in you, she still cares. She’ll wait for you not to be a shitheel. Honestly, that last part I’d rather she didn’t, but hey, she’s Naganami, and she does her. Still wish it though…
She weighs 2,500 tons, has literal steel skin, and a brace of guns that’d make an Ork proud. She can influence shitheels to not be shitheels very easily.
Apart from the usual All Out Assault, Naganami has lots of torpedoes. Or, more accurately, her skill Lightning Strikes Twice fires a torpedo barrage (of your torpedoes) without cost 10 seconds after you start the fight, with a 15-25% chance of firing another every 15 seconds after that. Her other skill, the Legacy of Lunga Point, means that if you place her in the middle of your vanguard, and they’re all alive at the start of a battle, she buffs Torpedoes by 5-15% and the Torpedo Crit Rate by 4-10% for Cruisers and Destroyers… And buffs the Evasion of your Destroyers by 5-15%
Basically, put her dead center in a Destroyer vanguard, and watch the suffering inflicted on your enemies.
Despite her cute and fluffy tail, Naganami’s put in work through much of World War 2, including severely wounding USS Pensacola and assisting in killing Northampton. Late in 1944, at Ormoc Bay, the transport convoy she was escorting got jumped by the ‘Murderer’s Row’ of Task Force 38, which proceeded to bomb and torpedo everything they could.
Naganami was broken in half, and sent to her final rest with her sister Hamanami, Wakatsuki, and Shimakaze.
HANAZUKI

Hanazuki loves flowers. She loves spring flowers the best, but she appreciates flowers of all seasons. She would take up gardening, but she has so much trouble deciding what to grow! She’s also quite diplomatic. If she’s disappointed in you, she’ll let you know that you’re going to be ostracised for shameful behaviour, and she’d rather that didn’t happen. And she lets you know her role from the get go: Anti-air, anti-sub.
As an Akizuki-class destroyer, Hanazuki’s normally toting eight 4” guns that would be used for plinking at other ships, and trying to poke holes in angry planes from 17 miles distance. She was also completed in December 1944, right as japan ran out of fuel wholesale.
Indeed, her Anti Sub Warfare stat is bloody good, and her main skill, Aerial Support, buffs her Firepower and Anti-Air by 5-25% for eight seconds when the vanguard starts firing on enemy planes. Now, this doesn’t stack, but since shooting down more planes refreshes the timer? She’s bloody good against carriers, and in other missions where there are a lot of planes.
Stuck in dock for the remainder of World War 2, with no actual opportunity to fight, her crew took to gardening in order to help the local populace with the rampant food shortages that plagued japan at the time.
Post-war, she was turned over to the US as a war prize, and sunk as a target in 1948.
And that’s the gals of Crimson Echoes! Most of them are pretty good, as event ships often (but not always) are, and they have an interesting set of characters. Makinami and Ashigara both have secretary questlines, so don’t forget those if you have the ships!
Each event generally has unique ships. Sometimes, they’re added to the permanent pool of ship builds, occasionally having a higher drop rate than usual. Sometimes… They aren’t. But don’t worry, there’s always re-runs if you missed these. And I suspect the Archives are only going to grow bigger with time. So, without further ado!
I have words about Crimson Echoes beyond the ship tally, but that can waitAnd you did, and I'm proud of you.
KAGA (BATTLESHIP)
That’s right, you heard me correctly: Kaga. As a battleship. Before the treaty mentioned in the Crimson Echoes main update, Kaga was a battleship, and she’s a lot louder than she is as an Aircraft Carrier. More brash, disdainful of carriers… She’s basically a violent teenager, full of pride.
Well, you know what they say about pride…
She Rejects her Carrier Conversion, Dio! Girl’s a fountain of Jojo memes because Manjuu are fans of that fucking series. She’s still honestly likeable and a surprisingly beefy asskicker. Fans also nicknamed her ‘Bakaga’ within minutes, referencing both the battleship code, and the fact that she’s a hot-blooded idiot.Skillwise, she gets two right out of the gate, and, what a shock, they’re both barrages. There’s her main gun barrage, with a 30-50% chance every time she fires her main guns to shoot a barrage of bullets (Fight to Win!), and her other skill, Conquer to Loot!, fires 8 torpedoes straight ahead 10 seconds into the fight, and every 40-20 seconds later.
The Torpedoes are actually aimed at where the nearest enemy currently is, like all Sakura-type torpedoes in the game launched from planes. Also, As BB Kaga is still Kaga, she procs the 35% Aviation Boost on Akagi if you have them in the same fleet. Also-Also, there’s a good visual pun in her art. Compare CV Kaga to BB Kaga, and you’ll see they both have armoured belts.Reflecting the period she’s in, she’s a little crap when it comes to anti-air, but she’s got some beef to her otherwise, and is a respectable pick.
She’s hot-headed, violent, quick to rise to even a perceived challenge, and was the fourth backliner to get a torpedo skill (The first three being Scharnhorst, Gneisenau, and Tirpitz); Give her a big gun and something to shoot at, and she’ll end up being a puddle of a happy fox.AMAGI
Oh, Amagi. A mama bear who’d probably be a little disgusted with how her kids turned out. Hell, one of her secretary lines is a very tactful way of saying exactly that. Still, she was a good big sister while she was around, a strategist who cared for her charges, thoughtful and kind… Well, until you rouse her. Then shit goes down, as Akagi and Kaga can both attest. Neither of them want to piss off their big sister.
Pretty much everyone loves Amagi, partly because of her personality, partly because of the skills she brings to the table, partly because of her very impressive character art, and partly because she takes no shit from nobody and has ten 41 centimetre guns to back up her displeasure with. Putimaxi does a chibi comic called ‘fox family’ that has Amagi being the adult figure for a pair of disgustingly adorable versions of Akagi and Kaga, and it’s pretty much exactly how the fans of the character see her....I would link more than this image, but Putimaxi also does a lot of NSFW stuff, so, uhh... Here's the image he wanted me to post, it's by Putimaxi, and we'll leave it at that.
Funnily enough, the weakness in her body (cause unknown, although she mentions it’s congenital) is reflected a little bit in her stats, being overall a little weaker than Battleships of her ilk. However, her skills more than make up for it.
In reality, Amagi was still under construction when the 1923 Kanto Earthquake Twisted her keel like a pretzel, completely destroying her before she was ever launched. Which is why Kaga got converted into a CV, instead of the original plan of Amagi and Akagi being the conversionsAgeless Phoenix essentially debuffs the enemy’s Firepower, Torpedo, and Aviation stats (IE, all their damage stats) by 3-9% (a pretty significant amount for an all stats debuff), Efficacious Planning reduces burn damage on the entire fleet by 5-15% and buffs the fleet’s Evasion by 4-10% as long as she’s alive, and her all out assault style skill, Crippling Barrage, does a decent frontal assault 40-70% of the time, each time she fires her main guns… And if she’s in a mostly Sakura Empire fleet (4 ships or more), her first salvo’s loading time is decreased by a whopping 25-45%, meaning she can get her first barrage off very quickly.
As such, if you want a decent flagship for a Sakura fleet, Amagi’s a solid pick. After all, she may be a little weak, but that isn’t going to matter if they all die first.
There’s also implications that the coughing of the Player-summonable Amagi is a bit of a play, as she was given a good wisdom cube this time, instead of a defective one. So she’s in much better overall health, if a little pale compared to her wilder younger sister.As one of two gold-tier battlecruisers, comparing her to HMS Hood is inevitable. Hood’s got more HP, but worse Gun, which reflects the design doctrines in play; pretty much every IJN ship in Azur Lane is all about dishing out the hurt as fast and as hard as possible
TOSA
Introduced in the rerun, Tosa is an interesting one. She’s a warrior. Not a duelist. Not a strategist. She is the epitome of someone who knows damn well the objective of a battle is to win. And, with that hyperfocus, comes a little bit of disdain. She’s blackly amused that you trust her, because trust? Foolish. She hates the phrase “That’s how it’s always been done”, because it implies that’s the correct way, and the only correct way (and rightly so, often.) She’s aware of her flaws, and she will imply very heavily that there will be dire consequences if you touch her lewdly.
Tosa also has arguably one of the most-lethally impressive pieces of swimwear art in the game, not just because of her appearance, but because it has basically exponentially increased the amount of fluff from her multiple tails; like all Kitsune, more tails is more powerful, and both the Tosas and Amagis have a full set of 9 tails each.Both of her skills are unique. Accomplish Any Feat! has a 45-70% chance of firing a special barrage in addition to her main gun fire, and it has the same placement regardless of her place in the fleet. Crush Any Contender! Is… A more specialised one. Like… really specialised.
Half of it isn’t. Whenever she’s hit, or when someone gets close, she fires a level 1-10 barrage, and then can safely be hit for 15 seconds, before it happens again.
The other… Okay, so:
- She has to be afloat. So far, so normal.
- The other fleet you’re using has to have a Battleship as its Flagship. Ummm…
- Said other fleet is in their 3rd, 4th, or 5th battle…
And then she launches a special barrage 20 seconds into the other fleet’s battle. Or at least, that’s the way it reads. Grump may well correct me. But… Yeah, that’s a highly specific skill.
It’s also impressive as fuck because it means that she’ll be able to reach across multiple map squares and lay down a hard smack to some dipshit. Historically, Tosa was never completed, and, in fact, some people would argue that she’s probably the angriest character in the game due to said historical fate: Being towed out and used to test weapons on before being scuttled is important, but normally it’s not done on state-of-the-art ships.The Washington Naval Treaty is what put the nails into Tosa’s coffin, and she is justifiably salty about it; in fact, her incomplete state is reflected in the appearance of her rigging, as there are plates (and the pointy bit of her bow) missing.
HATAKAZE
Hatakaze is a hard girl. Disappointed by her performance, she’s an old lady (yes, an old lady) who is hard on the commander, and, honestly, a little hard on everyone, including herself. But she’s a solid individual, all told, and I respect her.
Skillwise, Hatakaze has the usual All Out Assault, but her unique skill is Swift Defender, and it’s not bad. While she’s alive, the Main Fleet takes 3.5-8% less damage, and Light Cruisers and Destroyers have a 1-10% gun and torp damage debuff when it comes to hurting Hatakaze. She is, after all, a tough veteran. Even if she apparently didn’t do a lot, according to her.
Hatakaze is a Kamikaze-class destroyer, and approximately as old as dirt. (Not really; like pretty much every other girl on the list for Crimson echoes, her birthday is close to or shortly after the Kanto Earthquake). Predating the Fubuki-class, she predates the design revolution that gave destroyers the speed, guns, and torpedoes of a Light Cruiser, and as such is very heavily a torpedo boat in nature and design.History-wise, she’s a survivor, managing to dodge major attacks for the majority of the war before the Essex-class USS Ticonderoga managed to gank her in 1945. For actual battle service, she scored assists on HMAS Perth and USS Houston in the battle of Sunda Strait, which broke allied resistance in the east indies in 1942
NAKA
A focused gal, Naka is the smallest sister of the Sendai class, and wishes to surpass her sisters. She’s chipper about this, volunteers for work, and, even if she isn’t sure she will be better than her sisters, she still wants to try. If that gives the impression of a try hard, no, she really is just someone who knows their goal, and is happy to work towards it.
Naka is actually the second Naka, as the original was under construction when the Kanto Earthquake hit. She was completely obliterated in fires that burnt for weeks, and upon being recovered, she was promptly scrapped and rebuilt from scratch.Her wartime service could best be described as ‘being beaten the fuck up’ by everything and their grandchild, but it still took until late 1944 before she met her end; a combination dive-bombing and torpedo attack snapped her in half, taking most of her crew with her to the seabed 3 miles below
Skillwise, apart from her All Out Assault, she’s a buff Cruiser, increasing the Reload and Torpedo stats of her fellow Light Cruisers (and Destroyers) by 3-15% with her Torpedo Squadron skill. With a respectable speed, and solid stats overall, she’s good for a lighter vanguard.
Her sisters, especially Jintsuu, will make you hate PvP Exercises.ASHIGARA
Ashigara’s… An interesting one. If it weren’t for her questline, I’d just say she’s a hard worker, again, looking to be like her sisters, Myoukou and Nachi… But she’s also someone who doesn’t do well in unfamiliar situations, and, when she gets into the commander… Well, she shows anxiety, folding many, many paper cranes and losing her focus (Apparently, these can figure quite prominently in courtship and weddings.)
The ‘Hungry Wolf’ of the IJN, Ashigara gained that nickname not in combat, but during the diplomatic mission and naval review of the Coronation of King George VI, in 1937. Turns out her incredibly spartan crew quarters had some wag in the newspapers compare her crew to a ‘den of hungry wolves’Combat-wise, she was involved in heavy action in the East Indies, including being responsible for sinking HMS Exeter and HMS Encounter, as well as generally raising holy hell against the USN advance in 1944. She was eventually killed by the submarine HMS Trenchant, who pounded 5 torpedoes into the hapless cruiser’s side in a frankly brutal display of marksmanship.
The thing is, she’s a good heavy cruiser. Both of her skills have barrage components to them, her All Out Assault, and, more importantly, Flashing Blade of Surabaya, an “Every 20 seconds” skill with a 30-70% of a special barrage, and, on that proccing, a damage buff of 10-20% to other cruisers for 10 seconds. Considering that’s a 70% chance at the top end, it’s well worth maxing out, because it’s going to proc a lot.
MAKINAMI
Part of the Death By Cute brigade, Makinami is upbeat, likes to see others smile (and her questline reflects that), and, like all the cute ships, has a headpat line. Because headpats are good. She’s a bit of a klutz, but that’s mainly because she runs everywhere, so, y’know…
This is also one of the very few times I’ll argue for forgiveness about a “Special Touch” (shudder) line. Because a glomp is a leaping hug, and I am down for both glomps, and hugging Makinami, who deserves hugs and headpats.
Makinami’s one of the Yugumo-class, and as a result, was pretty much the most-advanced destroyer Class Japan ever made in World War 2, though you could argue competition from the Akizuki-class DDs. (We’ll talk one-offs like Shimakaze eventually). Which didn’t stop her from getting jumped in the battle of Cape Saint George, where the Little Beavers, led by USS Charles Ausburne proceeded to cripple her, then beat her to death with gunfire at point-blank range.With Full Firepower (30-60% chance of Firepower buff of 20-40% for 10 seconds, every 20 seconds), Double Torpedoes (15-30% of launching two sets of torpedoes every time you launch torps), and an All Out Assault, she’s definitely not a bad destroyer pick.
Again reflecting the general trend of Japanese ships in AL being ‘spray damage first and fast, they can’t hurt you if they’re dead’Hrm… Maybe I should make a Team Death By Cute, as well as my current project of Operation “Fuck Your Wave”... More on that last one much later.
NAGANAMI
Naganami is a friendly, cute bundle of huggy fluff. She likes being cuddled, she likes cuddling others, she’s a little confused that people think hugging her tail is good luck, and she prefers that you remember that she’s a happy, warm, and loving person, not just a fluffy tail. Hell, even if she’s disappointed in you, she still cares. She’ll wait for you not to be a shitheel. Honestly, that last part I’d rather she didn’t, but hey, she’s Naganami, and she does her. Still wish it though…
She weighs 2,500 tons, has literal steel skin, and a brace of guns that’d make an Ork proud. She can influence shitheels to not be shitheels very easily.Apart from the usual All Out Assault, Naganami has lots of torpedoes. Or, more accurately, her skill Lightning Strikes Twice fires a torpedo barrage (of your torpedoes) without cost 10 seconds after you start the fight, with a 15-25% chance of firing another every 15 seconds after that. Her other skill, the Legacy of Lunga Point, means that if you place her in the middle of your vanguard, and they’re all alive at the start of a battle, she buffs Torpedoes by 5-15% and the Torpedo Crit Rate by 4-10% for Cruisers and Destroyers… And buffs the Evasion of your Destroyers by 5-15%
Basically, put her dead center in a Destroyer vanguard, and watch the suffering inflicted on your enemies.
Despite her cute and fluffy tail, Naganami’s put in work through much of World War 2, including severely wounding USS Pensacola and assisting in killing Northampton. Late in 1944, at Ormoc Bay, the transport convoy she was escorting got jumped by the ‘Murderer’s Row’ of Task Force 38, which proceeded to bomb and torpedo everything they could.Naganami was broken in half, and sent to her final rest with her sister Hamanami, Wakatsuki, and Shimakaze.
HANAZUKI
Hanazuki loves flowers. She loves spring flowers the best, but she appreciates flowers of all seasons. She would take up gardening, but she has so much trouble deciding what to grow! She’s also quite diplomatic. If she’s disappointed in you, she’ll let you know that you’re going to be ostracised for shameful behaviour, and she’d rather that didn’t happen. And she lets you know her role from the get go: Anti-air, anti-sub.
As an Akizuki-class destroyer, Hanazuki’s normally toting eight 4” guns that would be used for plinking at other ships, and trying to poke holes in angry planes from 17 miles distance. She was also completed in December 1944, right as japan ran out of fuel wholesale.Indeed, her Anti Sub Warfare stat is bloody good, and her main skill, Aerial Support, buffs her Firepower and Anti-Air by 5-25% for eight seconds when the vanguard starts firing on enemy planes. Now, this doesn’t stack, but since shooting down more planes refreshes the timer? She’s bloody good against carriers, and in other missions where there are a lot of planes.
Stuck in dock for the remainder of World War 2, with no actual opportunity to fight, her crew took to gardening in order to help the local populace with the rampant food shortages that plagued japan at the time. Post-war, she was turned over to the US as a war prize, and sunk as a target in 1948.And that’s the gals of Crimson Echoes! Most of them are pretty good, as event ships often (but not always) are, and they have an interesting set of characters. Makinami and Ashigara both have secretary questlines, so don’t forget those if you have the ships!

Of note is that Eagle, being a former Battleship, isn't even applying effort to using the 1,750 ton destroyer like a barbell.
Hokay, so, let's get back onto the pain train for Prinz Eugen, and the rest of the Battle of Denmark Strait.
Honestly, there's going to be a lot of Denmark Strait in the first half of this post, because that battle was honestly kinda brutal, both in the morale hit, and in the death toll.
So, we left off with Hood being turned into a Funeral Pyre for 1,415 men, with all of Three survivors of her incredibly violent and quick death.
This left Prince of Wales alone, facing down the guns of both Bismarck and Prinz Eugen, and unable to maneuver away because Hood's burning wreck is on the left, and running over possible survivors is considered poor form.
Continuing with quotes Sourced from both wikipedia and history books on my desk (Discovery of the Bismarck, by Doctor Robert Ballard, 1991), let's see how Wales fared with her guns having teething issues and two capital ships hosing her down with high-calibre shells, hmm?

For her part, Wales gave nearly as good as she got, actually managing to clobber Bismarck three times, which, considering the brand-new battleship's teething issues, was a remarkable display.
(The two battleships traded 12 and 9 salvoes between them, neither scoring a hit.)
Three days Later, Bismarck would be brought to heel and Sunk in a massive battle involving the battleships King George V and Rodney, The Aircraft Carrier Ark Royal, The Heavy Cruisers Norfolk and Dorsetshire, the Light Cruiser Sheffield, and the Destroyers Cossack, Maori, Sikh, Zulu, Mashona, Tartar, and ORP Piorun (Of the Free Polish Navy).
Eugen's own attempt to raid convoys would swiftly come to an end, not in battle, but due to mechanical issues; the heavy cruiser's engines, generally considered temperamental due to being a high-performance design, ended up having some defects in construction rear their ugly heads and cut short her trek; refuelling twice on the 26th and 29th of May, one of her generator rooms broke down, followed by cooling issues in her port-side middle boiler room, which cut her speed.
On the 1st of June, 1941, Prinz Eugen made port at Brest, where she immediately entered Drydock for repairs, alongside Scharnhorst and Gneisenau.
Brest, by its very location, was well within the range of British Bombers, and the threat of two battleships and a heavy cruiser running rampant meant that the port was a priority target for the duration of the warships' stay there. During their stay in Brest, Prinz Eugen, Scharnhorst, and Gneisenau were repeatedly attacked, to the point that the Royal Air Force jokingly referred to the three ships as the Brest Bomb Target Flotilla.
Despite their best attempts, however, only one bomb caused damage to Eugen, when an Armour-piercing bomb managed to plant itself directly into the armoured control centre underneath the cruiser's bridge, effectively disabling her guns until repairs were completed at the end of 1941.
German High command soon decided that the French base was untenable, and with Hitler arguing that stopping the allied convoys to the Soviet Union being a greater priority, he ordered the three capital ships to redeploy, as well as using the English Channel to do so.
Now, as many with a grasp of geography might tell you, the English Channel was one of the most-heavily-contested, patrolled, mined, and dangerous areas of water at the time. So the idea of sending three capital ships through what amounts to a narrow slot with guns on all sides sounds suicidal at best.
And yet, on the night of February 11th, 1942, Prinz Eugen, Scharnhorst, and Gneisenau roared through the channel at top speed, middle fingers upraised, laughing uproariously at the British response, which had been delayed by 12 hours; it was only after the three German ships passed the Cliffs of Dover was there an attempt to intercept the ships, and the British aerial response was promptly jumped on by the Luftwaffles and shot to shreds (One of the only times the Luftwaffe wasn't doing dirty to the Kreigsmarine, as shown by the 'Friendly Fire' incident that sunk Z1 and Z3)
Eugen using her 105mm Dual-purpose guns to take potshots at Spitfires and Swordfish torpedo bombers during the Channel Dash
During the Dash, Eugen was shot at by coastal artillery, intercepted by Motor Torpedo Boats, Several squadrons of planes, and, within the last leg, on February 13, a half-dozen British Destroyers (of which she promptly slapped HMS Worcester with a barrage of 8" shells). Of the three capital ships involved, none had taken damage, but one of Eugen's crewmen had died, having been perforated by aircraft guns.
Subsequently sent up to Norway, Eugen's Norwegian service lasted for all of two days before the British Submarine Trident plunked a pair of torpedoes into Eugen's rump, causing her stern to collapse in much the same way that Bismarck's had, revealing a serious design flaw in the kreigsmarine capital ships (This flaw was subsequently repaired with additional structural reinforcements among the entire fleet). As for Eugen, the damaged parts, including her rudders, were cut away, and she travelled back to Kiel for permanent repairs.
On the way, while her crew was using a pair of jury-rigged rudders and a capstan to steer her, she smugged her way through an attack from 46 bombers and torpedo bombers without a scratch.
When your steering is controlled by literal man-power and you dodge 46 dive bomb and torpedo attacks without so much as getting a splinter, you get to wear deal with it shades, too.
With increasing domination of the skies preventing Eugen's Redeployment to the North Cape with Scharnhorst, she spent 9 months after repairs training officer cadets in the Baltic, Then was ordered to act as gunnery support for the Wehrmacht, covering the retreat from Finland as the Soviet Army found it had more men than the Germans had bullets. During the months of her patrolling and smacking any Soviet unit with volleys of eight-inch shells, she worked in concert with Lutzow, whom AL players know better as Deutschland; she also spent time with Leipzig, which ended in tragedy for the older cruiser when a combination of heavy fog and an engine issue caused Eugen to ram Leipzig amidships, nearly bisecting the smaller ship and wedging both vessels together for 14 hours.
This is why Leipzig has issues with fainting; she was considered a total loss and only patched enough to stay floating. She still evacuated some 3,000 civilians over a thousand miles during the Soviet advance into Germany.
In her last months of World War 2, Eugen spent most of her time hammering Soviets, until ammunition shortages stopped her one-ship rampage along the Baltic coast; From January to March 1945, she unloaded some 2,900 8" shells and another 2,445 4.1" shells into the Soviet advance; in the last weeks of the war, she was deployed to Swinemünde, which is in modern Poland; it was there, less than three weeks before the end of the war in Europe that Eugen watched as Lutzow was destroyed by a single hit from a Tallboy bunker-penetrating bomb.
And that was Prinz Eugen's War career.
As for post-war, well, her mere existence nearly caused a small war of its own.
Of Eugen's post-war crew, some 570 of the 600 were German. And on May 1, 1946, the German crew were officially discharged of duty, and returned home. Within a week, 11 of Eugen's 12 boilers had failed comprehensively, allegedly because the American crew assigned to the ship never bothered to read the manuals that had been left behind... because the manuals were in German.
Forward thinking, ladies and gents!
In part due to being a war prize, and in part due to the notoriously cranky engines within the heavy cruiser, Prinz Eugen was slated for the Crossroads Atomic tests, which was the USAF's attempt to argue that warships were not needed because Nuclear weapons would sink them.
Prinz Eugen proceeded to tank two nuclear weapons to the chin, with both the Able and Baker detonations occurring less than 1,000 metres from her; with only a broken shaft seal for her troubles, she was towed from Bikini Atoll to Kwajalein Atoll, being too radioactive to be maintained; Five months after being nuked twice, with progressive flooding from the broken shaft seal having remained unmaintained since then, Prinz Eugen capsized and sank in shallow water; her stern and propeller assembly remains above-water, though one of the propellers has been removed as a memorial.
And Here lies the Lucky Prince, showing her ass to the world.
Honestly, there's going to be a lot of Denmark Strait in the first half of this post, because that battle was honestly kinda brutal, both in the morale hit, and in the death toll.
So, we left off with Hood being turned into a Funeral Pyre for 1,415 men, with all of Three survivors of her incredibly violent and quick death.
This left Prince of Wales alone, facing down the guns of both Bismarck and Prinz Eugen, and unable to maneuver away because Hood's burning wreck is on the left, and running over possible survivors is considered poor form.
Continuing with quotes Sourced from both wikipedia and history books on my desk (Discovery of the Bismarck, by Doctor Robert Ballard, 1991), let's see how Wales fared with her guns having teething issues and two capital ships hosing her down with high-calibre shells, hmm?
Leach's gunners had found their range; as Wales maneuvered around Hood's wreck, her ninth salvo found their mark. But there was no time to savour that minor triumph. A shell from Bismarck's next barrage bowled through the captain's bridge, killing everyone save Leach and his navigating officer, who was wounded.
Because she shell did not explode, few people were aware of the catastrophe; in the plotting room, one deck below, none realized anything was amiss until blood dripped onto the charts from the communication voicepipe that led to the bridge.
Undaunted, Wales soldiered on into the withering fire laid down by Bismarck and Prinz Eugen. But she suffered more hits, seven in quick succession, while her own guns, still undergoing teething pains, malfunctioned. Never did she have all ten working at once.
First the forward turret jammed, and was unable to function, causing Captain Leach to choose discretion over suicide and turn his ship away, laying down smoke to cover his retreat.
As he did so, the aft turret jammed, leaving only one of his ten guns in action. He had lost a few dozen crew, nine more wounded, and his ship was in bad shape.
There was heavy damage topside and flooding aft; one shell had hit at the waterline, and one just below, sending water pouring into Wales' innards.
For her part, Wales gave nearly as good as she got, actually managing to clobber Bismarck three times, which, considering the brand-new battleship's teething issues, was a remarkable display.
Yes, Wikipedia makes that sound so dry. Let's see what an actual history book has to say, hmm?One shell struck the commander's boat and put the seaplane catapult amidships out of action (the latter damage not being discovered until much later, during an attempt to fly off the ship's War Diary on the eve of her final battle).
The second shell passed through the bow from one side to the other without exploding.
The third struck the hull underwater and burst inside the ship, flooding a generator room and damaging the bulkhead to an adjoining boiler room, partially flooding it.
As for Hood's crew?Hans Zimmerman and his mates in the aft boiler room felt the impact when one shell from Prince of Wales hit beneath the armoured belt, penetrating to the torpedo bulkhead before exploding. That caused flooding in the port forward generator room and slow seepage into the forward port boiler room; as a precautionary measure, both were shut down, reducing Bismarck's maximum speed to 28 knots.
More serious was the hit forward, where a shell had punched clean through the ship. The holes were above the waterline, but not above the wave thrown up by the bow, and water was pouring in. The shell had also damaged the transverse bulkhead separating the adjacent compartments, and both began to rapidly flood; by the time the shooting had stopped at 6:10, over a thousand tons of water had poured into the ship, requiring that the bulkheads between compartments 20 and 21 be shored up to prevent further damage. The holes themselves were patched with collision mats, which slowed, but did not stop the aquatic infiltration.
Due to the flooding, Bismarck was down by the bow and listing to port, badly enough to partially lift her starboard propeller partly out of the water, which was corrected by flooding two ballast tanks aft.
Prinz Eugen, with her much thinner armour and having been the subject of Hood and Wales' tender mercies before the British ships had shifted their target to Bismarck, had escaped untouched; the only evidence she had even been in battle was a large shell splinter - a remnant of Wales' first Salvo - that had landed on her deck near the funnel.
Eugen swapped position twice that day, once to trail behind Bismarck to check upon the amount of fuel leaking from the battleship's wounds, before again leading the way; this was to prepare her for being detached from the battleship to continue the original mission of surface raiding and harassment; a combination of Zig-Zag movement by the British ships to throw off the aim of possible U-boat contacts, followed by Bismarck looping back on her own course to open fire at the pursuing heavy cruisers and Prince of Wales for a second go allowed Eugen to slip away into the night.Among the wreckage and the slick of fuel oil that marked Hood's grave, three men still clung to life. They had each managed to find life rafts that had bobbed free of the sunken ship. For a time, they grappled together, cheering each other with talk of imminent rescue. But cold and fatigue forced them to let slip their grasps. Soon they lay slumped in a numb half-sleep, drifting towards hypothermia as their rafts floated aimlessly in the swells.
Two hours after the battle, the destroyers that had been left behind by Hood's dawn charge arrived on the scene. HMS Electra was the first to spot the three lonely rafts. One of the officers aboard, Leftenant-Commander J.T. Cain wondered where the rest of the survivors could be; "Where were the boats, the rafts, the floats. And the men, where were the men? I thought of how we had last seen Hood; I thought of her impressive company. Like a small army they'd looked, as they mustered for divisions. Then I thought of my words to Doc. 'We'll need everyone we've got to help the poor devils on board.'"
It is difficult for anyone not living in Britain then to comprehend the impact of this event on British pride and morale. It was as much a shock and humiliation as the Japanese attack on Pearl Harbour would be to Americans not seven months later.
"For most Englishmen the news of the Hood's death was traumatic, as though Buckingham Palace had been laid flat or the Prime Minister assassinated, so integral a part was she of the fabric of Britain and the empire. Admiral Wake-Walker, announcing the tragedy to the Admiralty and the world with his laconic signal 'Hood has blown up', felt compelled to classify it 'Secret', as though somehow this might prevent the dreadful news from reaching Hitler. Many people simply chose not to believe it."
(The two battleships traded 12 and 9 salvoes between them, neither scoring a hit.)
Three days Later, Bismarck would be brought to heel and Sunk in a massive battle involving the battleships King George V and Rodney, The Aircraft Carrier Ark Royal, The Heavy Cruisers Norfolk and Dorsetshire, the Light Cruiser Sheffield, and the Destroyers Cossack, Maori, Sikh, Zulu, Mashona, Tartar, and ORP Piorun (Of the Free Polish Navy).
Eugen's own attempt to raid convoys would swiftly come to an end, not in battle, but due to mechanical issues; the heavy cruiser's engines, generally considered temperamental due to being a high-performance design, ended up having some defects in construction rear their ugly heads and cut short her trek; refuelling twice on the 26th and 29th of May, one of her generator rooms broke down, followed by cooling issues in her port-side middle boiler room, which cut her speed.
On the 1st of June, 1941, Prinz Eugen made port at Brest, where she immediately entered Drydock for repairs, alongside Scharnhorst and Gneisenau.
Brest, by its very location, was well within the range of British Bombers, and the threat of two battleships and a heavy cruiser running rampant meant that the port was a priority target for the duration of the warships' stay there. During their stay in Brest, Prinz Eugen, Scharnhorst, and Gneisenau were repeatedly attacked, to the point that the Royal Air Force jokingly referred to the three ships as the Brest Bomb Target Flotilla.
Despite their best attempts, however, only one bomb caused damage to Eugen, when an Armour-piercing bomb managed to plant itself directly into the armoured control centre underneath the cruiser's bridge, effectively disabling her guns until repairs were completed at the end of 1941.
German High command soon decided that the French base was untenable, and with Hitler arguing that stopping the allied convoys to the Soviet Union being a greater priority, he ordered the three capital ships to redeploy, as well as using the English Channel to do so.
Now, as many with a grasp of geography might tell you, the English Channel was one of the most-heavily-contested, patrolled, mined, and dangerous areas of water at the time. So the idea of sending three capital ships through what amounts to a narrow slot with guns on all sides sounds suicidal at best.
And yet, on the night of February 11th, 1942, Prinz Eugen, Scharnhorst, and Gneisenau roared through the channel at top speed, middle fingers upraised, laughing uproariously at the British response, which had been delayed by 12 hours; it was only after the three German ships passed the Cliffs of Dover was there an attempt to intercept the ships, and the British aerial response was promptly jumped on by the Luftwaffles and shot to shreds (One of the only times the Luftwaffe wasn't doing dirty to the Kreigsmarine, as shown by the 'Friendly Fire' incident that sunk Z1 and Z3)
Eugen using her 105mm Dual-purpose guns to take potshots at Spitfires and Swordfish torpedo bombers during the Channel Dash
During the Dash, Eugen was shot at by coastal artillery, intercepted by Motor Torpedo Boats, Several squadrons of planes, and, within the last leg, on February 13, a half-dozen British Destroyers (of which she promptly slapped HMS Worcester with a barrage of 8" shells). Of the three capital ships involved, none had taken damage, but one of Eugen's crewmen had died, having been perforated by aircraft guns.
Subsequently sent up to Norway, Eugen's Norwegian service lasted for all of two days before the British Submarine Trident plunked a pair of torpedoes into Eugen's rump, causing her stern to collapse in much the same way that Bismarck's had, revealing a serious design flaw in the kreigsmarine capital ships (This flaw was subsequently repaired with additional structural reinforcements among the entire fleet). As for Eugen, the damaged parts, including her rudders, were cut away, and she travelled back to Kiel for permanent repairs.
On the way, while her crew was using a pair of jury-rigged rudders and a capstan to steer her, she smugged her way through an attack from 46 bombers and torpedo bombers without a scratch.
When your steering is controlled by literal man-power and you dodge 46 dive bomb and torpedo attacks without so much as getting a splinter, you get to wear deal with it shades, too.
With increasing domination of the skies preventing Eugen's Redeployment to the North Cape with Scharnhorst, she spent 9 months after repairs training officer cadets in the Baltic, Then was ordered to act as gunnery support for the Wehrmacht, covering the retreat from Finland as the Soviet Army found it had more men than the Germans had bullets. During the months of her patrolling and smacking any Soviet unit with volleys of eight-inch shells, she worked in concert with Lutzow, whom AL players know better as Deutschland; she also spent time with Leipzig, which ended in tragedy for the older cruiser when a combination of heavy fog and an engine issue caused Eugen to ram Leipzig amidships, nearly bisecting the smaller ship and wedging both vessels together for 14 hours.
This is why Leipzig has issues with fainting; she was considered a total loss and only patched enough to stay floating. She still evacuated some 3,000 civilians over a thousand miles during the Soviet advance into Germany.
In her last months of World War 2, Eugen spent most of her time hammering Soviets, until ammunition shortages stopped her one-ship rampage along the Baltic coast; From January to March 1945, she unloaded some 2,900 8" shells and another 2,445 4.1" shells into the Soviet advance; in the last weeks of the war, she was deployed to Swinemünde, which is in modern Poland; it was there, less than three weeks before the end of the war in Europe that Eugen watched as Lutzow was destroyed by a single hit from a Tallboy bunker-penetrating bomb.
And that was Prinz Eugen's War career.
As for post-war, well, her mere existence nearly caused a small war of its own.
Eugen then set sail for Boston, taking a week to cruise the January Atlantic; While at Boston, USN eggheads crawled all over the ship, removing her Hydrophone array for testing upon Submarines (In fact, the Prinz Eugen's Hydrophone and Sonar arrays are the progenitor of modern American sound-detection apparatus within their military vessels), while other scientists gained a renewed interest in magnetic amplifiers, which were the predecessor to the modern transistor.On 27 May 1945, Prinz Eugen and the light cruiser Nürnberg—the only major German naval vessels to survive the war in serviceable condition—were escorted by the British cruisers Dido and Devonshire to Wilhelmshaven, where the ships were temporarily interred. On 13 December, Prinz Eugen was awarded as a war prize to the United States, which sent the ship to Wesermünde.
The United States did not particularly want the cruiser, but it did want to prevent the Soviet Union from acquiring it. Her US commander, Captain Arthur H. Graubart, recounted later how the British, Soviet and US representatives in the Control Commission all claimed the ship and how in the end the various large prizes were divided in three lots, Prinz Eugen being one of them. The three lots were then drawn lottery style from his hat with the British and Soviet representatives drawing the lots for other ships and Graubart being left with the lot for Prinz Eugen.
Of Eugen's post-war crew, some 570 of the 600 were German. And on May 1, 1946, the German crew were officially discharged of duty, and returned home. Within a week, 11 of Eugen's 12 boilers had failed comprehensively, allegedly because the American crew assigned to the ship never bothered to read the manuals that had been left behind... because the manuals were in German.
Forward thinking, ladies and gents!
In part due to being a war prize, and in part due to the notoriously cranky engines within the heavy cruiser, Prinz Eugen was slated for the Crossroads Atomic tests, which was the USAF's attempt to argue that warships were not needed because Nuclear weapons would sink them.
Prinz Eugen proceeded to tank two nuclear weapons to the chin, with both the Able and Baker detonations occurring less than 1,000 metres from her; with only a broken shaft seal for her troubles, she was towed from Bikini Atoll to Kwajalein Atoll, being too radioactive to be maintained; Five months after being nuked twice, with progressive flooding from the broken shaft seal having remained unmaintained since then, Prinz Eugen capsized and sank in shallow water; her stern and propeller assembly remains above-water, though one of the propellers has been removed as a memorial.
And Here lies the Lucky Prince, showing her ass to the world.
-
- Site Admin
Oh, how Pride cometh before a fall, Grump...Salted Grump wrote: ↑Fri Aug 07, 2020 1:24 amAnd because Jamie will Never Get her, I'm tempted to add Mogami to the list, because good god, that poor girl had the WORST luck. Ever.

It's legendary.
To the point the IJA, which was known for assassinating IJN officers, felt so bad for Mogami that they refused to bully her.
Edit: Mogami's luck, in a single image.
To the point the IJA, which was known for assassinating IJN officers, felt so bad for Mogami that they refused to bully her.
Edit: Mogami's luck, in a single image.


If you say so
Costuming criticisms and musings will be on the way!
...whenever the next update comes out. In the meantime, I'll just try and catch up on these updates.
___________________________________________________________________________________________
E: Yes, hi, I'm Twybil and I for some reason started seriously evaluating anime outfits in the LP discord somehow
I don't know where and or how it happened, but here I am
Oh, and I did like a two hour lecture on the history of feminine chestwear in the NSFW channel because, well
...I don't know really. But I did.
Okay, it's been a few days, and I'm feeling lightly punchy, so let's take a look at probably the least-lucky ship in the Japanese Navy.
Mogami.
Lead of her class, Mogami was a spectacularly unlucky cruiser, having to deal with being a mobile treaty violation, having experimental construction techniques used that ended up creating stress fractures the first time she fired her guns, being built around the concept that her guns could be swapped out for bigger guns (again, treaty loophole), and that's not even getting into the three times she ended up ramming allied ships, or the time she fired the most-successful torpedo spread in the history of warfare, sinking five ships with six torpedoes.
Too bad for her that they were on her side. Whoops.
So, as usual, brass tacks and specifications.
Mogami was technically a Light Cruiser when she was completed in 1935, toting fifteen 155mm guns (6.1 inch) in five turrets, a brace of 5-inch secondary guns, and four triple-tube torpedo launchers, with a full set of reloads.
What made her notable is that Japan claimed that she weighed 8,500 tons, causing the rest of the world to go 'Either that ship is made of cardboard, or someone's lying through their teeth.'
On the flipside, she had an 8,000 mile range at her cruising speed of 20 knots, and a top soeed of 37 knots, which was honestly obscenely quick for a cruiser.
Two years after her completion and an incredibly expensive rebuild to rectify the design flaws caused by the use of electric welding for the first time, the Japanese Navy pulled out their 'We have a sneaky secret' card, and revealed that the Mogami-class were not actually Light cruisers, but had been designed so their turret barbettes were capable of accepting the 203mm (8 inch) twin turrets that were on the older Takao-class cruisers.
So, tada, Four new heavy Cruisers that turned out to be some of the best-designed and most-reliable ships Japan produced during the timeframe; Mogami took her fair share of hard knocks before her death at Suriago Strait in 1944, and her siblings were just as hard to put down.
Now, with the benefit of hindsight, the IJN construction doctrine of 'Every successive Design MUST be superior to everything else in its category' is pretty much the main source of issues and blame for projects like the Yamato-class battleships, or the Taihou, or the dickjousting competition that turbofucked the Shinano. Mogami was just the first victim of that doctrine, as all her issues were caused by the demand of superiority, when a simpler design would've been 'good enough' by any other standard.
As for Mogami's career, well, Let's start with some sass, borrowed from the Azur Lane EN reddit.

'Not Lucky' is British-tier Understatement
While Tambor's torpedos missed, Mikuma misinterpreted a flag signal, and while her siblings turned only 45 degrees to port, she swung around by 90 degrees, causing Mogami to promptly t-bone her sister.
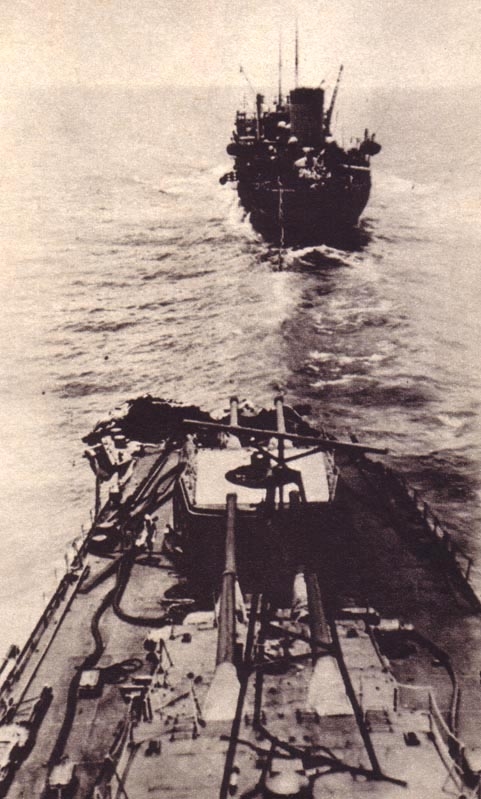
You could say that her nose is out of joint.

This photo was taken by one of the Dauntless bombers as it buzzed Mogami; as you can see, she got Beat The Fuck Up.
Returning to Truk Lagoon, which was the IJN's main staging base in the Pacific, Mogami was quickly repaired, then sent back to Japan for more-comprehensive repair work. Which had her converted into an Aviation cruiser, with all the facepalming you might wish to do due to the logic of converting a frontline combat vessel into the bastard hybrid of a Cruiser and a Seaplane carrier.
It's almost like IJN High Command didn't learn that aviation fuel is highly combustible and doesn't like being shot at.
Anyhow, the removal of Mogami's aft turrets and using the empty barbettes as fuel and ammunition storage took until Mid-1943, And, upon being recommissioned, she promptly traded paint with a tanker, the Toa Maru, in Tokyo Bay. Whoops.
Needless to say, the hits kept coming, with Mogami being deployed to the Solomons and Marshall islands to try and pursue American fleet elements. From May until November, she had no luck finding anything. And then one of Saratoga's Dauntless Dive Bombers planted a 500-pound can of boom on the cruiser, which lit Mogami on fire. She survived, patched the hole, and got sent right back out in time to act as a screening element in the Great Marianas Turkey Shoot, which broke the back of the IJN Air Arm, to the point that Japan's last surviving fleet carrier, Zuikaku, would be used as an unarmed sacrifice to draw away American Fleet elements at the battle of Leyte Gulf four months later.
And at Leyte Gulf, Mogami met her end.
Working to get her happiness up via the game's mechanics has her slowly ease off of the negativity, though she still has no idea what anyone would see in her.
Combat-wise, she is, by far, the best IJN Cruiser in the game, Post-retrofit. Though, even her own skills dunk on her, with her Retrofit skill being, quite literally, an accuracy boost every time 5 of her torpedoes hit.
So go and give her a hug. She needs it.
Mogami.
Lead of her class, Mogami was a spectacularly unlucky cruiser, having to deal with being a mobile treaty violation, having experimental construction techniques used that ended up creating stress fractures the first time she fired her guns, being built around the concept that her guns could be swapped out for bigger guns (again, treaty loophole), and that's not even getting into the three times she ended up ramming allied ships, or the time she fired the most-successful torpedo spread in the history of warfare, sinking five ships with six torpedoes.
Too bad for her that they were on her side. Whoops.
So, as usual, brass tacks and specifications.
Mogami was technically a Light Cruiser when she was completed in 1935, toting fifteen 155mm guns (6.1 inch) in five turrets, a brace of 5-inch secondary guns, and four triple-tube torpedo launchers, with a full set of reloads.
What made her notable is that Japan claimed that she weighed 8,500 tons, causing the rest of the world to go 'Either that ship is made of cardboard, or someone's lying through their teeth.'
On the flipside, she had an 8,000 mile range at her cruising speed of 20 knots, and a top soeed of 37 knots, which was honestly obscenely quick for a cruiser.
Two years after her completion and an incredibly expensive rebuild to rectify the design flaws caused by the use of electric welding for the first time, the Japanese Navy pulled out their 'We have a sneaky secret' card, and revealed that the Mogami-class were not actually Light cruisers, but had been designed so their turret barbettes were capable of accepting the 203mm (8 inch) twin turrets that were on the older Takao-class cruisers.
So, tada, Four new heavy Cruisers that turned out to be some of the best-designed and most-reliable ships Japan produced during the timeframe; Mogami took her fair share of hard knocks before her death at Suriago Strait in 1944, and her siblings were just as hard to put down.
Now, with the benefit of hindsight, the IJN construction doctrine of 'Every successive Design MUST be superior to everything else in its category' is pretty much the main source of issues and blame for projects like the Yamato-class battleships, or the Taihou, or the dickjousting competition that turbofucked the Shinano. Mogami was just the first victim of that doctrine, as all her issues were caused by the demand of superiority, when a simpler design would've been 'good enough' by any other standard.
As for Mogami's career, well, Let's start with some sass, borrowed from the Azur Lane EN reddit.
'Not Lucky' is British-tier Understatement
Mogami was at Midway, too, serving as heavy escort with all her younger sisters, Mikuma, Suzuya, and Kumano, as part of Cruiser Division 7. Ordered by Admiral Yamamoto to shell the island, the Cruisers sprinted forward through heavy seas, their escorting destroyers falling behind, until Yamamoto cancelled the previous order; This, however, left the four siblings in range of the submarine USS Tambor, who promptly opened fire as the cruisers turned to evade.At thirty-three minutes to midnight, in the battle of the Sunda Strait, the Mogami fired six torpedoes in the direction of the USS Houston. This volley was later described as one of the most effective of the Pacific War, as five of the six torpedoes found a target. Unfortunately, they missed the Houston and ran on towards Bantam Bay, where the Japanese had their invasion fleet at anchor.
A few minutes later, five heavy explosions lit up the night. The transporters Horai Maru, Sakura Maru, Tatsuno Maru and Ryujo Maru all sank in the shallow waters of the bay (the latter two were later raised by the Japanese). Additionally, the Japanese minesweeper W2 was hit and sunk.
Six torpedoes, five hits, five friendlies sunk.
See, just like USS William D Porter's follies around Iowa (depth charge allegedly fell out of a rack while armed, causing the fleet to panic, then accidentally fired a torpedo at the Iowa while the president was aboard), Mogami actually ganked a superior officer. But the transport she sank at Sunda Strait was no ordinary transport. No. It happened to be the one that carried Lt. General Imamura, the overall commander of the IJA invasion force.
Imamura had to swim to shore on his own. In his after action report, he lauded the bravery of the crew of the Houston and praised the accuracy of her torpedoes. When some aide at HQ helpfully pointed out that Houston had no torpedoes, Imamura thought for a bit, and said, "well, count the kill for the Houston anyways."*
Yes, the Mogami was such an embarrassment to the IJN that even the IJA couldn't stomach picking on them anymore.
While Tambor's torpedos missed, Mikuma misinterpreted a flag signal, and while her siblings turned only 45 degrees to port, she swung around by 90 degrees, causing Mogami to promptly t-bone her sister.
You could say that her nose is out of joint.
Mogami's bow caved in and she was badly damaged. Mikuma's portside oil tanks ruptured and she began to spill oil, but otherwise her damage was slight. Arashio and Asashio were ordered to stay behind and escort the two damaged cruisers. At 0534, the retreating ships were bombed from high altitude by eight B-17 Flying Fortresses from Midway's airbase, but they scored no hits. At 0805 on the same day, six SBD Dauntless dive-bombers and six SB2U Vindicators, also from Midway attacked Mikuma and Mogami but they only achieved several near-misses.
The following morning, June 6 1942, Mikuma and Mogami were heading for Wake Island when they were attacked by three waves of 31 SBD Dauntless dive-bombers from the aircraft carriers USS Enterprise and Hornet.
Mikuma was hit by at least five bombs and set afire. Her torpedoes ignited and the resultant explosions destroyed the ship. (This is a lesson, ladies and gentlemen. Namely, Oxygen fuel is as dangerous to you as it is to your enemies)
Arashio and Asashio were each hit by a bomb.
Mogami was hit by six bombs, ending up with her Fifth turret completely destroyed, and a significant amount of her upper works bashed to hell.
This photo was taken by one of the Dauntless bombers as it buzzed Mogami; as you can see, she got Beat The Fuck Up.
Returning to Truk Lagoon, which was the IJN's main staging base in the Pacific, Mogami was quickly repaired, then sent back to Japan for more-comprehensive repair work. Which had her converted into an Aviation cruiser, with all the facepalming you might wish to do due to the logic of converting a frontline combat vessel into the bastard hybrid of a Cruiser and a Seaplane carrier.
It's almost like IJN High Command didn't learn that aviation fuel is highly combustible and doesn't like being shot at.
Anyhow, the removal of Mogami's aft turrets and using the empty barbettes as fuel and ammunition storage took until Mid-1943, And, upon being recommissioned, she promptly traded paint with a tanker, the Toa Maru, in Tokyo Bay. Whoops.
Needless to say, the hits kept coming, with Mogami being deployed to the Solomons and Marshall islands to try and pursue American fleet elements. From May until November, she had no luck finding anything. And then one of Saratoga's Dauntless Dive Bombers planted a 500-pound can of boom on the cruiser, which lit Mogami on fire. She survived, patched the hole, and got sent right back out in time to act as a screening element in the Great Marianas Turkey Shoot, which broke the back of the IJN Air Arm, to the point that Japan's last surviving fleet carrier, Zuikaku, would be used as an unarmed sacrifice to draw away American Fleet elements at the battle of Leyte Gulf four months later.
And at Leyte Gulf, Mogami met her end.
Character-wise, in the game, I really do like Mogami. She's quiet, shy, has self-esteem issues, and just wants to get things done; Her battle history has left her with the opinion that she shouldn't even be called an older sister by her own siblings, though, so she doesn't believe anything good will happen to her.On 25 October, 1944, around 3:00 AM, Admiral Nishimura's assault force was attacked by American PT boats and destroyers. Battleships Fusō and Yamashiro were hit by torpedoes, the destroyer Yamagumo was sunk, and the destroyer Michishio disabled, but Mogami was not hit.
Fusō and Yamashiro both later sank. (Nishimura's entire fleet was massacred; the only survivor of the Suriago Strait attack force was the destroyer Shigure)
Between 3:50 and 4:02, after entering the Surigao Strait, Mogami was struck by four 8-inch shells from the heavy cruiser USS Portland ("Indy-chan Kawaiiii"), which destroyed both the bridge and the air defense center. Both the captain and executive officer were killed on the bridge, and the chief gunnery officer assumed command.
While attempting to retire southward, the flagship of Admiral Shima, Nachi, collided with Mogami. (And that's Mogami's third crash, though I can't really blame her, having been effectively decapitated and fighting at night)
Nachi's bow was damaged (read: Nearly ripped off) and she began to flood. Mogami was holed starboard above the waterline, but fires ignited five torpedoes that exploded and disabled her starboard engine.
Between 5:30 and 5:35, the crippled Mogami was hit again by ten to twenty 6-inch and 8-inch shells from the cruisers Portland, Louisville and Denver. (Louisville was one of the surviving Northampton-class cruisers, so this could be considered payback for Mogami helping take apart Houston at Sunda Strait)
At 8:30, Mogami's port engine broke down. Half an hour later, while adrift, she was attacked by 17 TBF Avenger torpedo-bombers from Task Group 77.4.1 and was hit by two 500-lb. bombs.
Finally, At 10:47, Mogami's crew abandoned ship, though she stayed afloat for the next two hours, still burning.
At 12:40, the destroyer Akebono was ordered to scuttle Mogami, and did so with a single Torpedo. She finally sank at 1:07 PM.
Working to get her happiness up via the game's mechanics has her slowly ease off of the negativity, though she still has no idea what anyone would see in her.
Combat-wise, she is, by far, the best IJN Cruiser in the game, Post-retrofit. Though, even her own skills dunk on her, with her Retrofit skill being, quite literally, an accuracy boost every time 5 of her torpedoes hit.
So go and give her a hug. She needs it.
Last edited by Salted Grump on Wed Aug 19, 2020 4:31 am, edited 1 time in total.
So, design-wise there's not too much I can call out here, but there is still some stuff. The tactiskirt is fine if you don't mind going really short, the heels seem to be normal, and the stockings seem to have some buttoning at the top, which could be nice. The stretch fabric bra has both neck and back support, which I appreciate, and the overall vacuum look it has going wouldn't be incredibly awful to achieve given it seems to end right at the chest. Normally, I'd prefer at least small band of some kind, but the design should be safe given it seems to go under a bit.
However, if that is some kind of buttoning, I only see one button at the bottom to begin with which makes me assume there would have to be another, and that would mean it's under the steel fronted garter things. At first I thought the first garter was going around both legs, but on a much closer inspection it seems it just goes around the the thigh and there just happens to be a garter of some kind at the bottom.
More concerningly, the metal curiass is also somewhat problematic specifically with the parts that run right up the sides of her breast. I'd be somewhat concerned they wouldn't be a risk of self injury in some way- you'd have to take a lot of excess precautions to make sure there's no way that could end up cutting you. It would've been more simple had it just joined with the plate in the front just a bit lower from where it is now.
The only other thing I could really point out is that the metal armguard on that sleeve looks too large to even stay on the arm as is. I imagine it's attached to some sort of small clasped bracer (cloth, leather, metal, etc) underneath what we can see, which would be located at right above the elbow, runs up the bicep some, and then expands out to the armguard, holding it it's present place.
As a last aside, you'd probably want the back of the tactiskirt perhaps just a bit longer than the front because on estimation, it looks like it's just enough to not be showing hindside, if it isn't already. Though for the ship's history, I'm not sure that would even be out of place.
Not as far as I can recall.
There's the occasional side-event where you have to beat X mission Y times with Z ship in fleet and not sink her, but those are pretty much exclusively for chat cosmetics.
Honestly, I'd sincerely suggest doing the events for the story; The Current one (Scherzo of Iron and Blood) is one of the strongest in the game, because it ties off the loose ends left by the very opening, and is also a tragedy in its own right.
Alright then, it'd be pretty poor form to ignore a recommendation from the lore master. I am learning that trying to juggle three mobile games at once might be a tad more time consuming than I previously thought. It's a sign, completed the first mission and got Glowworm, guess I'm in for the long haul now.
-
- Site Admin
It's also well worth following the Azur Lane twitter account, not least because it updates you on what's coming, but also because occasionally, it asks for survey responses, like it is now. And filling those out gets you rewards.
So, a Little teaser for my next historypost:
"Wait... So essentially the reason why Illustrious has the huge 'bulges' in-game is because she was deformed during an attack and the bulges are reconstructive surgery?"
The long and short of it is 'Yes'.
The blackly-humoured joke among her flight crews about her flight deck being 'gently undulating' sprang up from one of these near fatal encounters.
Lusty took her share of horrendous beatings over the course of the war. Like Enterprise and Warspite, she's a survivor.
-
- Site Admin
Okay, so... A fun little side update!
SIDE UPDATE: CHALLENGE MODE
So, even knowing this is out of order, let’s talk about a very special Commander Level. Specifically, Level 80, and what it unlocks… Challenge Mode.
It’s a good way of figuring out builds, but expect to get the tar beaten out of you
If you thought getting to the end of the campaign was a bastard, have I got news for you. Challenge Mode is worse. Level 120 fleets only need apply, and those with good synergy, and good defenses. Because, while there’s only five boss fights, they all have 50 health bars, and they are all bullet hell bosses in some fashion or another.
As shown in the video, Tirpitz is relatively gentle
Relatively. May God have mercy on you if Enty happens (and she can), because she won’t.
Beyond a chat frame for successfully beating four out of the five bosses? No reward beyond the pride of having done the thing. Much like, to be honest, all chat frames. Common bosses for a season of Challenge Mode include, but are not limited to: Atago or Takao, Laffey, Javelin, Z23, Zuikaku… But every now and again, you get one that you weren’t expecting.
Basically, Challenge mode looks at the top 30 or thereabouts from the annual popularity poll, gives them all about 500 tons of anabolic steroids, and tells the girls that you insulted their mother.
My first, for this video, was Tirpitz, noted Iron Blood shitkicker. And I am proud of, on my first try on manual, beating her, and taking 16 and some change health bars off Atago.
I will never expect to beat Challenge Mode. But damn if it isn’t fun to try sometimes.
I have beaten it, but that was a fluke. It’s fun to check out because of how ludicrous the bullet waves are; makes later stages in Touhou look sedate and demure.
Wow, Grump admitting something was a fluke? I thought I’d never see the day!
I also play almost-exclusively on Auto mode
The upside? Your artillery is much more likely to hit, and you aren’t momentarily stopped while the artillery fires up (annoys the shit out of me, that)
The downside? They will faceplant every bullet.
So, yeah. Challenge Mode lives up to its name, I suggest you check it out on occasion, but it’s little more than a testbed for fleet composition and trying to not expire messily. Levelcapped and gear-capped girls are a must.
SIDE UPDATE: CHALLENGE MODE
So, even knowing this is out of order, let’s talk about a very special Commander Level. Specifically, Level 80, and what it unlocks… Challenge Mode.
It’s a good way of figuring out builds, but expect to get the tar beaten out of youIf you thought getting to the end of the campaign was a bastard, have I got news for you. Challenge Mode is worse. Level 120 fleets only need apply, and those with good synergy, and good defenses. Because, while there’s only five boss fights, they all have 50 health bars, and they are all bullet hell bosses in some fashion or another.
As shown in the video, Tirpitz is relatively gentleRelatively. May God have mercy on you if Enty happens (and she can), because she won’t.
Beyond a chat frame for successfully beating four out of the five bosses? No reward beyond the pride of having done the thing. Much like, to be honest, all chat frames. Common bosses for a season of Challenge Mode include, but are not limited to: Atago or Takao, Laffey, Javelin, Z23, Zuikaku… But every now and again, you get one that you weren’t expecting.
Basically, Challenge mode looks at the top 30 or thereabouts from the annual popularity poll, gives them all about 500 tons of anabolic steroids, and tells the girls that you insulted their mother.My first, for this video, was Tirpitz, noted Iron Blood shitkicker. And I am proud of, on my first try on manual, beating her, and taking 16 and some change health bars off Atago.
I will never expect to beat Challenge Mode. But damn if it isn’t fun to try sometimes.
I have beaten it, but that was a fluke. It’s fun to check out because of how ludicrous the bullet waves are; makes later stages in Touhou look sedate and demure.Wow, Grump admitting something was a fluke? I thought I’d never see the day!
I also play almost-exclusively on Auto modeThe upside? Your artillery is much more likely to hit, and you aren’t momentarily stopped while the artillery fires up (annoys the shit out of me, that)
The downside? They will faceplant every bullet.
So, yeah. Challenge Mode lives up to its name, I suggest you check it out on occasion, but it’s little more than a testbed for fleet composition and trying to not expire messily. Levelcapped and gear-capped girls are a must.So, once more unto the historyposts, Let us look at a single two-week span in the Mediterranean Ocean, in January, 1941.
The Med was an utter hotbed of activity for almost all of the war, chewing up ships and crews in bloody actions that only tapered off after the collapse of the African Front and Italy's surrender in late 1943.
And, in November 1940, HMS Illustrious, with 18 Swordfish biplanes (known as stringbags for being able to carry damn near anything), proceeded to poke holes in a half-dozen major italian warships, including two battleships, and blew up most of the Italian Navy's strategic fuel reserves.
And that action, the attack on Taranto harbour, carried long-reaching consequences. Firstly, it hamstrung the Italian's big ships. Secondly, it directly inspired Pearl Harbour, some 13 months later. And Thirdly? It prompted the Nazis to send one of their best-trained and best-skilled Flight Corps to the Med to paint a target on Illustrious.

This is Illustrious.

This is also Illustrious.
Don't let her soft looks fool you, this young lady is a survivor, through and through.
Now, let's look at what became known as The Illustrious Blitz.
January 10th, 1941 (Friday) - Operation Excess Day IV
Having been shadowed by the submarine Ruggero Settimo, at dawn, convoy MC 4 is attacked by the Italian corvettes Circe and Vega which launch torpedoes at the convoy ships. The Ruggero Settimo contributes its own spread of torpedoes to the attack.
All the torpedoes miss.
Writers Note: (-‸ლ)
The Dido-class AA light cruiser Bonaventure and the destroyers Hereward and Jaguar give pursuit and Vega is run down and destroyed. During the pursuit, the Bonaventure is struck by return fire, and one rating was killed with another four wounded, one dying the following day. Both Ruggero Settimo and Circe escape, the latter going on to further menace the Royal Navy's Silent Service.
Writers Note: Fear the angry little boat. She scalped the HMS Grampus, HMS Union, HMS P38 and HMS Tempest. (Say what you will of the Italian Command, but their fast moving light ships were holy terrors for the duration of the Mediterranean conflict)
At 0815 hrs, Convoy MC 4 finally rendezvous with Sir Andrew Cunningham's Force A and they proceed on to Malta. However, having taken something of a southerly detour due to the previous torpedo attack, Convoy MC 4 runs into a minefield and the destroyer Gallant strikes one at 0835 hrs, destroying her bow and killing 65 of her crew. Heavily damaged, she is taken to Malta under tow by HMS Griffin, escorted by the Bonaventure and Mohawk.
At 0930 hrs, a Fulmar from Illustrious is directed to intercept an Italian reconnaissance aircraft which had been shadowing the fleet and shoots it down. Despite the successful interception, Lusty's Type 79Z long range radar (with a range of 90 miles) continues to pick up Italian aircraft at the fringes attempting to shadow the fleet.
Sensing trouble looming, Cunningham has Illustrious maintain her combat air patrol.
At 1120 hrs, fighter control again directs the Fulmars to intercept another radar contact. This time it is an Italian SM.79 bomber. It is shot down, but one Fulmar loses its canopy to damage and is forced to return to Illustrious for repairs at 1145 hrs.
Shortly afterwards, a Messerschmitt BF 109 is sighted by the fighters of Illustrious' combat air patrol. Though the Fulmars have a go of it, the 109 handily outruns them.
To the fleet, the unexpected presence of a German fighter is a portent that something is about to go very very wrong.
At 1220 hrs, Illustrious sights a pair of contacts six miles from the fleet. The contacts turn out to be Italian SM.79 torpedo bombers which drop their torpedoes, necessitating evasive action by the fleet and both Illustrious and Valiant narrowly avoid being hit.
The four Fulmars of Lusty's active combat air patrol are directed to attack, diving from 14,000ft to chase the low-level Savoias.
It is a terrible mistake.
Caught while in the midst of rotating aircraft and with her active combat air patrol pulled away to low altitudes, at 1225 hrs, a second wave is detected inbound on Illustrious' radar.
A strike wave of 43 Stukas rumble inbound, along with an additional 18 HE 111 medium bombers escorted by 10 BF 110 fighter-bombers.
It is a wonderfully choreographed strike. The Royal Navy is about to learn to fear X Fliegerkorps.
In the midst of a planned air-patrol rotation Lusty desperately turns into the wind at 1234 hrs after a communication delay, scrambling all ready aircraft she can off her deck with the last leaving the deck at 1237 hrs.
It is too late. The Germans are in visual range at 1235 hrs. The bombs start falling at almost the same time the last aircraft leaves her deck.
The Germans have a simple set of instructions. "Illustrious muss sinken!". Illustrious must sink.
Lusty must die.
Were it not so utterly devastating, the choreography of the raid is breathtaking. Ten Stukas break off from the pack to make runs on Valiant and Warspite to draw AA fire. Thirty more thunder on to Lusty.
Despite a valiant, if futile attempt by the Fulmars to break up the runs, including some flying through the bombing formation to cause German aviators to break off for fear of collision, German bombers keep coming on in practiced waves, forcing the British to split AA against a multitude of simultaneous threats.
At 1239 hrs, the first hit lands.
Writers Note: After this point, chronology becomes garbled. Plenty of running and screaming, not a lot of people calmly keeping time.
The Germans have planned the operation well. The first waves carry a mix of armour piercing and fragmentation rounds to pull teeth before the bulk of the strike carries out the bloody work of carving up the armoured carrier.
The first bomb to impact is a 1,100 pound beast, which lands on Lusty's Port 1 Pom-Pom platform superstructure, starting an ammunition fire, before spanging off her side armour belt and bouncing into the sea. This hit renders the gun nonfunctional for the duration of the action. (having a half-tonne chunk of metal and boom punch clean through the gun will do that)
The second bomb is also an 1,100 pound, coming down on an unarmoured flight deck extension section on her port side. This punches through the deck plating, keeps going through the recreation room below and leaves the ship through her bow flare, detonating on contact with the water outside the ship, spraying her bow with splinter damage causing minor flooding and small fires.
Bomb 3 is a 500 pound anti-personnel fragmentation bomb, landing on Lusty's starboard side. Exploding on contact without penetrating the reinforced deck, it shreds Lusty's AA gunnery crews, turning Starboard 1 and 2 Pom-Pom platforms into abattoirs. Both AA stations are rendered out-of-action due to a combination of damage to the weapons, damage to their electrical circuits and in Starboard 1's case, being jammed by debris from a toppled crane.
Bomb 4 is is a direct hit on Illustrious' deck, the 1100 pound bomb described as 'bouncing off bulkheads like a silver pinball', ricocheting across the deck, and falling into the 'jackpot hole' that is Lusty's aft elevator, destroying a Fulmar on the platform and rolling into the hangar itself.

Yes, that's the aft lift jutting upwards through the smoke.
Shrapnel from the detonation damages equipment, shreds aircraft and pulps hangar crew.
Seeing an opportunity, another Stuka aimed another 1100 lb bomb for the elevator shaft. The bomb hits the starboard forward corner of the lift well, but detonates on the armoured flight deck, spraying shrapnel down the elevator shaft into the hangar, compounding damage from the previous impact.
Lusty was built to take a beating. Her flight deck and reinforced box hangar design had been specifically built to withstand punishment and three inches of armour plating on her flight deck was specifically designed to shrug off most bomb hits.
The final Stuka, thundering down to land the knockout blow is not carrying 'most bombs'. It is laden with X Fliegerkorps' insurance - a massive 2,200 pound (One Tonne) bomb which it drops, at full dive, smack into the centre of Illustrious' flight deck.
There is nothing to be said for it. The bomb leaves a neat little 19-inch hole in the centre of her flight deck, before exploding in her hangar. The carnage is immense.
Cunningham, on the bridge of the Warspite, gets to watch the carnage unfold first hand. In his memoirs, he would later write “One was too interested in this new form of dive-bombing attack really to be frightened, and there was no doubt we were watching complete experts. We could not but admire the skill and precision of it all.”
Aboard the Illustrious, damage control teams struggle to contain her hangar fires.
At 1255 hrs, the carrier's electrical systems fail, drastically affecting her steering and jamming her rudder. Captain Boyd orders the flag signal raised that Illustrious is no longer under control.
Emergency repairs are able to restore functionality using a backup steam system at 1303 hrs.
Though her engines are still running, chemical fumes from the numerous fires flood her engineering spaces. The engineers struggle on regardless, dousing themselves in water and wrapping rags around their mouths. No help is coming, replacement crews busy waging an ongoing battle with flames in the hangar above. Though overworked men collapse from exhaustion, pass out from smoke inhalation or are incapacitated by heatstroke and have to be dragged to safety, they remain at their posts.
Writer's Note: It is without doubt in my mind that Illustrious' Engineers and stokers were instrumental in her survival, as the carrier's engines stopping would also kill her backup electrics, greatly harming firefighting efforts.
At 1329 hrs, Italian SM.79 bombers arrive, conducting high-altitude attacks against the fleet, forcing evasive action. During the attack, Lusty's steam controls fail entirely, leaving her locked steaming in circles. At 1348 hrs, jury rigged repairs regain control, but the system fails completely two minutes later.
Barely under control, Captain Boyd begins to manoeuvre Lusty by varying her propeller outputs. (As Illustrious had three propeller shafts, turning the ship by varying the output of the two outboard shafts is doable, if unwieldy and slow) A decision is made to run for the dubious safety of Malta at a crawl of 17 knots.
At 1604 hrs, a wave of fifteen Italian Stukas arrive to have a go at the crippled carrier. JU 88 medium bombers were reported to have formed up to join the raid but had been set upon and driven off by Hawker Hurricanes from Malta.
Near misses worsen Illustrious' flooding, which, when coupled with the water she had been taking on from the firefighting efforts, give the carrier a pronounced 5 degree list. A particularly cheeky Italian crew pops a third 1100 pound bomb down her ruined aft hangar elevator shaft. (For those keeping count, that's some 5,500 pounds of boom that's managed to detonate inside Illustrious' hangar.)
The blast kills many of the assembled firefighting crews.
At 1710 hrs, more Italian bombers arrive but fail to land hits, before being chased off by Illustrious' Fulmars which had flown on to Malta to rearm and refuel.
At 2130 hrs, Lusty limps into Malta and is helplessly coaxed into a berth by harbour tugs, her hull glowing a dull orange in the dark from the fires still raging within. Though firefighters and dockyard workers rush to provide assistance, the flames are only brought under control the following day.
126 men are dead and 91 more are grievously injured, but Lusty has lived through seven hours of air raids to fight another day.
Dropping off the maimed destroyer Gallant at Malta, the destroyer Mohawk and the cruisers of Force B steam to rejoin Force A. At 1522 hrs, 220 miles east of the Sicilian coast, the Royal Navy ships run afoul of a squadron of 35 JU 87 Stuka dive bombers commanded by Oberst (Major) Werner Ennecerus.
The Stukas smash home a 550 pound bomb into the deck of the Gloucester which punches through five decks, causing 9 fatalities, but fails to explode.
The Southampton is not so lucky. She catches a pair of delayed-action bombs in the wardroom and officer’s mess. Their detonations wipe out her damage control teams, causing huge fires that isolated some of the controls for flooding the magazines, making the situation immediately critical. The Southampton will lose 81 ratings and officers during the attack.
For four long hours, Southampton's crew fights a losing battle against the flames until the battle is deemed lost and the order to abandon ship is given. Abandoning their beloved ship to the conflagration consuming her, the crew of the Southampton are picked up by the Gloucester and the D-class destroyer Diamond.
Southampton is scuttled by the Leander-class Orion, which had arrived to bolster AA coverage.
The Allied merchant convoys of Operation Excess will successfully reach their destinations of Malta, Egypt, and Greece without loss, delivering 10,000 short tons (9,072 t) of supplies. Operation Excess is a success, but the Royal Navy has paid the blood price for victory.
The Luftwaffe has announced it's debut in the bloody battle of the convoys. The battle for the Mediterranean has merely escalated to ever more frightening intensities.
January 11th, 1941 (Saturday) Reinforcements For Malta
The Leander-class light cruisers Orion and HMAS Perth land troops at Malta. Though Orion leaves with the Dido-class AA Cruiser Bonaventure and the J-class Destroyer Jaguar, Perth remains at Malta for minor repairs. She will be docked opposite Illustrious in Malta harbour to provide AA coverage for the frantic ongoing repair efforts to make the carrier seaworthy again.
With Malta well within range of German aircraft, the Germans on the other hand, will begin stockpiling munitions in preparation for another attempt to beat Lusty to death.
January 16th, 1941 (Thursday) - The Illustrious Blitz
In the Mediterranean, a strange asymmetric race has developed between the Royal Navy and the Luftwaffe.
Not ones to leave a job unfinished, X Fliegerkorps has spent the past days replenishing the ordnance stockpiles expended during the attacks conducted against Illustrious on the 10th of January and the sinking of the Southampton on the 11th.
At Malta, frenzied round the clock repairs have been conducted since the moment Lusty crawled into dock, aimed at getting her seaworthy enough to flee Malta before the Germans can seal the deal.
Though the British make great strides in the repairs, including patching her ruined steering mechanism which had flooded and sprung a leak due to damage, the Luftwaffe ultimately come out ahead and at 1355 hrs on the 16th of January, Malta's air defence systems are faced with the grim sight of a massive inbound raid.
The Germans have pulled out the stops, sending 44 JU 87 Stukas, and 17 JU 88 Medium Bombers on to Malta with the express mission to sink Illustrious before she can escape.
Escorting the raid are 20 Bf 110 fighter bombers and an Italian contribution of 10 Macchi C.202 and 10 CR.42 fighters.
Scrambled to meet them are the meager fighter defence the Royal Air Force defenders of Malta can muster - 4 Hurricanes, 2 Gladiators and a trio of Fulmar fighters from Lusty's own wing which had flown on to Malta after the Luftwaffe had rendered her flight deck unusable.
Writers Note: A 1000 kg bomb will do that to a carrier.
In the harbour area, every available AA gun, including those mounted on the ships in the harbour, begin to throw ammunition skyward.
The raid is short and violent.
A large bomb, possibly a 2,200 pounder, comes down in a near miss, slipping into the gap between the HMAS Perth and the wharf before detonating, violently throwing the Leander-class cruiser about to the point where her bow is momentarily submerged. The shockwave from the blast bends her propeller shafts, rips open her oil bunkers and throws her turrets out of alignment.
Adjacent, the transport Essex, a key component of the entire Excess Convoy, is struck by German bombs and set alight, causing some consternation among the crew of the Perth and an understandably rapid shift in damage control priorities when it is discovered she is still partially loaded with ammunition.
Writers Note: Memories of the Halifax Explosion would not be too far removed from many of the older crewmen's minds on the merchant marine vessels.
Near misses from other 2,200 pound bombs perforate both Perth and Illustrious below the waterline, causing them to take on some water before the leaks are plugged.
Having broken through the Anti-Aircraft screen, German reports claim four hits on the Illustrious, which supposedly fail to penetrate Lusty's armoured flight deck and bounce off. There are no mentions of the hits in British damage control reports, but eyewitness reports from the crew of the Perth report sighting hits.
Writers Note: To be honest, this is one of those 'Running and Screaming' situations where nobody is paying all too much attention to the little details. The Stuka crews could be engaged in puffery, the Perth's could be mistaken, Lusty's crew could be too busy to pay attention to non-immediate threats to life and limb. Who knows, really.
Regardless of the veracity of the previous hits, the Luftwaffe do successfully land one telling hit with a 1100 pound bomb (or possibly a 2200 pound, since German flight records indicate the squadron delivering the strike in question were carrying shipkillers) penetrating her aft flight deck to explode in the Captain's cabin.
Though warned to stay outside the umbrella of Valetta's AA guns, the pilots, realising that the Luftwaffe are successfully pushing through the flak screen, plunge their fighters into the barrage. Following the engagement, Malta's artillery command office would subsequently receive several tersely worded messages regarding the accuracy of the AA fire.
Just as shortly, having expended their ammunition, the Germans are away, seeing no reason to continue to test Malta's air defences. Various sources place German loss in aircraft between five and eleven aircraft to a combination of AA fire and fighter interception.
Damage to Lusty during the raid is worrying, though most concerning is Lusty's already battered aft end. Already mangled by the trio of hits previously delivered to her aft elevator, dockyard assessors are concerned that the most recent penetration has shattered her internal transverse girders and compromised the structural integrity of her stern.
In her current state, the fear is that vibrations from her engines will detach her aft structure entirely, literally shaking the carrier apart.
As a stopgap measure, repair crews race to weld new temporary support beams into place, working through the night.
As dusk falls, HMAS Perth slips out of the harbour, ordered away to seek the relative safety of Alexandria for repairs.
January 17th, 1941 (Friday) - The Illustrious Blitz Day II
Axis forces continue sporadic high-level bombing of Malta aimed at disrupting repairs to the Illustrious and the carrier suffers several near misses. Despite the risk, Repair crews continue working through the attack.
Writer's Note: A relatively quiet day for Malta, which had endured daily bombing raids and harassment from both the Italians and Germans since day bloody one.
January 18th, 1941 (Saturday) - The Illustrious Blitz Day III
Faced with reports of determined RAF fighter interference from his pilots during the air raids conducted on the 16th of January, General der Flieger Hans Ferdinand Geisler orders Fliegerkorps X to temporarily shift tactics, temporarily focusing attacks on the airfields of Hal Far and Luqa, hoping to suppress them long enough to launch another follow up attack on the Illustrious.
Fifty-one JU 87 dive bombers attack Hal Far and Luqa, met by a paltry force of five Hurricanes and 3 Fulmars. The raid successfully takes Luqa out of action, destroying and damaging aircraft on the ground, but despite the loss of two Fulmars (Sub Lt A. S. Griffith, KIA), the RAF and FAA pilots are able to successfully beat off the raid on Hal Far, the airfield (and its defenders) remaining operational and available for the engagement on the 19th.
During this period, Regia Aeronautica aircraft continue to conduct raids into Malta harbour targeting Illustrious. For the most part these attacks are ineffective.
January 19th, 1941 (Sunday) - The Illustrious Blitz Day IV
With the airfields of Hal Far and Luqa assumed knocked out of action, General der Flieger Hans Ferdinand Geisler orders X Fliegerkorps to resume large scale attacks on the aircraft carrier Illustrious, which is almost ready to sail. Operating out of the hastily repaired Hal Far, the Royal Air Force and Fleet Air Arm stubbornly continue to contest the attacks with their remaining operating fighter aircraft - six Hawker Hurricanes, one Fairey Fulmar and one Gloster Gladiator biplane, which in the words of their pilots 'flew around uncontrolled, shooting at anything that came into range'.
Despite heavy resistance from fighters and flak, German bombers push through to the harbour area and deliver their payloads over the carrier. Illustrious suffers two near misses from 1,100 pound bombs, which throw the carrier against the wharf and again puncture her hull below the water line, fracturing her port turbine, flooding her boiler room (again) and shaking equipment out of alignment.
To Lusty's benefit, dense clouds of dust, kicked up from these early attacks, shield the carrier from sight and frustrates later runs. She will ultimately suffer no further damage from subsequent Luftwaffe bombing.
This raid is particularly costly to the Luftwaffe with British fighters downing eleven German aircraft and ground flak claiming eight more, although the Fulmar crew are forced to ditch during the engagement due to suffering engine damage from an alert Ju 87. Lt R. S. Henley and Naval Airman A. S. Rush are successfully recovered, having glided to Malta after Henley had discovered Rush couldn't swim.
Writers Note: Which is something of a concern given they're naval airmen.
Despite this latest setback which further delays her departure date, Lusty has ultimately emerged from this bloody affair the effective victor, having won out through sheer virtue of remaining afloat while having again run the Luftwaffe out of ammunition.
Writers Note: "Tittybote still refuses to die."
January 21st, 1941 (Tuesday) - Operation MBD 2 (Day 2)
Destroyers Jervis, Juno, Janus and Greyhound move from a holding position at Suda Bay towards Malta to prepare for the extraction of HMS Illustrious. Repairs are proceeding as planned and Lusty is expected to be seaworthy (if not combat ready) by the 23rd of January. The 1st Battle Squadron remains at short notice at Alexandria, waiting for the carrier to move out.
January 23rd, 1941 (Thursday) - Operation MBD 2 (Day 4)
Work crews successfully complete temporary repairs on the HMS Illustrious at Valetta Harbour. At 1846 hrs, when it is deemed too dark for accurate aerial sighting of fleet movement, Illustrious sets sail for Alexandria, escorted by the destroyers Jervis, Juno, Janus and Greyhound, her departure so abrupt that she leaves with her crew still reeling in the cables and securing ropes that trail behind her as she sets sail.
At Suda Bay, Force B (cruisers Orion, Ajax, Bonaventure, York and the destroyers Ilex and Hero) move to link up with Illustrious.
Force C (battleships Barham and Valiant, cruiser HMAS Perth and the destroyers Stuart, Nubian, Mohawk, Hasty, Diamond and Griffin) depart Alexandria to provide distant cover for the withdrawal.
Writer’s Note: Considering the absolute hammering Illustrious had taken in the prior 13 days, and the fact that Malta was still besieged by Axis air forces, her being able to scarper that quickly is a testament to the bravery of her crew and Valletta's repair work.
January 24th, 1941 (Friday) - Operation MBD 2 (Day 5)
Sailing at a surprising 25 knots, Illustrious' departure from Malta is sufficiently alacritous that she and her escort group overshoot the rendezvous with Force B (cruisers Orion, Ajax, Bonaventure, York and the destroyers Ilex and Hero) which had originally been supposed to link up with the carrier to act as a cruiser screen.
At 0800 hrs however, Illustrious was observed emitting intense smoke from her funnels, and her speed was reduced to 21 knots. Damage control teams conduct immediate checks and discover Lusty's tanks are contaminated with water.
Unless fuel can be salvaged, the carrier will run out of fuel oil in three hours.
The Luftwaffe has likewise not been idle. German aircraft conduct sweeps, searching for the Illustrious, which from their perspective had effectively disappeared overnight.
Discovering the loitering Force B, bombers from Fliegerkorp X attack the cruiser squadron, and Ajax is slightly damaged by splinter damage from near misses. While German bombers single out the Leander-class for repeated attack, no further damage is done to any of the ships.
Fortunately for Lusty, after a frantic search by her engineering crew to determine possible causes for the contamination ensue, damaged fuel lines are identified and isolated, and a fuel separator is jury-rigged. Efforts to salvage fuel from contaminated tanks succeed, and Lusty is able again raise her speed to 23 knots.
Unable to find her cruiser escort, a snap call is made and rather than wait for the cruisers (which were in fact waiting for her elsewhere), Lusty and her destroyer escorts moves to link up with Force C (battleships Barham and Valiant, cruiser HMAS Perth and the destroyers Stuart, Nubian, Mohawk, Hasty, Diamond and Griffin) instead, and contact is made during the afternoon.
Together with Force C, now acting as close escort, the British fleet turns and makes a run for Alexandria.
Writers Note: Somehow, this has left me with the unshakable image of Lusty clutching her sunhat and beating a hasty retreat past a confused York and Ajax while pursued by a swarm of Stukas.
January 24th, 1941 (Friday) - Operation MBD 2 (Final Day)
The battered aircraft carrier Illustrious triumphantly sails into Alexandria harbour at 1300 hrs, bringing Operation MBD 2 to a conclusion. It has been a close-run thing. Lusty has less than 60 tons of usable fuel left in her tanks.
She will undergo structural repairs at Alexandria before heading to Durban for a full underwater assessment and examination. The Royal Navy will subsequently arrange for permanent repairs to be conducted at the US Navy Yard at Norfolk, Virginia, taking the heavily-abused carrier out of the war until December 9. In fact, Illustrious and her youngest sister, Formidable, ended up returning home together, after Formidable had also endured a significant shellacking within the Med, and subsequent repairs in America.
The Med was an utter hotbed of activity for almost all of the war, chewing up ships and crews in bloody actions that only tapered off after the collapse of the African Front and Italy's surrender in late 1943.
And, in November 1940, HMS Illustrious, with 18 Swordfish biplanes (known as stringbags for being able to carry damn near anything), proceeded to poke holes in a half-dozen major italian warships, including two battleships, and blew up most of the Italian Navy's strategic fuel reserves.
And that action, the attack on Taranto harbour, carried long-reaching consequences. Firstly, it hamstrung the Italian's big ships. Secondly, it directly inspired Pearl Harbour, some 13 months later. And Thirdly? It prompted the Nazis to send one of their best-trained and best-skilled Flight Corps to the Med to paint a target on Illustrious.
This is Illustrious.
This is also Illustrious.
Don't let her soft looks fool you, this young lady is a survivor, through and through.
Now, let's look at what became known as The Illustrious Blitz.
January 10th, 1941 (Friday) - Operation Excess Day IV
Having been shadowed by the submarine Ruggero Settimo, at dawn, convoy MC 4 is attacked by the Italian corvettes Circe and Vega which launch torpedoes at the convoy ships. The Ruggero Settimo contributes its own spread of torpedoes to the attack.
All the torpedoes miss.
Writers Note: (-‸ლ)
The Dido-class AA light cruiser Bonaventure and the destroyers Hereward and Jaguar give pursuit and Vega is run down and destroyed. During the pursuit, the Bonaventure is struck by return fire, and one rating was killed with another four wounded, one dying the following day. Both Ruggero Settimo and Circe escape, the latter going on to further menace the Royal Navy's Silent Service.
Writers Note: Fear the angry little boat. She scalped the HMS Grampus, HMS Union, HMS P38 and HMS Tempest. (Say what you will of the Italian Command, but their fast moving light ships were holy terrors for the duration of the Mediterranean conflict)
At 0815 hrs, Convoy MC 4 finally rendezvous with Sir Andrew Cunningham's Force A and they proceed on to Malta. However, having taken something of a southerly detour due to the previous torpedo attack, Convoy MC 4 runs into a minefield and the destroyer Gallant strikes one at 0835 hrs, destroying her bow and killing 65 of her crew. Heavily damaged, she is taken to Malta under tow by HMS Griffin, escorted by the Bonaventure and Mohawk.
At 0930 hrs, a Fulmar from Illustrious is directed to intercept an Italian reconnaissance aircraft which had been shadowing the fleet and shoots it down. Despite the successful interception, Lusty's Type 79Z long range radar (with a range of 90 miles) continues to pick up Italian aircraft at the fringes attempting to shadow the fleet.
Sensing trouble looming, Cunningham has Illustrious maintain her combat air patrol.
At 1120 hrs, fighter control again directs the Fulmars to intercept another radar contact. This time it is an Italian SM.79 bomber. It is shot down, but one Fulmar loses its canopy to damage and is forced to return to Illustrious for repairs at 1145 hrs.
Shortly afterwards, a Messerschmitt BF 109 is sighted by the fighters of Illustrious' combat air patrol. Though the Fulmars have a go of it, the 109 handily outruns them.
To the fleet, the unexpected presence of a German fighter is a portent that something is about to go very very wrong.
At 1220 hrs, Illustrious sights a pair of contacts six miles from the fleet. The contacts turn out to be Italian SM.79 torpedo bombers which drop their torpedoes, necessitating evasive action by the fleet and both Illustrious and Valiant narrowly avoid being hit.
The four Fulmars of Lusty's active combat air patrol are directed to attack, diving from 14,000ft to chase the low-level Savoias.
It is a terrible mistake.
Caught while in the midst of rotating aircraft and with her active combat air patrol pulled away to low altitudes, at 1225 hrs, a second wave is detected inbound on Illustrious' radar.
A strike wave of 43 Stukas rumble inbound, along with an additional 18 HE 111 medium bombers escorted by 10 BF 110 fighter-bombers.
It is a wonderfully choreographed strike. The Royal Navy is about to learn to fear X Fliegerkorps.
In the midst of a planned air-patrol rotation Lusty desperately turns into the wind at 1234 hrs after a communication delay, scrambling all ready aircraft she can off her deck with the last leaving the deck at 1237 hrs.
It is too late. The Germans are in visual range at 1235 hrs. The bombs start falling at almost the same time the last aircraft leaves her deck.
The Germans have a simple set of instructions. "Illustrious muss sinken!". Illustrious must sink.
Lusty must die.
“This attack came at a bad moment for the fighters. Those in the air had already been engaged in two combats and were low down, and with little ammunition remaining. Relief fighters were ready on deck, but as the whole fleet had to be turned by signal from the Commander-in-Chief before they could be flown off, valuable minutes were wasted. In any case the Fulmar has not sufficient climbing speed to ensure being able to counter this type of attack, particularly if a heavy attack is launched shortly after a minor or diversionary attack.”
- Captain Denis Boyd, HMS Illustrious
Were it not so utterly devastating, the choreography of the raid is breathtaking. Ten Stukas break off from the pack to make runs on Valiant and Warspite to draw AA fire. Thirty more thunder on to Lusty.
Despite a valiant, if futile attempt by the Fulmars to break up the runs, including some flying through the bombing formation to cause German aviators to break off for fear of collision, German bombers keep coming on in practiced waves, forcing the British to split AA against a multitude of simultaneous threats.
At 1239 hrs, the first hit lands.
Writers Note: After this point, chronology becomes garbled. Plenty of running and screaming, not a lot of people calmly keeping time.
The Germans have planned the operation well. The first waves carry a mix of armour piercing and fragmentation rounds to pull teeth before the bulk of the strike carries out the bloody work of carving up the armoured carrier.
“When we had reached a few hundred feet we found ourselves surrounded by Ju87s as they were pulling out of their dives. Some were very close and I could clearly see the rear gunners firing at us. I looked down and saw poor Illustrious passing through huge columns of water, with smoke coming from the after end of the flight deck.”
- Lt Bill Barnes, Fulmar Ace.
The first bomb to impact is a 1,100 pound beast, which lands on Lusty's Port 1 Pom-Pom platform superstructure, starting an ammunition fire, before spanging off her side armour belt and bouncing into the sea. This hit renders the gun nonfunctional for the duration of the action. (having a half-tonne chunk of metal and boom punch clean through the gun will do that)
The second bomb is also an 1,100 pound, coming down on an unarmoured flight deck extension section on her port side. This punches through the deck plating, keeps going through the recreation room below and leaves the ship through her bow flare, detonating on contact with the water outside the ship, spraying her bow with splinter damage causing minor flooding and small fires.
Bomb 3 is a 500 pound anti-personnel fragmentation bomb, landing on Lusty's starboard side. Exploding on contact without penetrating the reinforced deck, it shreds Lusty's AA gunnery crews, turning Starboard 1 and 2 Pom-Pom platforms into abattoirs. Both AA stations are rendered out-of-action due to a combination of damage to the weapons, damage to their electrical circuits and in Starboard 1's case, being jammed by debris from a toppled crane.
Bomb 4 is is a direct hit on Illustrious' deck, the 1100 pound bomb described as 'bouncing off bulkheads like a silver pinball', ricocheting across the deck, and falling into the 'jackpot hole' that is Lusty's aft elevator, destroying a Fulmar on the platform and rolling into the hangar itself.
"By the flames which shot out of the hole in the deck, I realized that it had rolled off the lift and exploded in the hangar. Then the lift itself burst out of the deck, all 300 tons of it, and shot a few feet into the air and sank back into the lift well on its side, like a giant wedge-shaped hunk of cheese."
- Lt Charles Lamb, 'War in a Stringbag'
Yes, that's the aft lift jutting upwards through the smoke.
Shrapnel from the detonation damages equipment, shreds aircraft and pulps hangar crew.
Seeing an opportunity, another Stuka aimed another 1100 lb bomb for the elevator shaft. The bomb hits the starboard forward corner of the lift well, but detonates on the armoured flight deck, spraying shrapnel down the elevator shaft into the hangar, compounding damage from the previous impact.
Lusty was built to take a beating. Her flight deck and reinforced box hangar design had been specifically built to withstand punishment and three inches of armour plating on her flight deck was specifically designed to shrug off most bomb hits.
The final Stuka, thundering down to land the knockout blow is not carrying 'most bombs'. It is laden with X Fliegerkorps' insurance - a massive 2,200 pound (One Tonne) bomb which it drops, at full dive, smack into the centre of Illustrious' flight deck.
There is nothing to be said for it. The bomb leaves a neat little 19-inch hole in the centre of her flight deck, before exploding in her hangar. The carnage is immense.
Her hangar is now a charnel house with pulped bodies plastered against the walls. Shrapnel from the explosion punches upward, wrecking Lusty's radar system. Compression forces from the blast bulge her forward lift, forcing it upward and ruining her flight deck."Pierced the flight deck and burst on the hangar deck in which it made a large hole and caused violent explosion in the ward room flat. This bomb blew up the foremost lift, bulged the hangar deck forward and the combined effect of this and No. 4 wrecked the hangar fire screens and set fire to C hangar. Many casualties were caused in the hangar and the ward room flat; all leads and piping through ward room flat destroyed. Fires were started in the cabin flats on the upper deck abaft 156 bulkhead."
- Captain Boyd's Preliminary Damage Assessment.
In seven minutes, Lusty has taken six bombs. She is hurting.The explosion started a severe fire, destroyed the rear fire sprinkler system, bent the forward lift like a hoop and shredded the fire curtains into lethal splinters. It also blew a hole in the hangar deck, damaging areas three decks below. The Stukas also near-missed Illustrious with two bombs, which caused minor damage and flooding.
Cunningham, on the bridge of the Warspite, gets to watch the carnage unfold first hand. In his memoirs, he would later write “One was too interested in this new form of dive-bombing attack really to be frightened, and there was no doubt we were watching complete experts. We could not but admire the skill and precision of it all.”
Aboard the Illustrious, damage control teams struggle to contain her hangar fires.
At 1255 hrs, the carrier's electrical systems fail, drastically affecting her steering and jamming her rudder. Captain Boyd orders the flag signal raised that Illustrious is no longer under control.
Emergency repairs are able to restore functionality using a backup steam system at 1303 hrs.
Though her engines are still running, chemical fumes from the numerous fires flood her engineering spaces. The engineers struggle on regardless, dousing themselves in water and wrapping rags around their mouths. No help is coming, replacement crews busy waging an ongoing battle with flames in the hangar above. Though overworked men collapse from exhaustion, pass out from smoke inhalation or are incapacitated by heatstroke and have to be dragged to safety, they remain at their posts.
Writer's Note: It is without doubt in my mind that Illustrious' Engineers and stokers were instrumental in her survival, as the carrier's engines stopping would also kill her backup electrics, greatly harming firefighting efforts.
At 1329 hrs, Italian SM.79 bombers arrive, conducting high-altitude attacks against the fleet, forcing evasive action. During the attack, Lusty's steam controls fail entirely, leaving her locked steaming in circles. At 1348 hrs, jury rigged repairs regain control, but the system fails completely two minutes later.
Barely under control, Captain Boyd begins to manoeuvre Lusty by varying her propeller outputs. (As Illustrious had three propeller shafts, turning the ship by varying the output of the two outboard shafts is doable, if unwieldy and slow) A decision is made to run for the dubious safety of Malta at a crawl of 17 knots.
At 1604 hrs, a wave of fifteen Italian Stukas arrive to have a go at the crippled carrier. JU 88 medium bombers were reported to have formed up to join the raid but had been set upon and driven off by Hawker Hurricanes from Malta.
Near misses worsen Illustrious' flooding, which, when coupled with the water she had been taking on from the firefighting efforts, give the carrier a pronounced 5 degree list. A particularly cheeky Italian crew pops a third 1100 pound bomb down her ruined aft hangar elevator shaft. (For those keeping count, that's some 5,500 pounds of boom that's managed to detonate inside Illustrious' hangar.)
The blast kills many of the assembled firefighting crews.
At 1710 hrs, more Italian bombers arrive but fail to land hits, before being chased off by Illustrious' Fulmars which had flown on to Malta to rearm and refuel.
At 2130 hrs, Lusty limps into Malta and is helplessly coaxed into a berth by harbour tugs, her hull glowing a dull orange in the dark from the fires still raging within. Though firefighters and dockyard workers rush to provide assistance, the flames are only brought under control the following day.
126 men are dead and 91 more are grievously injured, but Lusty has lived through seven hours of air raids to fight another day.
With the withdrawal of Ark Royal and the maiming of Illustrious, besides Royal Air Force interceptors operating out of the 'unsinkable aircraft carrier' Malta, the Luftwaffe have, in a single stroke, won complete naval air superiority and they will press home this advantage."Wait... So essentially the reason why Illustrious has her incredibly large rack in the game is because she was deformed during an attack and the boobs are reconstructive surgery?"
The long and short of it is 'Yes'.
The blackly-humoured joke among her flight crews about her flight deck being 'gently undulating' sprang up from one of these near-fatal encounters.
Lusty took her share of horrendous beatings over the course of the war. Like Warspite, she's a survivor. (Enterprise could be said to have followed in Lusty's footsteps in 'how to survive')
Dropping off the maimed destroyer Gallant at Malta, the destroyer Mohawk and the cruisers of Force B steam to rejoin Force A. At 1522 hrs, 220 miles east of the Sicilian coast, the Royal Navy ships run afoul of a squadron of 35 JU 87 Stuka dive bombers commanded by Oberst (Major) Werner Ennecerus.
The Stukas smash home a 550 pound bomb into the deck of the Gloucester which punches through five decks, causing 9 fatalities, but fails to explode.
The Southampton is not so lucky. She catches a pair of delayed-action bombs in the wardroom and officer’s mess. Their detonations wipe out her damage control teams, causing huge fires that isolated some of the controls for flooding the magazines, making the situation immediately critical. The Southampton will lose 81 ratings and officers during the attack.
For four long hours, Southampton's crew fights a losing battle against the flames until the battle is deemed lost and the order to abandon ship is given. Abandoning their beloved ship to the conflagration consuming her, the crew of the Southampton are picked up by the Gloucester and the D-class destroyer Diamond.
Southampton is scuttled by the Leander-class Orion, which had arrived to bolster AA coverage.
The Allied merchant convoys of Operation Excess will successfully reach their destinations of Malta, Egypt, and Greece without loss, delivering 10,000 short tons (9,072 t) of supplies. Operation Excess is a success, but the Royal Navy has paid the blood price for victory.
The Luftwaffe has announced it's debut in the bloody battle of the convoys. The battle for the Mediterranean has merely escalated to ever more frightening intensities.
January 11th, 1941 (Saturday) Reinforcements For Malta
The Leander-class light cruisers Orion and HMAS Perth land troops at Malta. Though Orion leaves with the Dido-class AA Cruiser Bonaventure and the J-class Destroyer Jaguar, Perth remains at Malta for minor repairs. She will be docked opposite Illustrious in Malta harbour to provide AA coverage for the frantic ongoing repair efforts to make the carrier seaworthy again.
With Malta well within range of German aircraft, the Germans on the other hand, will begin stockpiling munitions in preparation for another attempt to beat Lusty to death.
January 16th, 1941 (Thursday) - The Illustrious Blitz
In the Mediterranean, a strange asymmetric race has developed between the Royal Navy and the Luftwaffe.
Not ones to leave a job unfinished, X Fliegerkorps has spent the past days replenishing the ordnance stockpiles expended during the attacks conducted against Illustrious on the 10th of January and the sinking of the Southampton on the 11th.
At Malta, frenzied round the clock repairs have been conducted since the moment Lusty crawled into dock, aimed at getting her seaworthy enough to flee Malta before the Germans can seal the deal.
Though the British make great strides in the repairs, including patching her ruined steering mechanism which had flooded and sprung a leak due to damage, the Luftwaffe ultimately come out ahead and at 1355 hrs on the 16th of January, Malta's air defence systems are faced with the grim sight of a massive inbound raid.
The Germans have pulled out the stops, sending 44 JU 87 Stukas, and 17 JU 88 Medium Bombers on to Malta with the express mission to sink Illustrious before she can escape.
Escorting the raid are 20 Bf 110 fighter bombers and an Italian contribution of 10 Macchi C.202 and 10 CR.42 fighters.
Scrambled to meet them are the meager fighter defence the Royal Air Force defenders of Malta can muster - 4 Hurricanes, 2 Gladiators and a trio of Fulmar fighters from Lusty's own wing which had flown on to Malta after the Luftwaffe had rendered her flight deck unusable.
Writers Note: A 1000 kg bomb will do that to a carrier.
In the harbour area, every available AA gun, including those mounted on the ships in the harbour, begin to throw ammunition skyward.
The raid is short and violent.
A large bomb, possibly a 2,200 pounder, comes down in a near miss, slipping into the gap between the HMAS Perth and the wharf before detonating, violently throwing the Leander-class cruiser about to the point where her bow is momentarily submerged. The shockwave from the blast bends her propeller shafts, rips open her oil bunkers and throws her turrets out of alignment.
Adjacent, the transport Essex, a key component of the entire Excess Convoy, is struck by German bombs and set alight, causing some consternation among the crew of the Perth and an understandably rapid shift in damage control priorities when it is discovered she is still partially loaded with ammunition.
Writers Note: Memories of the Halifax Explosion would not be too far removed from many of the older crewmen's minds on the merchant marine vessels.
Near misses from other 2,200 pound bombs perforate both Perth and Illustrious below the waterline, causing them to take on some water before the leaks are plugged.
Having broken through the Anti-Aircraft screen, German reports claim four hits on the Illustrious, which supposedly fail to penetrate Lusty's armoured flight deck and bounce off. There are no mentions of the hits in British damage control reports, but eyewitness reports from the crew of the Perth report sighting hits.
Writers Note: To be honest, this is one of those 'Running and Screaming' situations where nobody is paying all too much attention to the little details. The Stuka crews could be engaged in puffery, the Perth's could be mistaken, Lusty's crew could be too busy to pay attention to non-immediate threats to life and limb. Who knows, really.
Regardless of the veracity of the previous hits, the Luftwaffe do successfully land one telling hit with a 1100 pound bomb (or possibly a 2200 pound, since German flight records indicate the squadron delivering the strike in question were carrying shipkillers) penetrating her aft flight deck to explode in the Captain's cabin.
Though warned to stay outside the umbrella of Valetta's AA guns, the pilots, realising that the Luftwaffe are successfully pushing through the flak screen, plunge their fighters into the barrage. Following the engagement, Malta's artillery command office would subsequently receive several tersely worded messages regarding the accuracy of the AA fire.
Just as shortly, having expended their ammunition, the Germans are away, seeing no reason to continue to test Malta's air defences. Various sources place German loss in aircraft between five and eleven aircraft to a combination of AA fire and fighter interception.
Damage to Lusty during the raid is worrying, though most concerning is Lusty's already battered aft end. Already mangled by the trio of hits previously delivered to her aft elevator, dockyard assessors are concerned that the most recent penetration has shattered her internal transverse girders and compromised the structural integrity of her stern.
In her current state, the fear is that vibrations from her engines will detach her aft structure entirely, literally shaking the carrier apart.
As a stopgap measure, repair crews race to weld new temporary support beams into place, working through the night.
As dusk falls, HMAS Perth slips out of the harbour, ordered away to seek the relative safety of Alexandria for repairs.
As we went on board, Maltese were carrying bags down the other gangway. I said to one of the Maltese: ‘What’s that?’
He said: ‘This was a man.’
Blood was coming through the sacks … it was a bloodbath, right throughout the ship.
There was a paymaster with his head blown off. He was sitting at his desk like he was reading, but dead, with his head blown off. A piece of shrapnel had come through and whipped his head off. He was still there with a pen in his hand. I just shut the door again.
The shrapnel went right through the bulkheads just like it was tissue paper. And they had a Stuka in the lift. Dead. Shot down. It had a big swastika on its tail. But the Illustrious was a butcher’s shop. There was a big engineer officer, a big bloke in his white overalls, still had his torch on, and a piece of shrapnel had taken out his stomach, just like that. That was the first time I’d seen bodies in war. It was shocking, blood everywhere.
- Cruiser: The Life and Loss of HMAS Perth and her Crew, Mike Carlton
January 17th, 1941 (Friday) - The Illustrious Blitz Day II
Axis forces continue sporadic high-level bombing of Malta aimed at disrupting repairs to the Illustrious and the carrier suffers several near misses. Despite the risk, Repair crews continue working through the attack.
Writer's Note: A relatively quiet day for Malta, which had endured daily bombing raids and harassment from both the Italians and Germans since day bloody one.
January 18th, 1941 (Saturday) - The Illustrious Blitz Day III
Faced with reports of determined RAF fighter interference from his pilots during the air raids conducted on the 16th of January, General der Flieger Hans Ferdinand Geisler orders Fliegerkorps X to temporarily shift tactics, temporarily focusing attacks on the airfields of Hal Far and Luqa, hoping to suppress them long enough to launch another follow up attack on the Illustrious.
Fifty-one JU 87 dive bombers attack Hal Far and Luqa, met by a paltry force of five Hurricanes and 3 Fulmars. The raid successfully takes Luqa out of action, destroying and damaging aircraft on the ground, but despite the loss of two Fulmars (Sub Lt A. S. Griffith, KIA), the RAF and FAA pilots are able to successfully beat off the raid on Hal Far, the airfield (and its defenders) remaining operational and available for the engagement on the 19th.
During this period, Regia Aeronautica aircraft continue to conduct raids into Malta harbour targeting Illustrious. For the most part these attacks are ineffective.
January 19th, 1941 (Sunday) - The Illustrious Blitz Day IV
With the airfields of Hal Far and Luqa assumed knocked out of action, General der Flieger Hans Ferdinand Geisler orders X Fliegerkorps to resume large scale attacks on the aircraft carrier Illustrious, which is almost ready to sail. Operating out of the hastily repaired Hal Far, the Royal Air Force and Fleet Air Arm stubbornly continue to contest the attacks with their remaining operating fighter aircraft - six Hawker Hurricanes, one Fairey Fulmar and one Gloster Gladiator biplane, which in the words of their pilots 'flew around uncontrolled, shooting at anything that came into range'.
Despite heavy resistance from fighters and flak, German bombers push through to the harbour area and deliver their payloads over the carrier. Illustrious suffers two near misses from 1,100 pound bombs, which throw the carrier against the wharf and again puncture her hull below the water line, fracturing her port turbine, flooding her boiler room (again) and shaking equipment out of alignment.
To Lusty's benefit, dense clouds of dust, kicked up from these early attacks, shield the carrier from sight and frustrates later runs. She will ultimately suffer no further damage from subsequent Luftwaffe bombing.
This raid is particularly costly to the Luftwaffe with British fighters downing eleven German aircraft and ground flak claiming eight more, although the Fulmar crew are forced to ditch during the engagement due to suffering engine damage from an alert Ju 87. Lt R. S. Henley and Naval Airman A. S. Rush are successfully recovered, having glided to Malta after Henley had discovered Rush couldn't swim.
Writers Note: Which is something of a concern given they're naval airmen.
Despite this latest setback which further delays her departure date, Lusty has ultimately emerged from this bloody affair the effective victor, having won out through sheer virtue of remaining afloat while having again run the Luftwaffe out of ammunition.
Writers Note: "Tittybote still refuses to die."
The naval historian J. D. Brown noted that "There is no doubt that the armoured deck saved her from destruction; no other carrier took anything like this level of punishment and survived."
January 21st, 1941 (Tuesday) - Operation MBD 2 (Day 2)
Destroyers Jervis, Juno, Janus and Greyhound move from a holding position at Suda Bay towards Malta to prepare for the extraction of HMS Illustrious. Repairs are proceeding as planned and Lusty is expected to be seaworthy (if not combat ready) by the 23rd of January. The 1st Battle Squadron remains at short notice at Alexandria, waiting for the carrier to move out.
January 23rd, 1941 (Thursday) - Operation MBD 2 (Day 4)
Work crews successfully complete temporary repairs on the HMS Illustrious at Valetta Harbour. At 1846 hrs, when it is deemed too dark for accurate aerial sighting of fleet movement, Illustrious sets sail for Alexandria, escorted by the destroyers Jervis, Juno, Janus and Greyhound, her departure so abrupt that she leaves with her crew still reeling in the cables and securing ropes that trail behind her as she sets sail.
At Suda Bay, Force B (cruisers Orion, Ajax, Bonaventure, York and the destroyers Ilex and Hero) move to link up with Illustrious.
Force C (battleships Barham and Valiant, cruiser HMAS Perth and the destroyers Stuart, Nubian, Mohawk, Hasty, Diamond and Griffin) depart Alexandria to provide distant cover for the withdrawal.
Writer’s Note: Considering the absolute hammering Illustrious had taken in the prior 13 days, and the fact that Malta was still besieged by Axis air forces, her being able to scarper that quickly is a testament to the bravery of her crew and Valletta's repair work.
January 24th, 1941 (Friday) - Operation MBD 2 (Day 5)
Sailing at a surprising 25 knots, Illustrious' departure from Malta is sufficiently alacritous that she and her escort group overshoot the rendezvous with Force B (cruisers Orion, Ajax, Bonaventure, York and the destroyers Ilex and Hero) which had originally been supposed to link up with the carrier to act as a cruiser screen.
At 0800 hrs however, Illustrious was observed emitting intense smoke from her funnels, and her speed was reduced to 21 knots. Damage control teams conduct immediate checks and discover Lusty's tanks are contaminated with water.
Unless fuel can be salvaged, the carrier will run out of fuel oil in three hours.
The Luftwaffe has likewise not been idle. German aircraft conduct sweeps, searching for the Illustrious, which from their perspective had effectively disappeared overnight.
Discovering the loitering Force B, bombers from Fliegerkorp X attack the cruiser squadron, and Ajax is slightly damaged by splinter damage from near misses. While German bombers single out the Leander-class for repeated attack, no further damage is done to any of the ships.
Fortunately for Lusty, after a frantic search by her engineering crew to determine possible causes for the contamination ensue, damaged fuel lines are identified and isolated, and a fuel separator is jury-rigged. Efforts to salvage fuel from contaminated tanks succeed, and Lusty is able again raise her speed to 23 knots.
Unable to find her cruiser escort, a snap call is made and rather than wait for the cruisers (which were in fact waiting for her elsewhere), Lusty and her destroyer escorts moves to link up with Force C (battleships Barham and Valiant, cruiser HMAS Perth and the destroyers Stuart, Nubian, Mohawk, Hasty, Diamond and Griffin) instead, and contact is made during the afternoon.
Together with Force C, now acting as close escort, the British fleet turns and makes a run for Alexandria.
Writers Note: Somehow, this has left me with the unshakable image of Lusty clutching her sunhat and beating a hasty retreat past a confused York and Ajax while pursued by a swarm of Stukas.
January 24th, 1941 (Friday) - Operation MBD 2 (Final Day)
The battered aircraft carrier Illustrious triumphantly sails into Alexandria harbour at 1300 hrs, bringing Operation MBD 2 to a conclusion. It has been a close-run thing. Lusty has less than 60 tons of usable fuel left in her tanks.
She will undergo structural repairs at Alexandria before heading to Durban for a full underwater assessment and examination. The Royal Navy will subsequently arrange for permanent repairs to be conducted at the US Navy Yard at Norfolk, Virginia, taking the heavily-abused carrier out of the war until December 9. In fact, Illustrious and her youngest sister, Formidable, ended up returning home together, after Formidable had also endured a significant shellacking within the Med, and subsequent repairs in America.
Taking the topic away from those grisly situations, I suppose I have Overly Serious Anime Clothing Analysis to do.
I don't think I need to tell anyone how terribly impractical this outfit is, I think most people could see it to start with.
You know, I don't know what annoys me here the most, but nearly all of the fabric being sheer is far up there somewhere. You'd think for a ship with armoring that thick the clothing would be a bit more solid, but whatever. Heck, I'm not even sure whether the already present thirstiness being given a historical explanation is worthy of commendation or further rolling of the eyes and a deep sigh.
Anyway, the main problem here is easily the most "pronounced", one made only trickier thanks to a lack of solid fabrics. There's virtually no support for the chest, and given the shape of them from this angle there has to be a heavy push-up effect present. The only real answer I can give is that there would have to be a nude colored, underwire/solid, frontal bodice of sorts attached from the skirt and camouflaged under the sheer. And the wiring is going to have to be rigid on this, so wave goodbye to leaning forwards, I guess. Invisible/silicone bras exist, and given that frontal views have a visible cup design, there's a very, very minor chance something like that may be at work here, but I doubt it. Regardless, you're probably going to want some tape here, as much as I don't like having to say it.
(why does it always have to be about bare shoulders, I swear you can just make this a whole lot easier if you opt for shoulder support)
The skirt under the sheer is definitely a bit far too short for my tastes, but I really can't say anything about it. The soft heels are a bit odd (and coloration-wise the only excuse I can give it is it being a black velvet material), and aside from general complaining about heels in general. At least her stockings have garters. The ribbon being the landing deck is neat, although it being so low on the abdomen is kind of questionable given the purpose.
The only other thing I can complain about is that hat. Aside from not knowing why you'd want any black on a sun hat, there is no physical way for that thing to be on her noggin as a normal hat. In all likelihood, it's been vigorously pinned to her hair, which might be able to take slight advantage of the tied tails in her hair, but probably not.
-------------------------
Overall Aesthetics Rating: Good to Okay
(Comments- Pretty, lots of lace, and with a good color scheme. Although, anyone who knows me from the discord ought to know I don't like lots of skin showing. If the skirt underneath was a bit longer, I'd probably give it a bit more of a pass on this. It has hair bells though!)
------------------------------------
Practicality / Comfort Rating:
(Comments- The detailed analysis should make this pretty obvious.)
Estimated Walking Speed: A very careful brisk walk, at maximum
Lace Rating: Pretty
Would I Wear It:
--------------------------------------
CCT Style Analysis:
Cute: 15%
Classy: 30%
Thirsty: 55%
-------------------
-
- Site Admin
Character Stories, Part 1
Okay, so... I don't go into it for the video, but, with only a few exceptions (namely Submarines, Akashi, and Long Island's questline), the way to unlock character stories is the same.
- Make the nice shipgirl your secretary. Doesn't have to the one that actually gets affection, but at some point it will be.
- Click her on the main screen. The little refresh looking button will cycle between secretaries. This will start the story.
From here, there are 6 goals that result in more story, and one that's basically "A tiny reward you can come back to in your quest to max level all the girls."
- Give them 3 Torpedo Tempura. If you don't have any, you can buy some for fuel, so this isn't a biggie.
- Enhance ships 10 times (IE - use 10 ships to enhance other ships. Doesn't have to be one.) This is usually a good reason to get as many storylines on the go as you can, because just one set of 10 enhances will clear this step for all of them. Not that this is a troublesome requirement either.
- Sortie and obtain 20 victories with X in the fleet. Just battle in campaign maps, war archives, or events and win 20 battles with that fleet wot they're in. Again, you can do multiple shipgirl questlines this way, and if it's a map with a "4 till the boss" requirement, well, that's four times through, and bam, you're done.
- Complete 3 Daily Challenges with X in the fleet. Again, it's pretty self explanatory, but this is the one many people forget to do. It's only a minor annoyance, as it usually means you're taking on a daily less rewarding than you're used to.
- Reach 100 Affinity. 90% of this is pretty easy, and the rest isn't that hard. For the first 90 Affinity, just... Keep her in the secretary slot. Then fight with her in the fleet until it reaches 100.
- Max Limit Break the shipgirl. This can happen before you've even finished the 100 affinity, but yeah, this is only an annoying step if a) She rarely drops, or is unique, or b) She's SR or UR, and thus requires the harder to get Purin. And this is the step at which the story ends.
- Get the shipgirl to Level 100. The nice thing about this step is that it drops a gold ship blueprint of the same type as the shipgirl, but otherwise, your total rewards for the last three steps are 25 Dorm Coins, a T2 skillbook, a T2 blueprint, and 300 coins (on top of the 400 you got for the first four steps. The main reward for doing this is the story.
Since we're dealing with Long Island in this update, might as well mention the differences here. There are no rewards until the last step of Long Island's questline, and the final reward is her Indoor skin (aka, the Gamer Girl Outfit)
- Give her 3 Oxy-Cola (cheaper than Torpedo Tempura
- Win 15 battles (doesn't even have to be with her in the fleet)
- Enhance a ship 3 times.
- Scrap 3 pieces of gear.
- Replenish food in the dorm three times (can be at once)
- Complete 3 daily challenges
- MLB Long Island
- Give her all the fast food she's been dumping on your ass this whole time.
She's easy to please. So, storylines!

Character Stories Part 1 - Long Island, Warspite, Portland
SIDE STORY: LONG ISLAND
Long Island is on leave. And she isn’t coming out of her room. Or exercising. Or anything but playing them video games. And, rather naturally, the Commander wants her to at least try to stay in decent condition.
And so begins a small saga of the Commander attempting to cajole and trick Long Island into doing things. That’s… Yeah, that’s the story, there’s really not a lot to say here.
Long Island is one of two events where you get something other than the usual small rewards for her story. Specifically, you get her indoors skin. It’s a free skin, I nearly always use free skins, cool! And, like many skins, it has differing dialogue, showing that she’s a trueblue gaming nerd, like us.
As a character, Long Island can be divisive, but her personal story is kinda cute, because she accurately represents the average young adult nowadays. Only, like all KANSEN, she’s at least a 7/10 on the ‘cute and/or supernaturally hot’ scale, because every last shipgirl is idealized towards one of those two axes.
True. Although I’m thankful she’s not voiced in the stories. I will forever curse you for exposing me to Long-Island-Voice.
Cry some more. I was blindsided by that voice when I started the game
SIDE STORY: WARSPITE!!!
Oh, Warspite. You’re a good egg, devoted to your Queen, although… Okay, this is mostly a day in the life, but there’s a few fun things about it. For a start, the alternate choice of waking Her Majesty up forcefully. And her cry of “BOLLOCKS!!!” as her jumping for some papers leads to a mess (She’s kinda short, y’see, and it was a high shelf. But it’s mostly this little microcosm of “Fuck elegance!” that I like. Plus it’s a fun word to yell.)
Okay, I lied. This is a day of hilarious moments, often accidents, from the aforementioned file spillage, to Suffolk in the halls (So caught up in her work she mopped clear into the hallway), to Illustrious’ … Moment in the story (Boing)
But it’s also got some good moments. Enterprise and Warspite, showing their mutual skill, and their mutual respect for each other. Neither one actually managed to hit the other, but they did neutralise each other. It is, despite a hilariously rocky start for the old girl, a heartwarming one, where yes, like many, she falls for the Commander, but for her, it’s on the shared experience, the conversations… It’s good stuff, and still manages to mix in some humour of sorts with Queen Liz enquiring (in a way that, as Warspite thinks, is very hard to interpret), the Commander being warmly called a moron for having hid most of the work from her, and the rumourmongering afterwards. Not even a rumour shall break the Unsinkable Legend!
Basically, this is a good story to start with, because there’s a lot in its brief time. And it’s one of the more revealing stories, in my opinion.
While pretty much all of the character stories have the character falling for the commander on some level, Warspite’s is probably the most understated; she’s petite, she’s inelegant, she’s better at fighting than talking, and there’s no grand confession or anything. Just a tired lady having a nap and feeling safe. And That’s probably the gentlest, clearest, and kindest form of affection there is.
SIDE STORY: PORTLAND
Okay, so when this one was announced, the discord was… Dubious, to say the least. Portland is a somewhat grating (understatement) character, whose character seemed almost entirely one note (devotion to her big sister, sometimes in very weird forms, like her collection of IndyPort doujin, which only grows post retrofit.)
And, indeed, the first half is exactly that. So obsessive, she tries to create a Church of Indy, dedicated to a) making her new friends (okay, good goal), and b) Everyone else worshipping her cuteness (nooooot so good.)
It goes exactly as well as you’d expect, considering the first person she asks is Deutschland, and she asks in the worst possible way. The second, Dorsetshire, is exactly like Indy in this respect, and so they end up talking across each other, and I-58 is actually scared off by Portland, who completely puts her foot in her mouth. I mean, she did beat Indy in an exercise, but mistakes Portland’s amazement for anger. Kind of understandable, though.
And it’s at this point, where folks are groaning, especially at Portland’s new plan, to sortie Indy on an exercise with everyone who Indy has beaten, that it actually improves.
Yes, I’m saying the latter half of the story actually makes it… With a little adjustment to the plan. It’s Portland who gets sent out, and… Well, Portland has 16 battle stars. They do not lie. And Portland is recognised as having more than one layer, and Grump finally gets his wish. For Portland to be respected as a good strategist.
On the tactical level. Don’t put Portland in command of logistics.
Turns out Indy and the Commander were sort of in cahoots here, to demonstrate to others that Portland’s got more character than that, and to Portland that although her sister appreciates the talking up, it makes Portland grating to other people… And it all ends well (as these stories tend to.) Yay!
Overall, Portland, despite her utter obsession with her sister, is a character that is likeable mechanically, but really needed a firm kick at the history references. ‘Sweet Pea’ is her historical nickname, after all, and her being genuinely sweet to everyone in the side story is a nice bit of characterization. She’s loud, overbearing, hyperactive, and a complete dork, but she Cares, and I’m not going to find fault for that.
Okay, so... I don't go into it for the video, but, with only a few exceptions (namely Submarines, Akashi, and Long Island's questline), the way to unlock character stories is the same.
- Make the nice shipgirl your secretary. Doesn't have to the one that actually gets affection, but at some point it will be.
- Click her on the main screen. The little refresh looking button will cycle between secretaries. This will start the story.
From here, there are 6 goals that result in more story, and one that's basically "A tiny reward you can come back to in your quest to max level all the girls."
- Give them 3 Torpedo Tempura. If you don't have any, you can buy some for fuel, so this isn't a biggie.
- Enhance ships 10 times (IE - use 10 ships to enhance other ships. Doesn't have to be one.) This is usually a good reason to get as many storylines on the go as you can, because just one set of 10 enhances will clear this step for all of them. Not that this is a troublesome requirement either.
- Sortie and obtain 20 victories with X in the fleet. Just battle in campaign maps, war archives, or events and win 20 battles with that fleet wot they're in. Again, you can do multiple shipgirl questlines this way, and if it's a map with a "4 till the boss" requirement, well, that's four times through, and bam, you're done.
- Complete 3 Daily Challenges with X in the fleet. Again, it's pretty self explanatory, but this is the one many people forget to do. It's only a minor annoyance, as it usually means you're taking on a daily less rewarding than you're used to.
- Reach 100 Affinity. 90% of this is pretty easy, and the rest isn't that hard. For the first 90 Affinity, just... Keep her in the secretary slot. Then fight with her in the fleet until it reaches 100.
- Max Limit Break the shipgirl. This can happen before you've even finished the 100 affinity, but yeah, this is only an annoying step if a) She rarely drops, or is unique, or b) She's SR or UR, and thus requires the harder to get Purin. And this is the step at which the story ends.
- Get the shipgirl to Level 100. The nice thing about this step is that it drops a gold ship blueprint of the same type as the shipgirl, but otherwise, your total rewards for the last three steps are 25 Dorm Coins, a T2 skillbook, a T2 blueprint, and 300 coins (on top of the 400 you got for the first four steps. The main reward for doing this is the story.
Since we're dealing with Long Island in this update, might as well mention the differences here. There are no rewards until the last step of Long Island's questline, and the final reward is her Indoor skin (aka, the Gamer Girl Outfit)
- Give her 3 Oxy-Cola (cheaper than Torpedo Tempura
- Win 15 battles (doesn't even have to be with her in the fleet)
- Enhance a ship 3 times.
- Scrap 3 pieces of gear.
- Replenish food in the dorm three times (can be at once)
- Complete 3 daily challenges
- MLB Long Island
- Give her all the fast food she's been dumping on your ass this whole time.
She's easy to please. So, storylines!
Character Stories Part 1 - Long Island, Warspite, Portland
SIDE STORY: LONG ISLAND
Long Island is on leave. And she isn’t coming out of her room. Or exercising. Or anything but playing them video games. And, rather naturally, the Commander wants her to at least try to stay in decent condition.
And so begins a small saga of the Commander attempting to cajole and trick Long Island into doing things. That’s… Yeah, that’s the story, there’s really not a lot to say here.
Long Island is one of two events where you get something other than the usual small rewards for her story. Specifically, you get her indoors skin. It’s a free skin, I nearly always use free skins, cool! And, like many skins, it has differing dialogue, showing that she’s a trueblue gaming nerd, like us.
As a character, Long Island can be divisive, but her personal story is kinda cute, because she accurately represents the average young adult nowadays. Only, like all KANSEN, she’s at least a 7/10 on the ‘cute and/or supernaturally hot’ scale, because every last shipgirl is idealized towards one of those two axes.True. Although I’m thankful she’s not voiced in the stories. I will forever curse you for exposing me to Long-Island-Voice.
Cry some more. I was blindsided by that voice when I started the gameSIDE STORY: WARSPITE!!!
Oh, Warspite. You’re a good egg, devoted to your Queen, although… Okay, this is mostly a day in the life, but there’s a few fun things about it. For a start, the alternate choice of waking Her Majesty up forcefully. And her cry of “BOLLOCKS!!!” as her jumping for some papers leads to a mess (She’s kinda short, y’see, and it was a high shelf. But it’s mostly this little microcosm of “Fuck elegance!” that I like. Plus it’s a fun word to yell.)
Okay, I lied. This is a day of hilarious moments, often accidents, from the aforementioned file spillage, to Suffolk in the halls (So caught up in her work she mopped clear into the hallway), to Illustrious’ … Moment in the story (Boing)
But it’s also got some good moments. Enterprise and Warspite, showing their mutual skill, and their mutual respect for each other. Neither one actually managed to hit the other, but they did neutralise each other. It is, despite a hilariously rocky start for the old girl, a heartwarming one, where yes, like many, she falls for the Commander, but for her, it’s on the shared experience, the conversations… It’s good stuff, and still manages to mix in some humour of sorts with Queen Liz enquiring (in a way that, as Warspite thinks, is very hard to interpret), the Commander being warmly called a moron for having hid most of the work from her, and the rumourmongering afterwards. Not even a rumour shall break the Unsinkable Legend!
Basically, this is a good story to start with, because there’s a lot in its brief time. And it’s one of the more revealing stories, in my opinion.
While pretty much all of the character stories have the character falling for the commander on some level, Warspite’s is probably the most understated; she’s petite, she’s inelegant, she’s better at fighting than talking, and there’s no grand confession or anything. Just a tired lady having a nap and feeling safe. And That’s probably the gentlest, clearest, and kindest form of affection there is.SIDE STORY: PORTLAND
Okay, so when this one was announced, the discord was… Dubious, to say the least. Portland is a somewhat grating (understatement) character, whose character seemed almost entirely one note (devotion to her big sister, sometimes in very weird forms, like her collection of IndyPort doujin, which only grows post retrofit.)
And, indeed, the first half is exactly that. So obsessive, she tries to create a Church of Indy, dedicated to a) making her new friends (okay, good goal), and b) Everyone else worshipping her cuteness (nooooot so good.)
It goes exactly as well as you’d expect, considering the first person she asks is Deutschland, and she asks in the worst possible way. The second, Dorsetshire, is exactly like Indy in this respect, and so they end up talking across each other, and I-58 is actually scared off by Portland, who completely puts her foot in her mouth. I mean, she did beat Indy in an exercise, but mistakes Portland’s amazement for anger. Kind of understandable, though.
And it’s at this point, where folks are groaning, especially at Portland’s new plan, to sortie Indy on an exercise with everyone who Indy has beaten, that it actually improves.
Yes, I’m saying the latter half of the story actually makes it… With a little adjustment to the plan. It’s Portland who gets sent out, and… Well, Portland has 16 battle stars. They do not lie. And Portland is recognised as having more than one layer, and Grump finally gets his wish. For Portland to be respected as a good strategist.
On the tactical level. Don’t put Portland in command of logistics.Turns out Indy and the Commander were sort of in cahoots here, to demonstrate to others that Portland’s got more character than that, and to Portland that although her sister appreciates the talking up, it makes Portland grating to other people… And it all ends well (as these stories tend to.) Yay!
Overall, Portland, despite her utter obsession with her sister, is a character that is likeable mechanically, but really needed a firm kick at the history references. ‘Sweet Pea’ is her historical nickname, after all, and her being genuinely sweet to everyone in the side story is a nice bit of characterization. She’s loud, overbearing, hyperactive, and a complete dork, but she Cares, and I’m not going to find fault for that.Okay, Ladies and Gents, it's time for another mini-vote.
After writing up the Illustrious Blitz, I'm unofficially counting that as the HMS write-up for the second go-round.
This leaves the decision-making in your hands; Do you want a writeup on a USN, IJN, or KMS Vessel, or should I stick my hand into the grab-bag of minor factions and see about taunting a Russian, Italian, Two Flavours of French, or the Chinese?
I ask that you bold your vote by Faction code, and, if you have a preference for a class, to mention as such. (For the Grab bag, just mention that with a choice on who you'd prefer)
Something tells me that if I vote French, it'll probably be maid outfits upon maid outfits, so let's go Italian.
Okay, the thread has spoken, The Lurkers have delurked to prod me with pointy sticks, and I'm feeling inspired, so we're getting Both an Italian and a French Bote from the grab bag.
So, let's introduce the girls.
This is Tartu.
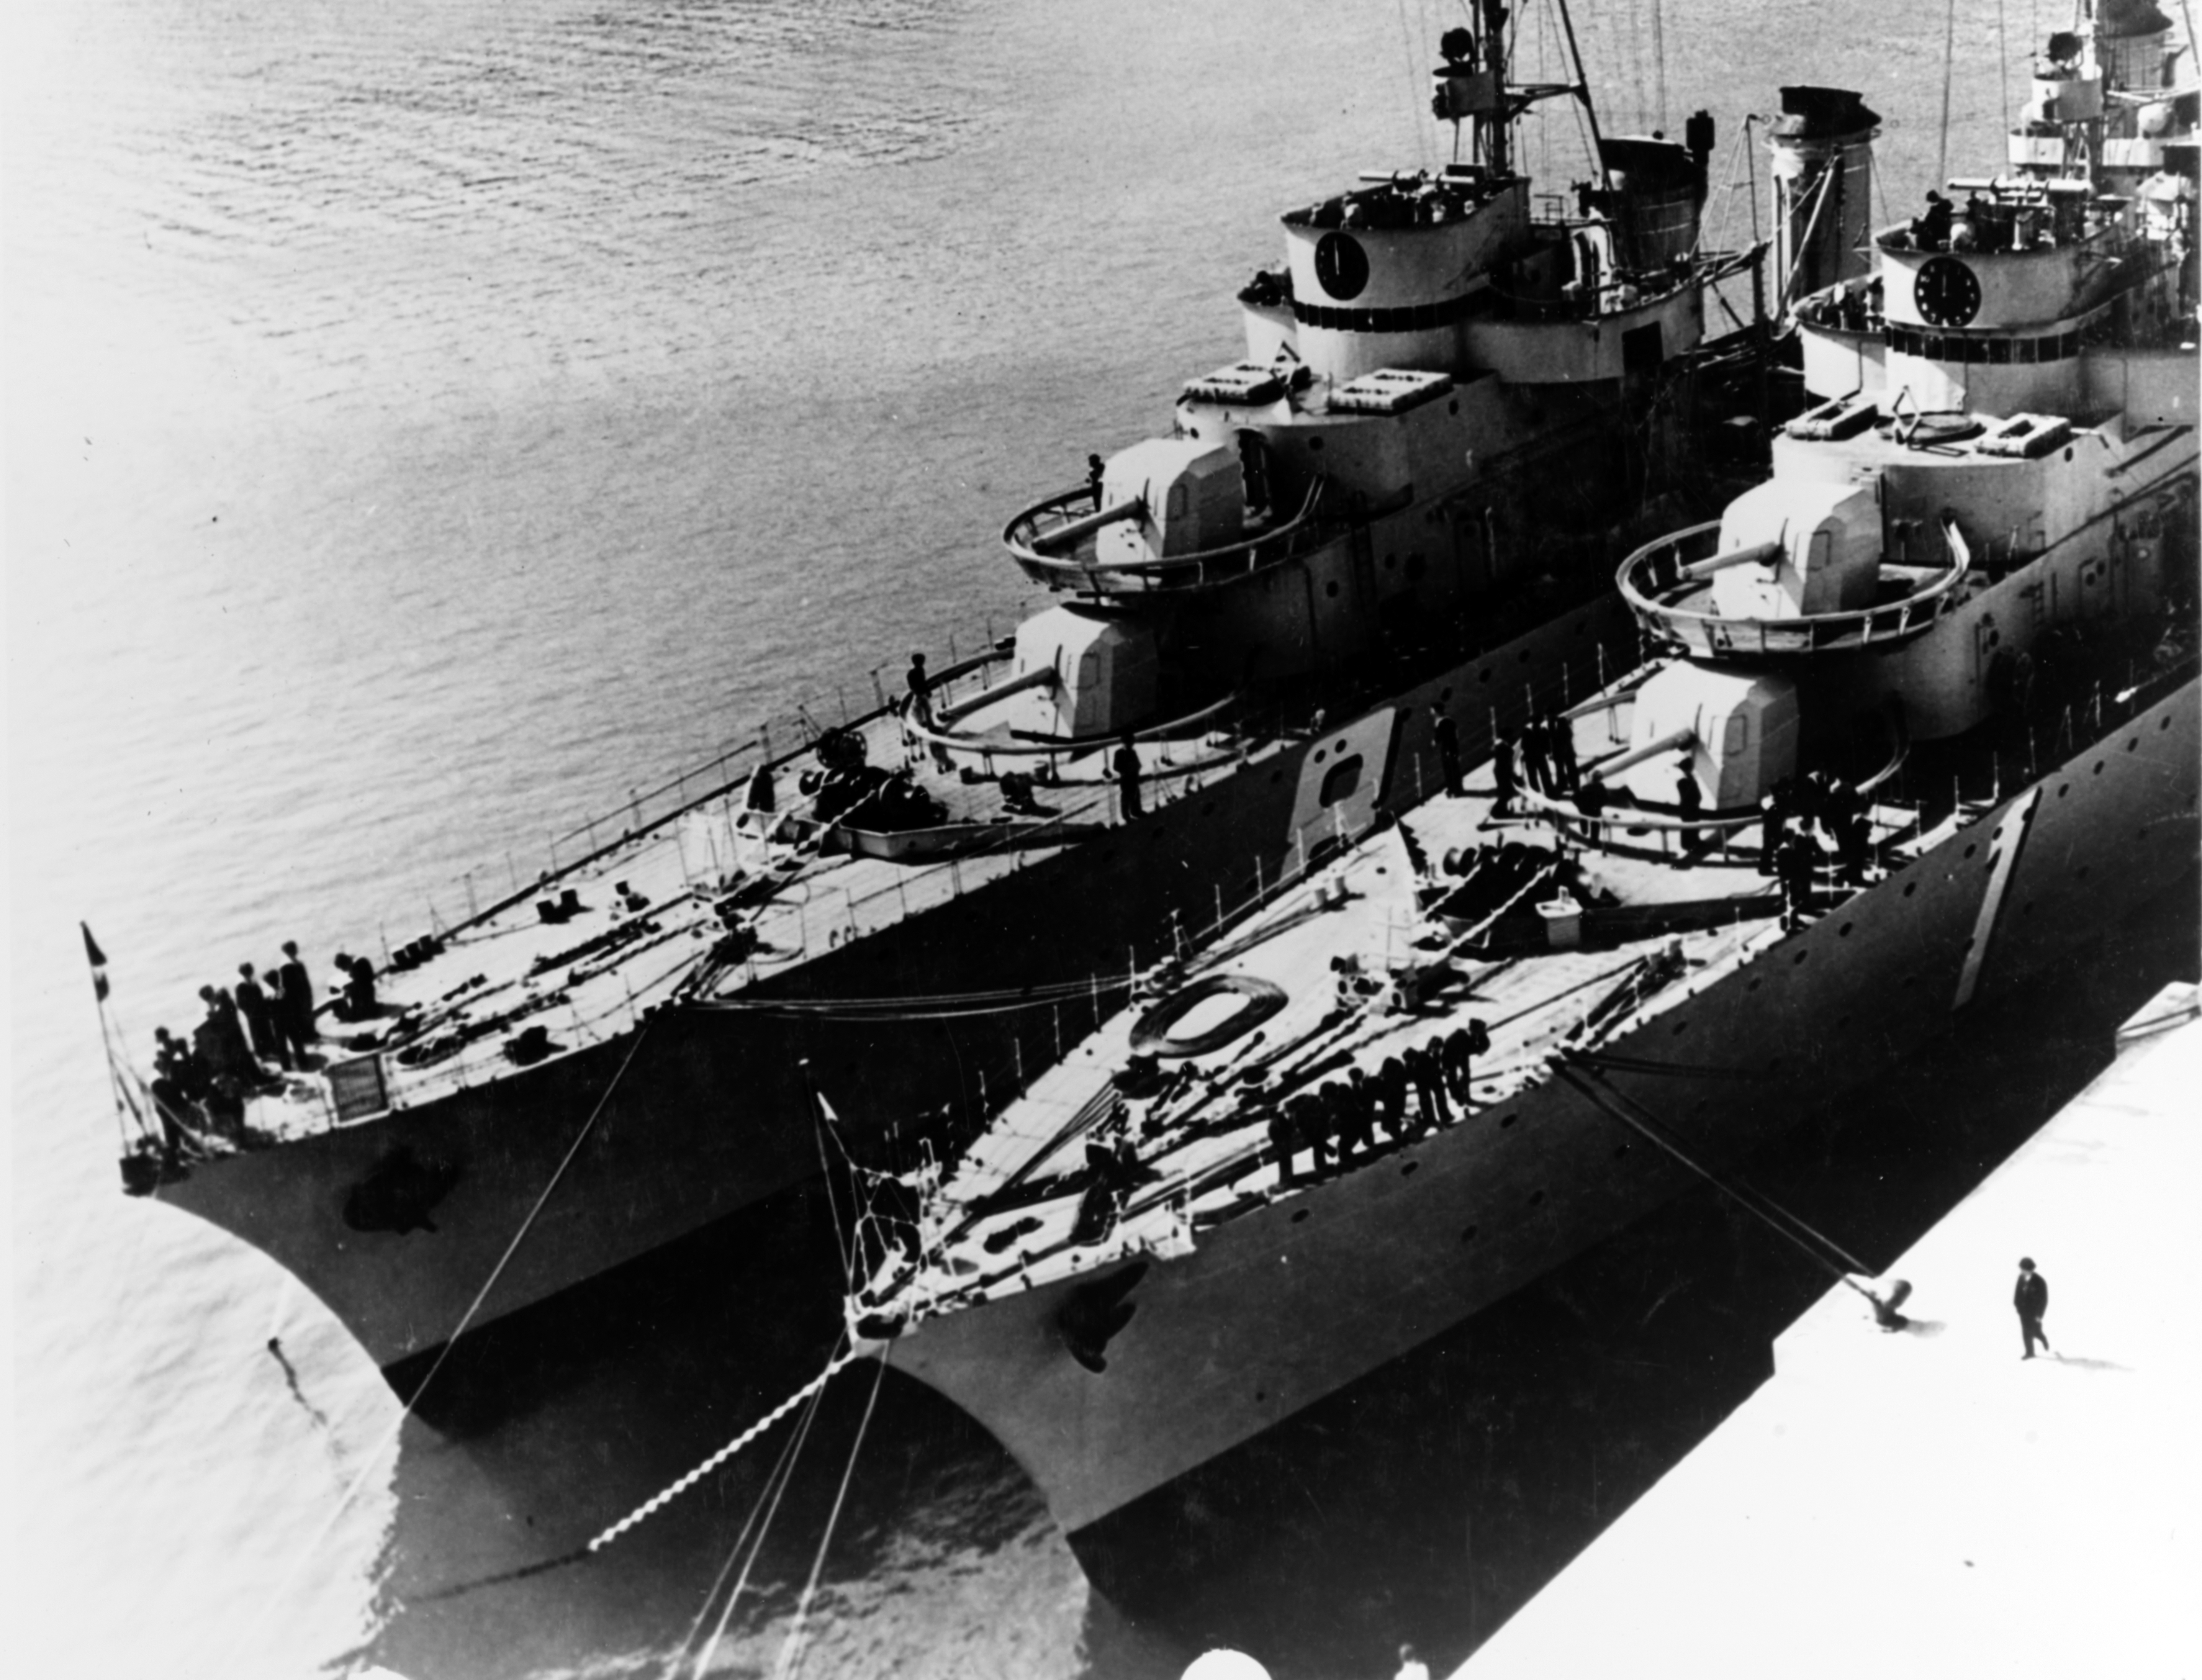
Shown with her older sister Vauquelin
This is also Tartu.

She stars in 'The Way home in the Dark' mini-event.
Tartu is our French Representative from the Grab-bag, featured in a mini-event with her older sister and the Battlecruiser Dunkerque; In service from 1933 until 1942, most of her life was spent in the Med, where she played with her sisters, made threatening faces at the Spaghettis down the way (As most of the French Navy was designed around conflict in the Med, and the Italians were the only real threat), and, during the Spanish Civil War, assisted on the non-intervention agreement of 1936-39, by blockading Spanish ports to prevent naval assistance.
So, Brass tacks once more.
Tartu's a big destroyer, at 3,100 tons fully loaded; toting five 138mm guns as her main armament, seven torpedo tubes in a 3-2-2 arrangement, depth charges, mines, and an impressive brace of 40mm AA guns, there were several arguments to re-classing her as a Light Cruiser. (In fact, her Successors, the Le Fantasque class, were classified as Light Cruisers in the middle of WW2.) The big thing about her (ha.) is that she's a lot faster than her size would suggest; while most destroyers her size struggled to maintain speeds of 33 knots, Tartu, like her siblings, had an official top speed of 36, and an actual top speed of 40 knots (Just under 80 kilometres per hour. Which doesn't sound like much in a one-tonne car, but in a 3100 tonne ship, that's Stupidly fast).
For the most part, Tartu spent her time in service with her sisters, acting as the flagship for her squadron for three years, and being quietly smug in the fact that of her five siblings, she was the only one to be completed on time; primarily based out of Toulon at the time of the Spanish Civil war, she found herself acting as the flagship of Contre-amiral Ollive whilst on the neutrality enforcement patrols off of the Spanish coast, with her siblings Vauquelin and Le Chevalier Paul.
And then World War 2 kicked off properly in September 1939. Tartu was originally deployed to Oran, but, upon request of the Royal Navy, was detached to serve as a convoy escort between Norway and Scotland in preparation for the Allied Invasion of the then-neutral country.
When the German Invasion preempted allied plans, Tartu's convoy duties were delayed, but eventually carried out as she escorted troop convoys to Namsos (where a mixed force of Anglo, French, and Norwegian troops held off German land and air attack for 18 days without relief, before retreating in good order to Scotland), and Narvik (The current event in the game, Stars of the Shimmering Fjord, details the first naval battle of Narvik).
After failing to intercept a German convoy, Tartu was asked to come home and prepare for the inevitable Italian hostilities, which happened inevitably.
Which is about when things started to turn out poorly for the French in general.
At Mers-el-Kebir, the Royal Navy bombarded the French Fleet at Anchor due to a series of miscommunications and ego getting in the way of common sense. (I'll be fair here and say that both commanders were utter assbags and leave it at that)
Tartu, still at Oran, headed north to Toulon, where she was folded into the Vichy Navy, and placed in reserve for the latter half of 1940. Reactivated in time for the Allied invasion of French Syria and Lebanon, Tartu found herself escorting troop convoys from Algeria to Marseilles, then, after a short refit, headed back to Mers-El-Kebir to escort Dunkerque home. (This is shown in the event 'The Way Home in the Dark', albeit with some embellishment for the sake of the gameplay and shootyness)
Tartu then stayed in Toulon, acting as a guard for the main fleet, until the 27th of November, 1942, when the Nazi Command demanded that the French Navy surrender all their ships to Germany. In response to the demand, and as a massive middle finger to the English as well, the French navy chose to scuttle the fleet.


And so, Tartu died, not at the hands of the enemy, but at the hands of her own crew, to prevent her from being forced to turn her guns against her own nation.
Now for the second half of this doubleheader.
This is Conte di Cavour, in her original 1915 state.
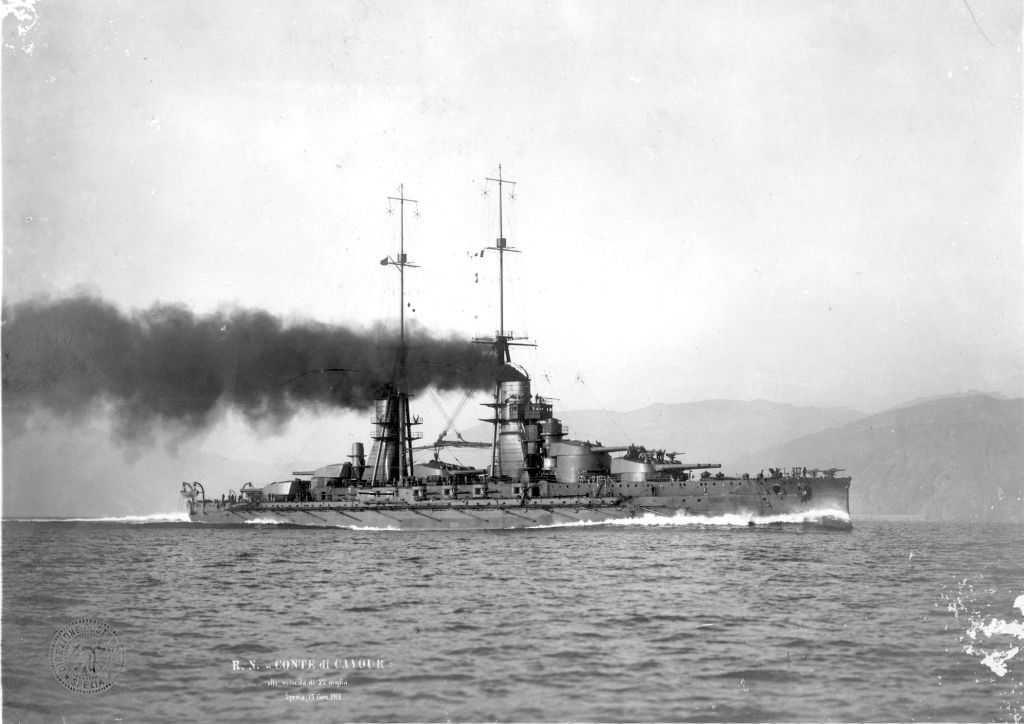
This is also Conte di Cavour, after her 1937 Retrofit.

A bit of a change, to say the least.
Conte and her sisters (including Giulio Cesare, who got mugged by Warspite), were designed as countermeasures against the then-new French Battleships of the Courbet class, which included the first Jean Bart. (We'll eventually talk about the Second one, as she's in the game)
Toting reasonably heavy armour for the time, thirteen twelve-inch guns, and a top speed of just over 22 knots, Conte di Cavour was very much an early dreadnought, and, most frustratingly for her, she actually missed out on the fighting in World War I.

It didn't go well for her, though through no fault of her own.
And, in fact, the latter is what was attempted.
So, let's introduce the girls.
This is Tartu.
Shown with her older sister Vauquelin
This is also Tartu.
She stars in 'The Way home in the Dark' mini-event.
Tartu is our French Representative from the Grab-bag, featured in a mini-event with her older sister and the Battlecruiser Dunkerque; In service from 1933 until 1942, most of her life was spent in the Med, where she played with her sisters, made threatening faces at the Spaghettis down the way (As most of the French Navy was designed around conflict in the Med, and the Italians were the only real threat), and, during the Spanish Civil War, assisted on the non-intervention agreement of 1936-39, by blockading Spanish ports to prevent naval assistance.
So, Brass tacks once more.
Tartu's a big destroyer, at 3,100 tons fully loaded; toting five 138mm guns as her main armament, seven torpedo tubes in a 3-2-2 arrangement, depth charges, mines, and an impressive brace of 40mm AA guns, there were several arguments to re-classing her as a Light Cruiser. (In fact, her Successors, the Le Fantasque class, were classified as Light Cruisers in the middle of WW2.) The big thing about her (ha.) is that she's a lot faster than her size would suggest; while most destroyers her size struggled to maintain speeds of 33 knots, Tartu, like her siblings, had an official top speed of 36, and an actual top speed of 40 knots (Just under 80 kilometres per hour. Which doesn't sound like much in a one-tonne car, but in a 3100 tonne ship, that's Stupidly fast).
For the most part, Tartu spent her time in service with her sisters, acting as the flagship for her squadron for three years, and being quietly smug in the fact that of her five siblings, she was the only one to be completed on time; primarily based out of Toulon at the time of the Spanish Civil war, she found herself acting as the flagship of Contre-amiral Ollive whilst on the neutrality enforcement patrols off of the Spanish coast, with her siblings Vauquelin and Le Chevalier Paul.
And then World War 2 kicked off properly in September 1939. Tartu was originally deployed to Oran, but, upon request of the Royal Navy, was detached to serve as a convoy escort between Norway and Scotland in preparation for the Allied Invasion of the then-neutral country.
When the German Invasion preempted allied plans, Tartu's convoy duties were delayed, but eventually carried out as she escorted troop convoys to Namsos (where a mixed force of Anglo, French, and Norwegian troops held off German land and air attack for 18 days without relief, before retreating in good order to Scotland), and Narvik (The current event in the game, Stars of the Shimmering Fjord, details the first naval battle of Narvik).
After failing to intercept a German convoy, Tartu was asked to come home and prepare for the inevitable Italian hostilities, which happened inevitably.
And then Germany invaded France, steamrolled the opposition, and forced France to sign an utterly humiliating surrender, in the same traincar that Germany had been forced to 20 years before.The 5th Scout Division returned to Toulon on 27 May as the Mediterranean Fleet was developing plans to attack the Italians in case they decided to join the war. After the Italians declared war on 10 June, the fleet planned to bombard installations on the Italian coast.
Tartu and the rest of the 5th Scout Division were among the ships ordered to attack targets in Vado Ligure. The destroyer was tasked to bombard the Nafta oil tanks. Two Italian MAS boats on patrol attempted to attack the French ships, but only one was able to launch a torpedo before they were driven off with light damage by the French defensive fire. Damage assessments afterward revealed that little damage had been inflicted on the Oil reserve despite expending over 1,600 rounds of all calibers during the bombardment.
Which is about when things started to turn out poorly for the French in general.
At Mers-el-Kebir, the Royal Navy bombarded the French Fleet at Anchor due to a series of miscommunications and ego getting in the way of common sense. (I'll be fair here and say that both commanders were utter assbags and leave it at that)
Tartu, still at Oran, headed north to Toulon, where she was folded into the Vichy Navy, and placed in reserve for the latter half of 1940. Reactivated in time for the Allied invasion of French Syria and Lebanon, Tartu found herself escorting troop convoys from Algeria to Marseilles, then, after a short refit, headed back to Mers-El-Kebir to escort Dunkerque home. (This is shown in the event 'The Way Home in the Dark', albeit with some embellishment for the sake of the gameplay and shootyness)
Tartu then stayed in Toulon, acting as a guard for the main fleet, until the 27th of November, 1942, when the Nazi Command demanded that the French Navy surrender all their ships to Germany. In response to the demand, and as a massive middle finger to the English as well, the French navy chose to scuttle the fleet.
And so, Tartu died, not at the hands of the enemy, but at the hands of her own crew, to prevent her from being forced to turn her guns against her own nation.
Now for the second half of this doubleheader.
This is Conte di Cavour, in her original 1915 state.
This is also Conte di Cavour, after her 1937 Retrofit.
A bit of a change, to say the least.
Conte and her sisters (including Giulio Cesare, who got mugged by Warspite), were designed as countermeasures against the then-new French Battleships of the Courbet class, which included the first Jean Bart. (We'll eventually talk about the Second one, as she's in the game)
Toting reasonably heavy armour for the time, thirteen twelve-inch guns, and a top speed of just over 22 knots, Conte di Cavour was very much an early dreadnought, and, most frustratingly for her, she actually missed out on the fighting in World War I.
So, yeah. Conte's first real fight was against her fellow World War I contemporary, HMS Warspite.She saw no action, however, and spent little time at sea. Admiral Paolo Thaon di Revel, the Italian naval chief of staff, believed that Austro-Hungarian submarines and minelayers could operate too effectively in the narrow waters of the Adriatic. The threat from these underwater weapons to his capital ships was too serious for him to actively deploy the fleet.
Instead, Revel decided to implement a blockade at the relatively safer southern end of the Adriatic with the battle fleet, while smaller vessels, such as MAS torpedo boats, conducted raids on Austro-Hungarian ships and installations. Meanwhile, Revel's battleships would be preserved to confront the Austro-Hungarian battle fleet in the event that it sought a decisive engagement.
In 1919 she sailed to North America and visited ports in the United States as well as Halifax, Canada. The ship was mostly inactive in 1921 because of personnel shortages, and was refitted at La Spezia from November to March 1922. Conte di Cavour and Giulio Cesare supported Italian operations on Corfu in 1923 after an Italian general and his staff were murdered at the Greek–Albanian frontier; Italian leader Benito Mussolini, who had been looking for a pretext to seize Corfu, ordered Italian troops to occupy the island.
Conte di Cavour bombarded the main town on the island with her 76 mm guns, killing 20 civilians and wounding 32. She escorted King Victor Emmanuel III and his wife aboard Dante Alighieri on a state visit to Spain in 1924, and was placed in reserve upon her return until 1926, when, in April, she conveyed Mussolini on a voyage to Libya. The ship was again placed in reserve from 1927 until 1933, when she began her reconstruction.
It didn't go well for her, though through no fault of her own.
Warspite plunked a 15" shell through Cesare's stacks, causing the Italian battleship's engine rooms to be flooded with smoke and fumes, which put her out of action until late August 1940; Conte, for her part, lingered in port during that time, as she and her sister were normally paired to work together; after Cesare's repairs, the two battleships made a proper nuisance of themselves intercepting convoys to Malta. Which is why they were priority targets at Taranto when Illustrious sent 21 planes to do Italy dirty. (18 of them did the ships dirty, the last 3 did dirty to Italy's main fuel reserve)The British were escorting a convoy from Malta to Alexandria, while the Italians had finished escorting another from Naples to Benghazi, Italian Libya. Vice Admiral Andrew Cunningham, commander of the Mediterranean Fleet, attempted to interpose his ships between the Italians and their base at Taranto. Crews on the fleets spotted each other in the middle of the afternoon and the Italian battleships opened fire at 15:53 at a range of nearly 27,000 meters (29,000 yd). The two leading British battleships, HMS Warspite and Malaya, replied a minute later.
Three minutes after she opened fire, shells from Giulio Cesare began to straddle Warspite which made a small turn and increased speed, to throw off the Italian ship's aim, at 16:00. At the same time, a shell from Warspite struck Giulio Cesare at a distance of about 24,000 meters (26,000 yd). Uncertain how severe the damage was, Campioni ordered his battleships to turn away in the face of superior British numbers and they successfully disengaged.
And that's the attack that mortally wounded Conte di Cavour; flooded up to her gunwales by the incompetence of her squadron's commander, guns inoperable, a hulk in the harbour, waiting to be dredged from the muck and scrapped or returned to service.On the night of 11 November 1940, Conte di Cavour was at anchor in Taranto harbor when she was attacked, along with several other warships, by 21 Fairey Swordfish torpedo bombers from the British aircraft carrier HMS Illustrious. The ship's gunners shot down one Swordfish shortly after the aircraft dropped its torpedo, but it exploded underneath 'B' turret at 23:15, knocking out the main bow pump.
Her captain requested tugboats to help ground the ship on a nearby 12-meter (39 ft) sandbank at 23:27, but Admiral Bruno Brivonesi, commander of the 5th Battleship Division, vetoed the request until it was too late and Conte di Cavour had to use a deeper, 17-meter (56 ft), sandbank at 04:45 the following morning. She initially grounded on an even keel, but temporarily took on a 50-degree list before settling to the bottom at 08:00 with an 11.5-degree list. Only her superstructure and gun turrets were above water by this time.
And, in fact, the latter is what was attempted.
Conte di Cavour had the lowest priority for salvage among the three battleships sunk during the attack and little work was done for several months. The first priority was to patch the holes in the hull and then her guns and parts of her superstructure were removed to lighten the ship.
False bulwarks were welded to the upper sides of the hull to prevent water from reentering the hull and pumping the water overboard began in May 1941. Some 15,000 long tons of water were pumped out before Conte di Cavour was refloated on 9 June and entered the floating dry dock GO-12 on 12 July. The damage was more extensive than originally thought and temporary repairs to enable the ship to reach Trieste for permanent repairs took until 22 December.
In many respects, Conte di Cavour is a reflection of the Italian Navy as a whole. Strapped for materials, equipment, and training, but still doing her utmost, she was failed not by her crew, or her captain, but by a higher command that ignored the words of the people 'on the ground' in favour of their own fictions.Her guns were operable by September 1942, but replacing her entire electrical system took longer so the navy took advantage of the delays and incorporated some modifications to reduce the likelihood of flooding based on lessons learned from the attack.
Other changes planned were the replacement of her secondary and anti-aircraft weapons with a dozen 135-millimeter dual-purpose guns in twin mounts, twelve 65-millimeter, and twenty-three 20 mm AA guns. The repair work was suspended in June 1943, with an estimated six months work remaining on Conte di Cavour, in order to expedite the construction of urgently needed smaller ships.
She was captured by the Germans on 8 September when Italy surrendered to the Allies, and was reduced to a hulk. She was damaged in an air raid on 17 February 1945, and capsized on 23 February. Refloated shortly after the end of the war, Conte di Cavour was scrapped in 1946.
-
- Site Admin
DAY THE FIFTH (AND SIXTH) - SOLOMON’S NIGHTMARE, PART 1

Video - Day 5 and 6
Now that we’re into the campaign where story doesn’t yet exist, it’s mostly the historical and mechanical to talk about. So I’ll let Grump talk about the bloodbath that is the Solomons, and will note a few things going on here.
So, The Solomons. This is where the Japanese Navy Went to Die, where the US Navy Went to Die, the Japanese Army Went to Die, the American Army Went to DIE, and Practically everyone was in the right by calling the focal point of the campaign, Guadalcanal, a ‘Loathsome Green Hell’.
I am not going to beat around the bush. In the four major naval battles and 18 months of constant harassment, some 80 ships on both sides were sunk, 50 in and around Savo Sound, which was renamed Ironbottom Sound due to the sheer volume of wrecked ships, planes, transports, and military equipment that litters the seabed. Hundreds of planes, tens of thousands of lives, and horrible acts and atrocities were committed on those islands, including persistent rumours of IJA soldiers resorting to cannibalism.
Solomon’s Nightmare is the lead-up to the November 12th and 13th action where the battleships Hiei and Kirishima, with attendant destroyers and cruisers, swung by to apply a ‘Thunder Run’ to Henderson Airfield, intending to unload what amounted to naval-grade Thermite Shrapnel onto the airbase to render its planes useless. Needless to say, shit goes downhill for everyone involved, which comes to its effective conclusion in Map 6-4, when the actual battle takes place.
In the interim, we also get a quick peek at the Battle of Santa Cruz in Map 5, but we’ll talk about that in the future.
As we noted at the end of the last video, we now have access to submarine maps. These are not a feature regularly used, but they are a good source of submarine equipment blueprints, which makes them pretty useful if you want to buff your submarines beyond, y’know… Doing the weekly and praying the Labs gives you something neat. It’s also one of the few places you’ll ever need Sonar and Depth Charges. Because submarines are generally nonexistent outside of this mode, and certain events. Except yours, which are inconsistently usable.
Submarine Assistance becomes more available and reliable as you progress through story maps; IIRC, by World 9 or 10, they’re fully free to help you in every map stage, though you’ll often have to pick and choose which fights to deploy them in, and which you can trust your surface members to stomp a mudhole into
To unlock more, you need to clear the next chapter, and roll the highest chapter you’ve currently got sub missions on, getting through it with an S (Sub missions generally roll in order, but that might be confirmation bias)
It is confirmation bias, but when you only have 3-X and 4-X open it’s easy to get the one you want on the SOS ping.
And there is The Shipyard. The Shipyard is a long term project, and one that, if you’re going for it wholesale, will inform what fleet composition you’re taking, as Priority Ships, as they’re called, have two requirements that need your fleet to be of a certain type. If the PRY is a frontliner, you’ll need frontliners of their faction to get their Combat EXP requirements, and use them until the bar’s full. If it’s a backliner, same deal. So an all american… Frontline is the requirement.
On the bright side, at least for Jamie, Saint Louis is an honest-to-god shitwrecker, and is a good choice as ‘babbys first PR’
(It’s such a shame then that I haven’t used her yet. At the time of writing. )
)
I don’t get Saint Louis for a while, because I like my current team too much. But hey, at least things are better in PRY ship getting, because previously, it was very specific classes of ships that needed to be used! This was the biggest pain in the ass for Roon, because you required Iron Blood Cruisers… Of which there are four freely available without events.
Roon, by the way, is also another Shitwrecker, and is generally considered one of the three best heavy cruisers in the game, with a focus on her breaking bosses over her knee.
I got Roon the old fashioned way on Main. I look forward to having an easier time, especially since some Iron Blood events have procced since then.
I could gloat, but I do enough of that in the Discord. Let’s just leave it at this; All the PR girls are legitimately great, and get universal damage boosts against Sirens, but come with an elevated fuel cost and long-term investment of time, resources, and in-game materials such as Cubes and Retrofit blueprints. It really is a marathon to get one, but the end result, and the wailing and lamentation from the enemy fleets, is entirely worth it.
Video - Day 5 and 6
Now that we’re into the campaign where story doesn’t yet exist, it’s mostly the historical and mechanical to talk about. So I’ll let Grump talk about the bloodbath that is the Solomons, and will note a few things going on here.
So, The Solomons. This is where the Japanese Navy Went to Die, where the US Navy Went to Die, the Japanese Army Went to Die, the American Army Went to DIE, and Practically everyone was in the right by calling the focal point of the campaign, Guadalcanal, a ‘Loathsome Green Hell’.I am not going to beat around the bush. In the four major naval battles and 18 months of constant harassment, some 80 ships on both sides were sunk, 50 in and around Savo Sound, which was renamed Ironbottom Sound due to the sheer volume of wrecked ships, planes, transports, and military equipment that litters the seabed. Hundreds of planes, tens of thousands of lives, and horrible acts and atrocities were committed on those islands, including persistent rumours of IJA soldiers resorting to cannibalism.
Solomon’s Nightmare is the lead-up to the November 12th and 13th action where the battleships Hiei and Kirishima, with attendant destroyers and cruisers, swung by to apply a ‘Thunder Run’ to Henderson Airfield, intending to unload what amounted to naval-grade Thermite Shrapnel onto the airbase to render its planes useless. Needless to say, shit goes downhill for everyone involved, which comes to its effective conclusion in Map 6-4, when the actual battle takes place.
In the interim, we also get a quick peek at the Battle of Santa Cruz in Map 5, but we’ll talk about that in the future.As we noted at the end of the last video, we now have access to submarine maps. These are not a feature regularly used, but they are a good source of submarine equipment blueprints, which makes them pretty useful if you want to buff your submarines beyond, y’know… Doing the weekly and praying the Labs gives you something neat. It’s also one of the few places you’ll ever need Sonar and Depth Charges. Because submarines are generally nonexistent outside of this mode, and certain events. Except yours, which are inconsistently usable.
Submarine Assistance becomes more available and reliable as you progress through story maps; IIRC, by World 9 or 10, they’re fully free to help you in every map stage, though you’ll often have to pick and choose which fights to deploy them in, and which you can trust your surface members to stomp a mudhole intoTo unlock more, you need to clear the next chapter, and roll the highest chapter you’ve currently got sub missions on, getting through it with an S (Sub missions generally roll in order, but that might be confirmation bias)
It is confirmation bias, but when you only have 3-X and 4-X open it’s easy to get the one you want on the SOS ping.And there is The Shipyard. The Shipyard is a long term project, and one that, if you’re going for it wholesale, will inform what fleet composition you’re taking, as Priority Ships, as they’re called, have two requirements that need your fleet to be of a certain type. If the PRY is a frontliner, you’ll need frontliners of their faction to get their Combat EXP requirements, and use them until the bar’s full. If it’s a backliner, same deal. So an all american… Frontline is the requirement.
On the bright side, at least for Jamie, Saint Louis is an honest-to-god shitwrecker, and is a good choice as ‘babbys first PR’(It’s such a shame then that I haven’t used her yet. At the time of writing.
I don’t get Saint Louis for a while, because I like my current team too much. But hey, at least things are better in PRY ship getting, because previously, it was very specific classes of ships that needed to be used! This was the biggest pain in the ass for Roon, because you required Iron Blood Cruisers… Of which there are four freely available without events.
Roon, by the way, is also another Shitwrecker, and is generally considered one of the three best heavy cruisers in the game, with a focus on her breaking bosses over her knee.I got Roon the old fashioned way on Main. I look forward to having an easier time, especially since some Iron Blood events have procced since then.
I could gloat, but I do enough of that in the Discord. Let’s just leave it at this; All the PR girls are legitimately great, and get universal damage boosts against Sirens, but come with an elevated fuel cost and long-term investment of time, resources, and in-game materials such as Cubes and Retrofit blueprints. It really is a marathon to get one, but the end result, and the wailing and lamentation from the enemy fleets, is entirely worth it.To go a bit further on the where you can take submarines, any x-4 stage world 3 and up allows you to take submarines. Once you hit world 8, you can bring them to x-3 stages. World 10 allows x-2 stages, and world 11 and onwards gives unrestricted submarine access. The world 10 to world 11 transition regarding access seemed a little weird, only one world where one of the stages doesn't allow access, while there's a significant zone between 3 and 8 where no new access stages.
One other important note: in the regular world daily Hard Mode clears where you get your retrofit blueprints, you cannot deploy submarines on any of those stages. Make sure you have your fleets well set up, because they will not be receiving submarine support!
One other important note: in the regular world daily Hard Mode clears where you get your retrofit blueprints, you cannot deploy submarines on any of those stages. Make sure you have your fleets well set up, because they will not be receiving submarine support!